menu icon
go to homepage
  • Projects
    • Cricut Help
    • Home Decor
    • Crafts
    • Organization
  • Materials
    • Adhesive Vinyl
    • Heat transfer vinyl
    • Foil
    • Infusible Ink
    • Paper and Cardstock
    • Pens and Markers
    • Other
  • Free cut files
    • See the free cut files
    • Get the free cut files
      • Get a password
      • Access the Library
  • Shop
  • Français
search icon
Homepage link
  • Projects
    • Cricut Help
    • Home Decor
    • Crafts
    • Organization
  • Materials
    • Adhesive Vinyl
    • Heat transfer vinyl
    • Foil
    • Infusible Ink
    • Paper and Cardstock
    • Pens and Markers
    • Other
  • Free cut files
    • See the free cut files
    • Get the free cut files
      • Get a password
      • Access the Library
  • Shop
  • Français
×
Home

The importance of making a test cut every time you use your Cricut

Image of Cricut Design Space written on it The importance of making a test cut with your Cricut so you never waste material

Wasting precious (and a lot of time expensive) materials because the cut didn't go completely through is really frustrating. I will show you how you can avoid this by making a simple test cut with your Cricut.

Have you ever tried cutting new material with your Cricut, using the recommended setting to only have a major fail? Maybe it wasn't even new material. You just did the same thing as usual and just ruined your precious vinyl (or paper, or leather, etc)

You're thinking: but why?? I did everything correctly!

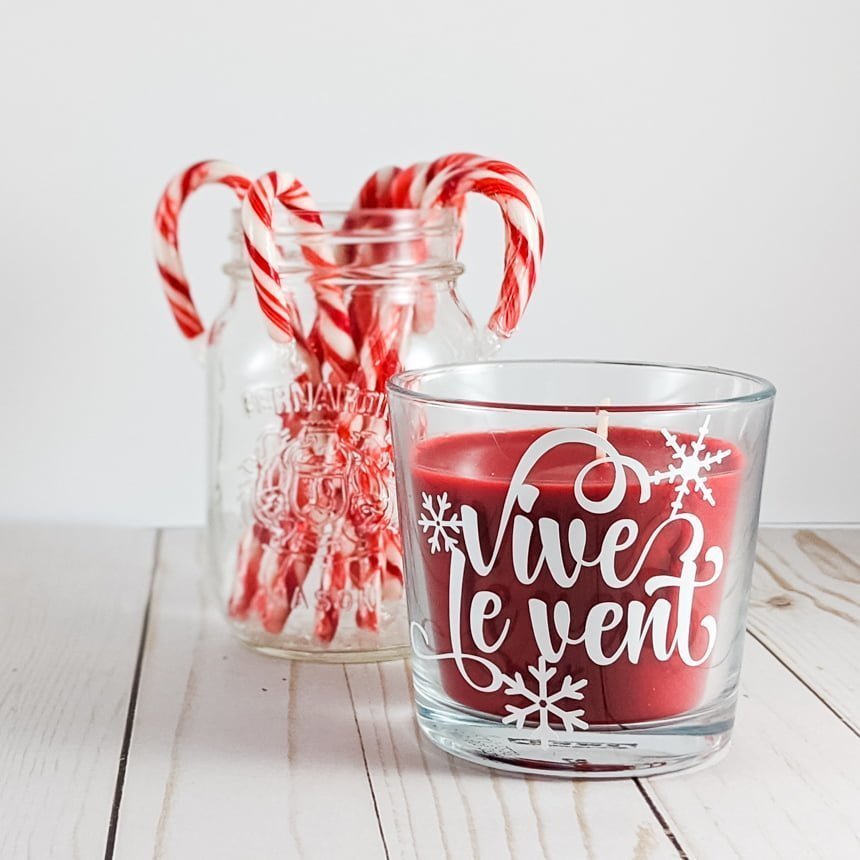
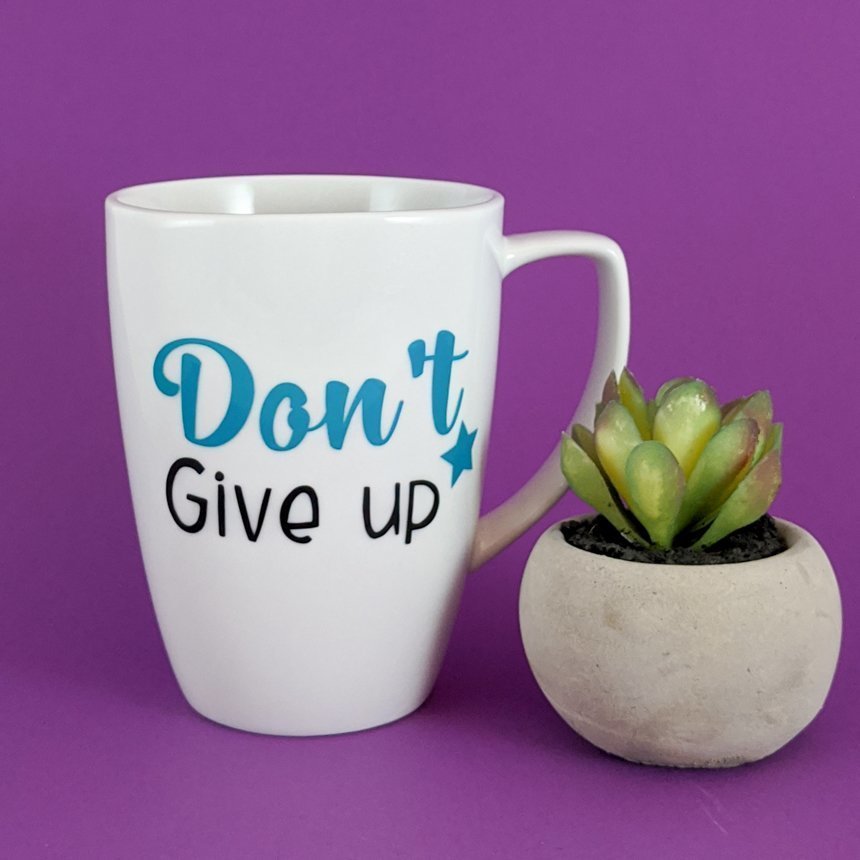
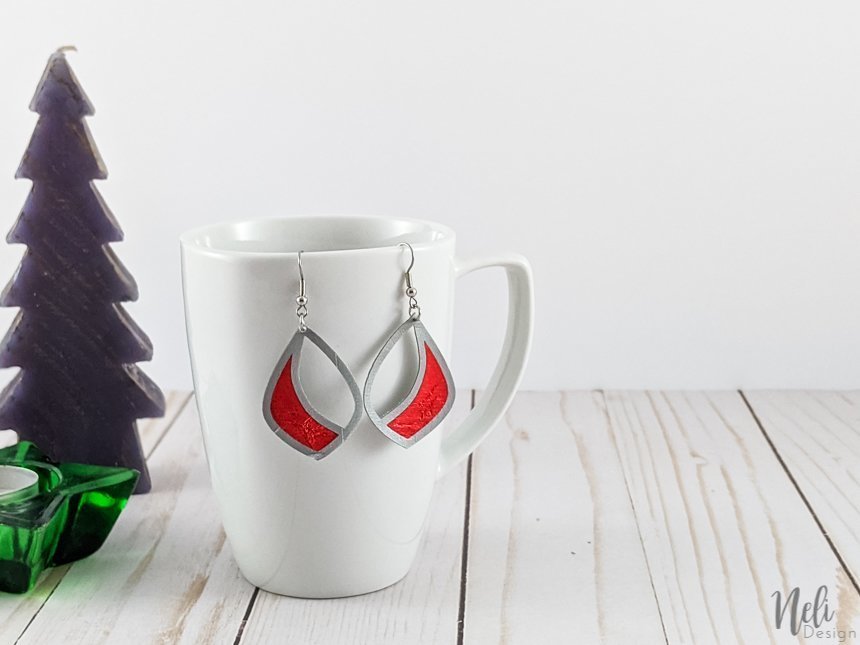
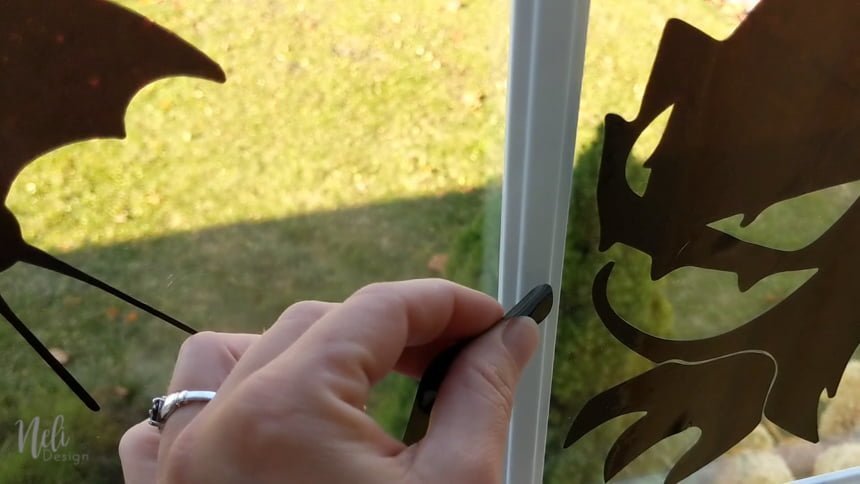
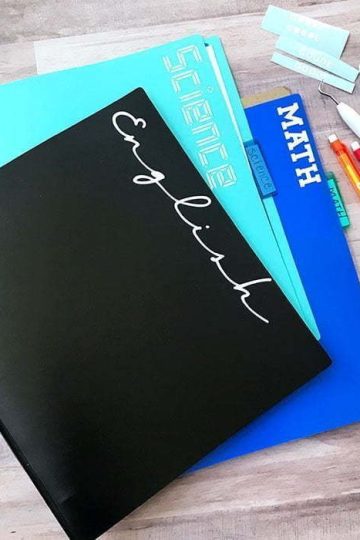
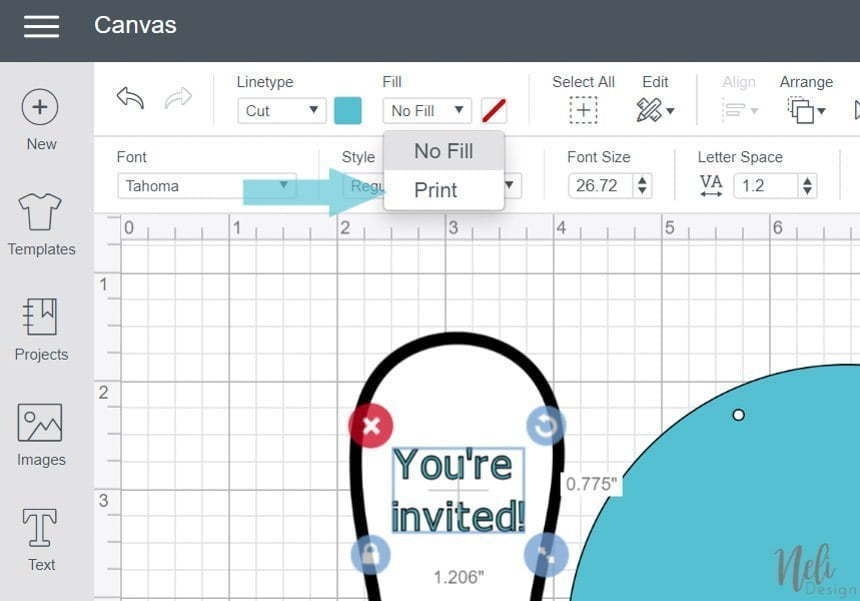
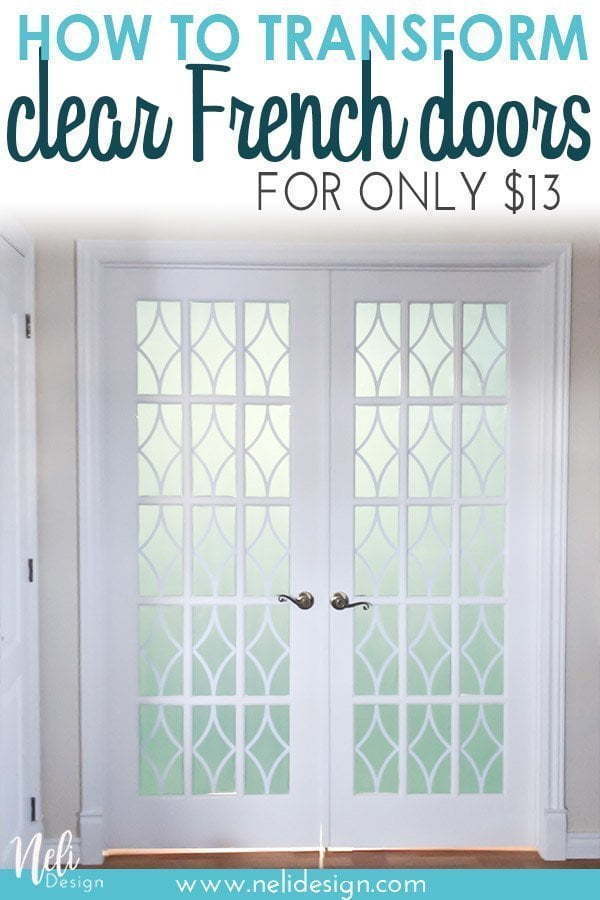
This is particularly true for vinyl where you're looking for a kiss cut. A kiss cut is a cut that will only cut the material and leave the backing (or carrier sheet) intact.

The truth is that there are so many variables that can affect the cut that it's impossible to just always use the same setting and hope for the best.

The blade

Whether your blade is new or not can have a major effect on your cut. You might have to change the setting of certain material as your blade wears out.

I always do something before a cut and I strongly suggest you do the same: I take an aluminum sheet that I roll into a ball (I actually always use the same one, over and over again) and I punch my blade into it many times.

punching the Cricut blade in aluminum to make a test cut

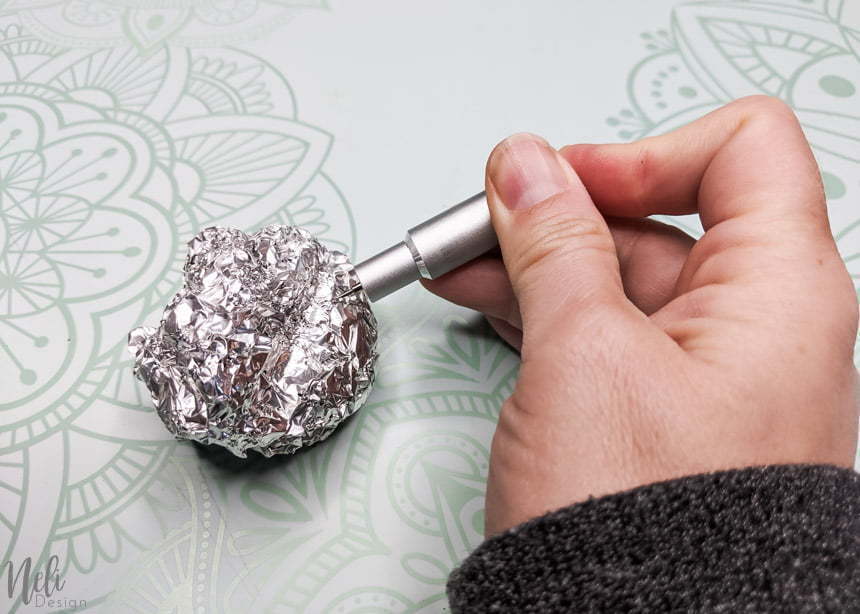
This will help clean your blade and make sure there is no dust or tiny pieces of material stuck to your blade (especially sticky vinyl!). (Note that it does not sharpen your blade as some people say!!)

Also, I like to use 2 different blades, one especially for vinyl and one for other materials like cardstock.

2 Cricut blades to make a test cut.

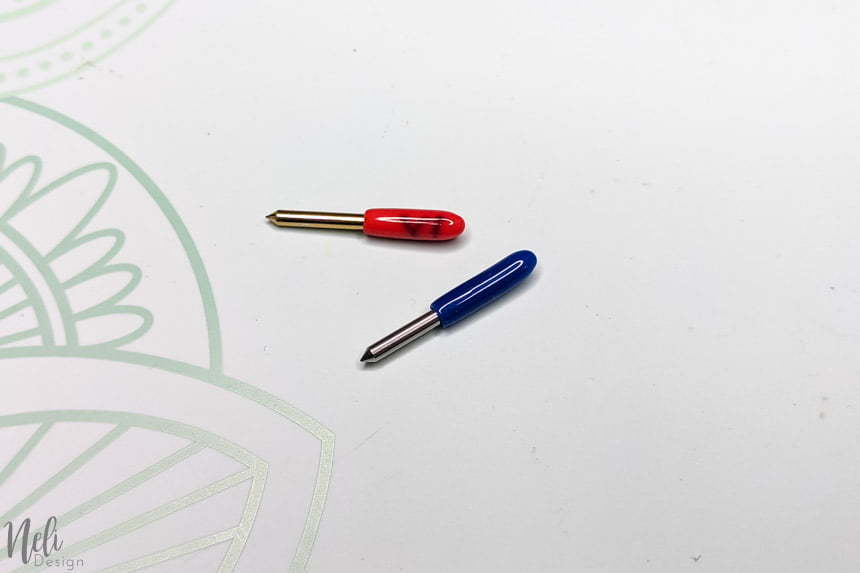
First, this assures me that the blade used for vinyl is less worn since it has only cut vinyl. Second, since vinyl has a sticky backing (or carrier sheet), I'm then sure I won't cut something else with glue residue on the blade and affect the cut.

This post contains some affiliate links for your convenience and at no extra cost to you. Click here to see my full disclosure policy.

The brand of material

Of course, from one brand to another (I'm thinking vinyl in particular, like Cricut or Oracal for example) you could need a different setting.

Even in the same brand, there are different kinds of vinyl (glitter, foil, etc). These can definitely affect the setting of your cut (there are already different basics settings for them in Cricut Design Space).

The colour

Did you say colour? Yes.I.did.

Especially vinyl. Sometimes, from one batch to another, from one colour to another, the vinyl can slightly change thickness even to the point that you'll need to change the setting of your cut.

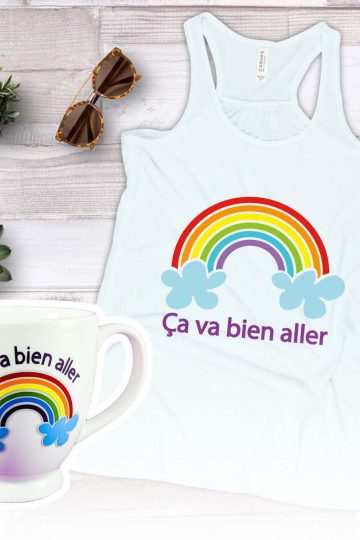
I'll be honest, I don't test every colour (like for the rainbow SVG in the previous post) but I would if it was something very large that uses a lot of vinyl. You can't ever be too careful.

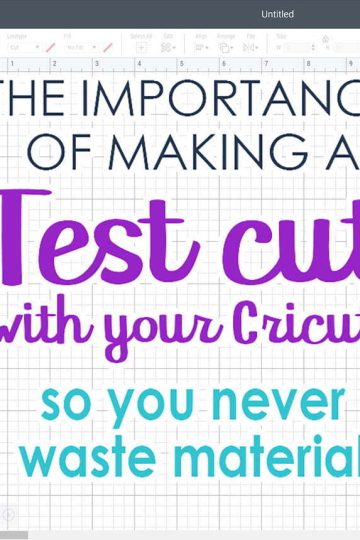
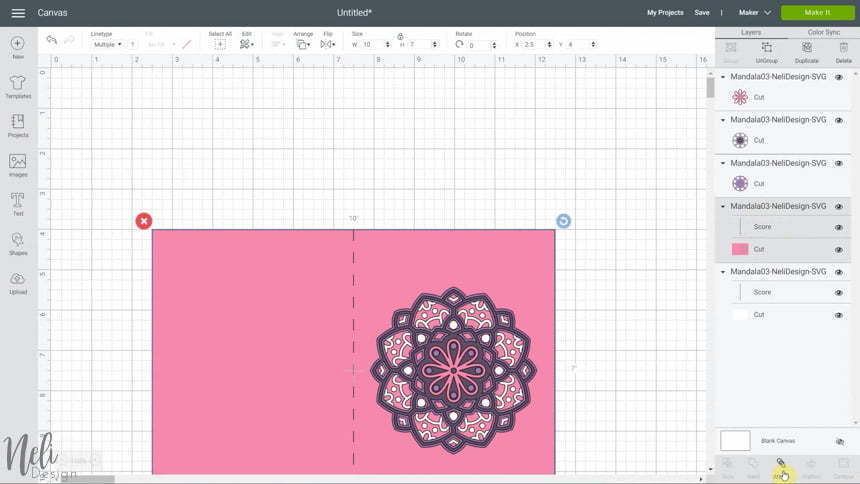
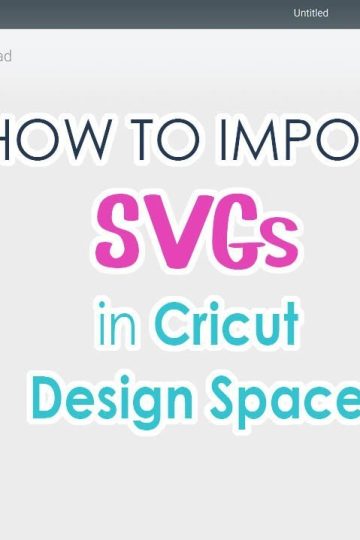
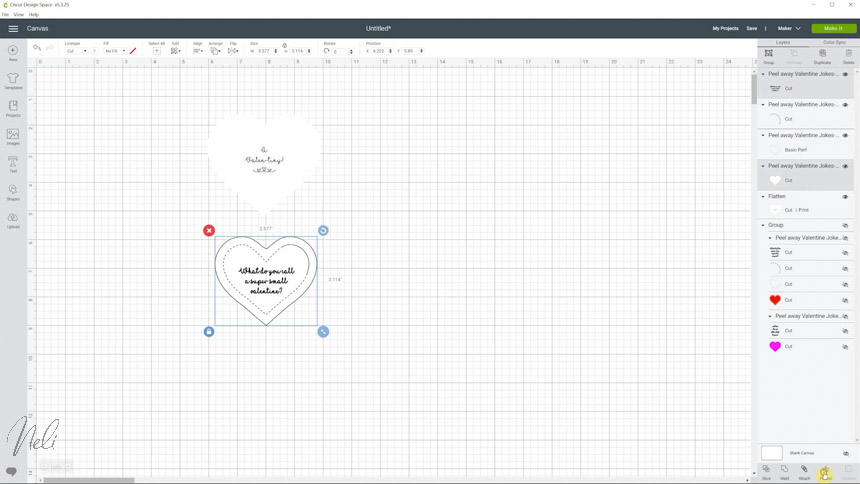
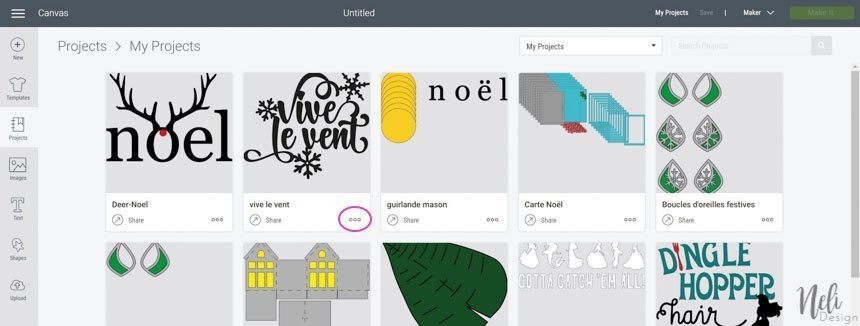
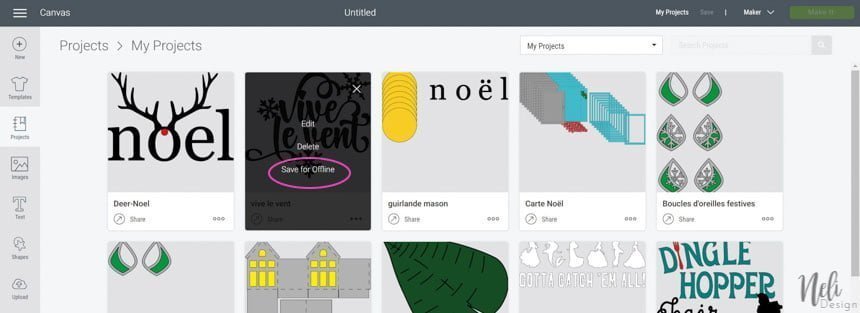
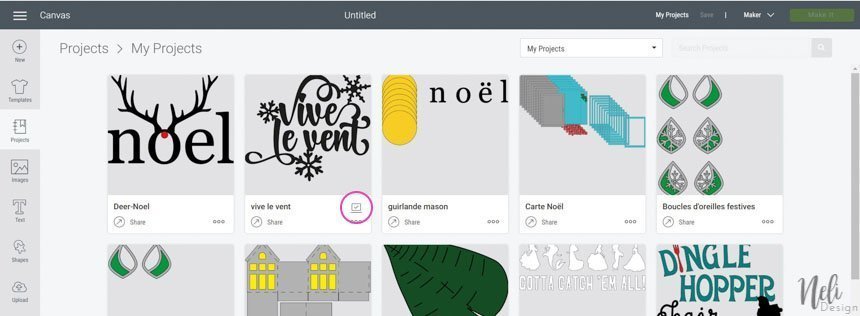
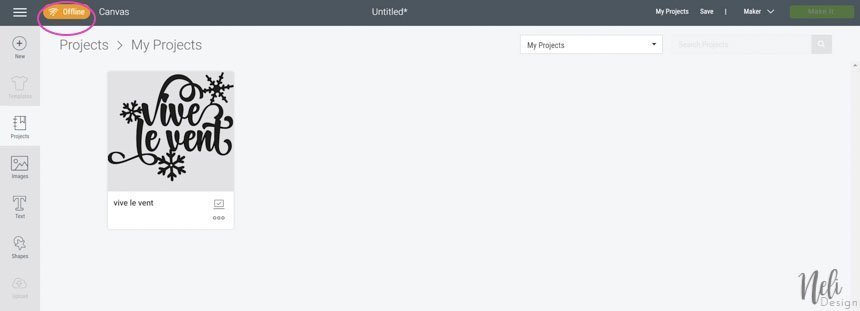
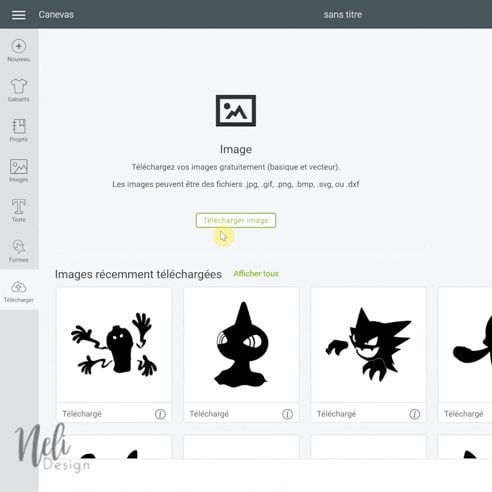
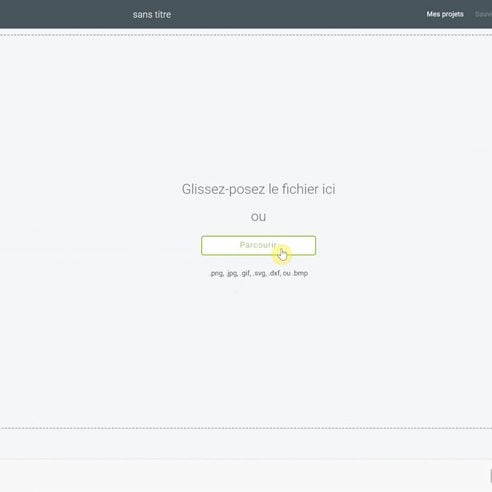
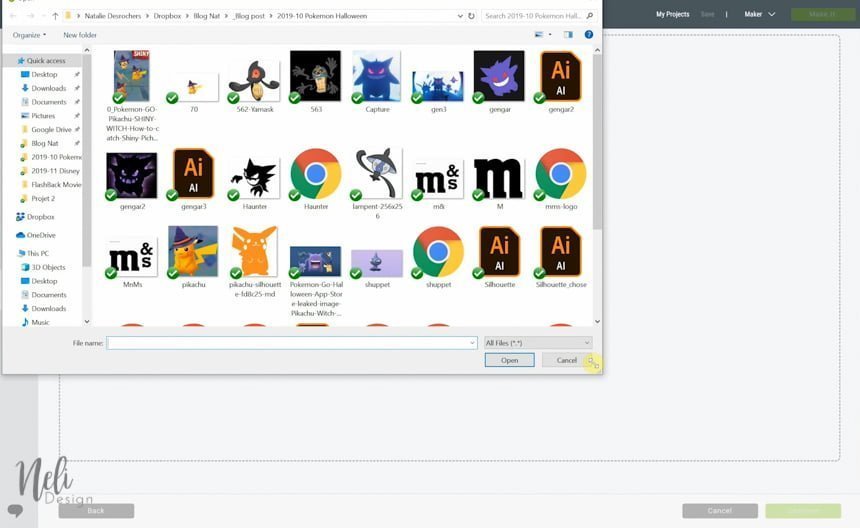
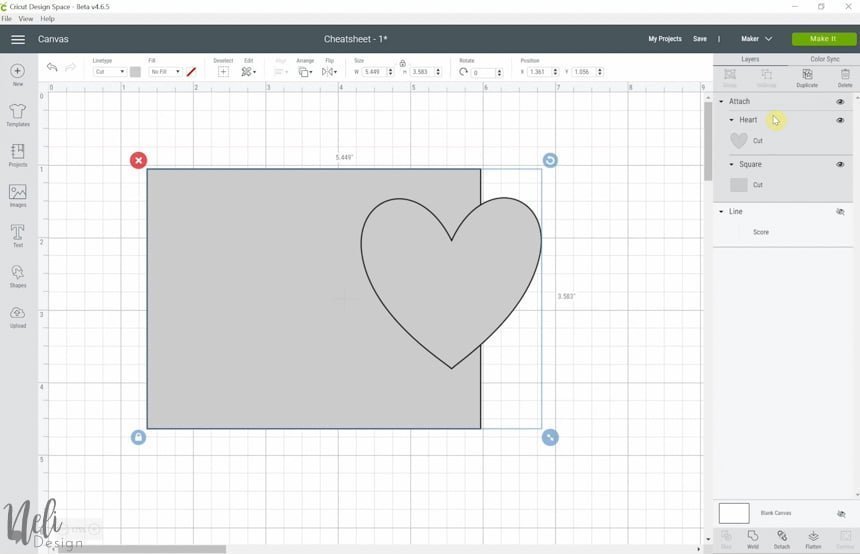
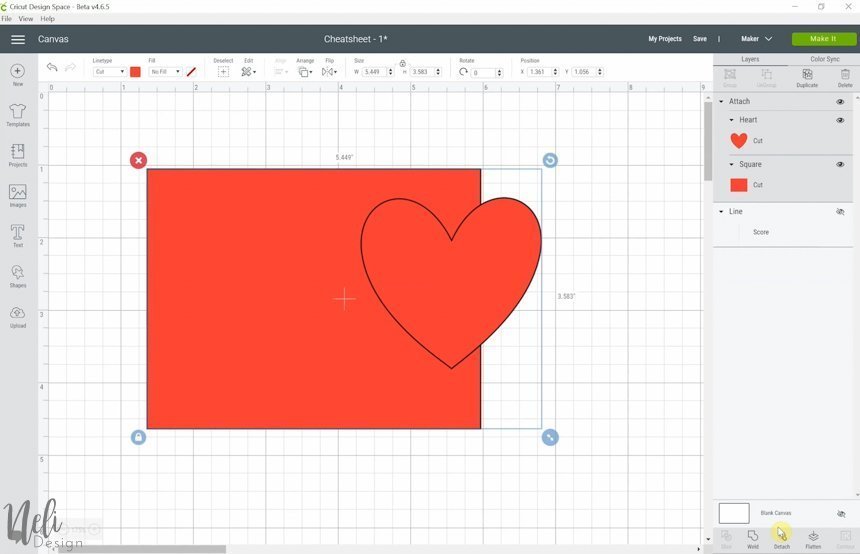
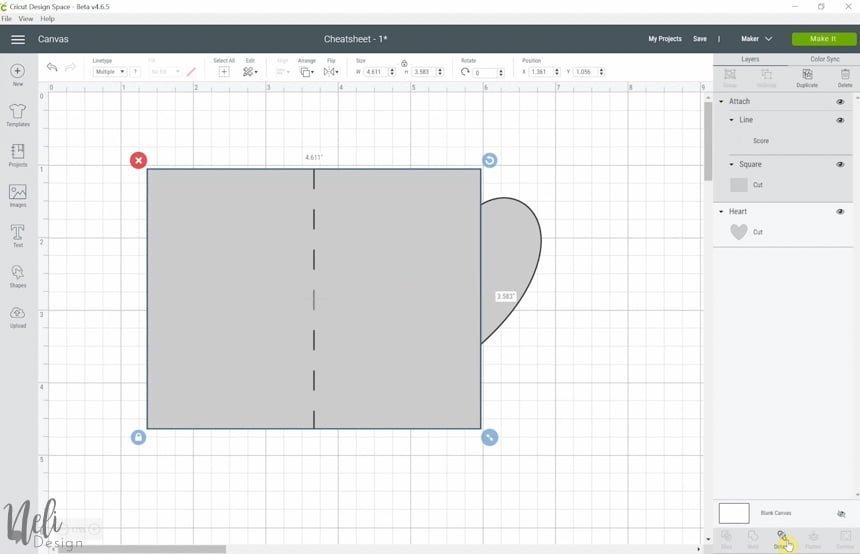
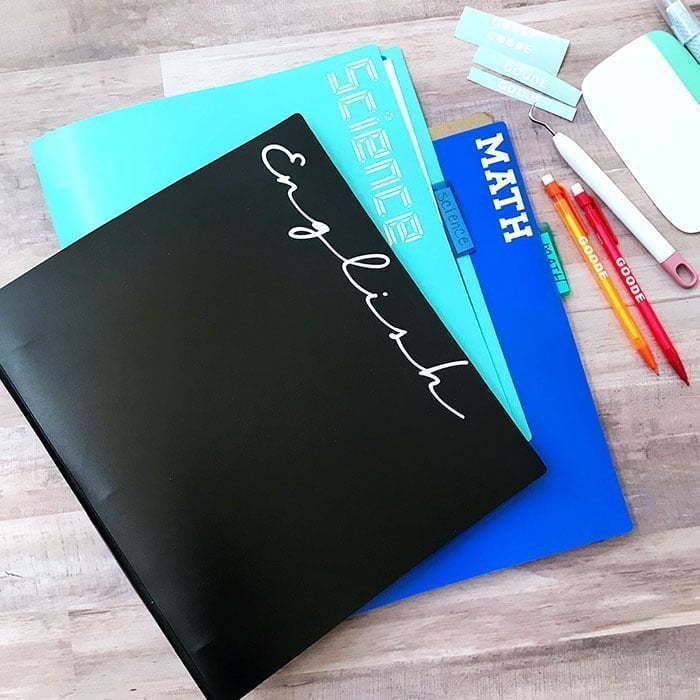
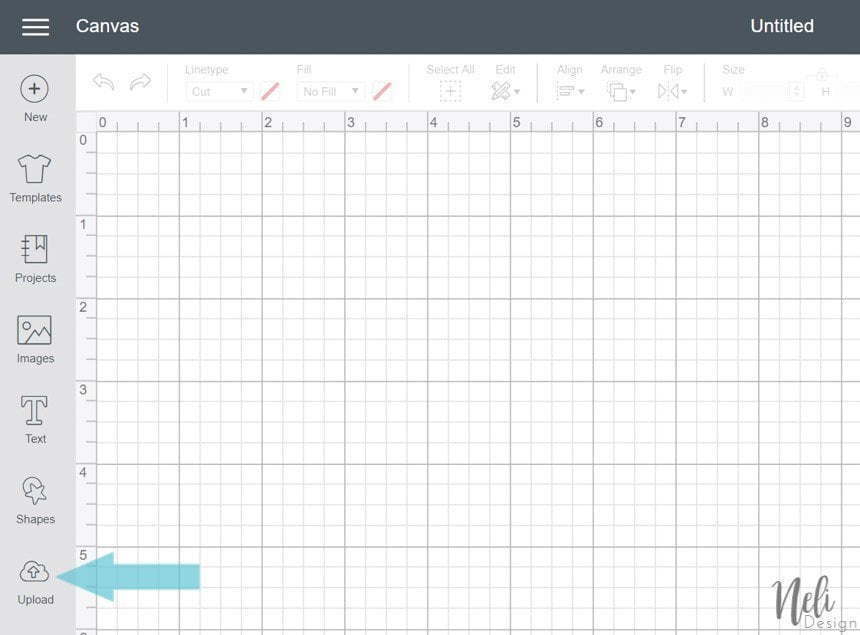
Making a test cut with your Cricut

After reading this, I hope you're starting to understand the importance of making a test cut with your Cricut.

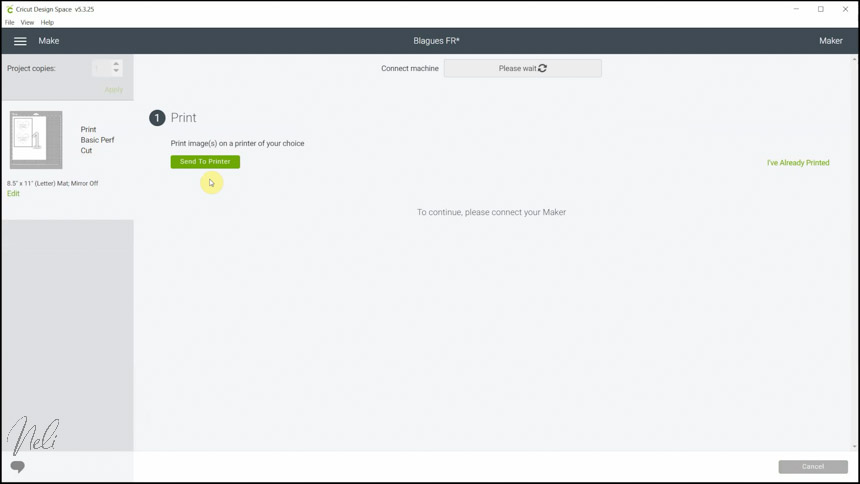
But what's the best way to do it? Check out this video where I take you step by step on how to make a test cut and how to adjust the blade until you get the perfect cut.

Note that what I use in the video is Oracal 651 and these blades.

Now you know that a lot of variables can influence a cut. I hope I have convinced you to make a test cut for your next project!

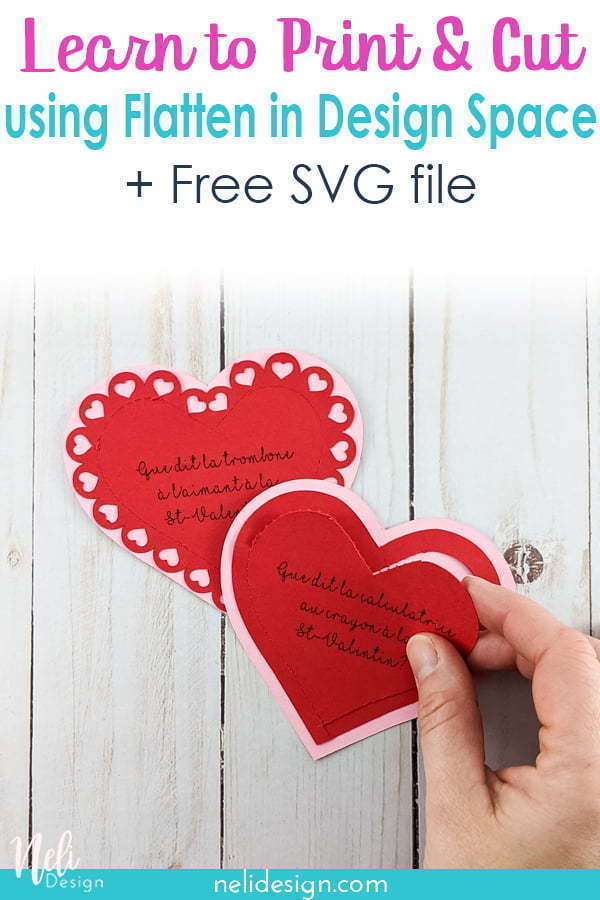
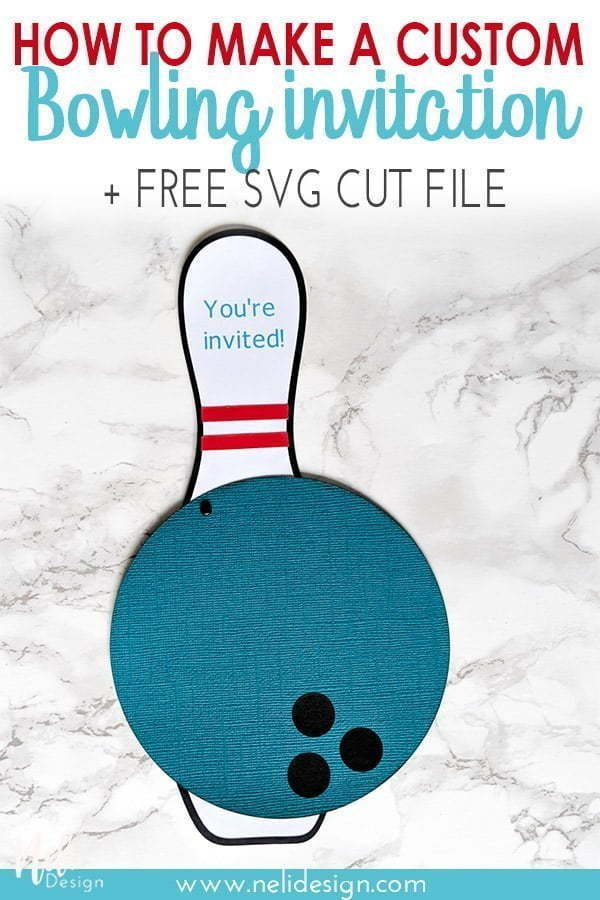
PS: Pin it to remember it!

Pinterest image written: Don't waste your material. How to make a test cut in Design Space

How to layer vinyl with your Cricut - Adhesive and HTV

Tank top and mug, both with rainbows that were made to show how to layer vinyl with your Cricut

Are you wondering how to layer vinyl with your Cricut? I'm going to show you an easy trick that works for both adhesive vinyl and heat transfer vinyl!

Last December, I showed you how to assemble 2 different layers of adhesive vinyl using a simple trick. This time will be layering 7 colours using my free rainbow SVG file that you can get by subscribing below.

    Rainbow SVG to show how to layer vinyl with your Cricut

    The rainbow SVG will be used to layer multiple colours of vinyl with the Cricut on two different projects. For the first one, we'll make a coffee mug using adhesive vinyl and the second one, we'll be using heat transfer vinyl (HTV) on a tank top.

    For the two projects, I'll show you how to use registration marks. The method is similar for both but totally different at the same time.

    How to layer vinyl with your Cricut - Adhesive and HTV

    Follow this video for the detailed step-by-step on how to layer vinyl.

    The following notes are here to help you:

    Adding registration marks in Cricut Design Space

    A registration mark is a shape that will be use on each layer of the project. The objective is to use it as a guide when applying every layer on top of one another.

    I like to use stars as registration marks but you could also use other shapes.

    This post contains some affiliate links for your convenience and at no extra cost to you. Click here to see my full disclosure policy.

    How to layer adhesive vinyl

    Rainbow mug made to show how to layer vinyl with your Cricut

    Required Tools & Materials

    • Cricut Maker (the Cricut Explore Air 2 is also fine)
    • Weeding tools
    • Coffee mug
    • Oracal 651 vinyl in all the colours of the rainbow
    • Transfer paper
    • Scraper
    • Rubbing alcohol
    • Free SVG Rainbow file that you can get by subscribing below

      Notes on layering adhesive vinyl

      • It's always best to limit yourself at one or 2 layers on top of each other** (unless it's an artwork or something that won't be manipulated at all).
      • Don't forget to rub the surface with rubbing alcohol to eliminate dust and oil.
      • You don't need to mirror your project in Cricut Design space

      How to layer heat transfer vinyl

      Rainbow on a tank top to show how to layer vinyl with your Cricut

      Required Tools & Materials

      • A way to cut your HTV (I have the Cricut Maker but the Explore Air 2 is also fine)
      • Easy Press (I have the 9" x 9")
      • Cricut protective sheet or Cookina
      • HTV vinyl (the one I use is Siser HTV stretch and this is where I buy it (great choice and excellent service))
      • Free SVG Rainbow file that you can get by subscribing below

        Notes on layering heat transfer vinyl

        • You can get the Siser Heat Guide here and the Cricut Iron-on guide here.
        • It's always best to limit yourself to 2 layers on top of each other. Understand that you could add more but the more you add the bulkier it will feel.**
        • Specialty vinyl (like glitter vinyl) can only go on top.
        • If you're a beginner, I suggest you use the same kind of vinyl for your entire project (although you can totally vary the colours!)
        • Don't forget to mirror ALL your mats after pressing "Make it" in Cricut Design Space.

        **There's a method, called the slice method, that enables you to make a design that appears to have multiple layers even though it's only one. This is more of an advanced technique that I promise to show you later! But I want to warn you that, if you're a perfectionist like me, you might have a problem with this technique when it comes to HTV. Since this vinyl expands a bit when heated, it sometimes leaves the layers not matching perfectly together. Consider yourself warned!! 😋

        I hope this tutorial helped you in getting your projects with multiple layers as beautiful as you imagine them! As for myself, I am sending the mug and tank top to two of my friends. A little present to remind them that "everything will be fine".

        PS: Don't forget to Pin it

        3 free SVG files to make 3D mandalas

        Free 3D mandala files

        3D Mandalas, as well as regular mandalas, are popular lately. I'm giving you free SVG files and I will show you 3 ways to use them.

        At first, I was not sure I wanted to create mandalas. Although I find them very beautiful, I wondered what use to give them.

        You know, I try to make useful Cricut projects. I don't want my creations (and the ones you make with my files!) to end up at the bottom of a drawer.

        So I asked my subscribers the question and I had so many great answers and ideas! See below for all the details.

        So I offer you 3 files and 3 different ways to make beautiful mandalas.

        Free 3D mandala files

        Continue reading, I detail them below. This post contains some affiliate links for your convenience and at no extra cost to you. Click here to see my full disclosure policy.

        Required material to make 3D mandalas

        • Coloured cardstock
        • Cutting machine (I own the Cricut Maker, but the Explore Air can also do the trick)
        • Green or blue cutting mat
        • Spatula and scraper (very useful to remove the remaining small pieces of the mandalas!)
        • 3D craft foam tape (see video for other economical options)
        • Glue pen (very useful for precision work)
        • Free mandalas SVG files available in NeliDesign's library by subscribing right here 👇

          Here are the 3 free SVG files

          Get access to them in NeliDesign's library. If you don't have the password yet, just use the form above to subscribe.

          A 12 x 12 mandala

          Free 3D mandala files

          A 3D mandala

          Free 3D mandala files

          A mandala card

          Free mandala card file 3d

          Another option

          I also thought of those who are looking for ways to keep your young children occupied: Take white cardstock and ask them to colour them in different colours. Whether it is arrangements of 2-3 colours or more. Then use the SVG files to cut these cardstocks in a mandala shape. That way, you'll have a very personalized and colourful mandala!

          Unfortunately, I have not yet managed to convince my teens to do so and I, therefore, have no image for you!!!

          What to do with a mandala?

          One answer immediately comes to mind. It is of course to frame it. It would also be easy to stick it on a canvas.

          But what else?

          My subscribers have a lot of imagination!

          Obviously, these days, the mandala can be useful for relaxing and entertaining, especially if you use my colouring file!

          It can also:

          • become a clock;
          • be used as a wall hanging backdrop for keys;
          • be a 3D marble drop as the item is turned;
          • be applied on a tote bag;
          • be cut from vinyl and applied to a cell phone, computer or other objects.

          I was even informed that the mandala can be used in meditation. The mandala should be coloured to please your eyes and you can then sit and stare into the mandala to help you meditate.

          If you like mandalas and 3D papercrafts, subscribe to my challenge!

          Click here to see all the details

          How to make 3D mandalas with free SVG files

          The 12 x 12 3D mandala

          Using 12x12 cardstocks, you'll be able to cut the mandala to 11.5 x 11.5 which is the largest size for the Cricut.

          I decided to use the darkest colour at the bottom but it's totally up to you!

          Once every layer is cut, you can start assembling. I using a glue pen that is pretty useful for this intricate design.

          Always add the glue to the top layer by turning it upside down. Then press it on the bottom layer.

          Adding glue to the 3D layered mandalas made with the free SVG files

          You'll see that the topmost layer is very thin. If you decide to scale down the mandala, I suggest you don't use this layer.

          the top layer is fragile of the 3D layered mandalas made with the free SVG files

          If some part of the mandala are not glued properly, you and use a piece of cardstock with glue on it to insert more glue between the layers.

          Adding glue to the 3D layered mandalas made with the free SVG files

          Another trick is to turn the mandala upside down and place it under something heavy until the glue dries completely. I'm using my laptop for this.

          Putting the mandala under laptop to make the 3D layered mandalas made with the free SVG files

          I decided to scale this one to 6" x 6", but the file is also made in 11.5" x 11.5" just like the first one.

          To add depth to the mandala, I'm adding spacers between the layers.

          Now, I suggest you find something in your stash or in the recycling bin for this. You could use, leftover chipboard, thick cardstock, cereal box, etc.

          As for myself, I found some craft foam that I think was part of one of my kid's craft game at some point.

          I cut some stips with a metal ruler and cut it again into smaller pieces with scissors.

          Cutting the foam to make the 3D layered mandalas made with the free SVG files

          My foam had a sticky side. If you have the same thing, use the sticky side first and then add glue to the other side.

          Adding foam to make the 3D layered mandalas made with the free SVG files

          I found that the top layer was too thin to add foam (or I was not patient enough to do so!). So I just glue the last layer on top without any spacer.

          adding the last layer to make the 3D layered mandalas made with the free SVG files

          The mandala card

          For this mandala, you'll need to make some little tweaks in Cricut Design Space.

          First, select the 2 layers that appear has lines (they are also colour red) and change the Linetype to "score".

          image of Cricut Design Space and changing the linetype to score to make the 3D layered mandalas made with the free SVG files

          Then, you'll see that these lines are each grouped with another layer. Select each layer individually and click on "Attach". You are then ready to cut!

          image of Cricut Design Space and Attach group to make the 3D layered mandalas made with the free SVG files

          When you start assembling, you'll see that adding the white cardstock inside the card reveals the bottom of the mandala.

          assemble the white cardstock to make the 3D layered mandalas made with the free SVG files

          The last thing you need to do is glue the rest of the layers, one by one.

          Adding the other layers to make the 3D layered mandalas made with the free SVG files

          If you like mandalas and 3D papercrafts, subscribe to my free challenge!

          Click here to see all the details

          Detailed steps on how to make 3D mandalas

          Now, if you prefer, you can check out this video with the detailed steps on how to make 3D mandalas using my free SVG cut files.

          I really like how the mandalas turned out and I had a lot of fun creating them. I hope you'll have fun too.

          As the colours chosen are very personal, I would love to see yours! Come show them to me on my Facebook group.

          Use the form below subscribe to my newsletter to access the mandala files AND get your free Cricut Cheat sheet.

          See you soon

          PS: Don't forget to Pin it on Pinterest

          3 different project 3d mandalas SVG DXF PNG PDF and free coloring pages

          DIY felt crocus flowers for spring with free SVG

          5 crocus flowers in white and purple felt made with free SVG

          I'm giving you the free SVG cut file to make felt crocus flowers (or paper flowers) to brighten up your home for spring or add to a wreath.

          I love making wreaths to decorate my front door. In fact, my wreaths have always had the same base, a grapevine wreath.

          In the latest one I made, I added some terracotta pots and I simply changed the kinds of flowers in the pots. Easy peasy!

          Spring wreath with terracotta pots, Easy Spring Wreath, Grapevine wreath, affordable, flowers, front porch, door wreath, Couronne du printemps avec mini pots de fleurs en terre cuite, sans colle, no glue #springwreath #wreath #grapevine #flowers #frontdoor #porch #spring

          This year, I decided to make the flowers myself. Since paper is not a great idea to put outside, I decided to make them out of felt.

          And I decided to make crocus flowers. I love these flowers that pierce the snow when spring arrives. They make me happy every time!

          Crocus flowers breaking through the snow

          Isn't that awesome? This post contains some affiliate links for your convenience and at no extra cost to you. Click here to see my full disclosure policy.

          5 crocus flowers in white and purple felt

          What type of felt to use?

          There are so many different types of felt and you should know that not all of them will cut well with a Cricut.

          In short, if you have the Cricut brand felt, you'll have no problem cutting it with the fine point blade of the Explore and Maker family and you'll even be able to cut it with the Cricut Joy!

          But if you have Craft felt, you'll need the rotary blade of the Maker.

          If you want to know more about this, check out my article about The different types of felt and how you can cut each with your Cricut.

          If you read "fine point blade" and "rotary blade" and are confused about which blade they are and want to know more about what all the Cricut blades, wheels and tips are for, you can check out this post.

          In there, you'll even find an opt-in form to download my free Cricut blades, wheels and tips cheat sheet.

          Material required to make felt crocus flowers

          • Acrylic felt or Cricut felt (I'll explain the difference in the video)
          • Cricut from the Explore family and fine point blade or, ideally, Cricut from the Maker family and rotary blade (see explanation below)
          • metal wire and pliers (or toothpicks or skewers)
          • Glue gun and glue sticks
          • Spray to stiffen fabrics Stiffen Quick
          • Free SVG file available in NeliDesign's library by registering below

          Steps to make felt crocus flowers

          Check out this video to get the full steps on how to make these crocus flowers and add them to your wreath.

          I'll even give you an awesome trick to prevent felt from ruining your Cricut mats.

          I really love the result and I hope this tutorial has helped you bring a little spring into your home.

          PS: Don't forget to Pin it to your favourite board!

          Pinterest image of felt Crocus flowers saying How to make Felt Crocuses with your Cricut. Free SVG-DXF-PNG-PDF

          How to import SVG files into Cricut Design Space

          image showing Import SVG into Cricut Design Space

          What is the difference between an SVG, JPG, PNG and DXF file? How to download and import them into Cricut Design Space? Here's everything you need to know!

          JPG, PNG, SVG, DXF ... do all these acronyms give you nightmares? It's totally normal! At first, we don't understand anything! But you will see, after this short tutorial, you will be a real pro!

          Pixels vs Vectors

          First, before explaining the definitions, you should know the difference between an image made up of pixels vs an image made up of vectors.

          Pixels are small dots that make up the image. If you enlarge this type of image too much, you see small squares. These are the pixels. You cannot, therefore, enlarge the images composed of pixels without affecting the quality.

          Vectors are mathematical calculations that generate an image. Vector images can be enlarged as desired without affecting the quality of the drawing.

          Definitions

          Pixel-based files:

          • JPG (Joint Photographic Experts Group): the word to remember in there is "Photographic". These are image files composed of pixels. It's usually the format used when taking photos with your camera.
          • PNG (Portable Network Graphics): They are also pixels files, but of better quality. This type of file often allows you to have images with a transparent background. Which is not possible with the JPG.

          Vector-based files:

          • DXF (Drawing Interchange Format): Format created for exchanging vector drawing files. It does not retain colours and operations performed on objects. Like for example, a hole in an object will become an independent solid circle in a DXF file, which is not ideal.
          • SVG (Scalable Vector Graphics): The best format for cutting in Cricut Design Space. And like the name says it, you can enlarge it as much as you want. And the drawing is exactly as the creator designed it.

          The DXF is especially useful for those who have a Silhouette cutting machine and who only have the free version of the Silhouette Studio software. Because, as of now, only the paid version allows you to import SVGs.

          For Cricut Design Space, you can import SVGs for free which is very interesting. So you don't have to worry about DXF files if you're a Cricut user.

          Import SVG files in Cricut Design Space

          There is nothing better than seeing "live" how to import files. So in the video, you will see:

          • How to access NeliDesign's library
          • How to download free cut files (if you don't have your password to access the library yet, click here)
          • How to import SVGs in Cricut Design Space
          • The difference between a JPG, DXF and an SVG imported into Cricut Design Space

          I hope I managed to enlighten you! If I forgot anything or have any questions, leave me a comment below or even better, join my Facebook group.

          PS: Don't forget to pin it!

          Pinterest image of how to import SVGs into Cricut Design Space

          DVD organization: DIY tab dividers with your Cricut

          Tab dividers made with Cricut for DVD organization before putting them in the drawer.

          You've got so many DVDs and Blu-rays that you don't know what to do with them? I'm going to show you a great solution to reduce the space occupied by your collection by at least 75%. And thanks to your Cricut, you will be able to organize them like a pro with DIY tab dividers!

          Some time ago, I showed you how I managed to reduce considerably the space occupied by all our DVDs and Blu-rays in this post.

          A drawer full of DVDs that need organization with my Cricut
          Before
          A drawer full of DVDs that needed organization with my Cricut and that now occupies 25% of the space
          After

          Impressive right? This post contains some affiliate links for your convenience and at no extra cost to you. Click here to see my full disclosure policy.

          In short, you need to use these awesome sleeves that you can find on Amazon. Seriously, they are a great invention! There is also this clear version that is a good choice according to the comments I have read.

          Then, a little DIY will allow you to organize everything alphabetically!

          How to make tab dividers

          Before I had my Cricut, I used this technique to organize my DVD and Blu-ray sleeves.

          It is not that it is not a good solution. In fact, I suggest it if you don't have a cutting machine.

          But now, I want to have fun with my Cricut and do something even more beautiful. And what could be better than staying in the cinema theme with tabs dividers reminiscent of vintage cinema marquee signs? Of course, you'll get the cut file for free!

          A view of the drawers where the DVDs are organized using the tab dividers for better organization
          A close-up view of the drawers where the DVDs are organized using the tab dividers for better organization

          Materials and tool required

          • Cutting machine (I have the Cricut Maker)
          • Coloured cardstock
          • Glue (I found these glue pencils which are awesome for precise small jobs!)
          • Printer or Cricut Pen (I explain both versions in the video)
          • A free font called: "Limelight"
          • DVD sleeves (the ones I have or these ones)
          • The free SVG cut file, available in the library by subscribing below.

            How to make tab dividers for your DVD organization with your Cricut

            I am really happy with the result! I think these new tab dividers add a nice original touch to my DVD organization! What do you think? Leave me a comment below and above all, don't forget to Pin it!

            Pinterest image of tab dividers written DIY tab dividers to organize your DVD and Blu-Ray, free SVG, DXF, PNG PDF

            Tips to layer multiple colors of Iron-on or HTV vinyl

            Vinyl layer a Valentine's Day gnome on a gray sweater

            Discover simple but very useful tips on how to layer several colors of vinyl by using this cute SVG cut file of a Valentine's Day gnome.

            I admit I am not the most experienced person when it comes to Iron-on or HTV. I made a lot of stuff with my Cricut, but I didn't really feel the need to try applying vinyl to fabric.

            I was wondering why people were doing this.

            I have teens, they are not very motivated in having vinyl on their t-shirts.

            It was like that for me until I planned a Disney trip.

            No, I didn't make matching t-shirts for the family! I rather had fun making funny and original t-shirts like this one that I made for my husband who's a Pokemon fan. (You should see him taking pictures with this shirt and ALL the princesses he could find!🤣)

            T-shirt with Iron-on vinyl of Pokemon. Disney princess silhouettes written underneath : Gotta catch 'em all

            And this is when...

            I got.THE.bug!!

            It was just too late! This post contains some affiliate links for your convenience and at no extra cost to you. Click here to read my full disclosure policy.

            A gnome for Valentine's day

            Now I have to hold back when I see beautiful files and slow down my brain that can't stop finding things I could do with them !!!

            And this is exactly what happened with this Valentine gnomes SVG file that I showed you on my Facebook group.

            I just fell in love!

            So I decided to take one of the gnomes in the file to make a pyjama t-shirt. Eh hum... MY pyjama! (we really need to make more things for ourselves don't you think?!)

            layered Iron-on vinyl of a Valentine gnome on a gray t-shirt

            Since it contains several overlapping colors, I decided to show you how I did it. Always sharing my good moves and above all, my mistakes! (This is how we learn the most!)

            The difference between HTV and Iron-on

            Before we start, I just want to tell you what's the difference between Iron-on and HTV. It's easy, there's no difference! HTV stands for Heat Transfer Vinyl and Iron-on is the name of the Cricut brand HTV. That's it!

            Materials and tools you need

            • A way to cut your Iron-on (I have the Cricut Maker but the Explore Air 2 is also fine)
            • Easy Press (at the time of this tutorial, I had the 9" x 9" but I have changed for the 12" x 10" since then. You can see why here.)
            • Cricut protective sheet or Cookina
            • HTV vinyl or Iron-on (the ones I use in the video are Cricut Iron-on Foil Red (for the Heart) and Siser HTV stretch.
            • "Valentine Gnomes" SVG file

            Layer Iron-on vinyl or HTV

            The first important thing to know when layering Iron-on vinyl (or HTV) is that it's better to limit the layering to a maximum of 2 or 3 layers.

            This gnome SVG was perfect for that because only the part of the hands over the heart added up to 3 layers thick.

            By applying this design to a t-shirt, I also learned another very important thing: it's always better if the first layer applied is the one that is located furthest back in the design.

            For this gnome, the order of the layers to apply would be:

            • The feet
            • The tunic
            • The beard
            • The hat
            • The little hearts, the big heart and the nose
            • The Hands

            As you will see in the video further down, I did everything backwards which caused some small mistakes.

            Look at the photo below, do you see my mistakes? It's subtle!

            layered Iron-on vinyl of a Valentine gnome on a gray t-shirt

            The tunic is a little over the beard which would not have happened if I had applied the tunic before the beard.

            This is because vinyl stretches when it is heated. This is why it is better to press only 5 seconds per layer when layering multiple colours.

            Also, the big heart is made of Iron-on Foil. This Iron-on is much more sensitive to demarcations. We can therefore see the mark made by the outline of the carrier sheet which held the hands.

            For all the details, mistakes and tricks learned, see the video. And don't forget to subscribe to my channel.

            Summary: Tips and Tricks for Layering HTV or Iron-on Vinyl

            • Limit the layering to 2 or 3 layers thick.
            • "Flip" your drawing directly on the canvas. This will prevent you from forgetting to "Mirror" when cutting.
            • Find the center of the t-shirt by folding it in half evenly and pressing it with the Easy Press.
            • Start by applying the furthest layer in the design.
            • Apply layers one by one, pressing for only 5 seconds. Only the last press will have the total number of seconds required.
            • Be careful not to mark the vinyl with the outline of the carrier sheets of the following layers.

            If you know of other tricks, don't hesitate to leave them for me in the comments.

            PS: Please don't forget to Pin it!

            Pinterest image of a Valentine gnome on a gray sweater. The writing says "Tips and Tricks to layer Iron-on Vinyl"

            DIY Valentine's Day earrings

            4 pairs of DIY Valentine's Day earrings

            Learn what to do and most importantly, what not to do to make beautiful faux leather and Iron-on earrings for Valentine's Day

            Today, I offer you a free SVG file including, not one, but 4 pairs of Valentine's Day earrings. They are made from faux leather and HTV and super easy to make.

            DIY Valentine's Day earrings

            To make them, I will refer you to the video of the festive earrings that I made during my 12 Christmas Crafts challenge.

            But just before, I have important tips that I want to mention because often we learn a lot more from our mistakes and oh did I make some!!

            DIY Valentine's Day earrings XO black and red
            DIY Valentine's Day earrings, red with 3 hearts
            DIY Valentine's Day earrings, red with little black heart.
            DIY Valentine's Day earrings, black with three red hearts

            Continue, it's important you learn too! This post contains some affiliate links for your convenience and at no extra cost to you. Click here to read my full disclosure policy.

            Materials and tools required

            • A way to cut your faux leather and vinyl (I have the Cricut Maker but the Explore Air 2 is fine also)
            • The fine point blade (that's the regular blade that comes with the Cricut).
            • Easy Press (whatever the size, even the mini can be fine)
            • Cricut protective sheet (discontinued) or Cookina Teflon sheet.
            • HTV vinyl (the one I use in the video is Cricut Iron-on Foil Red)
            • Faux leather in red (I bought mine at a local fabric store and it costs me not event 2$ for 10 cm x 54")
            • Cricut Faux leather, black (this is the bundle I have)
            • Jewelry pliers
            • Fishhook earring findings and jump rings
            • Free SVG file available in my resources library by subscribing to my newsletter below.

            Important to know when making DIY earrings

            What Cricut blade cuts faux leather?

            Do you know that you don't need a special blade to cut faux leather? That's right! You just need the regular fine point blade that can be used in both Cricut Maker, Explore Air or even the Cricut Joy!

            Test the cut setting

            Always, always test the cut setting before cutting a new material or even when using a material that you haven't cut in a while (the wear of your blade might be different than the last time you used it!)

            Check out this post to know all the details on how to make a test cut.

            Which mat should you use to cut faux leather?

            In the first faux leather earring tutorial I made, I was telling you that the purple mat was way too sticky. Well, when you have small details to cut as these earrings have, you really need to have a mat that sticks a lot.

            Therefore, you should really choose the strong grip mat (purple).

            When I tried with the green mat, it didn't cut all the way through because the faux leather lifted from the mat. Maybe my green mat just needed to be cleaned. Whatever mat you take, make sure it is sticky enough!

            Pay attention to the adhesive tape

            The margin Design Space leaves you is ¼". This is not a lot of space to add masking tape.

            Make sure you don't go over this margin with your masking tape otherwise, the faux leather might not be cut all the way through (lesson learned!).

            Can you engrave faux leather?

            Although Cricut states that the engraving tip will engrave faux leather, they are mostly talking about Cricut brand faux leather. Engraving this faux leather (that I bought at a fabric store) didn't work well at all!

            For details on how to assemble the free SVG Valentine's Day earrings cut file, check out this video.

            For all the details on all these important tips, see the video below. And don't forget to subscribe to my channel.

            Thanks for being there. I hope you enjoyed these tips. If you think I forgot anything, just leave me a comment below!

            PS: Please, don't forget to Pin it!

            How to use Flatten in order to Print and Cut in Cricut Design Space

            Two love notes for Valentine's day made using Flatten in Cricut Design Space

            In addition to showing you how to use flatten in Cricut Design Space, you will also make a peel-away love note for Valentine's Day.

            In my opinion, there is nothing better than making a project to learn something. So, I'm going to show you how to craft this little love note that you can slip into your children's lunch box or your husband's.

            two hearts with jokes on it made with Flatten in Cricut Design Space

            Of course, I'll give you the SVG file for free when you subscribe to my newsletter 😊. You will also have access to a library filled with other equally interesting files.

              The SVG file uses the Cricut Maker's perforation blade. It also contains children's jokes related to Valentine's Day. Therefore, the question is on top of the heart and the answer is inside. So it is necessary to tear along the dotted lines to get the answer.

              Required materials

              • Cricut Maker
              • Perforation blade
              • coloured cardstock
              • Glue
              • Colour printer (or a black and white printer can also do the trick)
              • My free SVG file which is available in my resource library.

              How to make a tear-away love note

              Once you have saved the free SVG file from NeliDesign's library, click on "Import", "Upload image" and find the SVG file and insert it.

              A view of Cricut Design Space, importing an image

              The first thing you need to do is immediately click on "Ungroup" so you are only left with the smaller groups.

              A view of Cricut Design Space, the image imported

              You'll see that the hearts on the left and the hearts on the right are two separated groups.

              A view of Cricut Design Space, the layers are grouped

              Let's close the "eye" on one of the group so we can concentrate on one of them at the time.

              A view of Cricut Design Space and how to use Flatten

              Select the group you're keeping and click on "Ungroup" again. You're going to be left with a group for the pink heart and one for the red heart.

              A view of Cricut Design Space and how to use Flatten

              Now, I want to "Print and Cut" and if I leave the hearts coloured in pink and red, my printer is going to print the red and the pink. Unless this is what you want to do you leave it like that.

              As for myself, I want to print the black letters on pink and red cardstock.

              Therefore, I'm going to change both hearts to white so that my printer doesn't print any colour.

              A view of Cricut Design Space and how to use Flatten

              IMPORTANT NOTE: The Maker is the only one that is sensitive enough to Print and Cut on coloured cardstock. There's a way of making it work if you have the Explore Air 2 that I'll show you in another tutorial.

              A view of Cricut Design Space and how to use Flatten

              How to use Flatten to Print and cut with your Cricut

              If you Flatten the letters with the heart, it will tell Design Space that you want to print the letters and cut the heart.

              Select the layers of the top heart and click Flatten.

              For the bottom heart, select the line that goes almost all the way around the heart and put the "Linetype" to "Perf". This will tell your Maker you want this perforated.

              A view of Cricut Design Space and how to use Flatten

              Before using Flatten on this heart, you'll need to "Ungroup" it because you only want to flatten the heart and the text, but not the other two layers.

              A view of Cricut Design Space and how to use Flatten

              Holding "Shift" select the heart and the text and click "Flatten".

              A view of Cricut Design Space and how to use Flatten

              Finally, select the 4 layers of the bottom heart and click on "Attach".

              A view of Cricut Design Space and how to use Flatten

              And now, you're ready to click "Make it".

              A view of Cricut Design Space and how to use Flatten

              Now this is how it's going to look like. Don't worry if you don't see the border of the hearts. It's totally normal because it's white on white.

              A view of Cricut Design Space and how to use Flatten

              Now, just send it to your printer and then follow the prompt on Design Space. This is seriously the easy part! 😉

              A view of Cricut Design Space and how to use Flatten

              In the video, I show you how to write your own words, but I also have some other children's jokes that you can write:

              • What did the stamp say to the envelope on Valentine's Day?
                • I'm stuck on you!
              • What do you call two birds in love?
                • Tweethearts.
              • Where do burgers take their Valentine's Day dates to dance?
                • To the meatball
              • What did the elephant say to his girlfriend?
                • I love you a ton!
              • How can you tell the calendar is popular?
                • It always has a lot of dates.
              • What did the girl squirrel say to the boy squirrel on Valentine's Day?
                • I'm nuts about you!

              For the detailed tutorial, check out the video!

              If all the functions of Cricut Design Space are not clear to you, don't hesitate to download my free cheat sheet.

              Natalie

              Please Pin it for later!

              Pinterest image showing Print and cut using Flatten in Cricut Design Space and free SVG file

              Cricut Design Space for desktop - everything you need to know

              Cricut will soon transition from the browser version to the desktop version of Design Space. I attended the Facebook Live and you'll find a summary of the information I received.

              First of all, I want to reassure you. You won't see any difference. The only thing you will have to do differently will be to launch the application from your computer (PC or Mac) (like when you use Word, Excel, etc.) instead of opening it from your internet browser.

              Also, Cricut mainly decided to go to a desktop version of Design Space in order to offer the possibility of working on projects "offline" (ie without internet connection). You won't need to use this unless you intend to go somewhere that doesn't have an internet connection and plan on working on your projects in DS.

              With the desktop version, Cricut also promises a faster connection between your Cricut and Design Space.

              In addition, the desktop version will offer a better image search. So if you search for a "Christmas tree" you will have Christmas trees and not pictures of Christmas and pictures of trees.

              Although Cricut announced the launch for mid-January, it now looks more likely to be done in late January. UPDATE: it will officially be January 29.

              Here are the main questions and answers:

              Can I immediately download the desktop version of Design Space?

              Yes, you can immediately do so by clicking here.

              Note that you will need to have Windows 8 or higher (for those still using Windows 7, you should update since Microsoft is not supporting Windows 7 since January 14 of this year. Therefore, you'll soon find yourself having problems with a lot of other software, not only Cricut).

              If I already have the Beta desktop version of Design Space, do I have something to do?

              No, everything will be done automatically.

              What will happen if I still go to design.cricut.com after the transition?

              The page will tell you to download the new desktop version or, if it is already installed, will ask you to open it.

              Can I still use Design Space mobile apps on my cell or tablet?

              Yes, there is no change for these applications.

              What will happen to the projects that I have already saved in the browser version?

              Everything will be redirected to the desktop version, you have no action to take.

              Will the desktop version of Design Space be available in other languages like French?

              Yes. Design Space will use the main language of your computer. So, to have access to the French version, your computer must also be in French.

              Will I have to do the updates myself?

              No. They will be done automatically.

              Will I be able to share my projects?

              Yes, you'll be able to share your projects on Facebook and Pinterest. The possibility of sharing a project with a link is coming soon.

              I have the Beta version and already a lot of problems.

              Starting this week, corrections will be made to improve the speed and "fill with pattern" option. (I think this is one of the reasons why the official release date is postponed to the end of January).

              Important Information

              How to use the offline function

              The new desktop version of Design Space still remains connected to the Internet. Thus, the functionality will be the same. The major difference is if you decide to work offline.

              If you want to test it, in the Beta version (download it here), go to your projects and choose an image and click on the 3 small dots (see the pink circles on the following images).

              Design space, 3 little dots

              Then click on save offline.

              Design Space, save offline

              You will see a computer icon appear on the image.

              Design space, computer icon

              To test the offline feature, you must disconnect from the Internet. So, this is what you will see once offline:

              Design space offline

              How to use a font offline

              To use a Cricut font offline, you need to download it as shown in the image below.

              offline font

              Note that this only applies to Cricut fonts. You always have access to the fonts on your computer.

              Work on several projects and / or machine at the same time

              Yes, it will be possible in the desktop version, you will only have to click on "file" and "new window".

              Project files saved offline

              Note that you cannot find projects saved offline (on your computer) by going through the file explorer. It will absolutely be necessary to open them and find them via Design Space.

              Anything else?

              If you have any other questions that I have not covered, please leave them to me below.

              The best trick to layer Cricut vinyl

              It's the last day of the 12 Christmas crafts challenge and I'll show you the best trick to easily layer several colours of vinyl.

              From December 1st and until Christmas, I will make one video every 2 days.

              For this 12 Christmas Crafts Challenge, I will show you how to make original projects and I will even include free SVG files to download.

              Today, how to combine several vinyl colours together.

              Layer Cricut vinyl

              Do you have a resolution planned for the start of the new year? If so, you're going to love the SVG file I made for you, which you can get for free in NeliDesign's library.

              These are two quotes that you can put wherever you want to remind you not to give up your resolution.

              English quotes Don't give up, you can do this

              So I'm going to show you the best trick to align two or more colours on the same object, without thinking too hard!

              Are you ready? This post contains some affiliate links for your convenience and at no extra cost to you. Click here to read my full disclosure policy.

              Required tools & materials

              Tools

              • Cricut Maker (the Cricut Explore Air 2 is also fine)
              • Weeding tools

              Materials

              • Coffee mug
              • Vinyl Oracal 651 black
              • Cricut premium vinyl aqua (permanent)
              • Transfer paper
              • Rubbing alcohol
              • Free SVG file that you can get by subscribing below

                Easily layer Cricut vinyl

                If you have any questions or comments don't hesitate to write to me below!


                The 12 Christmas Crafts Challenge

                Recap

                Défi jour 1
                Day 1
                See the project
                Défi jour 2
                Day 2
                See the project
                Day 3
                Day 3
                See the project
                Défi jour 1
                Day 4
                See the project
                Day 5
                Day 5
                See the project
                Day 6
                Day 6
                See the project
                Défi jour 1
                Day 7
                See the project
                Day 8
                Day 8
                See the project
                Day 9
                Day 9
                See the project
                Défi jour 1
                Day 10
                See the project
                Day 11
                Day 11
                See the project
                Day 12
                Day 12
                See the project

                Please, don't forget to Pin it!

                Pinterest image showing how to properly layer multiple vinyl colours + free SVG file

                My review on Cricut Infusible Ink

                In the middle of the 12 Christmas crafts Challenge, I tested the Cricut Infusible Ink and will give you my opinion on this product. The good, the bad and the ugly, without any filters.

                From December 1st and until Christmas, I will make one video every 2 days.

                For this 12 Christmas Crafts Challenge, I will show you how to make original projects and I will even include free SVG files to download.

                Today, I used Cricut Infusible Ink for the first time. You will have my opinion and my errors, without censorship.

                Cricut Infusible Ink review

                I was super happy to try what everyone was talking about. I even designed a beautiful SVG file for the occasion.

                Image of an SVG file written Noel with antlers

                Here's what I used for my test. This post contains some affiliate links for your convenience and at no extra cost to you. Click here to read my full disclosure policy.

                What I used

                Tools

                • Cricut Maker (the Cricut Explore Air 2 is also fine)
                • Easy Press (I have the Easy Press 2 9x9)
                • Easy Press Mat
                • Green Cricut mat
                • Lint-free cloth

                Materials

                • Medium size Cricut Tote bag
                • Infusible Ink - Buffalo check
                • White cardstocks
                • Free SVG file available in my resources library by subscribing below.

                  Test and review on Cricut Infusible Ink

                  The pros and cons of Infusible ink

                  I would say the biggest drawback is that it does not forgive any mistakes. I made some and I was frustrated that there was no way for me to repair them. If you have watched several of my videos, you will see that I sometimes make mistakes, I miss something or I forget a step, but I always end up correcting it at the end. I like to say that they are no problems, only solutions. But Infusible Ink doesn't leave me room for any solution!

                  • Bag with the writing Noel in red and black buffalo check with antlers.
                  • Bag with the writing Noel in black with antlers.

                  So, if they are no solutions, you need to start over. Starting over = $ and I'm more of a thrifty type! 😉

                  disadvantages:

                  • You are limited to what product you can apply it. You need a very high polyester composition (100% is ideal) so you can forget everything that is 100% cotton. Also, only very pale colours work. (I don't know about you, but me and the white t-shirts ... we don't go very well together !!)
                  • Buying Cricut blanks is expensive. At Michaels, the little bag cost me $12.99 and you can't apply any coupons. The best place to buy the blanks remains Cricut.com.
                  • Infusible Ink transfer sheets are expensive too.
                  • And how about butcher paper? Cricut provides a sheet in the box, but it can only be used once. In Canada, it's not easy to find. Amazon is where I found the cheapest one.
                  • You think to yourself you're going to use parchment paper instead? Cricut advises against it and insists that butcher paper is ideal "because the ink converts into a gas during the heat transfer process, it could bond with adjacent items or layers. Butcher paper and cardstock act as a barrier to protect your blank, Cricut EasyPress Mat, and Cricut EasyPress heat plate from unwanted transfer".(I'll let you read all the Infusible Ink application FAQ).
                  • Oh yes, "the ink converts into a gas" and I must say that it stinks!!
                  • Cricut also requires 12"x 12" white cardstocks to be used only once (this is not cheap either, if you know a cheap place, tell me in the comments below). They can, however, be replaced by 4 layers of butcher paper (I encourage you to do that, especially if you bought the big roll!!)
                  • And finally, you can't press twice. In other words, you are limited by the size of your Easy Press. You could do two press, but it is risky and best with the heat resistant tape (to keep your project in place) and a slight dividing line still might show.

                  Advantages:

                  • The finish is incredible and very professional.
                  • It may be ideal for a high-quality gift where you seek to impress!

                  Detailed instructions

                  Finally, I leave you the link to the detailed instructions for using Infusible Ink. It's illustrated and also allows you not to forget any part of the multiple steps you need to do!!

                  Have you experienced Infusible Ink? How did you find it? Write it to me in the comments below.


                  The 12 Christmas Crafts Challenge

                  Recap

                  Défi jour 1
                  Day 1
                  See the project
                  Défi jour 2
                  Day 2
                  See the project
                  Day 3
                  Day 3
                  See the project
                  Défi jour 1
                  Day 4
                  See the project
                  Day 5
                  Day 5
                  See the project
                  Day 6
                  Day 6
                  See the project
                  Défi jour 1
                  Day 7
                  See the project
                  Day 8
                  Day 8
                  See the project
                  Day 9
                  Day 9
                  See the project
                  Défi jour 1
                  Day 10
                  See the project
                  Day 11
                  Day 11
                  See the project
                  Day 12
                  Day 12
                  See the project

                  Please, don't forget to Pin it!

                  Image Pinterest Cricut infusible Ink the good the bad and the ugly + free SVG file

                  DIY Easy Christmas trees centerpiece with lights

                  For the 10th day of the 12 Christmas craft challenge, I offer you a file to make an easy, fast and elegant decoration for your centerpiece at Christmas dinner.

                  From December 1st and until Christmas, I will make one video every 2 days.

                  For this 12 Christmas Crafts Challenge, I will show you how to make original projects and I will even include free SVG files to download.

                  Today, a quick DIY to decorate your table or any piece of furniture and place in your home.

                  DIY Christmas tree centerpiece

                  I have created an SVG file in which you will be able to use the "draw" function in Cricut Design Space. You will have these elegant decorations in the shape of Christmas trees to put in the center of your table.

                  2 DIY Christmas tree centerpiece
                  DIY Christmas tree centerpiece with lights

                  Let's do it! This post contains some affiliate links for your convenience and at no extra cost to you. Click here to read my full disclosure policy.

                  Required materials

                  Tools

                  • Cricut Maker (the Cricut Explore Air 2 is also fine)
                  • Medium Cricut pen (I use the silver one you can find in this set)

                  Materials

                  • 12 x 12 coloured cardstock
                  • Glue
                  • battery candle lights
                  • SVG cut file from NeliDesign's library

                  Subscribe to my newsletter below and get access to my library full of free SVG cut files including this one to make the DIY Christmas centerpiece.

                    How to make the Christmas centerpiece

                    Step 1: In Cricut Design Space

                    In Cricut Design Space, start by uploading the SVG file that you previously saved from NeliDesign's library. Click on "Upload" and "upload image".

                    Select the SVG file and click "save".

                    Select the image and click "insert image".

                    The first thing you need to do with all of my files is to click "ungroup".

                    Then, you'll be left with to smaller groups. Select the layers that have the swirls on them and change the "Linetype" to "Draw".

                    Select the first group and click "Attach" so that the swirls stay on the right shape. Do the same with the second group.

                    Click "Make it", follow Design Space's prompt and cut the Christmas centerpiece.

                    Assembling the Christmas centerpiece

                    Remove the mat from the Cricut and put it face down.

                    Bend the mat to remove the cardstock. Don't bend the cardstock.

                    Add glue to the part where there's no design. Press firmly until it's glued. You might need to use a spatula or something similar to press the top of the tree.

                    Detailed DIY Christmas tree centerpiece

                    It's really not a complicated project, except to glue them. Go ahead, you can laugh at me! (see the video). I made the correction so you don't have as much trouble as I had!!!

                    If you have any questions or comments, or even some suggestions for a next craft, don't hesitate to write to me below!


                    The 12 Christmas Crafts Challenge

                    Recap

                    Défi jour 1
                    Day 1
                    See the project
                    Défi jour 2
                    Day 2
                    See the project
                    Day 3
                    Day 3
                    See the project
                    Défi jour 1
                    Day 4
                    See the project
                    Day 5
                    Day 5
                    See the project
                    Day 6
                    Day 6
                    See the project
                    Défi jour 1
                    Day 7
                    See the project
                    Day 8
                    Day 8
                    See the project
                    Day 9
                    Day 9
                    See the project
                    Défi jour 1
                    Day 10
                    See the project
                    Day 11
                    Day 11
                    See the project
                    Day 12
                    Day 12
                    See the project

                    Please, don't forget to Pin it!

                    Printerest image written Free SVG file Christmas trees DIY centerpiece with lights

                    DIY teacher gift with your Easy Press

                    We sprint towards the end of the 12 Christmas crafts challenge. I will show you how to make a personalized teacher gift with a funny quote.

                    From December 1st and until Christmas, I will make one video every 2 days.

                    For this 12 Christmas Crafts Challenge, I will show you how to make original projects and I will even include free SVG files to download.

                    Today, we're going to write a funny quote on a zipper pouch.

                    DIY teacher gift

                    We agree that it's a last-minute DIY teacher gift! It's not always easy to find good quotes on the Internet. Even less quotes of free SVG files!

                    Well, I made one for you and I think the quote is very funny but subtle at the same time! 😆 (And don't worry, I also have the English version of the quote for you, just scroll down a bit!)

                    pouch with the quote: without teachers life would have no class
                    Without teachers, life would have no class

                    The pouch is part of a lot of 3 pouches of different sizes that I bought at Michaels (with the discount coupon of course !!). I chose the middle size, telling myself that it was the perfect size for a pencil case or for a travel or makeup pouch.

                    On the back, I wrote the name of the teacher. I plan to put a gift card and a nice word in the pouch.

                    Pouch with french quote : Mme Julie

                    Let's start right now! This post contains some affiliate links for your convenience and at no extra cost to you. Click here to read my full disclosure policy.

                    What you'll need

                    Tools

                    • Cricut Maker or Cricut Explore Air 2
                    • Easy Press (I have the Easy Press 2 9x9)
                    • Easy Press mat (optional)
                    • Green Cricut mat

                    Materials

                    • 3 pouch kit from Imagin8 available at Michaels
                    • Iron-on (the ones I used are Glitter gold-black, the Green Glitter and the Everyday Black )
                    • Free SVG file available in my resources library by subscribing below.

                      How to make this DIY teacher gift

                      If you have any questions or comments, or even some suggestions for a next craft, don't hesitate to write to me below!


                      The 12 Christmas Crafts Challenge

                      Recap

                      Défi jour 1
                      Day 1
                      See the project
                      Défi jour 2
                      Day 2
                      See the project
                      Day 3
                      Day 3
                      See the project
                      Défi jour 1
                      Day 4
                      See the project
                      Day 5
                      Day 5
                      See the project
                      Day 6
                      Day 6
                      See the project
                      Défi jour 1
                      Day 7
                      See the project
                      Day 8
                      Day 8
                      See the project
                      Day 9
                      Day 9
                      See the project
                      Défi jour 1
                      Day 10
                      See the project
                      Day 11
                      Day 11
                      See the project
                      Day 12
                      Day 12
                      See the project

                      Please, don't forget to Pin it!

                      Pinterest image written: Free SVG file DIY teacher gift

                      DIY Mason jar lids Christmas craft

                      Today is the 8th project of the 12 Christmas crafts challenge. I'm going to show you how to make a rustic Christmas decoration using Mason jars lids.

                      From December 1st and until Christmas, I will make one video every 2 days.

                      For this 12 Christmas Crafts Challenge, I will show you how to make original projects and I will even include free SVG files to download.

                      Today, I'm proposing a rustic style mini garland to decorate your home.

                      DIY Mason jar lids Christmas craft

                      Mason jars can be used in all kinds of situations (other than canning!). They are both elegant and practical. But what can we do with the lids?

                      I made this pretty mini garland for you to brighten up your home this holiday season. It can be put in the tree or even hung on the wall.

                      DIY Mason jar lids Christmas craft Each lid has a letter that creates the word "Noël"

                      The really cool thing is that I did it with fabric and Iron-on, but the same thing could be done with cardstock or a lot of other materials. The possibilities are endless!

                      Go get your lids and let's do this! This post contains some affiliate links for your convenience and at no extra cost to you. Click here to read my full disclosure policy.

                      What you'll need

                      Tools

                      • Cricut Maker (or Cricut Explore Air 2 if you're not using fabric)
                      • Easy Press (I have the Easy Press 2 9x9, but the mini could be ok too!)
                      • Easy Press mat (optional)
                      • Green Cricut mat
                      • Pink Cricut mat (for fabric, also comes with the Maker)
                      • Rotative blade for fabric (comes with the Maker)
                      • Crop-A-Dile
                      • Brayer

                      Materials

                      • Mason jar rings and lids
                      • Christmas fabric scraps
                      • Iron-on (the one I use is the Glitter gold-black)
                      • Jute twine
                      • Spray adhesive
                      • E-6000 glue
                      • Free SVG file available in my resources library by subscribing below.

                        How to make a Mason jar Christmas craft ornament

                        Step 1: Cutting the fabric

                        With the brayer, apply the fabric on the pink mat.

                        Upload the free SVG template from NeliDesign's library to Cricut Design Space and cut the circle with the rotary blade.

                        You'll need two fabric circle for each Mason jar lid.

                        Gently remove the fabric from the mat.

                        Step 2: Cutting the vinyl

                        Look at the space the letters are taking in Design Space and cut a piece of vinyl that will fit.

                        Place it face-down on your mat. In Design Space, don't forget to select "Mirror".

                        I always prefer to separate the letters before weeding.

                        Weed the letters.

                        Step 3: Applying the letters with the Easy Press

                        Using the Cricut Heat Guide, check the setting of your materials.

                        Apply the Easy Press according to the time and pressure recommended in the Heat Guide.

                        Step 4: Glue fabric to lids

                        Put the lids in an old cardboard box and spray them with adhesive glue.

                        Apply the fabric to the lids.

                        Do the same thing for the back of the lids.

                        Step 5: Assembling the lids

                        Using the Crop-A-Dile, make two holes on each lids. Make sure you glue the lids to the rigs using E-6000 glue.

                        Make a knot in the jute twine and start by the last letter.

                        Make knots on each side of each lid as you go.

                        Finish by making a loop so you'll be able to hang your Mason lids Christmas craft.

                        DIY Mason jar lids Christmas craft Each lid has a letter that creates the word "Noël"

                        If you have any questions or comments, or even some suggestions for the next craft, don't hesitate to write to me below!


                        The 12 Christmas Crafts Challenge

                        Recap

                        Défi jour 1
                        Day 1
                        See the project
                        Défi jour 2
                        Day 2
                        See the project
                        Day 3
                        Day 3
                        See the project
                        Défi jour 1
                        Day 4
                        See the project
                        Day 5
                        Day 5
                        See the project
                        Day 6
                        Day 6
                        See the project
                        Défi jour 1
                        Day 7
                        See the project
                        Day 8
                        Day 8
                        See the project
                        Day 9
                        Day 9
                        See the project
                        Défi jour 1
                        Day 10
                        See the project
                        Day 11
                        Day 11
                        See the project
                        Day 12
                        Day 12
                        See the project

                        Please, don't forget to Pin it!

                        Pinterest image written Free SVG file Mason jar lids Christmas ornament

                        DIY Secret Santa gift tag

                        DIY gift tag for a Secret Santa Christmas gift exchange

                        I'm going to show you how to make a Secret Santa gift tag that will help you keep the name of the person you picked a secret.

                        From December 1st and until Christmas, I will make one video every 2 days.

                        For this 12 Christmas Crafts Challenge, I will show you how to make original projects and I will even include free SVG files to download.

                        Today, I want to show you how to make an original tag to label your Secret Santa gift or maybe even any gift you give!

                        DIY Secret Santa gift tag

                        Do you also have a gift exchange with your family or friends? In my family, for the Secret Santa, we only write the name of the person offering the gift on the label. Why? Well, because we always end up recognizing the gift wrap or the writing and it would spoil the surprise if we wrote the name of the person receiving the gift!

                        But this year, I have a solution! A peel-away tag thanks to the Cricut Maker perforation blade. That way, it will be easy to keep secret who is the gift for.

                        • Peel-away DIY Secret Santa gift tag
                        • Peel-away DIY Secret Santa gift tag

                        I think maybe we should do this for all the gifts! That would prevent curious ones from shaking theirs and trying to guess what's inside! 😉

                        Here's how you can make them. This post contains some affiliate links for your convenience and at no extra cost to you. Click here to see my full disclosure policy.

                        What you need to make the DIY gift tag

                        Tools

                        • Cricut Maker
                        • Cricut mat (blue or green)
                        • Perforation blade
                        • Wavy blade (optional)
                        • Weeding tools optional but extremely useful

                        Materials

                        • Christmas or plain cardstock scraps
                        • Free SVG file available in my resources library by subscribing below.

                          How to make a DIY gift tag

                          If you have any questions or comments, or even some suggestions for a next craft, don't hesitate to write to me below!


                          The 12 Christmas Crafts Challenge

                          Recap

                          Défi jour 1
                          Day 1
                          See the project
                          Défi jour 2
                          Day 2
                          See the project
                          Day 3
                          Day 3
                          See the project
                          Défi jour 1
                          Day 4
                          See the project
                          Day 5
                          Day 5
                          See the project
                          Day 6
                          Day 6
                          See the project
                          Défi jour 1
                          Day 7
                          See the project
                          Day 8
                          Day 8
                          See the project
                          Day 9
                          Day 9
                          See the project
                          Défi jour 1
                          Day 10
                          See the project
                          Day 11
                          Day 11
                          See the project
                          Day 12
                          Day 12
                          See the project

                          Please, don't forget to Pin it!

                          Pinterest image written How to make a DIY secret Santa gift tag + free SVG file

                          Personalize a candle with vinyl

                          We are already halfway through the 12 Christmas Crafts Challenge. Today, I will show you how to personalize a candle with your Cricut, vinyl and the reverse weeding technique.

                          From December 1st and until Christmas, I will make one video every 2 days.

                          For this 12 Christmas Crafts Challenge, I will show you how to make original projects and I will even include free SVG files to download.

                          Today, we'll be personalizing an IKEA candle by giving it a festive look.

                          Personalize a candle

                          This project is done more than quickly and can be a very nice and affordable hostess gift. I've created an SVG file "Vive le vent" but you can also choose the "Jingle bells" quote if you prefer.

                          Personalized candle with vinyl in a glass jar Written Vive le vent and a Mason jar with candy canes

                          Here's how to make it. This post contains links to affiliated products for your convenience and at no extra cost to you. Click here to read my full disclosure policy.

                          What you'll need to make the personalized candle

                          Tools

                          • A way to cut your vinyl (I have the Cricut Maker, but the Explore Air 2 can be ok too.)
                          • Cricut mat (blue or green)
                          • BrightPad (optional)
                          • Weeding tools optional but extremely useful

                          Materials

                          • Candle in a glass jar (this is the Sinnlig candle from IKEA that I used)
                          • Premium white vinyl (permanent)
                          • Transfer paper
                          • Rubbing alcohol
                          • Free SVG file available in my resources library by subscribing below.

                            How to personalize a candle

                            If you have any questions or comments, or even some suggestions for a next craft, don't hesitate to write to me below!


                            The 12 Christmas Crafts Challenge

                            Recap

                            Défi jour 1
                            Day 1
                            See the project
                            Défi jour 2
                            Day 2
                            See the project
                            Day 3
                            Day 3
                            See the project
                            Défi jour 1
                            Day 4
                            See the project
                            Day 5
                            Day 5
                            See the project
                            Day 6
                            Day 6
                            See the project
                            Défi jour 1
                            Day 7
                            See the project
                            Day 8
                            Day 8
                            See the project
                            Day 9
                            Day 9
                            See the project
                            Défi jour 1
                            Day 10
                            See the project
                            Day 11
                            Day 11
                            See the project
                            Day 12
                            Day 12
                            See the project

                            Please, don't forget to Pin it!

                            DIY balsa sled for your Christmas tree

                            It's the 5th day of the 12 Christmas Crafts Challenge and today, I'll show you how to make another balsa ornament for your Christmas tree. This time, it will be a little festive sled.

                            From December 1st and until Christmas, I will make one video every 2 days.

                            For this 12 Christmas Crafts Challenge, I will show you how to make original projects and I will even include free SVG files to download.

                            Today, we'll be making a cute and festive sled made of balsa to decorate your Christmas tree.

                            Festive balsa sled

                            It's another project that you can make pretty fast, especially with my free SVG file! It would also make a nice hostess gift that is sure to impress!

                            Here's how to make it. This post contains some affiliate links for your convenience and at no extra cost to you. Click here to see my full disclosure policy.

                            What you'll need to make the balsa sled

                            Tools

                            • A way to cut your balsa (I have the Cricut Maker)
                            • Cricut knife blade
                            • Cricut Strong grip mat (purple)

                            Materials

                            • Balsa 1/16"
                            • Masking tape
                            • Jute twine
                            • Crop-a-dile (optionnal)
                            • Glue gun and glue sticks
                            • Red and silver cardstocks
                            • Red paint and paint brush
                            • Tombow glue
                            • Dollar store ornaments
                            • Free SVG file available in my resources library by subscribing below.

                              How to make the balsa sled

                              If you have any questions or comments, or even some suggestions for a next craft, don't hesitate to write to me below!


                              The 12 Christmas Crafts Challenge

                              Recap

                              Défi jour 1
                              Day 1
                              See the project
                              Défi jour 2
                              Day 2
                              See the project
                              Day 3
                              Day 3
                              See the project
                              Défi jour 1
                              Day 4
                              See the project
                              Day 5
                              Day 5
                              See the project
                              Day 6
                              Day 6
                              See the project
                              Défi jour 1
                              Day 7
                              See the project
                              Day 8
                              Day 8
                              See the project
                              Day 9
                              Day 9
                              See the project
                              Défi jour 1
                              Day 10
                              See the project
                              Day 11
                              Day 11
                              See the project
                              Day 12
                              Day 12
                              See the project

                              Please, don't forget to Pin it!

                              DIY faux leather festive earrings

                              faux leather and blue vinyl earrings hung on a mug with a fir tree and a star candle

                              For the 4th day of the 12 Christmas Craft Challenge, I will show you how to make festive earrings in no time!

                              From December 1st and until Christmas, I will make one video every 2 days.

                              For this 12 Christmas Crafts Challenge, I will show you how to make original projects and I will even include free SVG files to download.

                              Today, I'm making 3 pairs of earrings for the Holidays.

                              DIY faux leather earrings

                              They only took me a few minutes to make, I love these kinds of projects! Yours will go even faster because you'll get the free SVG file to make the 3 models. An addition that will surely be noticed at your office party!

                              • faux leather and red vinyl earrings hung on a mug with a fir tree and a star candle
                              • faux leather and blue vinyl earrings hung on a mug with a fir tree and a star candle
                              faux leather and green vinyl earrings hung on a mug with a fir tree and a star candle

                              So, do we start the clock? This post contains some affiliate links for your convenience and at no extra cost to you. Click here to see my full disclosure policy.

                              Materials and tools needed to make the faux leather earrings

                              • A way to cut your faux leather and vinyl (I have the Cricut Maker but the Explore Air 2 is fine also)
                              • Easy Press (whatever the size, even the mini can be fine)
                              • Cricut protective sheet or Cookina
                              • HTV (the one I use in the video are: Cricut Iron-on Foil Red and Lemon-Grass and Iron-on Holographic sparkle blue)
                              • Silver faux leather (I bought mine at a fabric store near my house. 10 cm x 54" didn't even cost me 2$) but Cricut also has faux leather.
                              • Jewelry pliers
                              • Fishhook earring findings
                              • Jump rings
                              • Free SVG file available in my resources library by subscribing below.

                                How to make the faux leather earrings

                                Do you know that you don't need a special blade to cut faux leather? That's right! You just need the regular fine point blade that can be used in both Cricut Maker, Explore Air or even the Cricut Joy!

                                Check out the video to see the full tutorial!

                                Get the settings for the Easy Press here

                                If you have any questions or comments, or even some suggestions for a next craft, don't hesitate to write to me below!


                                The 12 Christmas Crafts Challenge

                                Recap

                                Défi jour 1
                                Day 1
                                See the project
                                Défi jour 2
                                Day 2
                                See the project
                                Day 3
                                Day 3
                                See the project
                                Défi jour 1
                                Day 4
                                See the project
                                Day 5
                                Day 5
                                See the project
                                Day 6
                                Day 6
                                See the project
                                Défi jour 1
                                Day 7
                                See the project
                                Day 8
                                Day 8
                                See the project
                                Day 9
                                Day 9
                                See the project
                                Défi jour 1
                                Day 10
                                See the project
                                Day 11
                                Day 11
                                See the project
                                Day 12
                                Day 12
                                See the project

                                Please, don't forget to Pin it!

                                faux leather and green vinyl earrings hung on a mug with a fir tree and a star candle written free SVG file DIY festive earrings in Faux leather and HTV.

                                How to make a DIY peel away Christmas card with your Cricut Maker

                                This is the third day of the 12 Christmas Crafts Challenge and today I will make a very special Christmas card thanks to the wavy and perforation blades of the Cricut Maker.

                                From December 1st to Christmas, I will make one video every 2 days.

                                For this 12 Christmas Crafts Challenge, I will show you how to make original projects and I will even include free SVG files to download.

                                And today is the day that we'll be using the wavy and perforation blades of the Cricut Maker.

                                DIY Christmas card

                                With this DIY Christmas card, you won't even need an envelope to send it by mail. Because of the perforation blade, you'll be able to send it as a postcard.

                                The person that will get it will only have to peel it to open it.

                                DIY Christmas card with family picture

                                And to be sure that it is not too complicated, I'll give you the SVG file for free!

                                So, do you want to make it? This post contains some affiliate links for your convenience and at no extra cost to you. Click here to see my full disclosure policy.

                                Materials and tools to make the DIY Christmas card

                                • Cricut Maker (the one I have)
                                • Scoring wheel
                                • Perforation blade
                                • Wavy blade (optional)
                                • Choice of cardstock
                                • Glue
                                • Free SVG file available in my resources library by subscribing below.

                                  How to make the Christmas card

                                  If you have any questions or comments, or even some suggestions for a next craft, don't hesitate to write to me below!

                                  The 12 Christmas Crafts Challenge

                                  Recap

                                  Défi jour 1
                                  Day 1
                                  See the project
                                  Défi jour 2
                                  Day 2
                                  See the project
                                  Day 3
                                  Day 3
                                  See the project
                                  Défi jour 1
                                  Day 4
                                  See the project
                                  Day 5
                                  Day 5
                                  See the project
                                  Day 6
                                  Day 6
                                  See the project
                                  Défi jour 1
                                  Day 7
                                  See the project
                                  Day 8
                                  Day 8
                                  See the project
                                  Day 9
                                  Day 9
                                  See the project
                                  Défi jour 1
                                  Day 10
                                  See the project
                                  Day 11
                                  Day 11
                                  See the project
                                  Day 12
                                  Day 12
                                  See the project

                                  Please, don't forget to Pin it!

                                  picture of the DIY Christmas card written Free SVG file Christmas card made with Cricut Maker perforation blade

                                  DIY Christmas House Ornaments

                                  It's the second day of the 12 Crafts of Christmas Challenge and today, I will show you how to make these IKEA-inspired house ornaments in cardstock.

                                  From December 1st to Christmas, I will make one video every 2 days.

                                  For this 12 Crafts of Christmas Challenge, I will show you how to make original projects and I will even include free SVG files to download.

                                  There will also be special projects using the perforation blade and the wavy blade. I can't wait to show them to you.

                                  IKEA-inspired ornaments

                                  Who doesn't love IKEA!!! Today, I will show you how to make these pretty houses to decorate your Christmas tree or just your home. Although we love IKEA for its inexpensive solutions, these little houses will cost you a fraction of the price.

                                  Houses Ornaments in a Christmas Tree

                                  Let's do it! This post contains some affiliate links for your convenience and at no extra cost to you. Click here to see my full disclosure policy.

                                  Hardware and tools needed to make the Christmas house ornaments

                                  • Cricut Maker (the one I have) or Cricut Explore Air 2
                                  • Scoring wheel (for the Maker) or the Stylus for the Explore Air 2
                                  • White cardstock
                                  • White Parchment paper
                                  • Christmas twine
                                  • Spray adhesive
                                  • Free SVG file available in my resources library by subscribing below.

                                    How to make the Christmas house ornaments

                                    Watch this video to get the full instructions of follow the steps below.

                                    Step by step Christmas house ornament

                                    In Cricut Design Space

                                    First of all, in Cricut Design Space, you're going to click on "upload".

                                    Then, on "upload image".

                                    Find the SVG file on your computer. This is why it's important to organize them when you download them from my free library so you always remember where to find them!

                                    Click "save".

                                    Select the file (don't mind the image, I have 3 times the file, but you'll only have it once!!!) and click "insert images".

                                    The first thing to do, while everything is selected is to click "Ungroup".

                                    This will leave you with 3 groups that I've created to help you figure out what to attach together. But before attaching, will need to change the lines to score.

                                    When you see a line in the layer panel (as opposed to a shape) select it (you can use "shift" to select all of them at the same time).

                                    In the "linetype" dropdown menu, choose "score".

                                    The score lines are now dashed lines. Now, select the first group and click "Attach" so that the score lines stay in place.

                                    Also, select the second group and do the same thing. You won't need to do it for the third group since there are no score lines in it.

                                    Click on "Make it". I changed the material size because I had Letter size cardstock.

                                    Select the material you have and just press the Cricut button.

                                    How to make the house ornament

                                    When removing the cardstock from the mat, remember to fold the mat, not the cardstock.

                                    Using a leftover of the cardstock, apply glue between the doors and windows and add the pieces of parchment paper.

                                    Fold along the score lines.

                                    Close the four sides of the house. You'll need to hold it that way for a bit so it stays in place.

                                    Add the twine to the roof and make a knot so it's on the inside of the roof.

                                    Add glue to the house where the roof will go.

                                    I'm using my spatula to press on the flaps that hold the roof in place to make sure it's properly glued.

                                    Last step, adding glue to close the bottom! and that's it!

                                    They are really cute and will make a good addition to my tree... once I get around to decorate it! Maybe that's why this little puppy doesn't seem too impressed!!! 😄

                                    Christmas house ornaments in a tree with a sad dog next to it.

                                    If you have any questions or comments, or even some suggestions for a next craft, don't hesitate to write to me below!

                                    The 12 Christmas Crafts Challenge

                                    Recap

                                    Défi jour 1
                                    Day 1
                                    See the project
                                    Défi jour 2
                                    Day 2
                                    See the project
                                    Day 3
                                    Day 3
                                    See the project
                                    Défi jour 1
                                    Day 4
                                    See the project
                                    Day 5
                                    Day 5
                                    See the project
                                    Day 6
                                    Day 6
                                    See the project
                                    Défi jour 1
                                    Day 7
                                    See the project
                                    Day 8
                                    Day 8
                                    See the project
                                    Day 9
                                    Day 9
                                    See the project
                                    Défi jour 1
                                    Day 10
                                    See the project
                                    Day 11
                                    Day 11
                                    See the project
                                    Day 12
                                    Day 12
                                    See the project

                                    Please Pin it if you liked it!

                                    DIY Balsa Christmas Ornaments

                                    ornement en balsa dans un sapin de noel

                                    It's day one of the 12 Crafts of Christmas Challenge and today, I'm showing you how to make this Balsa Christmas ornaments in Cricut Design Space.

                                    Here we are, already December 1st, can you believe it? This month will be a busy month because starting today and until Christmas, I will offer you one video every 2 days. 

                                    Why every 2 days? Well, to let you breathe a bit (and honestly so I can breathe too!) in this last sprint before Christmas.

                                    For this 12 crafts of Christmas challenge, I will show you how to make original projects and even include free SVG files for you to download. 

                                    There will even be some special projects using the perforation blade and the wavy blade. I can't wait to show you.

                                    Balsa Christmas Ornaments

                                    Today, we start by cutting balsa wood with the knife blade to make this cute ornament. There will be no SVG files today because you'll be designing it from A to Z in Cricut Design Space.

                                    balsa ornament in a Christmas tree

                                    If you don't have the knife blade, don't worry, I'll also show you how to make this project with cardstocks.

                                    Are you ready to start the 12 crafts of Christmas Challenge? Let's to it! This post contains some affiliate links for your convenience and at no extra cost to you. Click here to see my full disclosure policy.

                                    Material needed for making balsa Christmas ornaments

                                    • Cricut Maker (the one I have)
                                    • Cricut knife blade
                                    • Cricut Strong grip mat
                                    • 1/16" Balsa wood
                                    • Masking tape or painter's tape
                                    • Distress ink
                                    • finger sponge dauber
                                    • Mod Podge
                                    • Paintbrush

                                    Material needed for the Cardstock Christmas ornaments

                                    • Cricut Maker (the one I have) or Cricut Explore Air 2
                                    • Cricut light grip mat
                                    • Coloured Cardstock

                                    How to make balsa Christmas ornaments

                                    If you have any questions, don't hesitate to leave me a comment below.

                                    Natalie

                                    The 12 Christmas Crafts Challenge

                                    Recap

                                    Défi jour 1
                                    Day 1
                                    See the project
                                    Défi jour 2
                                    Day 2
                                    See the project
                                    Day 3
                                    Day 3
                                    See the project
                                    Défi jour 1
                                    Day 4
                                    See the project
                                    Day 5
                                    Day 5
                                    See the project
                                    Day 6
                                    Day 6
                                    See the project
                                    Défi jour 1
                                    Day 7
                                    See the project
                                    Day 8
                                    Day 8
                                    See the project
                                    Day 9
                                    Day 9
                                    See the project
                                    Défi jour 1
                                    Day 10
                                    See the project
                                    Day 11
                                    Day 11
                                    See the project
                                    Day 12
                                    Day 12
                                    See the project

                                    Please Pin it for later

                                    How to make window silhouettes for Halloween

                                    View from outside, at night.

                                    Make these beautiful customized Halloween silhouettes for your windows! You'll learn how to easily make them yourself with your Cricut.

                                    My son adores Pokemon. You'll probably notice by the number of crafts related to Pokemon on my blog. There are, for example, the Pikachu party bags, the Ash Ketchum Halloween costume and many more.

                                    For Halloween, I've decided to make Pokemon silhouettes for his bedroom window. And since his window is in front of the house, it's also perfect for Halloween decorations.

                                    Note that what you'll learn can be made for any kind of silhouette. You just need to choose your favourite images. This post contains some affiliate links for your convenience and at no extra cost to you. Click here to see full disclosure policy.

                                    What you'll need to make the Halloween silhouettes

                                    • Black Cricut Window Cling
                                    • Green cutting mat, ideally 12" x 24" to make bigger images
                                    • A cutting machine (I have the Cricut Maker and the possibilities are endless with it!)

                                    Steps to make Halloween window silhouettes

                                    If you prefer, you can watch the video that will even show you how I added colours to the silhouettes.

                                    Step 1: Find images on Google by using the word "silhouette" in your search. Avoid images with busy backgrounds and a lot of colours. Right-click on the image and save it on your computer where you'll be able to find it later.

                                    Step 2: Open a new canvas in Cricut Design Space and click Upload.

                                    view of Cricut Design Space and how to import an image

                                    Step 3: Click on Upload image and then on Browse.

                                    • view of Cricut Design Space and how to import an image
                                    • view of Cricut Design Space and how to import an image

                                    Step 4: Find the images you have saved on your computer. Select an image and click on Open.

                                    Import an image

                                    Step 5: Click on Simple and on Continue.

                                    Choose "Simple" in Cricut Design Space

                                    Step 6: Erase the background and anything else you want. (You can click on Preview to see the result). Then click on Continue.

                                    How to erase part of an image in Cricut Design Space.

                                    Step 7: Name your image, click on Save as a cut image and hit Save.

                                    Choosing a cut image

                                    Step 8: Select the image and click on Insert images.

                                    Repeat all the steps for each silhouette you want to cut.

                                    How to optimize the placement in order to save material

                                    The next steps are not essential but if you're thrifty and a bit ecologically friendly like me, you'll want to minimize the loss of material.

                                    Even though Cricut Design Space optimizes the placement of objects on the cutting mat, there is still room for improvement.

                                    You can click on an image and move it by holding down the left button of the mouse. You can also use the arrow to turn the images.

                                    Turn an image on the Cricut Design Space cutting mat

                                    But the best trick is to click on the three little dots and select Move to another mat.

                                    Button to change an image to another cutting mat in Cricut Design Space

                                    After clicking, you can even choose on which mat you want the object to be moved. Interesting isn't it?

                                    Button to change an image to another cutting mat in Cricut Design Space

                                    The difference between Window Cling and Vinyl

                                    You're going to ask me, I'm certain of it 😉, what are the benefits of using Window Cling? Why can't I simply use vinyl?

                                    Well, the answer is simple, Window Cling is reusable. It's non-adhesive and sticks to windows without leaving any residue behind (you can see my demonstration in the video). It also means you can add it to your windows and remove it many times (and let the kids change their minds as many times as they want, without arguing with them!!!)

                                    view of the window and how the window cling can be easily removed.

                                    At night, from outside, the result is rather pleasing. If you want to see how I added colours to some of the silhouettes, check out the video. 😊

                                    Don't forget to download the Free Cricut Cheat Sheet

                                    Click on the images below to get help on Cricut Design Space functions.

                                    And please, don't forget to Pin it!

                                    Pinterest image  "Make your own window silhouettes for Halloween"

                                    Use the Slice function in Cricut Design Space

                                    You don't really know how to use the Slice function in Cricut Design Space? Do you wonder what it can be used for? You'll have all the answers in the next paragraphs.

                                    The Cricut Slice tool, as its name suggests, is used to slice shapes. Its subtlety comes from the fact that you have to use shapes to slice other shapes. You will better understand with an example.

                                    Don't forget to grab the free one-page cheat sheet that will help you unravel all the Cricut Design Space functions

                                    How to use the Slice tool in Cricut Design Space

                                    Here is a rectangle in which I want to make a heart-shaped hole. To do this, you have to draw a heart and place it on top of it.

                                    Drawing a heart and placing it on the of the rectangle to use the Cricut slice function:

                                    Select both shapes using the "shift" key and press "Cut".

                                    At first glance, nothing happened. But if you look closely at the layers panel, or if you separate the objects, you will notice that they have changed. The red heart is still there. But the rectangle that has been slice is now in two pieces, a heart (the same as red) and a rectangle with a hole in the shape of a heart.

                                    On the canvas, a red heart, a gray heart and a gray rectangle with a heart-shape hole in it.

                                    If we do the same exercise, but instead we place the heart on the edge of the rectangle, we get 4 different pieces.

                                    Why? Because each edge is used to slice the other shape. So, the edge of the rectangle also cuts the heart.

                                    • The heart shape is placed on the border of the rectangle to use the slice function in Cricut
                                    • You can see the 4 pieces as a result of using the slice function in Cricut

                                    Ideas for using Cricut Design Space's Slice function

                                    You can edit existing images using the Slice function. For example, if I want to remove the stem of this flower, I only need to draw a rectangle over the stem and use Slice.

                                    Yellow flower to test the Cricut slice function
                                    Rectangle with the shape of the stem cut in it and the stem that is separated from the flower by using the Cricut slice function

                                    If I want to modify the shapes inside the flower and make them round, I can slice using circles.

                                    A round shape can cut the flower with the Cricut slice function

                                    But the most interesting

                                    Another really interesting way to use the Slice function is when you have several pieces to assemble next to each other and want them at a very specific place. For example for this text, imagine that you want to cut the letters in blue and glue them in a frame. It would be very difficult (and long) to place the letters straight with the exact spacing.

                                    How to slice Home Sweet Home on the Cricut Design space canvas.

                                    So, instead of cutting a blue cardstock, you can cut a white cardstock by drawing a rectangle the size of the cardstock and use the Slice function.

                                    View of what needs to be cut by the Cricut slice function.

                                    This way, you can simply glue coloured cardstocks from behind.

                                    The result from using Cricut slice function.

                                    For more details on how to properly use slice

                                    You can see more details by watching the short video. And please, don't forget to subscribe to my channel!

                                    Tips and tricks

                                    • You first have to ungroup and unattach the objects in order to use the Cricut Slice tool.
                                    • Only two objects can be slice at a time.

                                    And if you don't ever want to mix the Cricut functions, download my free Cheat Sheet!

                                    For more Cricut Design Space help, don't hesitate to chech out the "Cricut help" section in the top menu.

                                    PS: Don't forget to pin it!

                                    Pinterest image

                                    Difference between Group and Attach in Cricut Design Space

                                    The Group and Attach functions can be confusing when you use Cricut Design Space. This tutorial will show you the difference so you never get mixed up again!

                                    A common question I hear is why do objects move when I press Make it even when I have grouped everything?

                                    Well, the reason is simple, you need to use Attach and not Group.

                                    To help you, don't forget to grab my free one-page cheat sheet on all the important functions of the Cricut Design Space.

                                    Don't forget to grab the free one-page cheat sheet that will help you unravel all the Cricut Design Space functions

                                    You can also check out my full video tutorial

                                    The Group tool

                                    First of all, let's talk about the Group function. Group will allow you to link objects together so it's easier for you to modify them.

                                    To use Group, you need to select all the objects using the shift key and then press "group".

                                    You will now see your objects laid out under a new layer called Group in the layer panel. 

                                    Using Group in Cricut Design Space

                                    When your objects are grouped, you'll be able to move them, copy them and scale them together. You'll also be able to change the colour of the entire group with one click.

                                    When pressing "Make it" you'll notice that Cricut Design Space always automatically moves the objects on your Cricut mat, no matter how they are laid out on your canvas.

                                    This is because Cricut Design Space wants to use the least amount of material possible and even if your objects are grouped.

                                    Mat view after group in Cricut Design Space

                                    The Attach tool

                                    If you want your objects to cut exactly as they are designed on your canvas, you'll want to use the Attach tool.

                                    Using the previous example, let's use Attach instead of Group (select the object using the shift key and press Attach).

                                    Looking at your canvas, you don't really see a difference except that they are under the word "Attach" in the layer panel. 

                                    Using Attach in Cricut Design Space

                                    Now, when you hit "Make it", the objects are staying in the exact position as you designed them in the canvas!

                                    Mat view when using Attach in Cricut Design Space

                                    What happens if you attach 2 objects of two different colours. 

                                    Cricut Design Space associates a colour with a material. Therefore, using 2 different colours means you want to cut each shape into a different material.

                                    If you attach 2 objects of two different colours together, it's like telling Design Space that you want to cut these two objects on the same sheet of paper. Therefore, the object that is on top will take the colour of the object that is behind.

                                    Using Attach with 2 different colour objects in Cricut Design Space

                                    Score lines

                                    The Attach function is often used to attach score lines to the proper object. Score lines will help you fold paper.

                                    In this example, the rectangle could be a card we want to fold. You can see the line is set to "score" instead of "cut" in the layer panel. A score line by itself is not really useful.

                                    Score line in Cricut Design Space

                                    You'll need to attach it to the proper object in order for Cricut Design Space to know which object it needs to score. 

                                    Attach score lines in Cricut Design Space

                                    Don't forget to grab your free Cheat Sheet explaining the 5 essential functions of Cricut Design Space

                                    Troubleshooting and Frequently asked questions

                                    Why am I not able to group objects in Cricut Design Space?

                                    To group objects, you must select at least two layers or objects. Use the "Shift" key on your keyboard.

                                    If you try to group two objects that are already part of other groups, you will have to ungroup these groups (by clicking on ungroup) before you can group the two desired objects.

                                    How do I group in the Cricut Design Space Android or Apple app?

                                    You will have to select several objects. To do this, long press on the objects, one after the other.

                                    Natalie

                                    P.S.: If you like it, please Pin it!

                                    Pinterest image written "the difference between Group and attach short and simple so you never get mixed up again!

                                    8 ways to make school supply labels with your Cricut

                                    Personalized school supplies with vinyl

                                    This post will show you 8 different ways to make school supply labels with your Cricut cutting machine. Who said labelling couldn't be fun?

                                    This post contains some affiliate links for your convenience and at no extra cost to you. I get commissions for purchases made through links in this post. Click here to see my full disclosure policy.

                                    Back to school is just around the corner and it also means you need to tackle the dreaded task of labelling E-VE-RY school supply and gear. I thought we could make this task a fun one by combining it with a little crafting!

                                    If you have a Cricut machine, you can do so many beautiful and original labels just by using vinyl, stencil sheets or sticker paper.

                                    How to make school supply labels

                                    1- Quickly label school supplies

                                    I'm starting with this one because I think it might be my favourite one! I think I'll even try it since I just bought some new vinyl and transfer paper!

                                    Make school labels: Personalized school supplies with vinyl
                                    Credit: The Country Chic Cottage

                                    2- DIY Custom Lunch Box

                                    This lunch box is a cutie. You should also click to check out the other side!

                                    Make school labels: Metal lunch box with the name Zoey
                                    Credit: Artsy Fartsy Mama

                                    3- Print and cut stickers

                                    Print and cut is often a feature we forget, but I simply love to use it like for my bowling party invitations.

                                    Make school labels: round label with a cat written Property of Mia
                                    Credit: Ever after in the woods

                                    4- Easy personalized water bottles

                                    I love how the vinyl was matched to the colours of the bottles. Very well done!

                                    Make school labels: Two kid water bottle Orange and blue written Callum and Sebastian
                                    Credit: Hey there let's make stuff

                                    5- DIY Gold vinyl pencil pouches

                                    And how simple but cute is this pencil pouch?!!

                                    Make school labels: Translucent pencil pouch with gold dots
                                    Credit: Sarah Hearts

                                    6- Apple tote bag

                                    Now, this might have been made for a teacher, but I can totally see this tote bag for a kid. I know at my son's school, they ask that we have a bag for gym clothes. This one would totally do the trick!

                                    Make school labels: Tote bag with an apple with an A in it
                                    Credit: Hey there, let's make stuff

                                    7- Personalized pencil bags

                                    I love the idea of taking a low-cost pencil case and turning it to something fun and personal.

                                    Make school labels: Two pencil case. The pink says Hello, my name is Abby and the blue says Hello my name is Bryson
                                    Credit: Crafting Chicks

                                    8- Monogram stencil backpack makeover

                                    This one is no vinyl but it's made using a stencil. This stencil can easily be made with a Cricut to suit your needs. I like that only a letter is written on the backpack. I wouldn't want any strangers to know the name of my kid.

                                    Make school labels: Orange back pack with the monogram "B"
                                    Credit: Lolly Jane

                                    Do you have any other idea you could add to this list! Please don't hesitate to write it in the comments!

                                    LET ME HELP YOU CREATE WITH CONFIDENCE

                                    Get access to my resource library with these files and a lot more for free when you subscribe to my newsletter!

                                      We won't send you spam. Unsubscribe at any time. See my Privacy policy 

                                      Natalie

                                      Please Pin it if you liked it!

                                      Pinterest image saying 8 ways to make school supply labels with your Cricut
                                      Pinterest image written 8 ways to use your Cricut to make back to school labels

                                      How to customize this free SVG bowling party invitation

                                      Free bowling invitation assembled after being cut and customized in Cricut Design Space

                                      Whether it's for a kid's birthday or just a friendly party, you can easily customize this free bowling party invitation by using this tutorial and my free SVG template.

                                      The free bowling invitation assembled.

                                      I had this idea a while ago and actually made these invitations for the first time for my daughter's 6th birthday which had a bowling theme. But at that time, I had no Cricut and made everything by hand.

                                      Today, I'm upgrading my freebie and offering it to you as an awesome SVG cut file that you can download for free and let your cutting machine do (almost) all the work!

                                      Are you ready to make these invitations in no time? This post contains some affiliate links for your convenience and at no extra cost to you. Click here to see my privacy policy.

                                      Materials for the free bowling party invitation

                                      • Cricut cutting machine (I have the Cricut Maker and I love it so much!)
                                      • Coloured cardstock
                                      • Glue
                                      • Mini Brads or ribbon
                                      • Colour printer (or black and white printer could also be fine)
                                      • My free SVG cut file that is available in my free resource library. Just go to the bottom to get the password to access it!

                                      How to upload the cut file to Cricut Design Space

                                      First, you'll need to download my free SVG cut file and save it on your computer. Then, in the Cricut Design Space, click on the upload button show below.

                                      view of the Cricut Design Space Upload button to make the free bowling invitation

                                      Click on the "Upload image" button and find the SVG cut file that you've previously saved on your computer.

                                      view of the Cricut Design Space Upload image button to make the free bowling invitation

                                      Note that SVG cut files have the Google Chrome symbol. I identify my file with "SVG" at the end so you can't make any mistake.

                                      view of the Cricut Design Space Where to find the SVG file of the free bowling invitation.

                                      How to customize the cut file in the Cricut Design Space

                                      Now, once the file is uploaded to the Cricut Design Space, you'll see the name of the file at the top of the layer panel. That means you need to "UnGroup" it before.

                                      view of the Cricut Design Space, how to ungroup to make the free bowling invitation

                                      Use the "Text" button to type what you want for the invitation.

                                      view of the Cricut Design Space. How to add text to the free bowling invitation.

                                      If you'd like to print in colours, you can change it by clicking on the coloured square and choosing a new one, as shown below.

                                      view of the Cricut Design Space. how to change the text colour to make the free bowling invitation.

                                      Now, in order to print and not cut the letters, you'll need to select "Print" in the Fill dropdown menu.

                                      view of the Cricut Design Space. How to set the text to print to make the free bowling invitation.

                                      You'll need to do this for all the text you want to print. You can confirm that you're good to go by looking into the Layer panel and making sure "Cut |Print" is next to all your text layers.

                                      View of the Cricut Design Space. How to make sure your text are Cut and print to make the free bowling invitation.

                                      Now, for your text to print on the white bowling pin, you'll need to join them. For that, select all the text layers and the white bowling pin by holding the shift key. Then, click on "Flatten" at the bottom right of your screen.

                                      view of the Cricut Design Space. how to flatten layers to make the free bowling invitation.

                                      This is what you'll see once all the layers are joined together.

                                      view of the Cricut Design Space. What you see when the layers are flatten to make the free bowling invitation.

                                      How to print and cut in Cricut Design Space

                                      Now it's time to click the "Make It" button and see the awesome result 😊! You'll notice that the bowling pin is not showing on the white paper. But don't worry, it's there!!

                                      view of the Cricut Design Space when you press Make it to make the free bowling invitation.

                                      Start by sending the white bowling pin to your printer.

                                      view of the Cricut Design Space. How to send to printer to make the free bowling invitation.

                                      This is the result you'll get. Now, just place this sheet of paper in your Cricut and cut it!

                                      The result of the printed sheet to make the free bowling invitation.

                                      When you're done with all the cuts, this is what you'll get.

                                      All the pieces cut.

                                      Time to assemble this bowling party invitation!

                                      Get you glue out and assemble everything!

                                      All the pieces of the free bowling invitation assembled.

                                      With a mini brad or a ribbon, join the bowling ball to the bowling pin.

                                      The free bowling invitation assembled.

                                      And that's it! A really good looking invitation in no time! Any other kind of invitation you would like me to make for you?

                                      Get my Bowling party invitation SVG cut file for free!

                                      Download my free bowling SVG cut file by subscribing (free) below to get the password to my resource library.

                                      Natalie

                                      Please Pin it for later!

                                      Pinterest image saying "How to make a custom bowling invitation + free svg cut file"
                                      Pinterest image saying "How to customize a bowling invitation in Cricut design splace"

                                      The best DVD organization solution to save space

                                      A pile of DVD covers on the floor

                                      Learn how I saved 75% of the space occupied by my DVDs and Blu-rays with this easy and quick organization idea. You'll even get to keep all your movies!

                                      If you have kids like me, you probably have a ton of DVDs and Blu-rays of animated movies that are taking way to much space!

                                      Should I sort or get rid of some? Sorry, but I can't throw them away! Especially the Disney ones that get in stores only every 10 years! I still need to keep these classic movies for a few more years !!! But how to find good DVD storage that saves space while keeping your DVDs?

                                      Several years ago, I bought the IKEA Billy Bookcase made especially for DVDs. It was the perfect media storage. The multiple shelves stored all my DVDs and CDs, it was great. But time has passed and it's not the style I'm looking for anymore in my living room! Plus, I already used them of an entirely new purpose. You can see what I did with them in the post about my craft room makeover.

                                      Do you want to see how much space you can save with this DVD organization solution? Here it is:

                                      Drawer full of DVDs and Blu-rays
                                      Arrow
                                      Same drawer with the DVDs and Blu-Rays organized into a quarter of the space.

                                      You must admit that it's completely crazy! I could not believe it myself! It's about 100 DVDs that now take less than a quarter of the space they originally occupied! That's 75% less space!

                                      On the other hand, ** WARNING ** (as they say in movies😜) You will have to be "zen" and be ready to throw (well, recycle!) All DVD case and double covers:

                                      DVD cases all piled up

                                      Ouch! It's pretty scary but so satisfying at the same time!

                                      DVD Organization - How to save space

                                      And still keep your DVDs! Let's do it! This post contains some affiliate links for your convenience and at no extra cost to you. Click here to read my full disclosure policy.

                                      What you'll need:

                                      • DVD sleeves
                                      • A bit of time and patience! Or help from the kids!

                                      **Note: these DVD and Blu-Ray sleeves are exactly the ones I bought. There's also another clear version that seems to also work according to the comments I've read.

                                      Steps to follow:

                                      • Removing the double cover
                                        Step 1: Get rid of the double cover
                                      • Removing the DVD cover from the case
                                        Step 2: Remove the cover from the case
                                      • Folding the DVD cover
                                        Step 3: Fold the cover so you see the title on the side.
                                      • Pressing to fold the DVD cover properly
                                        Step 4: Make sure it's folded properly
                                      • Inserting the cover in the DVD sleeves
                                        Step 5: Insert the cover in the sleeve.
                                      • Showing that the cover fits perfectly
                                        Step 6: The cover fits perfectly inside.
                                      • Inserting the DVD inside the sleeve
                                        Step 7: Flip the sleeve and insert the DVD
                                      • Inserting a second DVD into the sleeve
                                        Step 8: There's also space for a second DVD

                                      And that's it! Now, I'll only have to do the same thing with the rest of the movies we have! But I'm convinced I'll be able to get them to fit all in the same drawer!!! What do you think?

                                      Next step, I'll show you two different ways you can organize alphabetically your DVD collection:

                                      1. By giving you a free SVG file to use with your Cricut
                                      2. Or this second method if you don't have a Cricut or any cutting machine.

                                      Do you also have a DVD collection that you don't want to get rid of? If you don't have a nice drawer like mine, there are other fun ways you can use the same sleeves. You can use a nice storage box with a cover or even just a simple box to hold them upright. Here are some options for you:

                                      [wc_row]

                                      [wc_column size="one-fourth" position="first"]

                                      [/wc_column]

                                      [wc_column size="one-fourth"]

                                      [/wc_column]

                                      [wc_column size="one-fourth"]

                                      [/wc_column]

                                      [wc_column size="one-fourth" position="last"]

                                      [/wc_column]

                                      [/wc_row]

                                      Want more Organization tips? Subscribe below

                                      LET ME HELP YOU CREATE WITH CONFIDENCE

                                      Get access to my resource library with these files and a lot more for free when you subscribe to my newsletter!

                                        We won't send you spam. Unsubscribe at any time. See my Privacy policy 

                                        PS: please Pin it so you remember it!

                                        Pinterest image saying "Organizing DVDS Save space + Keep your movies"

                                        DIY Pikachu Mason Jar gifts

                                        The final result of the DIY Pikachu Mason Jar gifts. 5 jars mounted in a pyramid (3 at the bottom and 2 on top)

                                        Get the free file to make these DIY Pikachu Mason Jar gifts. It's a budget friendly solution for party favors for your kid's birthday.

                                        I always feel a bit distraught when it's my kid's birthday and I need to find party favors for the guests. I wonder who started this tradition?! Isn't the party, the food, the cake, the games, enough?

                                        In my opinion, some people invest way too much in these gifts. Or the opposite, they buy a bunch of Dollar store toys that will rapidly end up in the trash (blunt honesty here!). Since I'm not either these kinds of person, I always try to make something that doesn't cost much, but will be sure to impress the kids and most importantly, be useful!

                                        As it's often the case in the last years, my son's birthday theme is either videogames or Pokémons! You can see other posts about his birthdays:

                                        • Nintendo 3DS birthday invitations
                                        • Pikachu party bags
                                        • Pokemon pizza bar

                                        What you need to make the DIY Pikachu Mason Jar gifts

                                        To make the Pikachu Mason jars, I used the same file that I made for the Pikachu party bags. It's free for you when you subscribe. Just see the form at the end of this post. This post contains some affiliate links for your convenience and at no extra cost to you. Click here to read my full disclosure policy.

                                        • Pikachu cut file available in my resource library (also available in PDF if you don't have a cutting machine).
                                        • Cutting machine (I have the Cricut Maker and I love it!) or scissors.
                                        • White paper
                                        • Colour printer
                                        • 250 ml (10 oz) Mason jars
                                        • Krylon Yellow spray paint (I used the leftover I had from making the Super Mario Bros Star Night light)
                                        • Newspapers
                                        • Mod Podge
                                        • Foam brush

                                        How to make the DIY Pikachu Mason jar gifts

                                        Step 1

                                        Lay down some newspapers outside and put the Mason jars upside down on top of the newspapers.

                                        5 mason jars upside down on newspaper, ready to be painted for DIY Pikachu Mason Jar gifts

                                        Spray paint the Mason jars in yellow. Let dry between each layers. You'll need 2 or 3 layers.

                                        5 mason jars upside down on newspaper painted in yellow for DIY Pikachu Mason Jar gifts

                                        Step 2

                                        Download the file from my free resource library (see at the bottom of this post to subscribe). Scale the design to fit the Mason jar. Instead of cutting each piece in different colour cardstock, I used the "print and cut" feature.

                                        It's easier to do it that way because the pieces are so small. If you don't have a cutting machine, use the PDF file and cut it with scissors.

                                        Step 3

                                        Using Mod Podge, glue all the pieces onto the Mason Jars. Note that the nose and the top lip were so small that I ended up drawing them with a black permanent marker.

                                        Gluing the eyes, mouth and cheeks with ModPodge to make DIY Pikachu Mason Jar gifts.

                                        Make sure to add Mod Podge on top of the paper and everywhere where it's yellow. That way, the texture will be identical all over the Mason jar and the Pikachu face will be protected.

                                        The final result of the DIY Pikachu Mason Jar gifts. 1 jar in front and 4 jars in the back.

                                        Step 4

                                        Finally, I added candies inside the Pikachu Mason jars! The kids were really happy with their present. They even get to use it as a decoration in their bedrooms.

                                        The final result of the DIY Pikachu Mason Jar gifts. 5 jars mounted in a pyramid (3 at the bottom and 2 on top)

                                        How to get the free Pikachu file to make the DIY Pikachu Mason jar gifts?

                                        LET ME HELP YOU CREATE WITH CONFIDENCE

                                        Get access to my resource library with these files and a lot more for free when you subscribe to my newsletter!

                                          We won't send you spam. Unsubscribe at any time. See my Privacy policy 

                                          Don't think you have time to make the Pikachu Mason jars?

                                          Here's an average of the time it could take you to tackle this project, separated in blocks:

                                          1. Make Step 1: about 5 minutes per layers with 30 minutes of drying time between each layer (total 1 hour, 45 minutes);
                                          2. Continue with Steps 2 and 3: around 45 minutes for 5 jars.

                                          Total time: 2 hours, 30 minutes

                                          Note that this is just an example. You can always separate a project to your convenience and according to the time you have! If you make this project and find that the time is not realistic, please don't hesitate to tell me!

                                          Don't forget to pin it, so you can find it later!

                                          Pinterest image saying DIY Pikachu Mason jar gifts + free file to make them!

                                          How to add privacy to French doors for only $13

                                          How to add privacy to French door glasses

                                          Learn how to find an original and economical way to add privacy to French doors. It will save you lots of money for a beautiful look!

                                          Last September, I participated in the $100 Room Challenge. If you weren't there, it's a challenge where you need to makeover one room, in one month for $100 or less. For this challenge, I decided to makeover my master bedroom. If you're curious, you can see the different steps of the challenge by following these links:

                                          Week 1 | Week 2 - stencil | Week 3 - paint blinds | Week 4 - reveal

                                          An original way to add privacy to French doors

                                          The master bedroom is located in the basement. When we bought the house, French doors with clear glass were already there. Seriously, who would want to install these kinds of doors for their bedroom? Not parents with children, that's for sure!

                                          View from outside the bedroom, through the French door clear glass. The French doors absolutely need to have more privacy.

                                          So I wanted to find an original way to add privacy to clear glass. Also, since I was in the middle of the $100 Room Challenge, I had to find something economical! How about $13? That's budget-friendly enough!

                                          This is probably the most economical way to modify clear glass! This post contains some affiliate links for your convenience and at no extra cost to you. Click here to see my privacy policy.

                                          Required materials

                                          • At least 30 white 8-½" x 14" cardstocks of around 90lb or 110lb
                                          • A cutting machine like a Cricut (I have the Cricut Maker) or a pair of scissors and patience!
                                          • An empty cardboard box
                                          • Spray adhesive
                                          • Thin plastic shower curtain lining (mine was dark blue)
                                          • Cutting mat
                                          • Metal ruler
                                          • Rotary cutter
                                          • and the Cut file (or printable) that you can get for free in my resource library by subscribing to my newsletter right here. 👇

                                            How to add privacy to French doors

                                            Just a little note before explaining everything: since it was the $100 Room Challenge, I tried to use what I already had at home. Therefore, you'll see that my pattern is made of 2 pieces. This is because I only had 8-½ x 11 cardstock (letter size). To simplify your life, use a larger size, like the 8-½ x 14 (legal size) so you can have a pattern in one piece!

                                            Step 1:

                                            First of all, be sure to clean the glass thoroughly. By immediately doing this step, you'll be sure they will be dry when it's time to glue the pattern.

                                            Step 2:

                                            Measure the glass on your doors and make sure that the cut-out pattern (the file you'll find in my library at the very bottom of this post) is the right size. If it's not the case, adjust it in the Cricut design space. The file is a PNG image so you can also use any image program to make the adjustments.

                                            Cut all the patterns with your Cricut or another cutting machine (or scissors!). If you have the same doors, you'll need 30 cut-out patterns.

                                            Removing the pattern cut with the Cricut or Silhouette.

                                            Step 3:

                                            Place one piece at the time at the bottom of the cardboard box and spray the adhesive.

                                            Place the patterns at the bottom of the cardboard box.

                                            Apply the pattern on the glass from top to bottom. If you don't have a good eye the find the middle of the glass, just make a little mark with a pencil.

                                            Apply the pattern on the glass from top to bottom.
                                            Apply the pattern on the glass from top to bottom.

                                            When you spray, make sure you're not too close. If you are, you'll end up with small drops on the cardstock as you can see in the image below.

                                            Showing the little drops on the pattern.

                                            Step 4:

                                            Now you need to cut the shower curtain. Since the plastic was a bit elastic, I had trouble cutting it to the right size. I had to do it piece by piece. Well, 2 pieces by 2 pieces!

                                            As a matter of fact, I made a cardstock template the size of one glass (as you can see in the image below). Then, I folded the shower curtain in half so I could cut 2 pieces at a time.

                                            Cut the shower curtain

                                            Step 5:

                                            To install the pieces of shower curtain in the glass, use the same cardboard box and spray one piece at a time.

                                            To install it, start by the top corners. Then, press down on the plastic to get rid of all the air bubbles.

                                            • Install the pieces of shower curtain from top to bottom.
                                            • Install the pieces of shower curtain from top to bottom while pulling down.

                                            It is best that the plastic rectangle be slightly bigger than the glass. If it's the case and you end up with corners like in the left image below, simply cut the corners to 45 degrees with scissors.

                                            • If there's too much plastic in the corner.
                                            • cut the shower curtain at 45 degrees.
                                            • It's better if the rectangle is slightly bigger than the glass.

                                            The final result

                                            And here you have it! The view from inside the bedroom.

                                            Final result for an original way to add privacy to French doors. View from the inside.

                                            What I like the most, it's that the view from outside the bedroom is totally different!

                                            This is the view from outside of the room where you can see the result of adding privacy to the french doors.

                                            Budget summary

                                            I must confess, I first used repositionable adhesive to save money as part of the $100 Room Challenge (the same spray I used for the stencil). But a few weeks later, I had to face the facts: several rectangles were peeling off and bubbles had appeared in some places. So I bought a permanent spray adhesive and now everything is staying in place!

                                            DescriptionPrice
                                            Spray adhesive13,00 $
                                            Shower curtain5,00 $
                                            Cardstock (already had it)0 $
                                            Total18,00 $

                                            And like I always say in the $100 Room Challenge, it's 18$ CAD, so about $13 USD 😜. The final budget for the $100 Room Challenge was $87 USD including the shower curtain. So, to be honest, if I add the spray adhesive (around $10 USD), I'm still under budget! Yesss!!

                                            Picture of the bedroom with the french doors you can see the result of adding privacy to the French doors.

                                            So, how about you, are you willing to try something similar?

                                            I'm waaay too busy to make this DIY!

                                            If you're scared of tackling this project because of a lack of time, try making it in blocks like this:

                                            1. Make steps 1 and 2 / Time: around 1 hour, 30 minutes
                                            2. Continue with step 3 / Time: around 1 hour
                                            3. Go to steps 4 and 5 / Time: around 2 hours, 30 minutes

                                            Note that this is just an example. You can always separate a project to your convenience and according to the time you have! If you make this project and find that the time is not realistic, please don't hesitate to tell me!

                                            How to get the cut file?

                                            Just subscribe here and get a free Cricut Design Space Cheat Sheet at the same time!

                                            Don't forget to Pin the image to save this idea!

                                            This is an image to save on Pinterest where it says "How to transform clear French doors for only $13"

                                            DIY outdoor modular bench with storage

                                            The final result of the outdoor modular seating with storage

                                            Learn how I made a modular outdoor bench with storage for my deck. You can do the same thing with the free plans included!

                                            Last spring, I showed you how I made a privacy screen for my patio. I was dreaming to build a bench, just below, right there:

                                            Outdoor modular bench before

                                            Well, I succeeded! In addition, the benches are also chests that will allow me to store a lot of things! You are surely always looking for storage too, right?

                                            Outdoor modular bench after

                                            Material required to build an outdoor modular bench with storage

                                            • Kreg jig (I have the  K5 model and I love it!)
                                            • 2-½" outdoor screws for Kreg jig
                                            • Drill
                                            • Pressure treated wood
                                            • Screws for treated wood
                                            • End Cut Sealer for Pressure Treated Wood
                                            • Square
                                            • Hinges
                                            • The plans and required quantities are available in my resource library. Just subscribe at the end of the post!

                                            My original plan was to build the structure of the benches with 2x3. Since there was no more at the store, they offered to give me 2x4 at the same price. Since I didn't want to wait, I had to make a few adjustments but it was worth it!

                                            How to make an outdoor modular bench with storage

                                            You'll find all the dimensions to precisely cut all the pieces in the plans included in my resource library. Just go to the bottom of this post to subscribe!

                                            Step 1: Cut and drill holes

                                            nce the pieces are cut to the right dimensions, they must be drilled using the Kreg Jig.

                                            Drill with the Kreg jig to allow assembly of all pieces of modular outdoor bench with storage.

                                            Two holes per end are required. The plans will tell you exactly where to make the holes.

                                            Drill with the Kreg jig to allow assembly of all pieces of modular outdoor bench with storage.

                                            Step 2: Sealing

                                            Then it is necessary to protect the cuts with a sealer.

                                            Protect all cuts of outdoor modular bench with storage with sealant

                                            Step 3: Structure assembly

                                            I first assembled the front and back legs, making sure the pieces were at 90 degrees with a square.

                                            Assemble the first pieces of modular outdoor bench with storage
                                            The main structure of the modular outdoor bench with storage

                                            I then added the cross pieces that hold the front and the back. You can see here the corner table.

                                            The structure of the corner table of the modular outdoor bench with storage

                                            Step 4: The lid

                                            For the lid, I used pieces as spacers to always have the same space between the boards (if you're wondering what are these  odd-shaped pieces ... well these are pieces found in wine crates. And if you saw this article (among others) you know that I have "a couple" of them at home !!)

                                            How to make the lid of modular outdoor bench with storage

                                            Note that after I finished the plans, I realised that the covers were not solid enough and wouldn't support the weigh of... hmm hmm, heavier people! I will probably correct this by adding a piece of 2x3 in the centre. I'll update this post when it's done! (note that I already corrected the plans!).

                                            Then I added hinges to allow opening. Since I want to put things in there that do not ask for frequent access, I put very small hinges. I probably could not even put some, because the lid is still very much in place.

                                            Install hinges on outdoor modular bench with storage

                                            Step 5: The sides

                                            To make the front and the sides, I used the same pieces from the wine crates. You'll notice that the leg protrudes a little and it's normal. I did not want the horizontal boards to rest directly on the patio.

                                            Make the front and the sides of the modular outdoor bench with storage

                                            To save money, and because there is a low wall behind, I did not put horizontal boards to close the back of these two benches. But I had to do it for the one who is back to the railings.

                                            2 modular benches installed on the terrace

                                            The end result

                                            And here, 3 benches and a table that can serve as storage!

                                            And here we are, 3 modular benches and table that can be used as storage!

                                            Note that the bench completely to the left is less deep than those with cushions. The reason is that I didn't want to have cushions for the backrest so as not to hide the view towards the yard.

                                            Here is the final photo of the modular outdoor bench with storage

                                            Oh! and did you noticed the intruder on the picture? He is so cute! (and so much bigger now! haha)

                                            The cost

                                            Counting all the pressure treated wood and the screws, the total cost of this project came up just below 200$. As for the cushions, I bought them at Home Depot and they were 65$ each. So the big total is 460$ This is way less than buying a modular bench of that size in stores! And these kind of bench usually don't have the convenient storage 😉 !

                                            To get the detailed plans

                                            If you want to get the plans or just receive my newsletter, sign up below and you will have access to many more pratical freebies!!

                                            And until then, don't forget to Pin it!

                                            Pinterest image saying "How to build an outdoor Modular Seating + free plans"

                                            April Fool's Cootie Catcher free printable

                                            Get this April Fool's Cootie Catcher printable for free. Also called a joke teller, the funny fish jokes will make your kids laugh!

                                            If you've been following me for a while, you might have seen this other Cootie Catcher I made :

                                            • Valentine Cootie Catcher with cute animals

                                            It had funny Valentine-themed jokes inside.

                                            It was such a hit that I thought I could make another version of this cootie catcher for April Fool's day.

                                            April Fool's cootie catcher when folded

                                            April Fool's cootie catcher

                                            So what's the difference with this cootie catcher? Well the cute animals have been replaced by fish drawn by my daughter (isn't she talented? I love them!)

                                            • April Fool's cootie catcher when opened
                                            • April Fool's cootie catcher when opened

                                            All the jokes are different from the other cootie catchers and are all around fish/ocean theme. Here's a little sample:

                                            • Where do fish keep their money? In the river bank!
                                            • What do you call a fish with no eye? Fsssshh!

                                            How to fold the cootie catcher?

                                            Note that when printing, do not use the "Scale to fit" feature. Just leave it as is (even if your printer says that some clipping may occur).

                                            If you prefer, you can check this short video I made with the Valentine cootie catcher on how to fold it!

                                            How to get the free April Fool's cootie catcher?

                                            If you'd like to have this free printable, just subscribe below. You'll also have access to a lot of other fun and usefull files!

                                            Hopefully, this free printable will save you from some April Fool's pranks! 😛

                                            PS: Please share it on Pinterest!

                                            Pinterest image saying "April fool's funny cootie catcher free printable"

                                            Free April Fools Pokémon Cootie Catcher

                                            Get this April Fool's Pokemon Cootie Catcher printable for free. Also called a joke teller, the funny fish jokes will make your kids laugh

                                            Get this April Fool's Pokemon Cootie Catcher printable for free. Also called a joke teller, the funny fish jokes will make your kids laugh!

                                            If you've been following me for a while, you might have seen these other Cootie Catcher I made :

                                            • Pokemon Valentine Cootie Catcher
                                            • Valentine Cootie Catcher with cute animals

                                            They had funny Valentine themed jokes inside. I had to make a Pokémon version since my son was complaining that cute animals weren't his thing!

                                            So I thought I could make another version of this cootie catcher for April Fool's day. Again, here's the Pokemon version. But if you prefer a cute version with fish drawn by my daughter, just follow this link.

                                            Get this April Fool's Pokemon Cootie Catcher printable for free. Also called a joke teller, the funny fish jokes will make your kids laugh

                                            April Fool's Pokémon cootie catcher

                                            So what's the difference with this cootie catcher? A Pokémon expert will notice that the Pokémons I used are fish-Pokémons (don't worry, I had help from my son for that! I'm not THAT good! haha).

                                            All the jokes are different from the other cootie catchers and are all around fish/ocean theme. Here's a little sample:

                                            • Where do fish keep their money? In the river bank!
                                            • What do you call a fish with no eye? Fsssshh!

                                            How to fold the cootie catcher?

                                            It might seem simple at first glance but having a little guide is always welcome.

                                            First, note that when printing, do not use the "scale to fit" feature. Just leave it as is.

                                            • Printable of the April Fool's Pokemon Cootie Catcher
                                            • Cut the top of the April Fool's Pokemon Cootie Catcher
                                            • How to fold the April Fool's Pokemon Cootie Catcher
                                            • How to fold the April Fool's Pokemon Cootie Catcher

                                            Now, flip it over and continue folding like this:

                                            • How to fold the April Fool's Pokemon Cootie Catcher
                                            • How to fold
                                            • How to fold the April Fool's Pokemon Cootie Catcher

                                            And there you have it!

                                            • Now you can play with the April Fool's Pokemon Cootie Catcher
                                            • Now you can play with the April Fool's Pokemon Cootie Catcher
                                            • And finally a joke can be told with the April Fool's Pokemon Cootie Catcher

                                            If you prefer, you can check this short video I made with the Valentine cootie catcher on how to fold it!

                                            How to get the free Pokémon April Fool's cootie catcher?

                                            If you'd like to have this free printable, just subscribe below. You'll also have access to a lot of other fun Pokémon files!

                                            LET ME HELP YOU CREATE WITH CONFIDENCE

                                            Get access to my resource library with these files and a lot more for free when you subscribe to my newsletter!

                                              We won't send you spam. Unsubscribe at any time. See my Privacy policy 

                                              Hopefully, this free printable will save you from some April Fool's prank jokes! 😛

                                              PS: Please share it on Pinterest!

                                              Pinterest image saying "April fool's Pokemon Cootie Catcher free printable"

                                              How to upcycle a vintage trunk with old newspapers

                                              How to upcycle a vintage trunk with old newspapers. This DIY of an old trunk makeover is a great way to add personality to your space. This restoration of a vintage trunk with chalk paint and old newspapers using modpodge can also save you money. This is a great solution to salvage an old chest and repurpose it even if it's made of plywood! #oldtrunk #upcycle #restore #chalkpaint #modpodge #paint #crafts #diy

                                              Learn how to upcycle a vintage trunk with old newspapers. This DIY makeover is a great way to add personality to your space without spending too much.

                                              It all started when I spotted this old trunk on my neighbour's yard. They were giving it away for free! Ok, it was in bad shape but I was sure there was something I could do to restore it!

                                              How to upcycle a vintage trunk with old newspapers. This DIY of an old trunk makeover is a great way to add personality to your space. This restoration of a vintage trunk with chalk paint and old newspapers using modpodge can also save you money. This is a great solution to salvage an old chest and repurpose it even if it's made of plywood! #oldtrunk #upcycle #restore #chalkpaint #modpodge #paint #crafts #diy

                                              Since the trunk was made of plywood and the cover was pretty broken, I had to find something to cover it up.

                                              Then, my sister in law gave me these old newspapers she found in the walls while renovating her house in Montreal. It was pretty standard to do that back then to add insulation. You can even see the holes the nails made.

                                              My sister in law knew I liked these kind of things and thought I would probably find a useful thing to do with them. (Thank you so so much!)

                                              How to upcycle a vintage trunk with old newspapers. This DIY of an old trunk makeover is a great way to add personality to your space. This restoration of a vintage trunk with chalk paint and old newspapers using modpodge can also save you money. This is a great solution to salvage an old chest and repurpose it even if it's made of plywood! #oldtrunk #upcycle #restore #chalkpaint #modpodge #paint #crafts #diy
                                              Old French Canadian Newspaper "La Presse" (still exist today!) Montreal, March 18, 1924

                                              Notice the title above the woman's head? It says "Red Pill, for the pale and weak women". Thankfully times have changed! You should see other articles of the journal (more on that at the end of this post).

                                              Upcycle a vintage trunk with old newspapers

                                              Materials you need

                                              • An old trunk
                                              • Old newspapers, maps or memorabilia
                                              • Clear Zinsser B-I-N Primer Stain Blocker Odour Sealer
                                              • White Chalk spray paint
                                              • Mod Podge
                                              • Sponge brush
                                              • Scraper or an old credit card
                                              • Utility knife

                                              Painting to get rid of a bad smell!

                                              I have to be honest, not only was this trunk in bad shape, and it was also smelling pretty weird. Especially inside. But I found the best product for that. After wiping the trunk and scrubbing the hardware, I applied 2 coat of Zinsser B-I-N Primer. It's also an odor sealer and I must say, it does work pretty well!

                                              Next, I spraypainted the hardware using White Chalk spray paint. I had to apply 2 coat while letting it dry between each one.

                                              How to upcycle a vintage trunk with old newspapers. This DIY of an old trunk makeover is a great way to add personality to your space. This restoration of a vintage trunk with chalk paint and old newspapers using modpodge can also save you money. This is a great solution to salvage an old chest and repurpose it even if it's made of plywood! #oldtrunk #upcycle #restore #chalkpaint #modpodge #paint #crafts #diy

                                              Old newspapers

                                              Now the fun part! 😊 It's easier to glue the newspapers on an horizontal surface, so I laid the trunk on the back and changed its position for each face I was working on.

                                              I poured Mod Podge on the surface and brush it with a foam brush, making sure not to put any on the hardware.

                                              • How to upcycle a vintage trunk with old newspapers. This DIY of an old trunk makeover is a great way to add personality to your space. This restoration of a vintage trunk with chalk paint and old newspapers using modpodge can also save you money. This is a great solution to salvage an old chest and repurpose it even if it's made of plywood! #oldtrunk #upcycle #restore #chalkpaint #modpodge #paint #crafts #diy
                                              • How to upcycle a vintage trunk with old newspapers. This DIY of an old trunk makeover is a great way to add personality to your space. This restoration of a vintage trunk with chalk paint and old newspapers using modpodge can also save you money. This is a great solution to salvage an old chest and repurpose it even if it's made of plywood! #oldtrunk #upcycle #restore #chalkpaint #modpodge #paint #crafts #diy

                                              I then applied carefully the newspaper, scraping it gently with an old card.

                                              How to upcycle a vintage trunk with old newspapers. This DIY of an old trunk makeover is a great way to add personality to your space. This restoration of a vintage trunk with chalk paint and old newspapers using modpodge can also save you money. This is a great solution to salvage an old chest and repurpose it even if it's made of plywood! #oldtrunk #upcycle #restore #chalkpaint #modpodge #paint #crafts #diy

                                              Using a utility knife, I cut the newspaper around the hardware. By pressing with my fingers on the newspaper, I was able to see exactly where the hardware was. Then, I just needed to cut around and peel off the paper.

                                              • How to upcycle a vintage trunk with old newspapers. This DIY of an old trunk makeover is a great way to add personality to your space. This restoration of a vintage trunk with chalk paint and old newspapers using modpodge can also save you money. This is a great solution to salvage an old chest and repurpose it even if it's made of plywood! #oldtrunk #upcycle #restore #chalkpaint #modpodge #paint #crafts #diy
                                              • How to upcycle a vintage trunk with old newspapers. This DIY of an old trunk makeover is a great way to add personality to your space. This restoration of a vintage trunk with chalk paint and old newspapers using modpodge can also save you money. This is a great solution to salvage an old chest and repurpose it even if it's made of plywood! #oldtrunk #upcycle #restore #chalkpaint #modpodge #paint #crafts #diy
                                              • How to upcycle a vintage trunk with old newspapers. This DIY of an old trunk makeover is a great way to add personality to your space. This restoration of a vintage trunk with chalk paint and old newspapers using modpodge can also save you money. This is a great solution to salvage an old chest and repurpose it even if it's made of plywood! #oldtrunk #upcycle #restore #chalkpaint #modpodge #paint #crafts #diy

                                              Final result

                                              After carefully choosing which page to glue on the trunk (yes, I'm crazy like that!) and a lot of gluing and cutting, here's the final result :

                                              How to upcycle a vintage trunk with old newspapers. This DIY of an old trunk makeover is a great way to add personality to your space. This restoration of a vintage trunk with chalk paint and old newspapers using modpodge can also save you money. This is a great solution to salvage an old chest and repurpose it even if it's made of plywood! #oldtrunk #upcycle #restore #chalkpaint #modpodge #paint #crafts #diy

                                              This side has a crochet tutorial on how to make a baby hat. Isn't that cool?

                                              How to upcycle a vintage trunk with old newspapers. This DIY of an old trunk makeover is a great way to add personality to your space. This restoration of a vintage trunk with chalk paint and old newspapers using modpodge can also save you money. This is a great solution to salvage an old chest and repurpose it even if it's made of plywood! #oldtrunk #upcycle #restore #chalkpaint #modpodge #paint #crafts #diy

                                              On these papers, you can clearly see the holes made by the nails that were used for building the walls. I love how it tells a story!

                                              I even found a house plan. As an architect, I really wanted to include it. I had to cheat a bit but it doesn't really shows!

                                              How to upcycle a vintage trunk with old newspapers. This DIY of an old trunk makeover is a great way to add personality to your space. This restoration of a vintage trunk with chalk paint and old newspapers using modpodge can also save you money. This is a great solution to salvage an old chest and repurpose it even if it's made of plywood! #oldtrunk #upcycle #restore #chalkpaint #modpodge #paint #crafts #diy

                                              On the cover of the trunk, I used the "Red pills" article I was talking about at the beginning of this post. Right below, there's an ad about all the sizes available of Simms' paintbrush. It says (I translate) "The head of the house is more often in doubt as to which is the best paintbrush...". Yep, "the head of the house"! I really love to read these articles. Some make us laugh, others frown.

                                              How to upcycle a vintage trunk with old newspapers. This DIY of an old trunk makeover is a great way to add personality to your space. This restoration of a vintage trunk with chalk paint and old newspapers using modpodge can also save you money. This is a great solution to salvage an old chest and repurpose it even if it's made of plywood! #oldtrunk #upcycle #restore #chalkpaint #modpodge #paint #crafts #diy

                                              Still to come

                                              I have more plans for this old vintage trunk. I'm thinking of whitewashing it. Just a bit because I still want to see the writing, obviously. Also, I'd like to:

                                              • Add wheels (to avoid scratching the floors) and change the look of the handles;
                                              • Paint a protective coat on top of the whitewash;
                                              • Add a lining of some sort inside.

                                              Any idea on what I should do with the handles or what I could do to upgrade the inside of the trunk? Don't hesitate to leave me a comment below!

                                              LET ME HELP YOU CREATE WITH CONFIDENCE

                                              Get access to my resource library with these files and a lot more for free when you subscribe to my newsletter!

                                                We won't send you spam. Unsubscribe at any time. See my Privacy policy 

                                                Pin it so you can find it later

                                                Pinterest image saying "How to upcycle this Old vintage trunk"

                                                Best travel gifts for families

                                                Your family likes to travel or you know one who does? Trying to find the Best travel gifts for families? I've got the best gifts ideas for traveling families because I use all of it and they are sanity-savers! #travel #gifts #family

                                                [wc_box color="inverse" text_align="center" margin_top="" margin_bottom="" class=""] Over the years, I learned a lot of tricks traveling with my husband and kids. So I rounded-up my best travel gift ideas for families. [/wc_box]

                                                I love to travel. Lucky for me, my husband loves it too. It's actually something we discovered together. And, not having family members close by to babysit the kids, we got used to bringing them with us.

                                                The first time we took the plane with both the kids was to go see the grandparents in Florida. My son was 1 and my daughter was 3 (wow, long time ago!).

                                                Your family likes to travel or you know one who does? Trying to find the Best travel gifts for families? I've got the best gifts ideas for traveling families because I use all of it and they are sanity-savers! #travel #gifts #family

                                                But the first big trip we did was to go see my friend in Norway while stopping in Paris. At that time, the kids were 5 and 7. I'm telling you, they got used to travel and love it. Since all those years, I learned a lot of tricks that can help a family when travelling.

                                                This post contains some affiliate links for your convenience and at no extra cost to you. Click here to read my full disclosure policy.

                                                Best travel gifts for families

                                                Now, if you want to keep your sanity regarding the clothes in the luggage, this is a must-have.  We bought one kit for each member of the family and each kit is a different colour. When we get to the hotel or wherever we are, we can take our cubes out of the luggage and have our stuff near our bed. The kids now manage their own things. I'm telling you, sanity saver!

                                                Your family likes to travel or you know one who does? Trying to find the Best travel gifts for families? I've got the best gifts ideas for traveling families because I use all of it and they are sanity-savers! #travel #gifts #family

                                                Another sanity saver if you ask me is this toiletry bag. Everything for the family gets in there. When we arrive at our destination, we just hang it in the bathroom. No more "mom, where's my toothbrush?"Your family likes to travel or you know one who does? Trying to find the Best travel gifts for families? I've got the best gifts ideas for traveling families because I use all of it and they are sanity-savers! #travel #gifts #family
                                                How about all the cables we need to bring when we travel? Tablet, phone, e-reader, etc. There's no getting out of it! This cable organizer is another great way to find everything you need. I like that it's relatively compact.

                                                Your family likes to travel or you know one who does? Trying to find the Best travel gifts for families? I've got the best gifts ideas for traveling families because I use all of it and they are sanity-savers! #travel #gifts #familyAnd electronics also means charging. We have this portable charger that can charge up to three devices at the same time. And it charges very fast.

                                                Your family likes to travel or you know one who does? Trying to find the Best travel gifts for families? I've got the best gifts ideas for traveling families because I use all of it and they are sanity-savers! #travel #gifts #family

                                                Another thing that I couldn't live without is my tote bag from Peak Design.  I carry it with me on the plane. It has these "Flexifold" dividers that let you organize the inside of the tote however you like. It has easy-open side panels for quick access. What I also love it's the magnetic closure (I'm the pro in forgetting to close my bag! Not a problem with this one). It can also be attached to a carry-on luggage.

                                                Your family likes to travel or you know one who does? Trying to find the Best travel gifts for families? I've got the best gifts ideas for traveling families because I use all of it and they are sanity-savers! #travel #gifts #family

                                                Talking about Peak Design, the reason I have this bag is that my husband swears only by this company. The quality of the bags are incredible and the customer service is also awesome. He personally owns the "Everyday backpack" that he uses to bring his laptop and camera to work (yeah... he does that!). But now, he just got himself the new travel backpack. For now, I can't really tell you what's good about this bag since he didn't use it yet. But, just looking at this picture will show you how promising it is! You should also go check the Gif image on the website, it explains it all in one look!

                                                Your family likes to travel or you know one who does? Trying to find the Best travel gifts for families? I've got the best gifts ideas for traveling families because I use all of it and they are sanity-savers! #travel #gifts #family

                                                Your family likes to travel or you know one who does? Trying to find the Best travel gifts for families? I've got the best gifts ideas for traveling families because I use all of it and they are sanity-savers! #travel #gifts #family
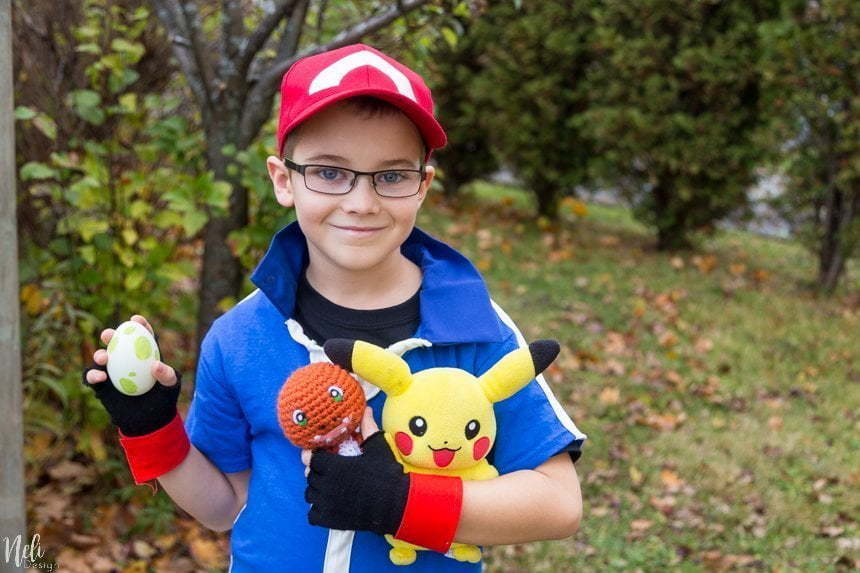
The kids always have their own backpack when we travel. In the plane, they are responsible for their own games and stuff. When we visit places, they bring their backpack too. Even if there's almost nothing inside, just carrying their own sandwich, for example, gives them a sense of responsibility and makes them very proud.

                                                You can see them here, in 2013 in Paris, with their backpacks. They are so tiny!

                                                The important thing to remember when buying a backpack for a kid (and for an adult as a matter of fact!) it's to have a front strap (sternum strap) so you can adjust the bag properly and prevent the shoulder straps from slipping. This one would be a great choice for kids.
                                                Your family likes to travel or you know one who does? Trying to find the Best travel gifts for families? I've got the best gifts ideas for traveling families because I use all of it and they are sanity-savers! #travel #gifts #familyIn order to save as much space as you can, you'll want to have these microfiber towels. I couldn't be happier with them. They take almost no space and can be used as an extra blanket or a beach towel. They saved me more than once. I recommend you don't go below 60 inches, 72 being the most versatile size in my experience.Your family likes to travel or you know one who does? Trying to find the Best travel gifts for families? I've got the best gifts ideas for traveling families because I use all of it and they are sanity-savers! #travel #gifts #family

                                                This last one is on my "to buy" list. My husband always manages all the plane tickets and passports when we're at the airport. I like that this family passport holder would make everything easily accessible and safe (RFID).

                                                Your family likes to travel or you know one who does? Trying to find the Best travel gifts for families? I've got the best gifts ideas for traveling families because I use all of it and they are sanity-savers! #travel #gifts #family

                                                Now you must think I'm an organized freak! lol And you might be right!😜  I like when things run smoothly and I can enjoy my vacation instead of worrying about the little details and losing time trying to find things.

                                                How about you, do you have any gifts idea regarding family travel that I could add to my wishlist?

                                                Don't forget to Pin it for later

                                                Pinterest image saying "Best gift ideas for a traveling family"

                                                Your family likes to travel or you know one who does? Trying to find the Best travel gifts for families? I've got the best gifts ideas for traveling families because I use all of it and they are sanity-savers! #travel #gifts #family

                                                [wc_box color="secondary" text_align="center" margin_top="" margin_bottom="" class=""]

                                                Don't miss any new freebies. Subscribe to get access to the library full of resources!

                                                [wc_button type="warning" url="https://nelidesign.com/landing-page/" title="Inscrire" target="blank" url_rel="" icon_left="" icon_right="" position="center" class=""]Subscribe me![/wc_button][/wc_box]

                                                Click here to see which Link Party I participate.

                                                How to make throw pillow covers from euro size pillowcase

                                                How to make throw pillow covers from euro size pillow case. Here's an easy and simple no sew way to transform the euro pillow covers into a smaller size. #Tutorial #pillowcase #diy #throwpillow

                                                [wc_box color="inverse" text_align="center" margin_top="" margin_bottom="" class=""] Learn how to make throw pillow covers from euro size pillowcase without sewing. This simple trick will make you save time and money! [/wc_box]

                                                This DIY came from the last $100 Room Challenge I did. This challenge requires that we makeover one room, in one month, for less than $100.  So last September, I decided to makeover my bedroom.

                                                When doing this challenge, you always try to find things you already own or that are at a very low price. So when I stumbled upon these Euro size pillows that were only 4,99$ (regular price was 40$!!!) I bought them right away! They were the perfect match to bring colour to my bedroom.

                                                How to make throw pillow covers from euro size pillow case. Here's an easy and simple no sew way to transform the euro pillow covers into a smaller size. #Tutorial #pillowcase #diy #throwpillow

                                                FYI, Euro size pillows are square pillows that usually are 26" x 26". The thing is that I didn't have pillows of that size and no money in the challenge to buy some.

                                                But I did have these small throw pillows :

                                                How to make throw pillow covers from euro size pillowcase. Here's an easy and simple no sew way to transform the euro pillow covers into a smaller size. #Tutorial #pillowcase #diy #throwpillow

                                                This post contains some affiliate links for your convenience and at no extra cost to you. Click here to read my full disclosure policy.

                                                Required materials for making throw pillow covers from euro size pillowcase

                                                • Euro size pillowcase
                                                • small throw pillow
                                                • safety pins

                                                Yep, that's all you'll need!

                                                How to make throw pillow covers from euro size pillowcase

                                                The trick is to insert the throw pillow diagonally in the euro pillow, like this:

                                                How to make throw pillow covers from euro size pillow case. Here's an easy and simple no sew way to transform the euro pillow covers into a smaller size. #Tutorial #pillowcase #diy #throwpillow

                                                Ok, now, I have a confidence to make: my husband thought of that! He can be so practical sometimes!  I'm more the kind of person who's thinking too hard!!! lol

                                                Once the throw pillow is inside the euro cover, simply fold the opposite corners towards the center like this and tie them with safety pins.

                                                [wc_row]

                                                [wc_column size="one-half" position="first"]

                                                How to make throw pillow covers from euro size pillow case. Here's an easy and simple no sew way to transform the euro pillow covers into a smaller size. #Tutorial #pillowcase #diy #throwpillow

                                                [/wc_column]

                                                [wc_column size="one-half" position="last"]

                                                How to make throw pillow covers from euro size pillow case. Here's an easy and simple no sew way to transform the euro pillow covers into a smaller size. #Tutorial #pillowcase #diy #throwpillow

                                                [/wc_column]

                                                [/wc_row]

                                                So that's what the pillow looks like from the back:

                                                How to make throw pillow covers from euro size pillow case. Here's an easy and simple no sew way to transform the euro pillow covers into a smaller size. #Tutorial #pillowcase #diy #throwpillow

                                                You can pull the corners so they straighten up a bit.

                                                How to make throw pillow covers from euro size pillow case. Here's an easy and simple no sew way to transform the euro pillow covers into a smaller size. #Tutorial #pillowcase #diy #throwpillow

                                                And voilà! You'll never tell the covers are Euro size!

                                                How to make throw pillow covers from euro size pillow case. Here's an easy and simple no sew way to transform the euro pillow covers into a smaller size. #Tutorial #pillowcase #diy #throwpillow

                                                And you know the best part? If I ever get Euro pillows, I can still use them!

                                                Aren't they the perfect fit?

                                                How to make throw pillow covers from euro size pillow case. Here's an easy and simple no sew way to transform the euro pillow covers into a smaller size. #Tutorial #pillowcase #diy #throwpillow

                                                Do you love learning simple tricks like this one? Well, don't hesitate and subscribe!

                                                P.S.: don't hesitate to Pin it! It really helps me when you do!

                                                How to make throw pillow covers from euro size pillow case. Here's an easy and simple no sew way to transform the euro pillow covers into a smaller size. #Tutorial #pillowcase #diy #throwpillow #nosew

                                                In the meantime, here are some Euro size pillows you might enjoy:

                                                [wc_row]

                                                [wc_column size="one-third" position="first"]

                                                [/wc_column]

                                                [wc_column size="one-third"]

                                                [/wc_column]

                                                [wc_column size="one-third" position="last"]

                                                [/wc_column]

                                                [/wc_row]

                                                LET ME HELP YOU CREATE WITH CONFIDENCE

                                                Get access to my resource library with these files and a lot more for free when you subscribe to my newsletter!

                                                  We won't send you spam. Unsubscribe at any time. See my Privacy policy 

                                                  How to upgrade a ceiling light shade for free

                                                  Get inspiration from this colorfull master bedroom makeover reveal. The $100 Room challenge is a great time to show a lot of ideas on how to makeover a bedroom on a budget. See the before and after pictures and find out how simple DIY crafts projects, stencilling and a change in the layout of the room can make a difference! Yes, you can have a bed in front of a window. #makeover #bedroom #roomreveal #teal

                                                  [wc_box color="inverse" text_align="center" margin_top="" margin_bottom="" class=""] Learn how I upgraded a ceiling light shade with things I already had at home. This is a low-cost solution to get rid of the boob light and replace it with a beautiful light fixture. [/wc_box]

                                                  This DIY was part of the $100 Room Challenge I did last September where I had to makeover my master bedroom in one month for no more than $100. And I did it for only $87! You can check out the reveal here.

                                                  The best part is that I already had all the material to make the lampshade. When you have only $100 to makeover a whole room, it's convenient!

                                                  Get inspiration from this colorfull master bedroom makeover reveal. The $100 Room challenge is a great time to show a lot of ideas on how to makeover a bedroom on a budget. See the before and after pictures and find out how simple DIY crafts projects, stencilling and a change in the layout of the room can make a difference! Yes, you can have a bed in front of a window. #makeover #bedroom #roomreveal #teal

                                                  This post contains some affiliate links for your convenience and at no extra cost to you. Click here to read my full disclosure policy.

                                                  Required materials for making your ceiling light shade

                                                  • Bamboo shades (mine were 40" wide)
                                                  • Wood glue
                                                  • Clothespins
                                                  • Small brads
                                                  • Super Glue
                                                  • Scissors
                                                  • Punch or drill (that's the punch I have and it works really well)
                                                  • 6 small metal corner braces

                                                  How to start

                                                  First of all, the ceiling lampshade that I made has 2 pieces. The top part has an 18" diameter and is 12" high and the bottom part as 14" in diameter x 6" high.

                                                  If your bamboo strips are not long enough to make the size you want, you can use two strips. You'll see that this DIY is made of a lot of "glue and wait". Unless you have a ton of clothespins!!!

                                                  Bottom part

                                                  So first, I made two circles of the same size by glueing the end of a bamboo strip together like this. I use the wood glue for this but the super glue can also work.

                                                  How to upgrade a ceiling light shade for free. Get rid of the boob light and get a beautiful light fixture. You just need to upcycle one thing to get this new lamp shade. Full step by step tutorial so you can make this idea. #lampshade #lightfixture #ceilinglight #diy #upcycle

                                                  Then I cut 3 or 4 pieces of bamboo exactly the height that I wanted for the bottom of the shade. Glue one end of the pieces of bamboo to one circle and the other end to the other one, forming a cylinder.

                                                  How to upgrade a ceiling light shade for free. Get rid of the boob light and get a beautiful light fixture. You just need to upcycle one thing to get this new lamp shade. Full step by step tutorial so you can make this idea. #lampshade #lightfixture #ceilinglight #diy #upcycle

                                                  After, I cut different lengths of bamboo and glued them.

                                                  How to upgrade a ceiling light shade for free. Get rid of the boob light and get a beautiful light fixture. You just need to upcycle one thing to get this new lamp shade. Full step by step tutorial so you can make this idea. #lampshade #lightfixture #ceilinglight #diy #upcycle

                                                  There's really no exact recipe for this! You just continue until you're satisfied (or tired!!)

                                                  How to upgrade a ceiling light shade for free. Get rid of the boob light and get a beautiful light fixture. You just need to upcycle one thing to get this new lamp shade. Full step by step tutorial so you can make this idea. #lampshade #lightfixture #ceilinglight #diy #upcycle

                                                  Top part

                                                  For the top part, I drew an 18" circle on a big sheet of paper to help guide me. Then, I placed 3 strips of bamboo so that they evenly cross each other like this:

                                                  How to upgrade a ceiling light shade for free. Get rid of the boob light and get a beautiful light fixture. You just need to upcycle one thing to get this new lamp shade. Full step by step tutorial so you can make this idea. #lampshade #lightfixture #ceilinglight #diy #upcycle

                                                  You see, I had this rod and washer that I planned to use to fasten the new shade (see the arrow).

                                                  How to upgrade a ceiling light shade for free. Get rid of the boob light and get a beautiful light fixture. You just need to upcycle one thing to get this new lamp shade. Full step by step tutorial so you can make this idea. #lampshade #lightfixture #ceilinglight #diy #upcycle

                                                  Here's the same washer. I wanted to make sure the rod would go through the whole I was making with the three bamboo strips.

                                                  How to upgrade a ceiling light shade for free. Get rid of the boob light and get a beautiful light fixture. You just need to upcycle one thing to get this new lamp shade. Full step by step tutorial so you can make this idea. #lampshade #lightfixture #ceilinglight #diy #upcycle

                                                  Then, I glued the 3 strips together.

                                                  How to upgrade a ceiling light shade for free. Get rid of the boob light and get a beautiful light fixture. You just need to upcycle one thing to get this new lamp shade. Full step by step tutorial so you can make this idea. #lampshade #lightfixture #ceilinglight #diy #upcycle

                                                  Now, I made another ring of bamboo and made sure it fits inside the bottom ring. I decided to do it that way so that we don't see the braces from the outside of the lampshade. This is where I used my punch to make holes and fasten the small braces with brads as shown in the image below. I added super glue to the brads to make sure it didn't come off.

                                                  How to upgrade a ceiling light shade for free. Get rid of the boob light and get a beautiful light fixture. You just need to upcycle one thing to get this new lamp shade. Full step by step tutorial so you can make this idea. #lampshade #lightfixture #ceilinglight #diy #upcycle

                                                  How to upgrade a ceiling light shade for free. Get rid of the boob light and get a beautiful light fixture. You just need to upcycle one thing to get this new lamp shade. Full step by step tutorial so you can make this idea. #lampshade #lightfixture #ceilinglight #diy #upcycle

                                                  When making the holes, I had to make sure I was making them aligned with the 3 bamboo strips I had glued together previously. Since the bamboo strips are flexible, it's better to have drawn a circle on a paper to use as a guide and make sure the hole stays in the middle.

                                                  How to upgrade a ceiling light shade for free. Get rid of the boob light and get a beautiful light fixture. You just need to upcycle one thing to get this new lamp shade. Full step by step tutorial so you can make this idea. #lampshade #lightfixture #ceilinglight #diy #upcycle

                                                  I didn't glue the brads to the 3 pieces of bamboo right away, and you'll see why later.

                                                  How to upgrade a ceiling light shade for free. Get rid of the boob light and get a beautiful light fixture. You just need to upcycle one thing to get this new lamp shade. Full step by step tutorial so you can make this idea. #lampshade #lightfixture #ceilinglight #diy #upcycle

                                                  When everything was attached, I cut the excess of the bamboo strips.

                                                  How to upgrade a ceiling light shade for free. Get rid of the boob light and get a beautiful light fixture. You just need to upcycle one thing to get this new lamp shade. Full step by step tutorial so you can make this idea. #lampshade #lightfixture #ceilinglight #diy #upcycle

                                                  The next steps for the top part are the same as for the bottom part.

                                                  How to upgrade a ceiling light shade for free. Get rid of the boob light and get a beautiful light fixture. You just need to upcycle one thing to get this new lamp shade. Full step by step tutorial so you can make this idea. #lampshade #lightfixture #ceilinglight #diy #upcycle

                                                  Final assembly

                                                  Finally, I inserted the 3 bamboo strips in the bottom part like that (that's why I didn't glue them right away).

                                                  How to upgrade a ceiling light shade for free. Get rid of the boob light and get a beautiful light fixture. You just need to upcycle one thing to get this new lamp shade. Full step by step tutorial so you can make this idea. #lampshade #lightfixture #ceilinglight #diy #upcycle

                                                  The only thing left to do was to screw the washer with the nut until the lampshade touched the ceiling.

                                                  And voilà, a new and free lampshade.

                                                  How to upgrade a ceiling light shade for free. Get rid of the boob light and get a beautiful light fixture. You just need to upcycle one thing to get this new lamp shade. Full step by step tutorial so you can make this idea. #lampshade #lightfixture #ceilinglight #diy #upcycle

                                                  I can't say it wasn't a long process and I made a lot of mistakes along the way. Hopefully, this tutorial will help you if you decide to try it! Don't hesitate to ask if you have any questions!

                                                  And please, don't forget to pin it!

                                                  Pinterest image saying "Ceiling light shade makeover for free!"

                                                  How to upgrade a ceiling light shade for free. Get rid of the boob light and get a beautiful light fixture. You just need to upcycle one thing to get this new lamp shade. Full step by step tutorial so you can make this idea. #lampshade #lightfixture #ceilinglight #diy #upcycle


                                                  LET ME HELP YOU CREATE WITH CONFIDENCE

                                                  Get access to my resource library with these files and a lot more for free when you subscribe to my newsletter!

                                                    We won't send you spam. Unsubscribe at any time. See my Privacy policy 

                                                    How to make a fall wreath with mini terracotta pots

                                                    Get the tutorial on how I changed my spring/summer wreath for a fall wreath with mini terracotta pots in just a couple of minutes. This Dollar Store DIY is easy to make. You'll have a beautiful, natural and rustic look for your front door for autumn. #wreath #grapevine #flowers #frontdoor #porch #fall #autumn

                                                    [wc_box color="inverse" text_align="center" margin_top="" margin_bottom="" class=""]Find out how I transformed my spring/summer wreath into a fall wreath with mini terracotta pots in just a couple of minutes. [/wc_box]

                                                    Am I too late for a fall post? Don't you think it's crazy that fall has been there officially for almost a month? I meant to post this one way before but two things got in the way. One, the makeover of my master bedroom for the $100 Room Challenge that took all the month of September (you can check out the reveal here) and second, the exterior or my house was so dirty that I just couldn't take a picture of my wreath without being ashamed!

                                                    Now, it looks a bit better. But I don't have anything that says fall apart from the wreath and the pumpkin.

                                                    Get the tutorial on how I changed my spring/summer wreath for a fall wreath with mini terracotta pots in just a couple of minutes. This Dollar Store DIY is easy to make. You'll have a beautiful, natural and rustic look for your front door for autumn. #wreath #grapevine #flowers #frontdoor #porch #fall #autumn

                                                    Do you also feel overwhelmed by all the front porch fall decor we see on the web and magazines? There's no way I have time, money and space for all that! So don't worry if your house looks like this, you're not alone! 😉

                                                    How to make a fall wreath with mini terracotta pots

                                                    Last spring, I decided to use my grapevine wreath again to make a new wreath with terracotta pots.

                                                    Spring wreath with terracotta pots, Easy Spring Wreath, Grapevine wreath, affordable, flowers, front porch, door wreath, Couronne du printemps avec mini pots de fleurs en terre cuite, sans colle, no glue #springwreath #wreath #grapevine #flowers #frontdoor #porch #spring

                                                    I've used this grapevine base for two other wreaths before. A 15 minute Spring wreath and another fall wreath. I love how versatile the grapevine can be. It allows me to simply insert the stem of the flowers without needing to use glue.

                                                    This post contains some affiliate links for your convenience and at no extra cost to you. Click here to read my full disclosure policy.

                                                    What you'll need to make the fall wreath with mini terracotta pots

                                                    • 3 terracotta mini pots
                                                    • Artificial flowers
                                                    • Artificial floral moss
                                                    • Floral foam
                                                    • Jute Twine
                                                    • Grapevine wreath
                                                    • Cutting pliers
                                                    • Hot glue gun and hot glue stick

                                                    How to make the fall wreath with mini terracotta pots

                                                    This tutorial is only about changing the flowers that are in the mini terracotta pots. If you want the rest of the tutorial, please refer to the Spring mini terracotta pots wreath post.

                                                    The trick is pretty simple, just swap your flowers for fall looking ones. I also added some floral foam this time since it tends to be a lot windier during fall.

                                                    Get the tutorial on how I changed my spring/summer wreath for a fall wreath with mini terracotta pots in just a couple of minutes. This Dollar Store DIY is easy to make. You'll have a beautiful, natural and rustic look for your front door for autumn. #wreath #grapevine #flowers #frontdoor #porch #fall #autumn

                                                    The flowers I used are the same ones that were in my fall wreath last year. I also picked-up some pine cones right in front of my house. So the only spending I made was for the floral foam.

                                                    Get the tutorial on how I changed my spring/summer wreath for a fall wreath with mini terracotta pots in just a couple of minutes. This Dollar Store DIY is easy to make. You'll have a beautiful, natural and rustic look for your front door for autumn. #wreath #grapevine #flowers #frontdoor #porch #fall #autumn

                                                    You can see the difference. It does feel more autumn-ish don't you think?

                                                    [wc_row]

                                                    [wc_column size="one-half" position="first"]

                                                    Spring wreath with terracotta pots, Easy Spring Wreath, Grapevine wreath, affordable, flowers, front porch, door wreath, Couronne du printemps avec mini pots de fleurs en terre cuite, sans colle, no glue #springwreath #wreath #grapevine #flowers #frontdoor #porch #spring

                                                    [/wc_column]

                                                    [wc_column size="one-half" position="last"]

                                                    Get the tutorial on how I changed my spring/summer wreath for a fall wreath with mini terracotta pots in just a couple of minutes. This Dollar Store DIY is easy to make. You'll have a beautiful, natural and rustic look for your front door for autumn. #wreath #grapevine #flowers #frontdoor #porch #fall #autumn

                                                    [/wc_column]

                                                    [/wc_row]

                                                    I love to reuse things I already have. How about you? And if you're wondering where I got my super nice wreath hanger, just follow this link to this super simple tutorial!

                                                    Please Pin it for later


                                                    LET ME HELP YOU CREATE WITH CONFIDENCE

                                                    Get access to my resource library with these files and a lot more for free when you subscribe to my newsletter!

                                                      We won't send you spam. Unsubscribe at any time. See my Privacy policy 

                                                      DIY Pokemon Ash Ketchum costume

                                                      DIY Pokemon Ash Ketchum costume for kids or adults ideal for Halloween or Pokemon cosplay. Pokemon XYZ costume for your parties. Full tutorial on how to make Ash's Cap, gloves, t-shirt and a Pokeball. So easy for a fraction of the price in stores. #Halloween #pokemon #pokemonXYZ #AshKetchum #cosplay

                                                      [wc_box color="inverse" text_align="center" margin_top="" margin_bottom="" class=""] Your kids are still in the Pokemon frenzy? I have a Pokemon Ash Ketchum costume tutorial for you! Just follow these instructions and save money! [/wc_box]

                                                      Oh yes, another Pokemon DIY craft (just search "Pokemon" on my blog and you'll know what I mean 😛 )!!! My son has his way to challenge me! And this is not just an Ash Ketchum Costume, it's Ash from Pokemon XY. So not the Ash costume you're used to seeing!

                                                      DIY Pokemon Ash Ketchum costume for kids or adults ideal for Halloween or Pokemon cosplay. Pokemon XYZ costume for your parties. Full tutorial on how to make Ash's Cap, gloves, t-shirt and a Pokeball. So easy for a fraction of the price in stores. #Halloween #pokemon #pokemonXYZ #AshKetchum #cosplay

                                                      Ash Ketchum t-shirt

                                                      Even though you can see in this image that I made the whole costume, including the blue and white shirt, this will not be a tutorial about this shirt.

                                                      OMG no! I'm not a good sewer. In fact, I really hate it and if I can avoid it, I will!! So I don't know what got into me with that but I tried to make an Ash shirt by using a blue t-shirt and sewing pieces of white fabric. Not. good. at. all.

                                                      So if you're like me and you hate sewing, but still want to make the shirt, I found this post from Frugal Florida Mom where she uses white Duck tape on a blue t-shirt. That's my kinda thing!

                                                      The worst thing is that I thought of using white Duck tape to make the shirt and even bought some, pinky swear! But sometimes, I get caught up in "making it perfect" so I went with white fabric. Are you like that too? Always want your crafts to look perfect? Well, let me tell you, it's not always worth it!

                                                      Ash Ketchum costume

                                                      So, that being said, I will instead show you how to make the cap, accessories and the gloves, which require way less sewing.

                                                      The cap

                                                      This post contains some affiliate links for your convenience and at no extra cost to you. Click here to read my full disclosure policy.

                                                      Required materials to make the cap

                                                      • Red baseball cap
                                                      • White acrylic paint
                                                      • Golden GAC-900
                                                      • Small paint brush
                                                      • Free template (available in my resources library, just subscribe to get access to ALL my freebies)

                                                      You just mix your paint half and half with the GAC-900 and paint the circles. You'll need at least 2 coats. You can trace the circles with a pencil before if you want and just use something round that is about the same size. If you don't feel comfortable eye-balling it, just get the free template accessible in my resources library.

                                                      DIY Pokemon Ash Ketchum costume for kids or adults ideal for Halloween or Pokemon cosplay. Pokemon XYZ costume for your parties. Full tutorial on how to make Ash's Cap, gloves, t-shirt and a Pokeball. So easy for a fraction of the price in stores. #Halloween #pokemon #pokemonXYZ #AshKetchum #cosplay

                                                      Note that the template I offer you is not a stencil and is made only to guide you. Here is how to use it :

                                                      DIY Pokemon Ash Ketchum costume for kids or adults ideal for Halloween or Pokemon cosplay. Pokemon XYZ costume for your parties. Full tutorial on how to make Ash's Cap, gloves, t-shirt and a Pokeball. So easy for a fraction of the price in stores. #Halloween #pokemon #pokemonXYZ #AshKetchum #cosplay
                                                      Print the template
                                                      DIY Pokemon Ash Ketchum costume for kids or adults ideal for Halloween or Pokemon cosplay. Pokemon XYZ costume for your parties. Full tutorial on how to make Ash's Cap, gloves, t-shirt and a Pokeball. So easy for a fraction of the price in stores. #Halloween #pokemon #pokemonXYZ #AshKetchum #cosplay
                                                      cut it like this
                                                      DIY Pokemon Ash Ketchum costume for kids or adults ideal for Halloween or Pokemon cosplay. Pokemon XYZ costume for your parties. Full tutorial on how to make Ash's Cap, gloves, t-shirt and a Pokeball. So easy for a fraction of the price in stores. #Halloween #pokemon #pokemonXYZ #AshKetchum #cosplay
                                                      Use scotch tape
                                                      DIY Pokemon Ash Ketchum costume for kids or adults ideal for Halloween or Pokemon cosplay. Pokemon XYZ costume for your parties. Full tutorial on how to make Ash's Cap, gloves, t-shirt and a Pokeball. So easy for a fraction of the price in stores. #Halloween #pokemon #pokemonXYZ #AshKetchum #cosplay
                                                      Use clips

                                                      And then you're all set to trace the design.

                                                      The gloves

                                                      Required materials for the gloves

                                                      • Black magic gloves
                                                      • Red fabric
                                                      • Red sewing thread
                                                      • Velcro

                                                      Now, for that, you'll need sewing! But, since you're reading this, you won't need to do it twice as I did!

                                                      So this is important: Since the gloves are stretchable, you can't just sew (or tape!) a red fabric all around. You need to take into consideration the elasticity of the gloves. You want your kid to be able to put on the gloves.

                                                      So, I measured my son's wrist and made a 2 inches wide rectangle with the red fabric. It needs to be just a little longer than the wrist.

                                                      DIY Pokemon Ash Ketchum costume for kids or adults ideal for Halloween or Pokemon cosplay. Pokemon XYZ costume for your parties. Full tutorial on how to make Ash's Cap, gloves, t-shirt and a Pokeball. So easy for a fraction of the price in stores. #Halloween #pokemon #pokemonXYZ #AshKetchum #cosplay
                                                      DIY Pokemon Ash Ketchum costume for kids or adults ideal for Halloween or Pokemon cosplay. Pokemon XYZ costume for your parties. Full tutorial on how to make Ash's Cap, gloves, t-shirt and a Pokeball. So easy for a fraction of the price in stores. #Halloween #pokemon #pokemonXYZ #AshKetchum #cosplay

                                                      Now, the only sewing that needs to be done is for the velcros (and the sides of the rectangle if you want nicer edges).

                                                      DIY Pokemon Ash Ketchum costume for kids or adults ideal for Halloween or Pokemon cosplay. Pokemon XYZ costume for your parties. Full tutorial on how to make Ash's Cap, gloves, t-shirt and a Pokeball. So easy for a fraction of the price in stores. #Halloween #pokemon #pokemonXYZ #AshKetchum #cosplay
                                                      DIY Pokemon Ash Ketchum costume for kids or adults ideal for Halloween or Pokemon cosplay. Pokemon XYZ costume for your parties. Full tutorial on how to make Ash's Cap, gloves, t-shirt and a Pokeball. So easy for a fraction of the price in stores. #Halloween #pokemon #pokemonXYZ #AshKetchum #cosplay

                                                      Accessories

                                                      For the accessories, the Charmander Pokemon my son has in his hands (Yes, Mom know the Pokemon's names!!) is an Amigurumi I made a while back. It was my first one so it's far from being perfect, but my son's love it! You can see the post I have about it by clicking here.

                                                      In the picture, he also has an egg which is an item you can find in Pokemon Go game. The only thing he did (yep, he did it himself!) was taking a fake egg from the food toys we still had and drawing green dots on it with a crayon.

                                                      One thing you don't see is the Pokeball. I had made a crochet apple cozy in the shape of a Pokeball and we also used it for the costume. You can find the tutorial here.

                                                      And, of course, Ash needs his Pikachu! That's a plush toy he already had but you can find great deals here.

                                                      And there you have it, a complete Pokemon Ash Ketchum costume from Pokemon XY.

                                                      DIY Pokemon Ash Ketchum costume for kids or adults ideal for Halloween or Pokemon cosplay. Pokemon XYZ costume for your parties. Full tutorial on how to make Ash's Cap, gloves, t-shirt and a Pokeball. So easy for a fraction of the price in stores. #Halloween #pokemon #pokemonXYZ #AshKetchum #cosplay

                                                      If you have any trouble or question, don't hesitate to ask (unless it's about sewing! lol!!!)

                                                      Don't forget to Pin it for later

                                                      Pinterest image saying Pokemon DIY Ash Ketchum costume

                                                      LET ME HELP YOU CREATE WITH CONFIDENCE

                                                      Get access to my resource library with these files and a lot more for free when you subscribe to my newsletter!

                                                        We won't send you spam. Unsubscribe at any time. See my Privacy policy 

                                                        Master bedroom makeover reveal / $100 Room Challenge

                                                        Master bedroom makeover as seen for the entry

                                                        Check out my colourful master bedroom makeover reveal. Everything was done in one month with less than $100. Proof that a small budget can still make a big impact.

                                                        Is it time already? It just can't be!! I was gone on a blogging conference 2 weeks ago so I had one less weekend to finish my projects. I knew it when I decided to do this challenge, but still, it went pretty fast! I'm not complaining because everything turned out perfectly: the conference was totally worth it AND I'm completely in love with my master bedroom makeover!

                                                        Week 1 (The plan) | Week 2 (Stencil) | Week 3 (Painting the blinds)

                                                        Let's recap! This post contains some affiliate links for your convenience and at no extra cost to you. Click here to read my full disclosure policy.

                                                        Remember the plan?

                                                        I had a lot on my plate for this project. I was hoping to make all of these things (the one checked are the one I actually did!):

                                                        • Painting the blinds white; [wc_fa icon="check-square-o" margin_left="" margin_right="" class=""][/wc_fa]
                                                        • Hanging the curtains that I had in the previous house and that I never hung; [wc_fa icon="check-square-o" margin_left="" margin_right="" class=""][/wc_fa]
                                                        • Stencilling the wall of the window with this awesome stencil; [wc_fa icon="check-square-o" margin_left="" margin_right="" class=""][/wc_fa]
                                                        • Changing the light fixture; [wc_fa icon="check-square-o" margin_left="" margin_right="" class=""][/wc_fa]
                                                        • Make the windows of the french doors opaque or translucent. [wc_fa icon="check-square-o" margin_left="" margin_right="" class=""][/wc_fa]

                                                        If I had the budget and time, I also wanted to:

                                                        • Spraypainting the furniture's hardware;
                                                        • Give a makeover to the table lamps;
                                                        • Add throw pillows of different accent colours. [wc_fa icon="check-square-o" margin_left="" margin_right="" class=""][/wc_fa]

                                                        With all of this, I wanted to change the layout of the room so that it made a beautiful focal point when we came in.

                                                        Plus, someone mentioned that it's "Feng Shui" to have the bed facing the door! Maybe I'll sleep better! 😉

                                                        Master bedroom makeover reveal

                                                        So, here's the before and after from the entrance:

                                                        • What the room looked like before the Master bedroom makeover
                                                          Before
                                                        • Vue of the master bedroom after the makeover
                                                          After

                                                        It is so much more colourful than before! I love it! I'm glad I went with the two colours for the stencilling.

                                                        View of the left side of the master bedroom after the makeover

                                                        I even DIYed a new lamp for 0$! (I already had everything on hand since I had made something similar for my dining room)

                                                        View from the left side of the bed in the master bedroom after the makeover

                                                        I love the pattern it makes on the ceiling at night.

                                                        View from the door of the master bedroom after the makeover, when the light is on.

                                                        If you've been reading my blog for a bit, maybe you remember these deer wall art? I made them for my bathroom for my first $100 Room Challenge.  I think they look better in here, don't you think?

                                                        View of the deer wall art from the foot of the bed in the master bedroom after the makeover.

                                                        I also have free deer printable so you can easily make them too! You just need to subscribe at the end of this post.

                                                        Finally, no more clear windows for the French doors! Yes! Privacy! 😉 Are you curious about what I did? Well, you can see the tutorials here and it involves a 5$ shower curtain and a Cricut! lol

                                                        View from the head of the bed of the master bedroom after the makeover.

                                                        Here's how it looks from the outside.

                                                        View of the doors from the inside of the master bedroom after the makeover..

                                                        I'm so happy with the end result of my master bedroom makeover. If you don't really like your bedroom, you should really give it a try! Now, I even feel like making my bed in the morning!! lol

                                                        View from the outside of the master bedroom after the makeover.

                                                        The budget

                                                        Week 2: Stencilling the wall

                                                        • Foam Paint roller and pan 11,44$ ($8,80 USD)
                                                        • Stencil 49,34$ ($37,95 USD)
                                                        • Repositionable Adhesive 8,99$ ($6.94 USD)

                                                        Total week 2: $53.69 USD

                                                        Week 3: Painting the blinds

                                                        • spray paint: 8,37$ ($6.44 USD)

                                                        Week 4: French doors, throw pillows and blanket

                                                        • Shower curtain 5,00$ ($3.86 USD) - for the french doors
                                                        • 2 throw pillows at 5,00$ each ($3.86 USD each)
                                                        • Throw blanket 20,00$ ($15.38 USD)

                                                        Total week 4: $26.95 USD

                                                        Total for the Challenge: $87.08

                                                        I still have $13 left!

                                                        Being able to have this beautiful room for only $87 makes me feel so good!

                                                        Now it's your turn! You can do it too! Please leave me a comment or tell me what's preventing you from making a similar makeover. I'm there for you!


                                                        Subscribe to get access to freebies to help you make these simple and budget-friendly projects, including the deer printable to make the wall art.

                                                        And if you want to shop the look :

                                                        See the other weeks of the challenge here:

                                                        Week 1 (The plan) | Week 2 (Stencil) | Week 3 (Painting the blinds)


                                                        And if you like the result, please Pin it to your favourite board!


                                                        I can't wait to see the room reveal of the other participants:

                                                        An InLinkz Link-up

                                                        How to paint blinds the fastest and cheapest way

                                                        [wc_box color="inverse" text_align="center" margin_top="" margin_bottom="" class=""] This post will tell you all about how to paint blinds for less than $10. It's so easy that it can be done in an afternoon! [/wc_box]

                                                        It's already week 3 of the $100 Room Challenge. My master bedroom is underway and I'm hoping to get everything done by next week! You can check out what I've done already or skip ahead:

                                                        Week 1 | Week 2 | Week 3 | Week 4

                                                        Last week, I stencilled the wall of the window but didn't paint anything under and above the window. Why do you say? Stencilling a wall with a stencil from Cutting Edge Stencil. This geometric pattern will look great for an accent wall in my master bedroom. I even used 2 colors for the Tea House Trellis Allover Stencil. You can find out if stencilling is for you or not! Stencil will bleed and it won't be perfect. See why. #cuttingedge #stencil #diy #masterbedroom #makeover
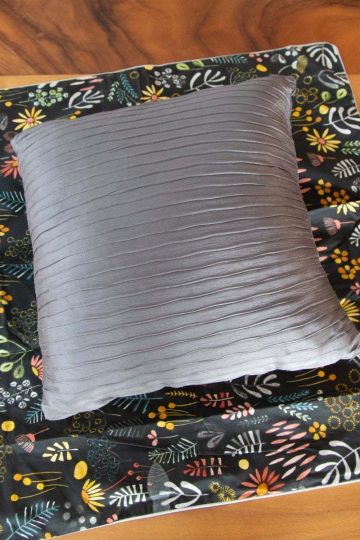
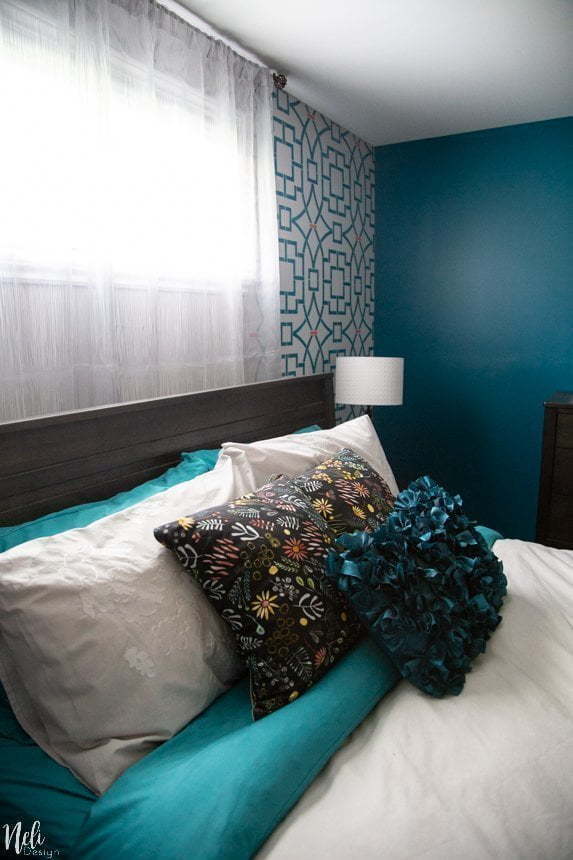
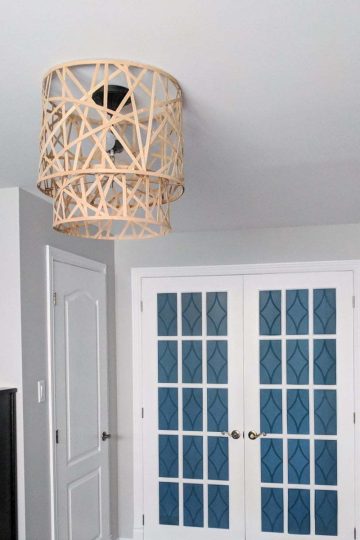
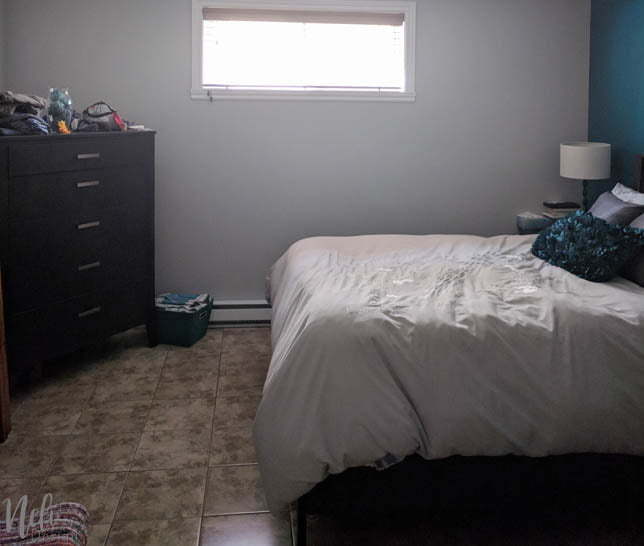
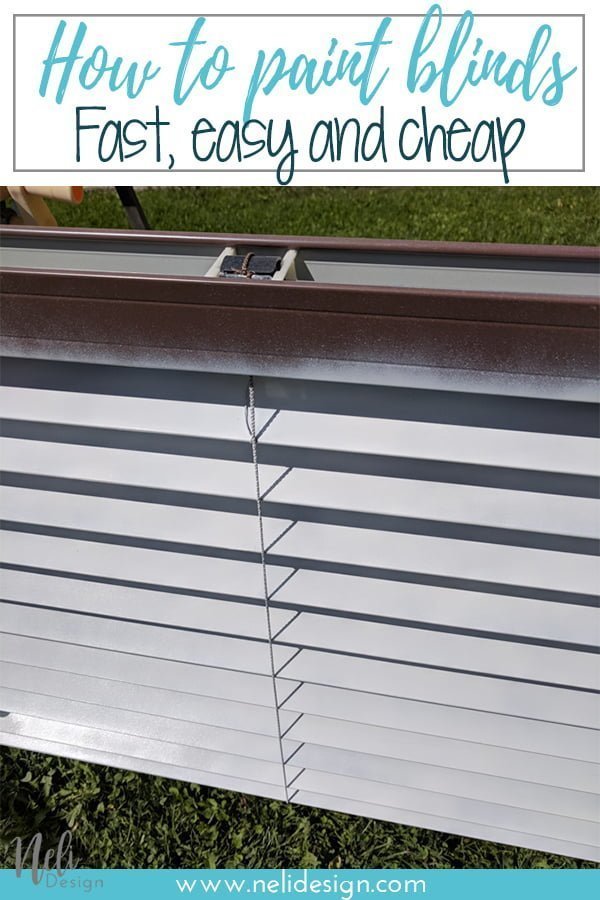
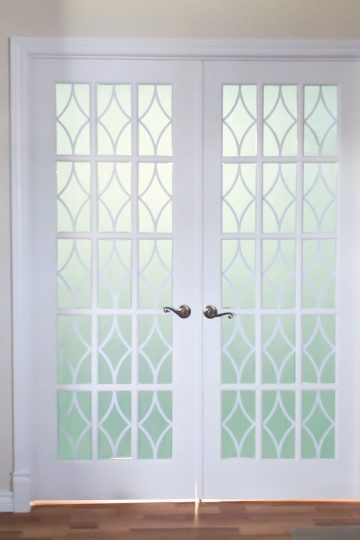
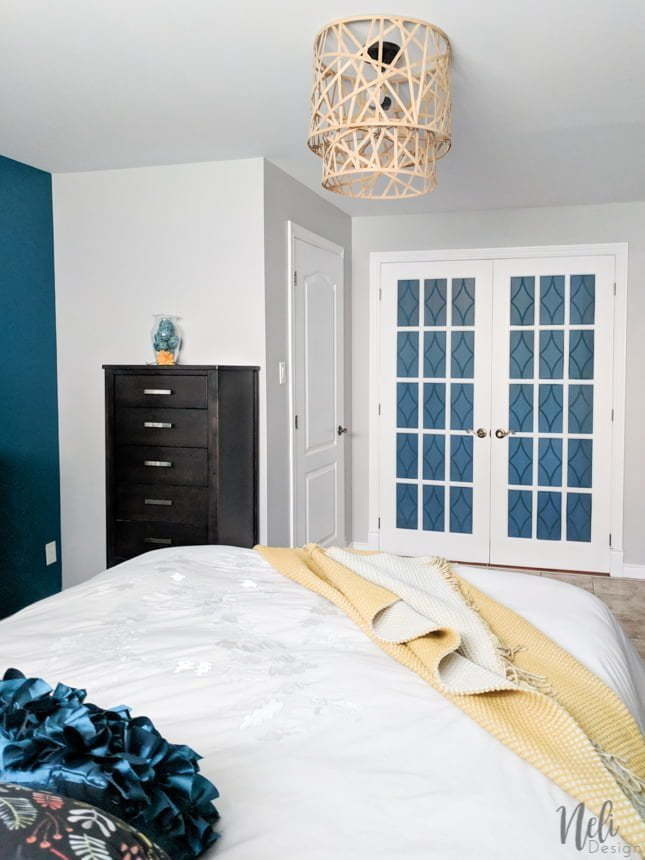
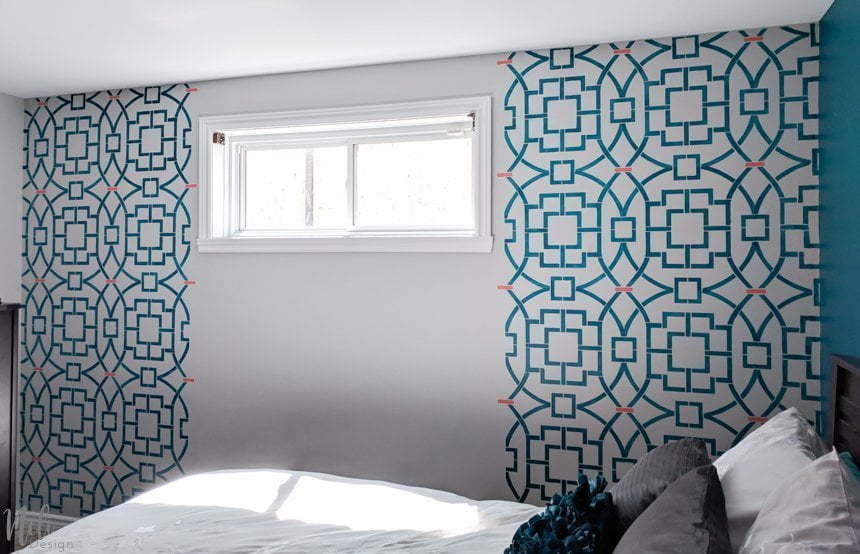
Well, the plan is to make the window look bigger when I hang the sheer grey curtains that I already own.

                                                        For that, I need to paint the brown blinds that were hanging there or it's the only thing we're going to see through the curtains!!

                                                        How to paint blinds

                                                        You know how we can be in a hurry sometimes (well, too often!). I needed to get this done fast and there was no way I would take down my blinds piece by piece to paint it. Oh-No! So I decided to try and spray paint it!

                                                        This post contains some affiliate links for your convenience and at no extra cost to you. Click here to read my full disclosure policy.

                                                        Required materials to paint blinds

                                                        [wc_box color="primary" text_align="left" margin_top="" margin_bottom="" class=""]

                                                        • Rust-Oleum Painter's Touch Ultra Cover 2x spray paint
                                                        • Ugly brown PVC blinds 😉

                                                        [/wc_box]

                                                        Lucky me, it was a day almost without wind. The weather tends to be against me each time I try to spray paint!! 😛 But not today!

                                                        This is not a complicated tutorial! You just need to hang the blinds in a way to be able to open and close the blinds. Use what you have on hand. I used two trestles and some leftover wood.

                                                        How to paint blinds the fastest and cheapest way. Spray paint your plastic or wooden blinds in one afternoon. It won't cost you much to change your window treatment and you'll get a great look. This method is fast and affordable. #spraypaint #windowtreatment #makeover #diy

                                                        And then spray until the brown is gone! In the next picture, the left side has 2 coats and the right side only one.

                                                        How to paint blinds the fastest and cheapest way. Spray paint your plastic or wooden blinds in one afternoon. It won't cost you much to change your window treatment and you'll get a great look. This method is fast and affordable. #spraypaint #windowtreatment #makeover #diy

                                                        I let it dried a bit before closing the blinds and spraypainting again.

                                                        How to paint blinds the fastest and cheapest way. Spray paint your plastic or wooden blinds in one afternoon. It won't cost you much to change your window treatment and you'll get a great look. This method is fast and affordable. #spraypaint #windowtreatment #makeover #diy

                                                        It took me the entire can of paint. Note that the one I had, had a bonus of "25% more" paint. In a perfect world, I would have added a third coat. But since there will be sheer curtains on top of the blinds, I don't really mind if they're not perfect. Plus, it's the $100 Room Challenge, I need to save money!

                                                        When it was all dry (at least 24 hours later) I tried scratching it with my nails and it seems pretty durable to me. I'll try to come back to this post in a year or so and update you on how it's doing!

                                                        How to paint blinds the fastest and cheapest way. Spray paint your plastic or wooden blinds in one afternoon. It won't cost you much to change your window treatment and you'll get a great look. This method is fast and affordable. #spraypaint #windowtreatment #makeover #diy

                                                        Budget

                                                        Here is the total of my spending up to now:

                                                        • Previous weeks: $46,75
                                                        • This week for the spray paint: $6,44 (8,37$ CAD)

                                                        Total : $55,12

                                                        I still have $45 on my budget! 😀

                                                        Still to come

                                                        Now, there are still two big projects I absolutely want to make:

                                                        • Getting rid of the clear class of the French doors
                                                        • Changing the light

                                                        You can check out the other weeks here:

                                                        Week 1 | Week 2 | Week 3 | Week 4

                                                        And don't go too far! It's already "reveal week" next Wednesday!

                                                        If you want to keep this idea, don't forget to Pin it!

                                                        Pinterest image saying How to paint blinds Fast, easy and cheap

                                                        [wc_box color="secondary" text_align="center" margin_top="" margin_bottom="" class=""]

                                                        Don't miss any new freebies. Subscribe to get access to the library full of resources!

                                                        [wc_button type="warning" url="https://nelidesign.com/landing-page/" title="Inscrire" target="blank" url_rel="" icon_left="" icon_right="" position="center" class=""]Subscribe me![/wc_button][/wc_box]

                                                        Click here to see which Link Party I participate.

                                                        Check out what the others have done this week!

                                                        An InLinkz Link-up


                                                        Stencilling a wall / How to know if it's for you or not!

                                                        Stencilling a wall with a stencil from Cutting Edge Stencil. This geometric pattern will look great for an accent wall in my master bedroom. I even used 2 colors for the Tea House Trellis Allover Stencil. You can find out if stencilling is for you or not! Stencil will bleed and it won't be perfect. See why. #cuttingedge #stencil #diy #masterbedroom #makeover

                                                        [wc_box color="inverse" text_align="center" margin_top="" margin_bottom="" class=""] It's week 2 of the $100 Room Challenge where I'm transforming my master bedroom. This week, I was stencilling a wall! It was an adventure! Find out if it's one you'd like to take! [/wc_box]

                                                        Thanks to Cutting Edge Stencils for sending me the stencil for this project. All opinions are 100% my own.

                                                        I had a vision. I was seeing it in my mind: a perfectly defined design that would make an awesome focal point when entering the master bedroom.

                                                        Find out what I have planned for my small master bedroom makeover for the $100 Room Challenge. A lot of ideas are planned to change this decor and add colour, all of it, on a budget. You'll see that the layout will be changed so that the bed is in front of the window. Check out the before and after plan. #100roomchallenge #masterbedroom #onabudget #bedroomdecor #bedroomideas #bedrooms

                                                        $100 Room Challenge: Week 1 | Week 2 | Week 3 | Week 4

                                                        I had never used a stencil before apart from when making mixed media art. And when I did that, I embraced any bleeds or mistakes like part of the art. But not on my wall! I wanted everything as clean as possible.

                                                        So I read and watched many tutorials and I said to myself: "Pretty easy, I can do this!"

                                                        This post contains some affiliate links for your convenience and at no extra cost to you. Click here to read my full disclosure policy.

                                                        Stencilling a wall

                                                        I chose the beautiful Tea House Trellis from Cutting Edge Stencil.

                                                        I bought a foam roller and even decided to use repositionable adhesive to make sure to get the cleanest edges possible.

                                                        The tutorials I watched said to put very little paint on the roller and wipe the excess on a paper towel, so I did.

                                                        I was all excited, "let's do this!"

                                                        But even with all my precautions, it bled through the stencil and it was awful.

                                                        So I ran and came back with wet towels and wiped it all off... I did that three times!

                                                        Since I was using the paint I owned, I thought that maybe that was the problem. So I asked the other $100 Room Challenge bloggers and was surprised to hear that some of them just "learned to embrace de bleeds and imperfections" while others vowed to never stencil again!!

                                                        Ok, so it's not just me! And it's not as easy as it looks!

                                                        What the others had to say

                                                        I also got good advice from the other bloggers :

                                                        • Monica from Monica Wants it suggested trying a stencilling brush.
                                                        • Leslea from A Heart Filled Home also said to use less paint and that with chalk paint and a flat brush, she gets minimal bleeding.
                                                        • Kate from Kate Decorates suggested using a stencil brush, very little paint and the stencilling creme from royal design studio
                                                        • Jennifer from Jen-Ron Designs told me to use a stencil brush and make sure to use flat paint (never a sheen paint).

                                                        From what I take out, a stencil brush and very little paint are the things to remember!

                                                        Unfortunately, I didn't have a stencil brush and needed to get this done today! So, with all the advice in mind, I went back to my roller. I squished the paint out of it as much as I could by pressing it down. Then, I rolled it on a paper towel and tried A-GAIN!

                                                        This time, it was way better.

                                                        Stencilling a wall with a stencil from Cutting Edge Stencil. This geometric pattern will look great for an accent wall in my master bedroom. I even used 2 colors for the Tea House Trellis Allover Stencil. You can find out if stencilling is for you or not! Stencil will bleed and it won't be perfect. See why. #cuttingedge #stencil #diy #masterbedroom #makeover

                                                        There were still some bleeding but not as much. Lesson learned:

                                                        Even when you think you don't have a lot of paint on your roller, you still have too much!

                                                        My tips to you

                                                        Like it or not, it will bleed. If you see bubbles like this, it means you still have way too much paint on your roller!

                                                        Stencilling a wall with a stencil from Cutting Edge Stencil. This geometric pattern will look great for an accent wall in my master bedroom. I even used 2 colors for the Tea House Trellis Allover Stencil. You can find out if stencilling is for you or not! Stencil will bleed and it won't be perfect. See why. #cuttingedge #stencil #diy #masterbedroom #makeover

                                                        I used wet Q-Tips to clean some of the edges. You can also come back with your base colour and an artist brush for touch-ups. Also, when it was time to wash the stencil, I laid it down on an old rag to dry it and dabbed it with a paper towel.

                                                        Is stencilling for you?

                                                        Can you accept imperfections? Are you the patient type? If not, I would say don't do it!! 😉

                                                        Just finishing the top, sides and bottom as you can see below took me 3 hours. Even if Cutting Edge Stencils sends a convenient top edge stencil just for the top.

                                                        Stencilling a wall with a stencil from Cutting Edge Stencil. This geometric pattern will look great for an accent wall in my master bedroom. I even used 2 colors for the Tea House Trellis Allover Stencil. You can find out if stencilling is for you or not! Stencil will bleed and it won't be perfect. See why. #cuttingedge #stencil #diy #masterbedroom #makeover

                                                        Stencilling a wall with a stencil from Cutting Edge Stencil. This geometric pattern will look great for an accent wall in my master bedroom. I even used 2 colors for the Tea House Trellis Allover Stencil. You can find out if stencilling is for you or not! Stencil will bleed and it won't be perfect. See why. #cuttingedge #stencil #diy #masterbedroom #makeover

                                                        Doing the sides and bottom was a struggle because you have to bend the stencil and still fit the design.

                                                        Stencilling a wall with a stencil from Cutting Edge Stencil. This geometric pattern will look great for an accent wall in my master bedroom. I even used 2 colors for the Tea House Trellis Allover Stencil. You can find out if stencilling is for you or not! Stencil will bleed and it won't be perfect. See why. #cuttingedge #stencil #diy #masterbedroom #makeover

                                                        And that is where I had the most touch-ups to do! Lucky me, there will be furniture in front!

                                                        Stencilling a wall with a stencil from Cutting Edge Stencil. This geometric pattern will look great for an accent wall in my master bedroom. I even used 2 colors for the Tea House Trellis Allover Stencil. You can find out if stencilling is for you or not! Stencil will bleed and it won't be perfect. See why. #cuttingedge #stencil #diy #masterbedroom #makeover

                                                        Final thoughts

                                                        I was frustrated at first but I can't say that I'm not in loooove with the look.

                                                        Stencilling a wall with a stencil from Cutting Edge Stencil. This geometric pattern will look great for an accent wall in my master bedroom. I even used 2 colors for the Tea House Trellis Allover Stencil. You can find out if stencilling is for you or not! Stencil will bleed and it won't be perfect. See why. #cuttingedge #stencil #diy #masterbedroom #makeover

                                                        I even took my courage an added another colour to the mix: Coral Blush. I'm so glad I did!

                                                        Stencilling a wall with a stencil from Cutting Edge Stencil. This geometric pattern will look great for an accent wall in my master bedroom. I even used 2 colors for the Tea House Trellis Allover Stencil. You can find out if stencilling is for you or not! Stencil will bleed and it won't be perfect. See why. #cuttingedge #stencil #diy #masterbedroom #makeover

                                                        Now, if you wonder why I didn't stencil under the window, it's because I don't want to see the pattern through the curtains. That way, I think the window will seem bigger! We'll see!

                                                        Stencilling a wall with a stencil from Cutting Edge Stencil. This geometric pattern will look great for an accent wall in my master bedroom. I even used 2 colors for the Tea House Trellis Allover Stencil. You can find out if stencilling is for you or not! Stencil will bleed and it won't be perfect. See why. #cuttingedge #stencil #diy #masterbedroom #makeover

                                                        Material I used

                                                        • Foam paint roller
                                                        • Repositionable Adhesive
                                                        • Paper towel
                                                        • Tea House Trellis Stencil from Cutting Edge
                                                        • Acrylic paint I already owned
                                                          • Base colour: Sico 6182-21 Breton Salt
                                                          • Stencil colour: Sico 6151-83 Underwater Cave
                                                        • DecoArt Americana Coral Blush

                                                        Recommended material and what I will use next time!

                                                        • Flat Stencilling brush
                                                        • Chalk paint

                                                        Budget

                                                        What I spent this week looks like this :

                                                        • Foam Paint roller and pan 11,44$ ($8,80 USD)
                                                        • Stencil 49,34$ ($37,95 USD)
                                                        • Repositionable Adhesive 8,99$ ($6.94 USD)
                                                        • Paint: Already owned
                                                          • Base colour: Sico 6182-21 Breton Salt
                                                          • Stencil colour: Sico 6151-83 Underwater Cave
                                                          • Stencil second colour: DecoArt Americana Coral Blush

                                                        Total spent : $53,69 USD.

                                                        Stay tuned for next week of the $100 Room Challenge if you want to know the quickest and cheapest way to paint blinds. 😀 Here's the recap:

                                                        Week 1 | Week 2 | Week 3 | Week 4

                                                        Pin it to save for later

                                                        Pinterest image saying "Stencilling a wall, How to know if it's really for you?"

                                                        Here are other Cutting Edge Stencils that caught my eye (I even bought one of them for a next project! Can you guess which one?)

                                                        [wc_row]

                                                        [wc_column size="one-fourth" position="first"]Stencilling a wall with a stencil from Cutting Edge Stencil. This geometric pattern will look great for an accent wall in my master bedroom. I even used 2 colors for the Tea House Trellis Allover Stencil. You can find out if stencilling is for you or not! Stencil will bleed and it won't be perfect. See why. #cuttingedge #stencil #diy #masterbedroom #makeover

                                                        [/wc_column]

                                                        [wc_column size="one-fourth"]

                                                        Stencilling a wall with a stencil from Cutting Edge Stencil. This geometric pattern will look great for an accent wall in my master bedroom. I even used 2 colors for the Tea House Trellis Allover Stencil. You can find out if stencilling is for you or not! Stencil will bleed and it won't be perfect. See why. #cuttingedge #stencil #diy #masterbedroom #makeover

                                                        [/wc_column]

                                                        [wc_column size="one-fourth" position="last"]

                                                        Stencilling a wall with a stencil from Cutting Edge Stencil. This geometric pattern will look great for an accent wall in my master bedroom. I even used 2 colors for the Tea House Trellis Allover Stencil. You can find out if stencilling is for you or not! Stencil will bleed and it won't be perfect. See why. #cuttingedge #stencil #diy #masterbedroom #makeover

                                                        [/wc_column]

                                                        [/wc_row]

                                                        [wc_box color="secondary" text_align="center" margin_top="" margin_bottom="" class=""]

                                                        Don't miss any new freebies. Subscribe to get access to the library full of resources!

                                                        [wc_button type="warning" url="https://nelidesign.com/landing-page/" title="Inscrire" target="blank" url_rel="" icon_left="" icon_right="" position="center" class=""]Subscribe me![/wc_button][/wc_box]

                                                        Click here to see which Link Party I participate.

                                                        You can see what the other participants are doing by following these links:

                                                        An InLinkz Link-up


                                                        « Previous Page
                                                        Next Page »

                                                        Hi! I'm Natalie

                                                        I help crafters create with confidence, useful DIY and craft projects with their Cricut.

                                                        More about me

                                                        Popular

                                                        • Cricut Maker 4 and Cricut Explore 4: Everything you need to know about these new cutting machines!
                                                        • Cricut's Value materials
                                                        • How to engrave on a curved surface with the xTool S1 laser cutter
                                                        • Difference between xTool M1 and xTool S1 laser cutters

                                                        Seasonal

                                                        • Cricut printable Iron-on for light and dark fabrics - everything you need to know
                                                        • How to cut felt with the Cricut Joy and Joy Xtra
                                                        • Using Infusible Ink on cotton
                                                        • Buying a Cricut: where to find the best price

                                                        Footer

                                                        ↑ back to top

                                                        Informations

                                                        • Privacy Policy
                                                        • Disclosure
                                                        • CCPA
                                                        • Do not sell my personnal information

                                                        Newsletter

                                                        • Sign up for emails and updates

                                                        Resources

                                                        • Access the library
                                                        • Discount codes
                                                        • About NeliDesign
                                                        • Contact
                                                        • Français

                                                        .

                                                        As an Amazon Associate I earn from qualifying purchases.

                                                        Copyright © NeliDesign

                                                        Manage Cookie Consent
                                                        We use technologies like cookies to store and/or access device information. We do this to improve browsing experience and to show (non-) personalized ads. Consenting to these technologies will allow us to process data such as browsing behavior or unique IDs on this site. Not consenting or withdrawing consent, may adversely affect certain features and functions.
                                                        Functional Always active
                                                        The technical storage or access is strictly necessary for the legitimate purpose of enabling the use of a specific service explicitly requested by the subscriber or user, or for the sole purpose of carrying out the transmission of a communication over an electronic communications network.
                                                        Preferences
                                                        The technical storage or access is necessary for the legitimate purpose of storing preferences that are not requested by the subscriber or user.
                                                        Statistics
                                                        The technical storage or access that is used exclusively for statistical purposes. The technical storage or access that is used exclusively for anonymous statistical purposes. Without a subpoena, voluntary compliance on the part of your Internet Service Provider, or additional records from a third party, information stored or retrieved for this purpose alone cannot usually be used to identify you.
                                                        Marketing
                                                        The technical storage or access is required to create user profiles to send advertising, or to track the user on a website or across several websites for similar marketing purposes.
                                                        • Manage options
                                                        • Manage services
                                                        • Manage {vendor_count} vendors
                                                        • Read more about these purposes
                                                        View preferences
                                                        • {title}
                                                        • {title}
                                                        • {title}
                                                        Manage Cookie Consent
                                                        To provide the best experiences, we use technologies like cookies to store and/or access device information. Consenting to these technologies will allow us to process data such as browsing behavior or unique IDs on this site. Not consenting or withdrawing consent, may adversely affect certain features and functions.
                                                        Functional Always active
                                                        The technical storage or access is strictly necessary for the legitimate purpose of enabling the use of a specific service explicitly requested by the subscriber or user, or for the sole purpose of carrying out the transmission of a communication over an electronic communications network.
                                                        Preferences
                                                        The technical storage or access is necessary for the legitimate purpose of storing preferences that are not requested by the subscriber or user.
                                                        Statistics
                                                        The technical storage or access that is used exclusively for statistical purposes. The technical storage or access that is used exclusively for anonymous statistical purposes. Without a subpoena, voluntary compliance on the part of your Internet Service Provider, or additional records from a third party, information stored or retrieved for this purpose alone cannot usually be used to identify you.
                                                        Marketing
                                                        The technical storage or access is required to create user profiles to send advertising, or to track the user on a website or across several websites for similar marketing purposes.
                                                        • Manage options
                                                        • Manage services
                                                        • Manage {vendor_count} vendors
                                                        • Read more about these purposes
                                                        View preferences
                                                        • {title}
                                                        • {title}
                                                        • {title}