What is Cricut printable Iron-on and how do I use it? That's what you'll learn in this tutorial.
This post contains some affiliate links for your convenience and at no extra cost to you. I get commissions for purchases made through links in this post. Click here to see my full disclosure policy.
What is printable Iron-on
Heat transfer vinyl, also known as, HTV or Iron-on, is a type of vinyl that is applied with heat, with an iron or press. It is mainly used to apply to fabrics.
The printable version an iron-on that can be printed on with a printer. This Iron-on comes in two versions, one for light fabrics and one for dark fabrics.

This is NOT sublimation, which requires special ink and a dedicated printer. Cricut's printable Iron-on only requires an inkjet printer with regular ink. (It is not compatible with laser printers)
To find out all about the different types of vinyl and how to tell them apart, check out my post on the subject here.
Why use printable Iron-on
Printable Iron-on is a great alternative when your design is too complex to use regular HTV.
It also lets you use images with color gradations, opening up a whole world of possibilities.
As mentioned above, this is NOT sublimation. Sublimation requires polyester fabric. Printable iron-on can be applied to many materials, even cotton (see the Cricut Heating Guide for details).
It's important to note that you'll need to use Cricut Design Space's "Print then Cut" feature. This function is not available for the Cricut Joy, but you can use it with all other Cricut models, including the Cricut Joy Xtra, the Explore family, the Maker family and even the Cricut Venture.
How to choose between Iron-on for light or dark fabrics
You might think that Iron-on for light fabrics goes on light fabrics and iron-on for dark fabrics goes on dark fabrics.
And yes, that's right, but I'd like to add a small recommendation, let me explain.
Iron-on for light fabrics
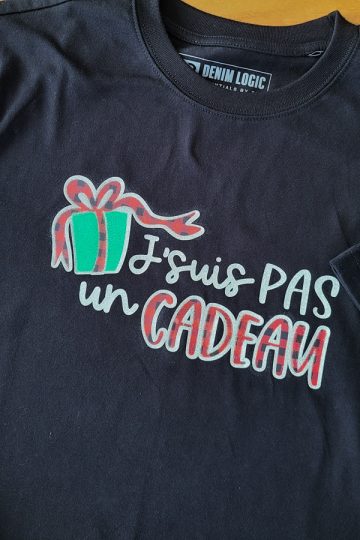
Iron-on for light fabrics is semi-transparent. In fact, everything white is transparent. The colors will be translucent.
Here we see Iron-on for light fabrics applied to a t-shirt with stripes. The stripes are clearly visible even through the unicorn colors.

Iron-on for dark fabrics
Iron-on for dark fabrics is completely opaque. So what's white will remain pure white. And the color of the fabric will have no effect on the printed image, as can be seen in the image below.

My recommendation between iron-on for light and dark fabrics
Here are the same images applied to my striped t-shirt after several washes (I'd say at least 10!).

The white seems to have yellowed a little. If the image didn't have so much white, you probably wouldn't notice the difference.
So my recommendation is this: if you have an image that has a lot of white and it's important to you that the white stays bright, use the dark fabric iron-on even if your t-shirt (or any other blank) is white.
I also find it important to note that iron-on for light fabrics is thinner and more elastic. I find it more difficult to work with, especially if you have thinner pieces.
As you can see in the photo, the hummingbird's beak is shorter. I had to cut it since it was stretched when I lifted it from its backing.

You can subtly see that the one on the left is more colorful. The one on the right looks more "melted" (look especially at the gray of the wing).
The same is true of the texture. As iron-on for light fabrics is thinner, it seems to be more integrated into the fiber. Iron-on for dark fabrics, on the other hand, is more like a standard iron-on installed on the fiber.
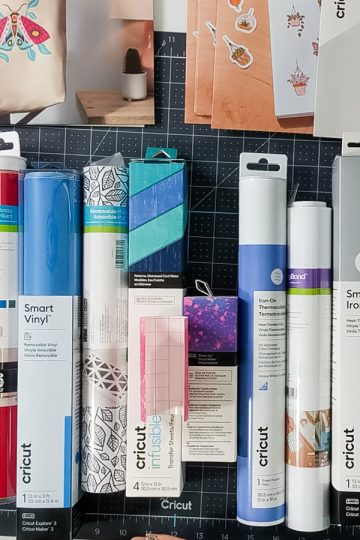
Size and identification
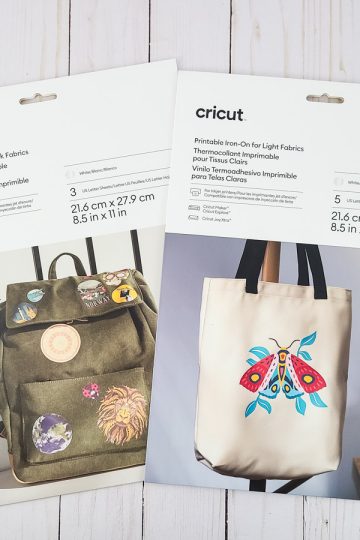
Printable iron-on is available in Letter size for North America or A4 size for Europe.
It is sold in flat packs, in 3-sheet packs for dark fabrics and in 5-sheet packs for light fabrics.
Iron-on for light fabrics has a green grid on the back. I advise you to always keep it in its packaging, as it's not the only printable material with a green grid!
Iron-on for dark fabrics has no grid. It simply has a QR code on one side, so you understand that you have to print on the opposite side.
Settings for printing on printable Iron-on
I'm not a printer specialist. Plus, there are so many models to choose from! All I can recommend is that you use a higher quality (or "photo") print setting.
This type of setting takes more ink, but you won't regret it.
As both printable Iron-on have a "matte" finish, I personally use "matte photo paper" and it has always worked well.
Cutting the printable Iron-on
Warning! A few recommendations before cutting:
- You don't need to use the "Mirror" mode for printable Iron-on, light or dark fabrics. (This is valid for Cricut Iron-on. Beware, because for some other brands, mirroring must be done for printable HTV for light fabrics but not for dark fabrics).
- If you've never used the "Print then Cut" feature, I suggest you take a look at this post. This is by far the most complex feature in Design Space to understand, so don't worry if you need my tutorial to understand the Flatten function (because yes, unless you've imported an image into Design Space or chosen an image specifically for print and cut, you're going to need to use Flatten).
- If you're a Cricut Access member, you may want to use "Create sticker", but this is optional.
- And finally, if you've never used the "Print then Cut" feature, or haven't used it for a long time, I strongly suggest you calibrate your Cricut before you start printing.
- If you haven't added an offset and you're wondering why your image looks distorted compared to what you see on the screen, you should know that it's called "bleed" and that it's normal. Don't listen to all the people on social networks who tell you to turn off the "bleed", because this feature is required for the Cricut to do a nice cutting job. Check out this post on full bleed instead.
The rest is pretty straightforward. Once your print has been retrieved from your printer, simply place the material on the blue mat (LightGrip). Make sure your print is positioned in the same direction as what you see on the screen.
Choose the setting in Design Space according to your material:
- "Printable Iron-On, Light" or
- "Printable Iron-On, Dark"

Transfer printable Iron-on
Cricut printable Iron-on should be removed from its backing in the same way you would do with a sticker. In other words, there is no transfer sheet.
Simply place it on its blank, cover it with the protective sheet found in the packaging and apply with the press, following the settings of the heat guide according to your fabric.
This applies equally to iron-on for light and dark fabrics.
Care instructions for printable Iron-on
Cricut recommends waiting at least 48 hours before washing your project.
It's best to wash inside out in cold water and hang to dry.