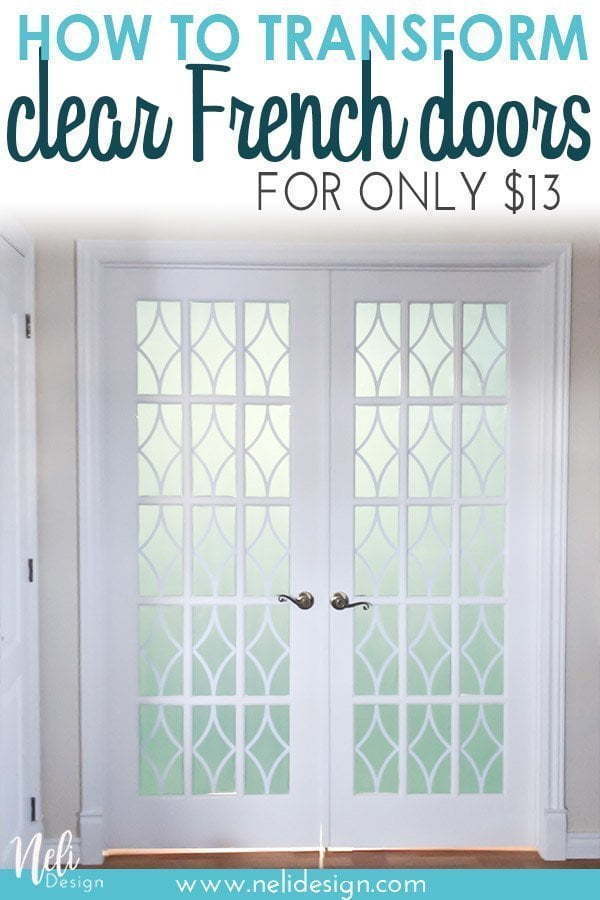
Learn how to find an original and economical way to add privacy to French doors. It will save you lots of money for a beautiful look!
Last September, I participated in the $100 Room Challenge. If you weren't there, it's a challenge where you need to makeover one room, in one month for $100 or less. For this challenge, I decided to makeover my master bedroom. If you're curious, you can see the different steps of the challenge by following these links:
Week 1 | Week 2 - stencil | Week 3 - paint blinds | Week 4 - reveal
An original way to add privacy to French doors
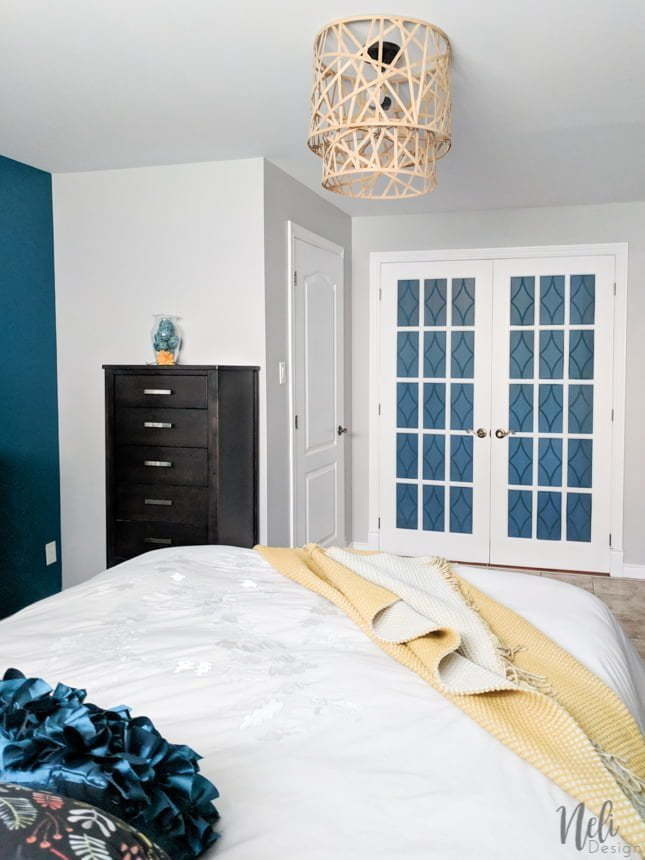
The master bedroom is located in the basement. When we bought the house, French doors with clear glass were already there. Seriously, who would want to install these kinds of doors for their bedroom? Not parents with children, that's for sure!
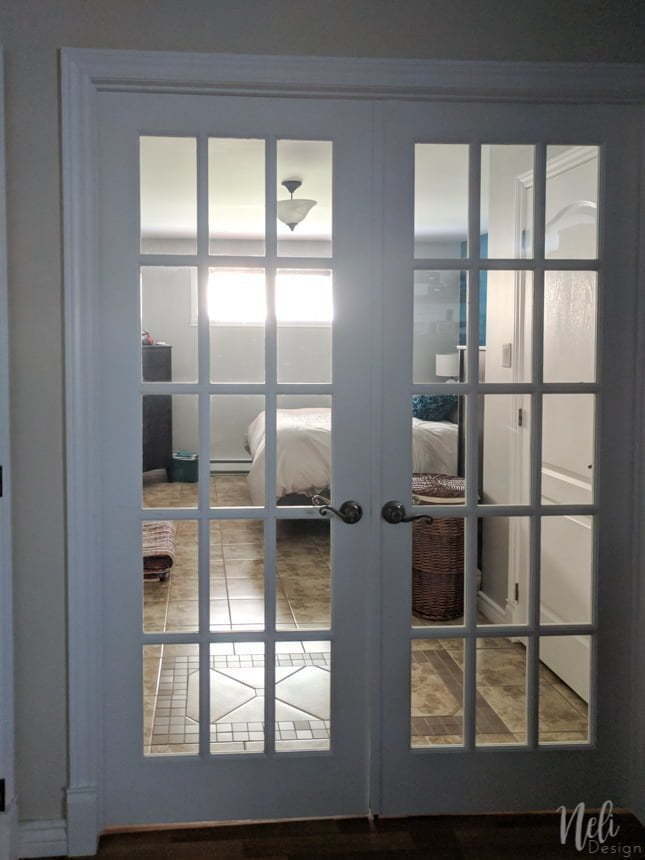
So I wanted to find an original way to add privacy to clear glass. Also, since I was in the middle of the $100 Room Challenge, I had to find something economical! How about $13? That's
This is probably the most economical way to modify clear glass! This post contains some affiliate links for your convenience and at no extra cost to you. Click here to see my privacy policy.
Required materials
- At least 30 white 8-½" x 14" cardstocks of around 90lb or 110lb
- A cutting machine like a Cricut (I have the Cricut Maker) or a pair of scissors and patience!
- An empty cardboard box
- Spray adhesive
- Thin plastic shower curtain lining (mine was dark blue)
- Cutting mat
- Metal ruler
- Rotary cutter
- and the Cut file (or printable) that you can get for free in my resource library by subscribing to my newsletter right here. 👇
How to add privacy to French doors
Just a little note before explaining everything: since it was the $100 Room Challenge, I tried to use what I already had at home. Therefore, you'll see that my pattern is made of 2 pieces. This is because I only had 8-½ x 11 cardstock (letter size). To simplify your life, use a larger size, like the 8-½ x 14 (legal size) so you can have a pattern in one piece!
Step 1:
First of all, be sure to clean the glass thoroughly. By immediately doing this step, you'll be sure they will be dry when it's time to glue the pattern.
Step 2:
Measure the glass on your doors and make sure that the cut-out pattern (the file you'll find in my library at the very bottom of this post) is the right size. If it's not the case, adjust it in the Cricut design space. The file is a PNG image so you can also use any image program to make the
Cut all the patterns with your Cricut or another cutting machine (or scissors!). If you have the same doors, you'll need 30 cut-out patterns.

Step 3:
Place one piece at the time at the bottom of the cardboard box and spray the adhesive.
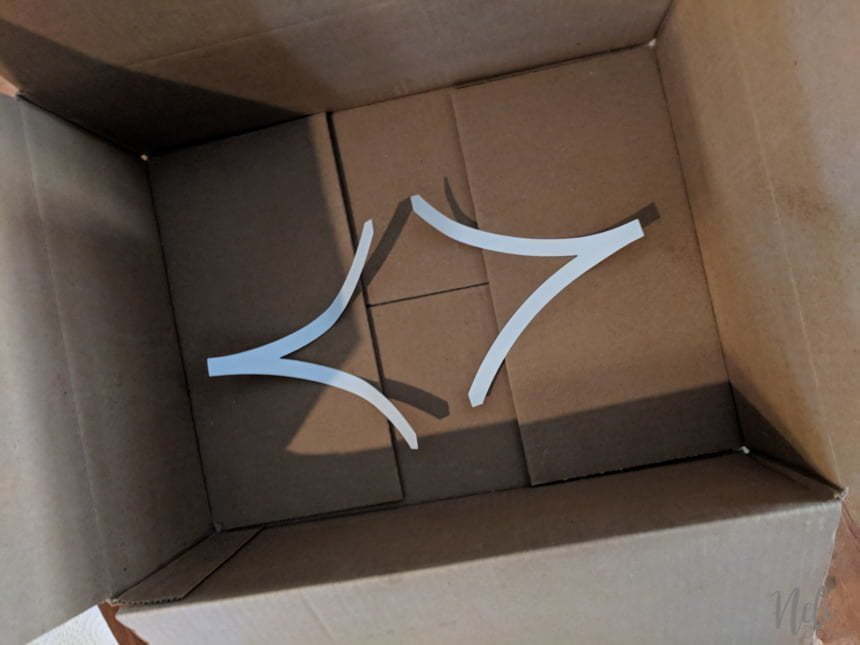
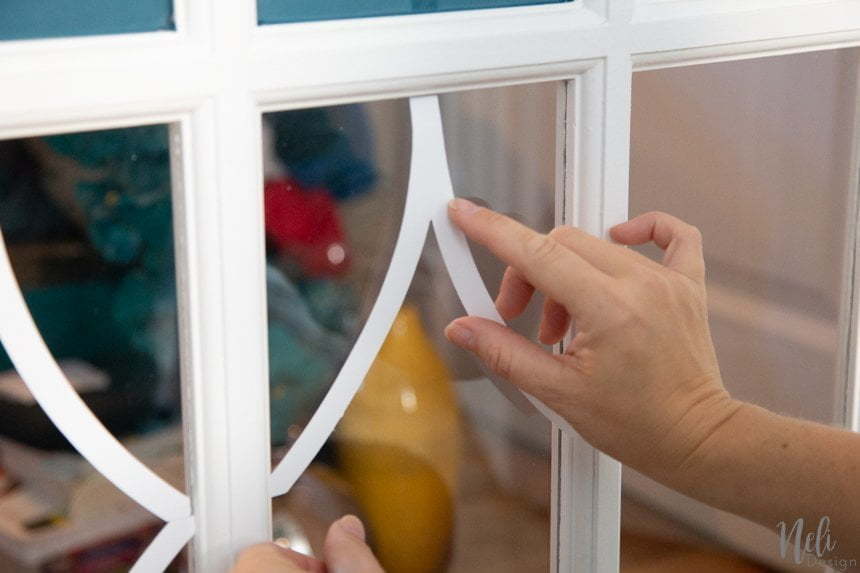
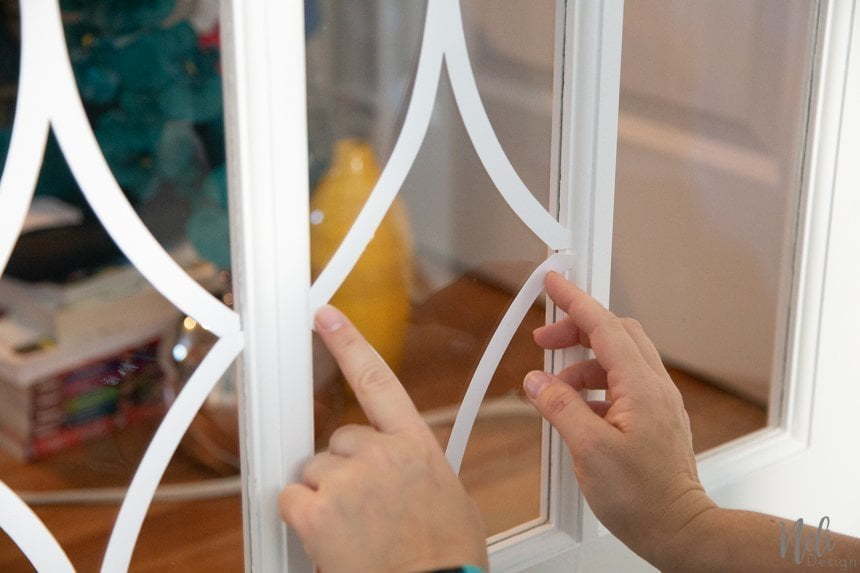
Apply the pattern on the glass from top to bottom. If you don't have a good eye the find the middle of the glass, just make a little mark with a pencil.
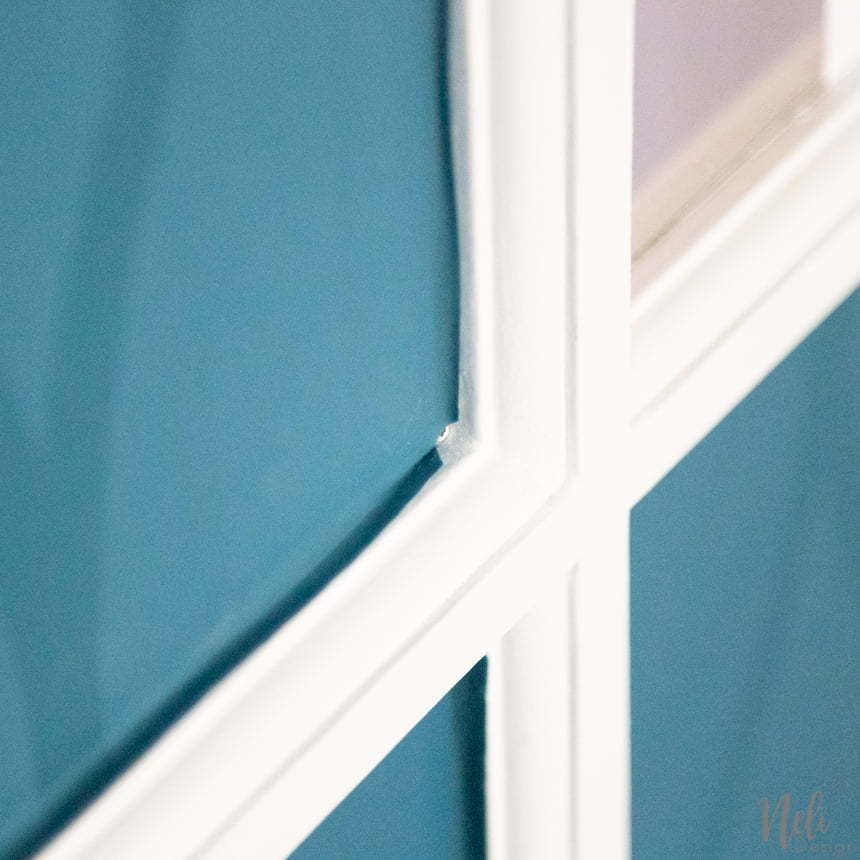
When you spray, make sure you're not too close. If you are, you'll end up with small drops on the cardstock as you can see in the image below.

Step 4:
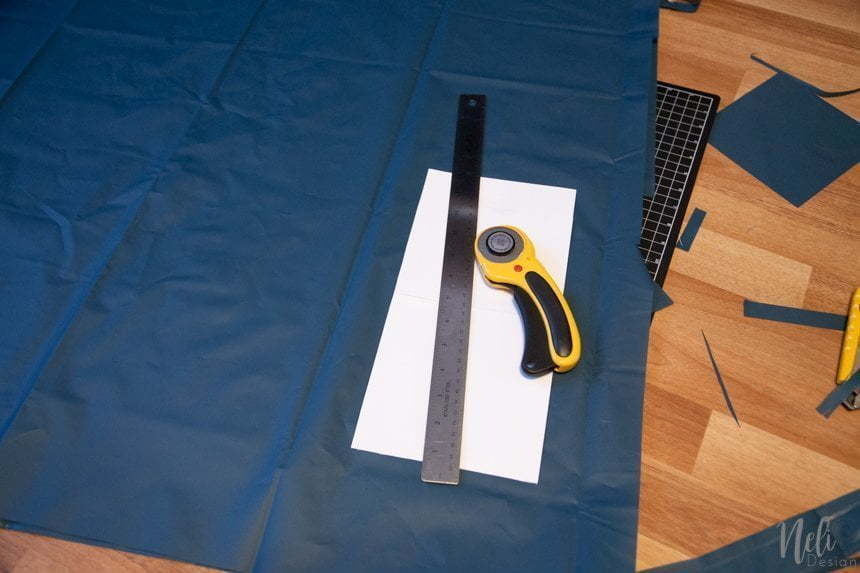
Now you need to cut the shower curtain. Since the plastic was a bit elastic, I had trouble cutting it to the right size. I had to do it piece by piece. Well, 2 pieces by 2 pieces!
As a matter of fact, I made a cardstock template the size of one glass (as you can see in the image below). Then, I folded the shower curtain in half so I could cut 2 pieces at a time.
Step 5:
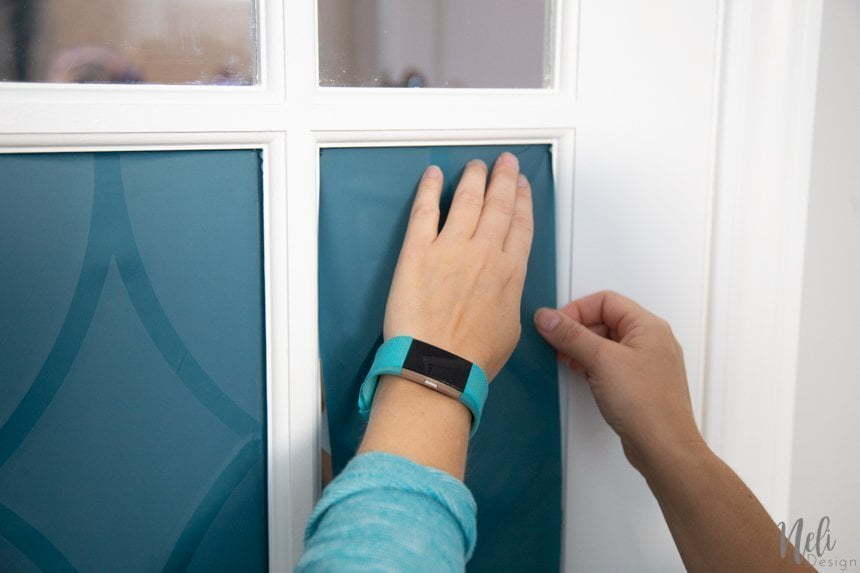
To install the pieces of shower curtain in the glass, use the same cardboard box and spray one piece at a time.
To install it, start by the top corners. Then, press down on the plastic to get rid of all the air bubbles.
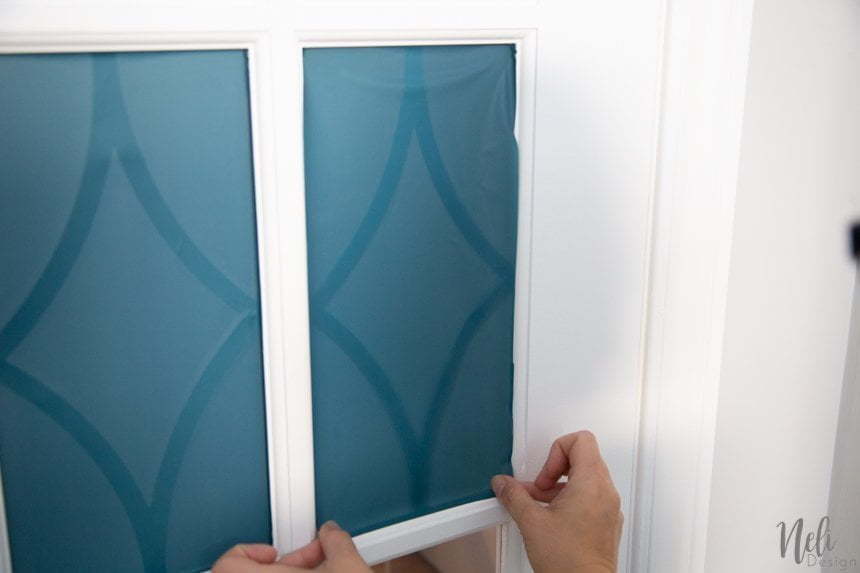
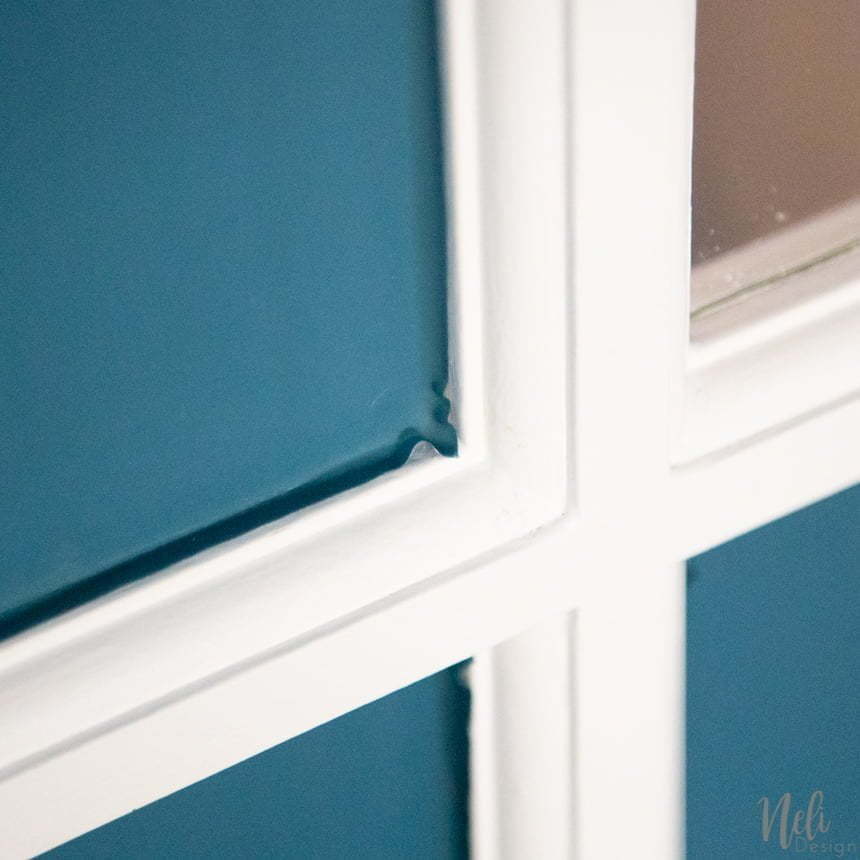
It is best that the plastic rectangle be slightly bigger than the glass. If it's the case and you end up with corners like in the left image below, simply cut the corners to 45 degrees with scissors.

The final result
And here you have it! The view from inside the bedroom.
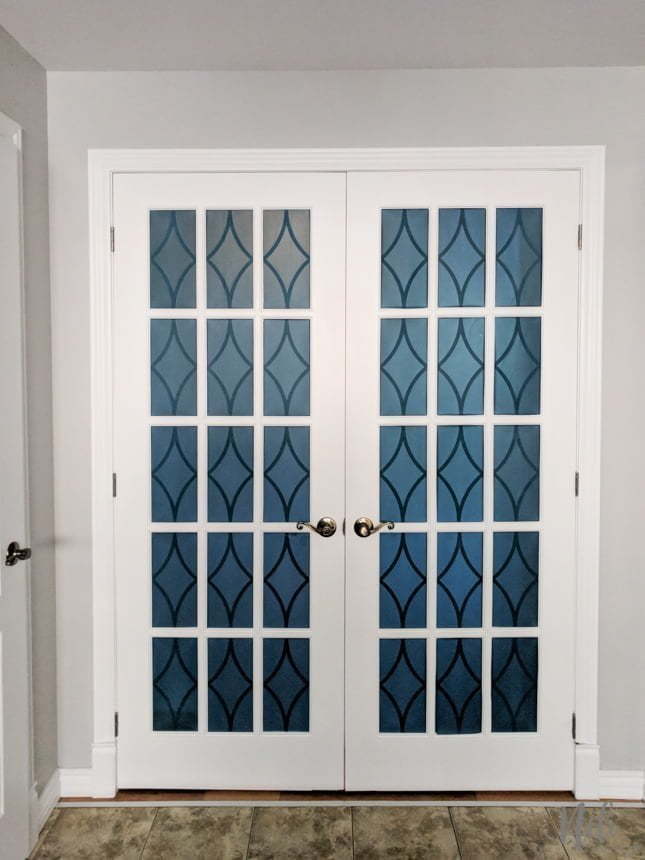
What I like the most, it's that the view from outside the bedroom is totally different!

Budget summary
I must confess, I first used repositionable adhesive to save money as part of the $100 Room Challenge (the same spray I used for the stencil). But a few weeks later, I had to face the facts: several rectangles were peeling off and bubbles had appeared in some places. So I bought a permanent spray adhesive and now everything is staying in place!
| Description | Price |
| Spray adhesive | 13,00 $ |
| Shower curtain | 5,00 $ |
| Cardstock (already had it) | 0 $ |
| Total | 18,00 $ |
And like I always say in the $100 Room Challenge, it's 18$ CAD, so about $13 USD 😜. The final budget for the $100 Room Challenge was $87 USD including the shower curtain. So, to be honest, if I add the spray adhesive (around $10 USD), I'm still under budget! Yesss!!
So, how about you, are you willing to try something similar?
I'm waaay too busy to make this DIY!
If you're scared of tackling this project because of a lack of time, try making it in blocks like this:
- Make steps 1 and 2 / Time: around 1 hour, 30 minutes
- Continue with step 3 / Time: around 1 hour
- Go to steps 4 and 5 / Time: around 2 hours, 30 minutes
Note that this is just an example. You can always separate a project to your convenience and according to the time you have! If you make this project and find that the time is not realistic, please don't hesitate to tell me!
How to get the cut file?
Just subscribe here and get a free Cricut Design Space Cheat Sheet at the same time!
Don't forget to Pin the image to save this idea!