NeliDesign

menu icon
go to homepage
  • Projects
    • Cricut Help
    • Home Decor
    • Crafts
    • Organization
  • Materials
    • Adhesive Vinyl
    • Heat transfer vinyl
    • Foil
    • Infusible Ink
    • Paper and Cardstock
    • Pens and Markers
    • Other
  • Free cut files
    • See the free cut files
    • Get the free cut files
      • Get a password
      • Access the Library
  • Shop
  • Français
search icon
Homepage link
  • Projects
    • Cricut Help
    • Home Decor
    • Crafts
    • Organization
  • Materials
    • Adhesive Vinyl
    • Heat transfer vinyl
    • Foil
    • Infusible Ink
    • Paper and Cardstock
    • Pens and Markers
    • Other
  • Free cut files
    • See the free cut files
    • Get the free cut files
      • Get a password
      • Access the Library
  • Shop
  • Français
×
Home

How to add shadow to text in Cricut Design Space

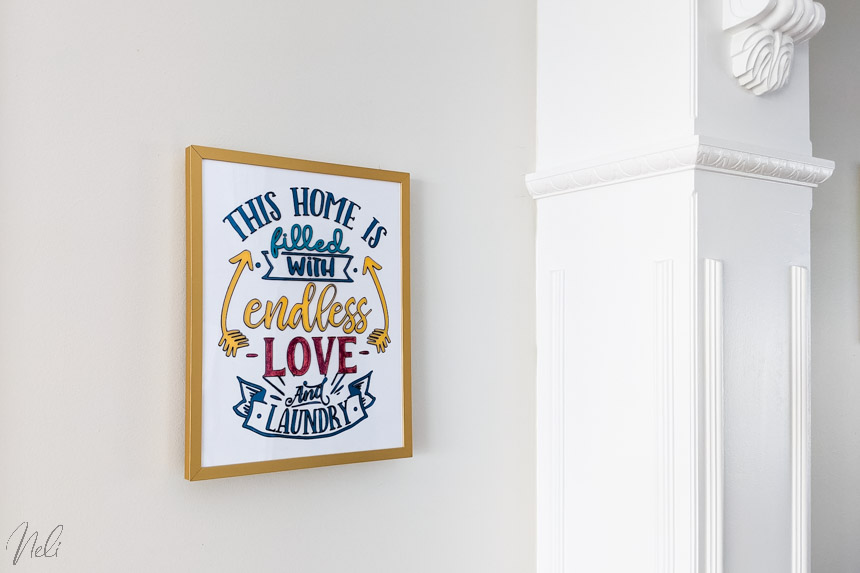
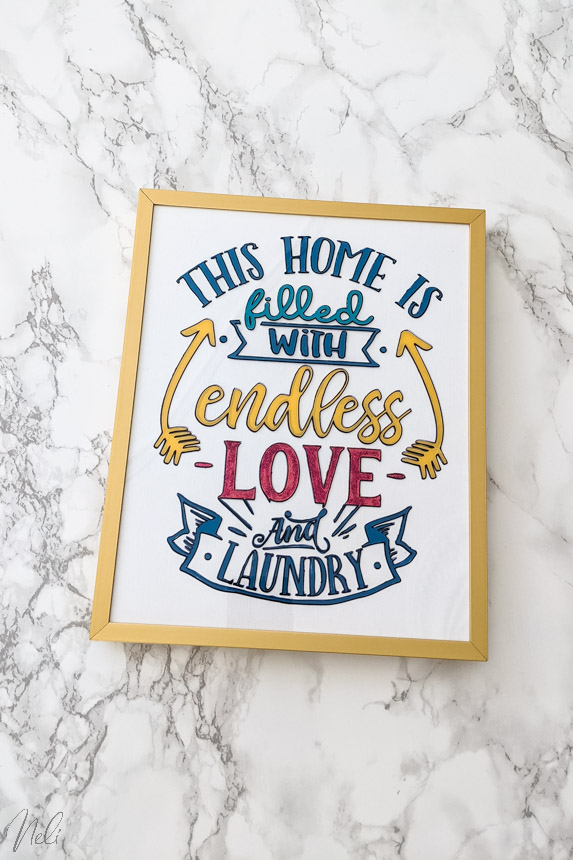
This post will show you how to create two types of shadow to your text using only the functions of Cricut Design Space.

There are several ways to enhance the text of your projects. Obviously, we immediately think of "Offset" which allows you to create a shape that outlines the text.

If you do not know the "Offset" function, head to this post that will give you all the details.

As for this post, it will show you another technique, that of creating shadows to improve your text.

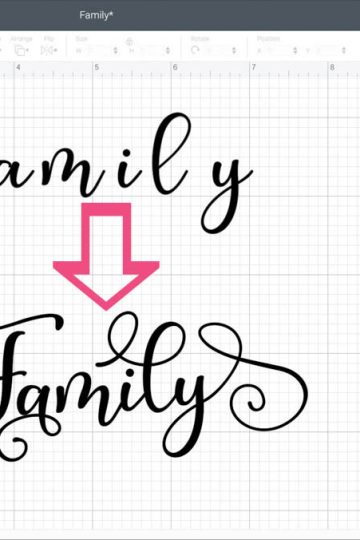
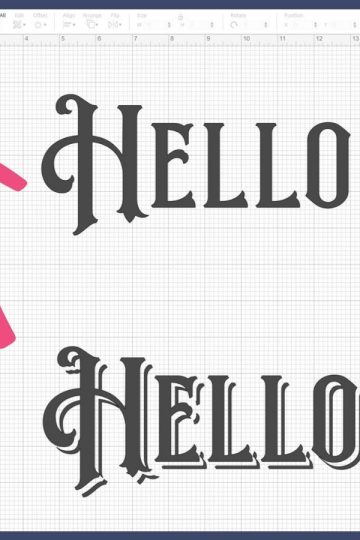
So I'll show you these two different styles:

Feel free to scroll to the bottom to view the video, if you prefer! This article contains links to affiliated products for your convenience and at no additional cost to you. Click here to read my full disclosure policy.

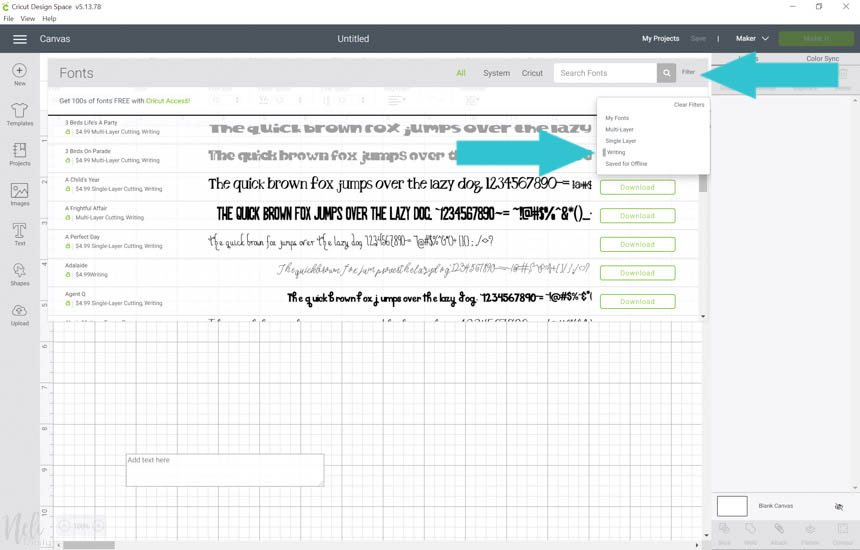
Fonts used in the video

  • Cricut Sans (Cricut Design Space's free base font)
  • NS emnhericans Vintage Pairing Fonts (seriously, I got this one at a discount price. Unless you absolutely want it, I do not advise you to buy it at full price!!!)

How to make a standard shadow

You might think that to achieve a standard shadow, you just need to duplicate your text. Yes and no.

It can work if you really don't mind the thickness of multiple layers.

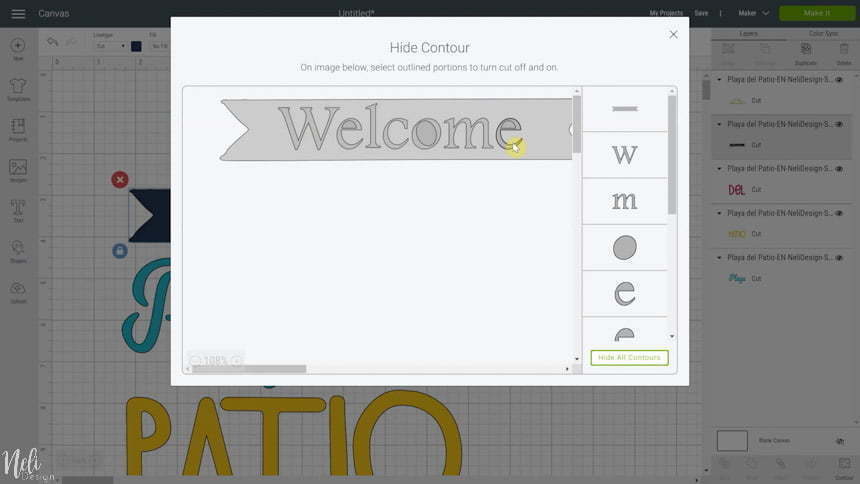
But if you want a uniform layer (maybe for HTV vinyl for example) you will want to Slice to get this kind of layer (see the selected layer below):

To make this cut, it will be necessary to duplicate the top layer (the pink one in this case) to have a total of three layers including the gray one.

Next, select the two pink layers and click on Align/Center.

While the two pink layers are selected, position them to get a shadow that you like.

Next, select one of the two pink layers and the gray layer and click on Slice.

You then observe four "Slice Result" at the very top in the layer panel. The two pink layers can be eliminated.

The only gray layer that should be kept is this one:

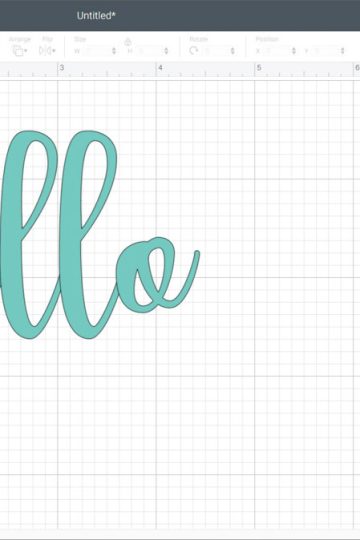
How to make a spaced shadow

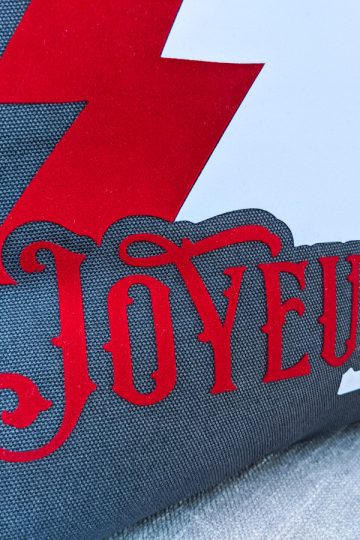
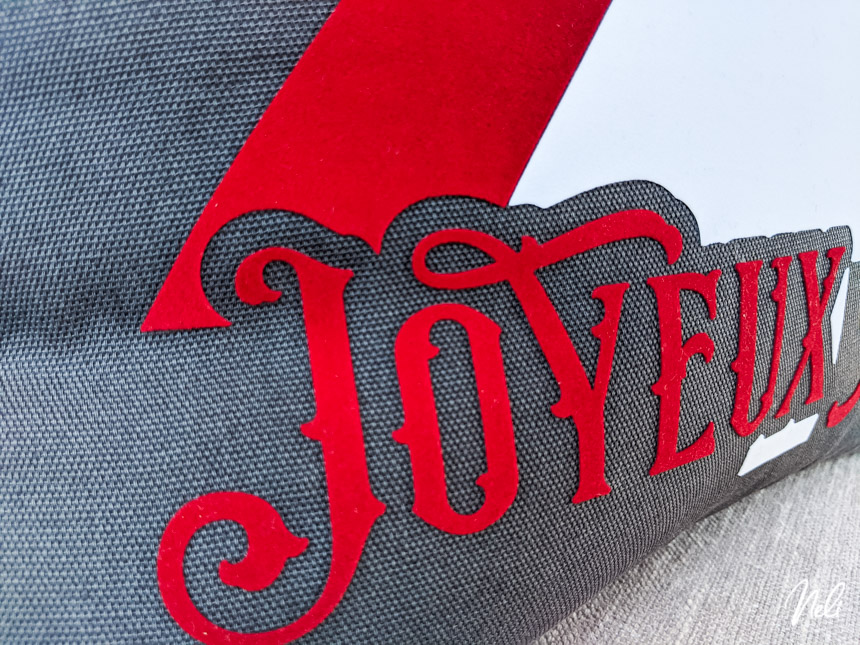
A "spaced" shadow (I don't know if there is an official term but I decided to call it that! 🙈) can give a completely different and original look to your texts.

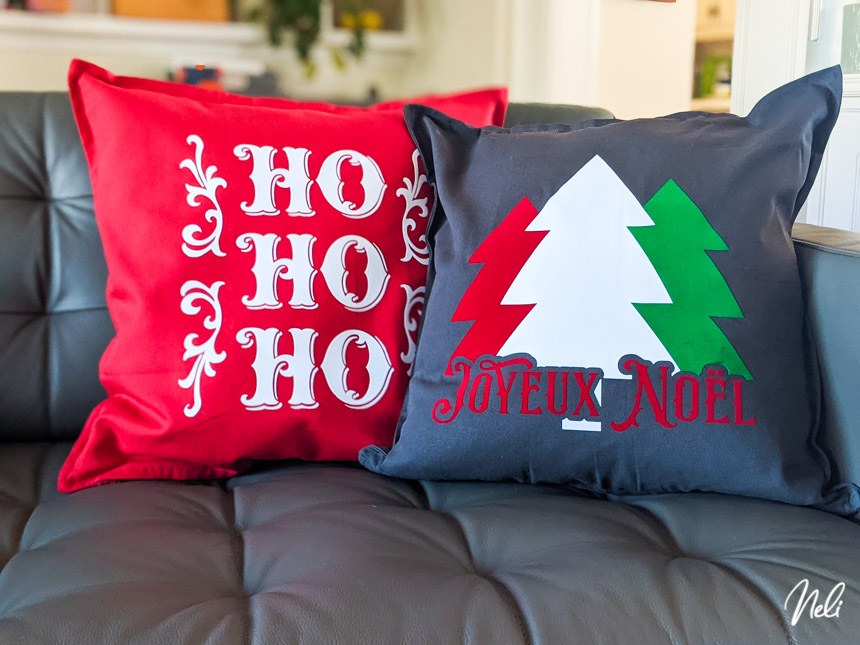
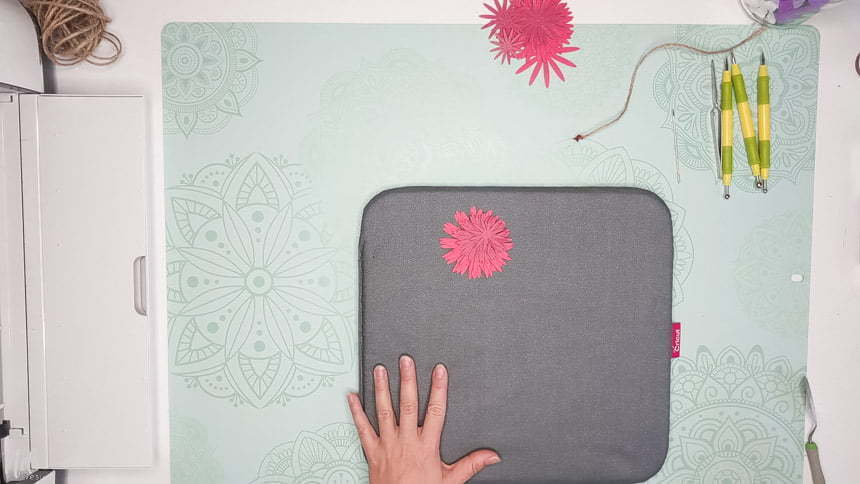
Using a font like NS emnhericans can give a Vintage look as on these flocked HTV cushions I made for Christmas:

Here's how to do it.

Start by typing the text and increasing the height to about 10 inches (25 cm).

Duplicate the layer twice for a total of three identical layers. Select all three and tap Align/Center.

Select the bottom layer and move it using the arrows on your keyboard. Five times to the right and five times down.

Then select the middle layer and move it with the arrows as well. Twice to the right and twice down.

Tip: To get an idea of what it can look like, change the colour of the middle layer to the same as the background of the canvas (in this case, white).

Close the "eye" of the top layer.

Select the two remaining layers and as with the standard shadow technique, click Slice. Keep only this layer:

Click the eye to open the closed layer.

Looking carefully, we see that some pieces overlap. To have a nice cut, you will have to select the two layers and click on Weld.

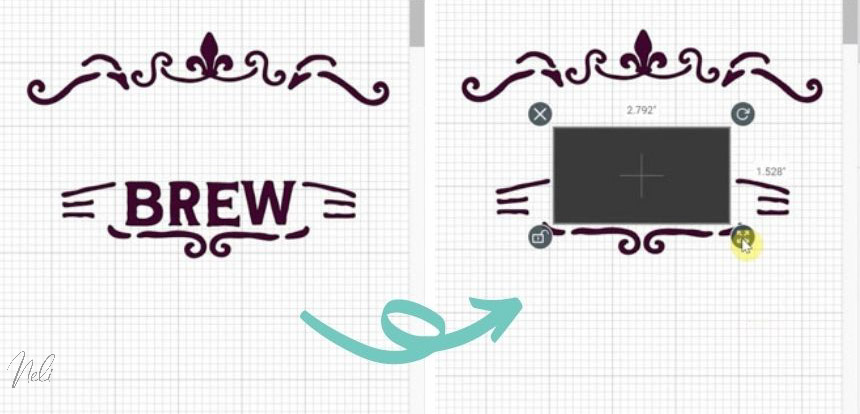
How much do objects move in Cricut Design Space when using the arrows on the keyboard?

When the arrows on the keyboard are used to move objects in Cricut Design Space, the increment is 0.1.

0.1 what? Well, that's the story! Whether you are in metric or imperial, the increment will be 0.1 centimetres or 0.1 inches respectively!

If we put the two side by side, it is not at all the same scale!

So if you try to do the tutorial by following my steps, you might not get exactly the same result as I did. The best thing to do is to make tests and adjust your project to your liking!

Why do I scale everything to 10 inches in height?

If you try the same process at the initial size of the text that you type in Design Space you will not end up with the same result.

Because the text is very small, the increment of 0.1 takes the layers too far apart. Try it yourself and you'll see!

If you prefer, see all the details in the video

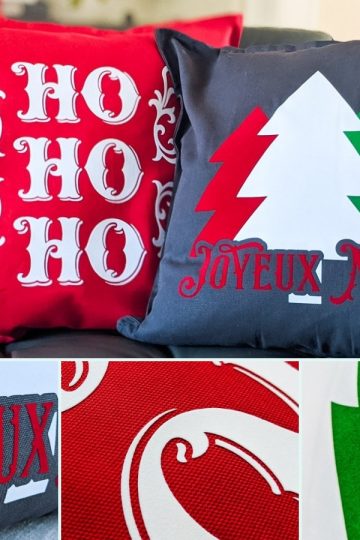
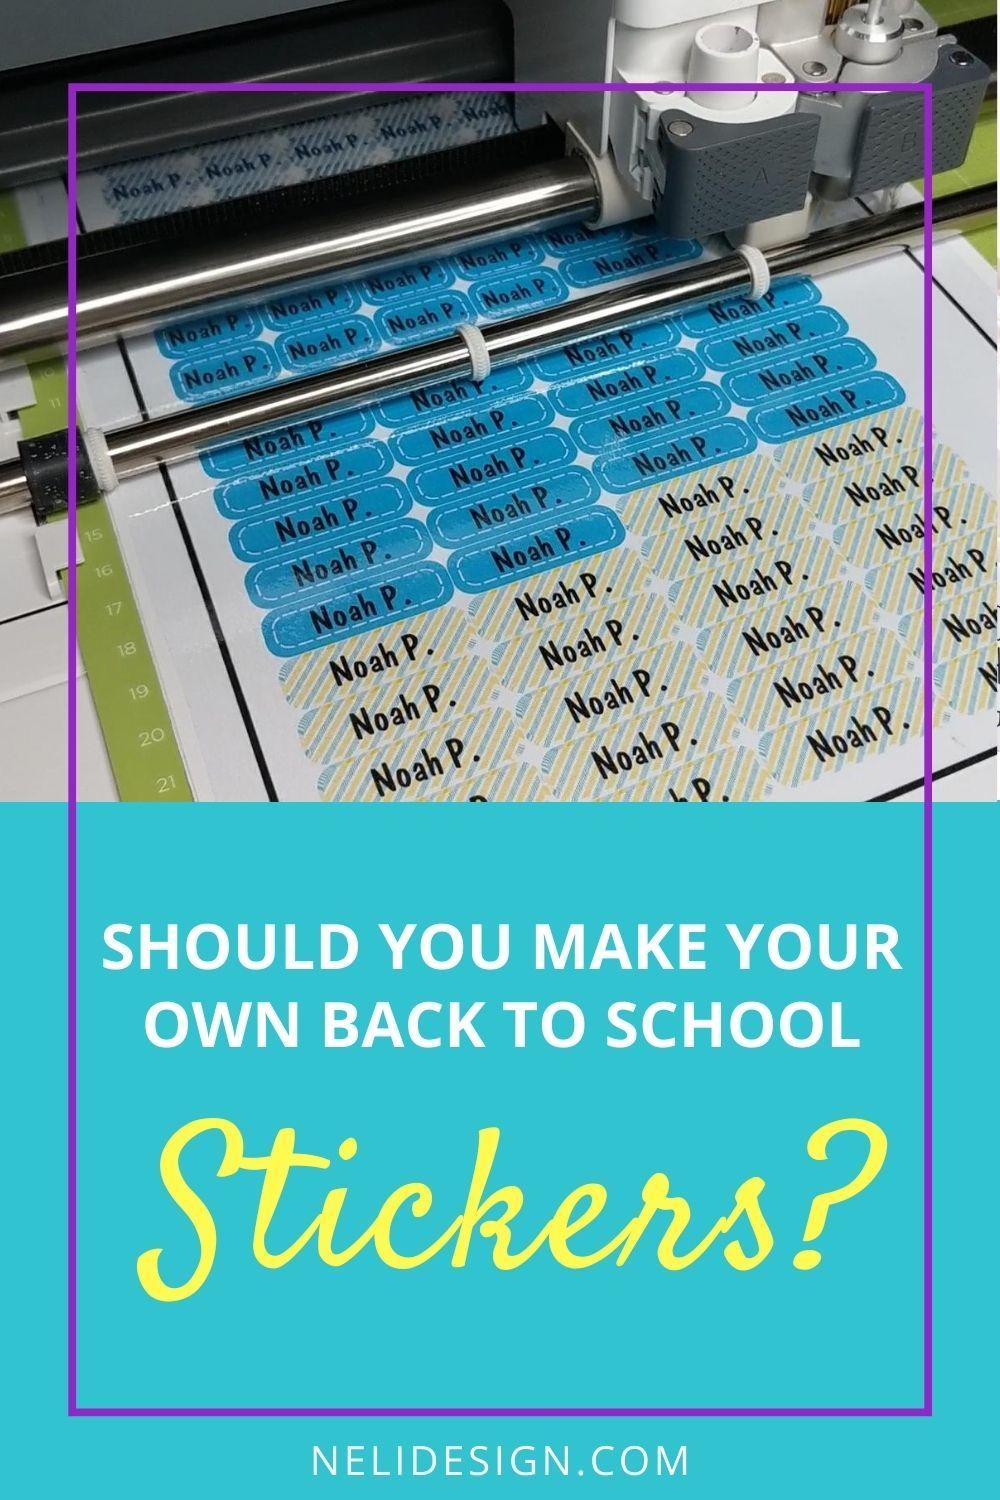
Pin to Pinterest to share!

The new Cricut Bright 360 lamp

This post will tell you everything you need to know about the new Cricut Bright 360 lamp.

Disclosure: Thanks to Cricut for providing me with the product for review. I am not paid or sponsored by Cricut to write this post. All opinions are 100% my own and honest.

This post contains some affiliate links for your convenience and at no extra cost to you. Click here to read my full disclosure policy.

If you are looking for the perfect lamp for your DIY projects, Cricut now has the solution for you!

Indeed, Cricut launches today its new Cricut Bright 360 LED lamp created and designed especially for all your projects! Whether it's for scrapbooking, sewing, model making, jewelry making or simply weeding and so much more!

In fact, I say ITS, but I should rather say THEIR, because yes, the lamp comes in two models, a table lamp and a floor lamp.

Image courtesy of Cricut

See more and do more!

If your work table is poorly lit and you tend to tear your eyes out on your projects, you'll appreciate all the features of both Cricut Bright 360 models:

  • LED lamp offering bright and uniform light, without shadows or hot spots.
Image courtesy of Cricut
  • A large and wide lamp head that illuminates up to 4 square feet of work surface (that's 4 Cricut 12x12 mat (30 cm x 30 cm) placed in the shape of a square!😮)
Image courtesy of Cricut
  • 4 points of articulation with counterweight allowing easy movement in all directions.
Image courtesy of Cricut
  • Dimmer allowing adjustment up to 1500 lux for the table lamp and 3000 lux for the floor lamp
  • A second dimmer allows the adjustment of the temperature (colour) of the light. Adjustable from warm (yellow, 2900K) to cold (white 5200K). To compare, the daylight is 4400K.
Image courtesy of Cricut
  • Colour rendering index at 95+ (in short, it means that instead of going under the sunlight to find out if it's navy blue or black you have in hand, you'll know it directly under the lamp! 😉)
Image courtesy of Cricut

Experience optimal lighting!

Both models of Cricut Bright 360 have an array of LED bulbs in the lamp head. These long-lasting LEDs have been tested to last more than 40,000 hours. (I did the math, it's 4.5 years if it stays on 24 hours a day!!! 😮) So no need to worry about changing the bulbs!

In addition, since they are LED lights, the lamp will never get hot. The lamp can therefore be handled easily by the head and moved in all directions.

Image courtesy of Cricut

As the Cricut Bright 360 offers equivalent light (and even more) to daylight (4000K), they are also the ideal lamps for taking photos and videos giving them a professional look!

Where and when can I get the Cricut Bright 360?

At the moment, the Cricut Bright 360s are only available in Canada and the United States and can be ordered as of January 27, 2022 on the Cricut.com website.

Technical details

Cricut Bright 360 Floor Lamp (placed on the floor):

  • Height (adjustable): 46" - 56" (1.2m - 1.4m)
  • Horizontal span: 31" - 39" (79 cm - 99 cm)
  • Lamp head diameter: 9.5 in (24 cm)
  • Base diameter: 10.5 in (27 cm)
  • Lighting area: up to 4 square feet (0.37 square meters) of work surface
  • Power cord length: ~71" (180 cm)
  • Weight: 14.8 lbs (6.7 kg)

Cricut Bright 360 Table lamp:

  • Height (adjustable): 16.5" - 27" (42 cm - 69 cm)
  • Horizontal span: 31" - 39" (79 cm - 99 cm)
  • Lamp head diameter: 9.5 in (24 cm)
  • Base Diameter: 8.5" (22 cm)
  • Lighting area: up to 4 square feet (0.37 square meters) of work surface
  • Power cord length: ~71" (180 cm)
  • Weight: 8.7 lbs (3.9 kg)

Which model to choose?

Well, only you can know! But here is some food for thought:

  • How big is your work table? Would you have enough space to add a lamp with an 8.5-inch (22 cm) base?
  • To enjoy the full movement of the lamp, I estimate that it will take a clearance of at least 12 inches (30 cm) behind the lamp (I am waiting for additional information on the subject). As in the photo above, it would therefore be better if the lamp was not completely against the wall.
  • Do not forget that in full extension, the lamp has a horizontal span of 39 inches.
  • If you think you can give it a double utility (I know that's what I have in mind!) take the floor lamp so you can rotate it, for example, between your work desk and a reading chair! 💡

The best Cricut deals for Black Friday for Canadians

The best black friday deals on Cricut and craft products for Canadians

This is where you'll find in one place all the best deals for Canadians on Cricut products and other related products for Black Friday.

During the week before Black Friday and until Cyber-Monday (November 29, 2021), I will list for you the best Canadian deals. This post will be updated frequently so come back often!

Since I'm a well-organized girl and don't want to ask you to reread everything every time, updates will be codified by colours 😆 Yes... that's totally me!! lol

  • Black Friday Updates Will Be Pink
  • Those of Saturday, Sunday and Cyber-Monday will be ORANGE

I want it to be easy to find what's available to you, Canadian friends

Subtly send the link of this page husband to your boyfriend/girlfriend/spouse/parent for an awesome Christmas gift (for you obviously!).

In addition, it will save them from the craziness of holiday shopping! This post contains some affiliate links for your convenience and at no extra cost to you. Click here to read my full disclosure policy.


Save on NeliDesign products and courses

Get 40% off on the lowest marked price of any NeliDesign's product and courses! Click here for full details


Important notes on the various sites

****Note that coupons and prices may vary depending on where you live. So your savings might not be exactly like mine. I always do my best to share honest and neutral information. I only recommend products and places I trust and use.

This year, Cricut has taken a big step in selling their products in Canada. At the beginning of the year Cricut products made a comeback in Walmarts across the country.

Recently, Best Buy, Staples and Indigo were added.

In addition, the prices on the Cricut.com site are now available in $CAD which makes it much easier to compare! Make sure to select "Canada" at the top right of the screen.

Cricut.com

NeliDesign is now Partner of Cricut. 🙌

So when you order for $50 or more of materials, accessories or supplies on the Cricut website (excludes everything that plugs in, the Cricut Access subscription as well as digital products) you get 10% off and free shipping (valid in Canada and the United States only) by using the promo code CRICUTP at checkout. $50 or more of materials, accessories or supplies on the Cricut website (excludes everything that plugs in, the Cricut Access subscription as well as digital products) you get 10% off and free shipping (valid in Canada and the United States only) using the promo code CRICUTP.

This discount is in addition to the 10% discount you already have if you are a Cricut Access member (see next paragraph).

From November 26 to December 1st:

  • Spend $100 and get a $20 coupon on your next purchase (this coupon will be sent automatically by email)
  • Free shipping on all orders, no minimum purchases!

Cricut Access

Did you know that when you subscribe to Cricut Access, you get an additional 10% discount on all your purchases at Cricut.com? Yes, on all purchases, even Cricut machines. Considering the subscription is around $13/month, it's worth subscribing even before you buy a Cricut! (Do the math. It starts to be advantageous as soon as your order is more than $130)

Not to mention all the projects and fonts to which you will have access!

You can also subscribe for a year (or ask for it as a gift!), the annual price will be a little more economical than paying monthly.

Finally, by signing up for Cricut Access (even for a single month) and using the promo code CRICUTP, you will save a lot of money on your orders and this is why Cricut.com often has the lowest price compared to other stores.

Methodology and delivery costs

The prices compared are in $CAD, before taxes and delivery costs and are those accessible online. I will not be able to inform you of the prices in store, unless indicated in a weekly ad. But again, prices may vary depending on where you live.

Comparative table of shipping costs

StoreDeliveryComments
Cricut.comFree shipping from November 26 to December 1, no minimum purchasesYou also get 10% off with promo code CRICUTP and an additional 10% if you are a Cricut Accessmember.
Amazon.caFree shipping for Prime MembersShipping costs vary by item.
Michaels.caSame day delivery for $14.99Alternatively, you can buy online and pick up in-store. It also seems that Michaels also accepts to equal the competitors' prices, but I've never tried.
Costco.caYou need to enter your address to see the shipping costsA Costco membership number is required. Costco only has exclusive Bundles that are difficult to compare with products from other stores. You can see them here.
Walmart.ca Free shipping on order over $35
Staples.caFree shipping, no minimum purchase required
Indigo.ca Free shipping on order over $35
Bestbuy.ca Free shipping on order over $35

Black Friday Deals

Shortcut to all discounts

  • Important notes
  • Get your promo code
  • Cricut Access
  • Cricut Maker
  • Cricut Explore Air 2
  • Maker & Explore Air 2 Bundles
  • Cricut Maker 3
  • Cricut Explore 3
  • Cricut Joy
  • Easy Press 2
  • Easy Press 2 Mini
  • Cricut Brightpad
  • Materials and accessories
  • Cricut mats
  • Foil tip
  • Cricut Tools
  • Vinyl
  • Cricut Maker tool
  • Design Bundles - Ultimate $1 Sale Event
  • Pen Adapters for Cricut
  • Design software

Which Cricut to choose

If you are looking for a Cricut machine, I suggest reading these 2 articles so that you are sure to get the machine that suits your needs:

  • Must-have Cricut supplies for beginners
  • Should you replace your Cricut with an Explore 3 or Maker 3?

Maker vs Maker 3 / Explore Air 2 vs Explore 3

Last June, Cricut launched the new Explore 3 and Maker 3. The "old" models are still available and in my opinion, unless you are someone who does very big projects or products in large quantities, the Maker and Explore Air 2 are high-performance machines that will totally meet your needs! Read this article for more details.

Enjoy the specials on the "old" models

The Cricut Maker AT AN UNPRECEDENTED PRICE until November 29th only!

  1. Cricut.com has the LOWEST PRICE EVER SEEN FOR THE MAKER (valid until November 29th only). And if you take Cricut Access for a month,you'll get an extra 10% off (and you have the choice of several colors)
  2. Amazon.ca comes in 2nd place

**Warning, see below because buying your Cricut in a bundle is really worth it!

The Cricut Explore Air 2 is already on special

  1. Cricut.com has the best price if you take Cricut Access for a month that will give you 10% off.

**Warning, see below because buying your Cricut in a bundle is really worth it

Buying a Bundle at Cricut.com, a good choice!

Often, it's really a good deal to buy a Cricut machine in a bundle. Cricut.com has many of them. I'll tell you which ones I think are the best. Here are the best deals I've found (remember that these deals will be updated periodically until Monday, November 29, 2021)

Bundles for Maker and Explore Air 2

For the Explore Air 2, the"Essential Bundle"is only $40 more than the machine alone. Or even better, I suggest the"Everything Bundle" for only $50 more than the machine alone!

For the Maker, as for the machine alone, the Bundles are at the LOWEST PRICE EVER SEEN (until November 29 only), the"Essential Bundle" is $50 more while the"Everything Bundle"is $70 more than the Maker alone.

Here are the differences between the two Bundles:

What's inside the Bundles
(besides the Cricut Explore Air 2 or Maker) - In pink: useful for heat transfer; in orange: adhesive vinyl.
Essential BundleEverything Bundle
Sample Iron-on Foil, BejeweledX
Everyday Iron-On Sample, EleganceXX
Metal Foil Adhesive Vinyl Sample, BejeweledX
Removable Premium Vinyl Sample, EleganceXX
Dry erase vinylX
Stencil vinylX
Chalkboad vinylX
Sample Poster Board, BejeweledX
Sample Cardstock Glitter, BrightsX
Sample Basic CardstockX
Transfer tapeXX
Set of 5 pensX
Scoring stylusX
X-Acto true controlXX
Cutting mat 12 x 12 (one green, one blue, one purple)XX
Basic tools (spatula, scraper, etc.)XX
Transportable slicerXX

Cricut Maker 3

  1. Cricut.com is $50 more than Amazon, but if you already have Cricut Access, it's cheaper for you
  2. Amazon.ca and all others

Cricut Explore 3

  1. Cricut.com
  2. Amazon and all the others

Cricut Joy

  1. Cricut.com (look even for a Bundle, it's worth it)
  2. Other stores except Amazon
  3. Amazon

Cricut Mug Press

  1. Cricut.com has the best price especially if you use the code "RUDOLPHSDEAL" to get $10 off

Easy Press 2

One thing I regret about buying my Easy Press 2 is to have taken a 9" x 9". At that time, I didn't think I would like heat transfer vinyl that much. But oh how wrong I was!

Since the Cricut has a 12" mat I should have taken the 12" x 10" from the start. You can see this article for more details.

So I looked at the prices of this size. In any case, the prices of the other sizes will be proportional.

  1. Cricut.com in addition, get $10 off the purchase of an Easy Press using the code "RUDOLPHSDEAL"
  2. The other stores are all more expensive and I don't even count the $10 discount

Easy Press 2 mini

  1. Cricut.com has the best price if you use the code "RUDOLPHSDEAL" to get $10 extra discount
  2. Amazon
  3. Walmart
  4. the others are much more expensive

Cricut Materials and Accessories

Note that almost all materials and accessories are CURRENTLY at 50% off on Cricut's website. Do not wait, products could quickly come out of stock.

Take advantage of this discount to fill up on infusible Ink blanks!

  • Coasters
  • Mugs
  • Pillow covers
  • T-shirts
  • etc.

Cricut mat

  1. Cricut.com has the best prices especially using the CRICUTP coupon
  2. Michaels is not far behind
  3. The other stores much more expensive

Foil tip

  1. Cricut.com has the best price especially using the CRICUTP coupon
  2. Michaels is not far behind
  3. Other stores

Useful Cricut tools

Gift ideas for less than $25

  • Basic tool set
  • Wedding tools
  • 12x12 mat for the Easy Press
  • Set of 30 Cricut pens

If you have the Cricut Maker

Take the opportunity to buy or to ask Santa for specialized blades and tips.

  • Scoring wheel (includes the QuickSwap housing, allowing you to buy only the tips of other kinds of tips).
  • QuickSwap housing (this link is the perforation tip but you'll also find other tips to emboss, engrave and cut wavy lines.)
  • Storage for tips, wheels and blades

If you are looking to get the knife blade, it is unfortunately out of stock at Cricut.com. You can find it on Amazon (watch out for copies) and at Michaels

Design Bundles Ultimate $1 Sale

Design Bundles' $1 Ultimate Sale will be held from November 26 to December 2nd.

WHAT IS THE ULTIMATE $1 SALE?

  • 18,000 + premium design resources for only $1 each
  • 6 days incredibly low price
  • 500 copies available of each item on sale
  • Unlimited copies available for Plus members (and they save 10-15%)
  • SVG, fonts, illustrations, sublimation designs, laser cutting designs, Procreate brushes, paper cutting file, embroidery patterns, models, mockups, icons, patterns, textures, add-ons and much more
  • Personal and commercial use license included
  • Lifetime Download Guarantee
  • No minimum orders. Order as few or as many products as you want
  • Once you've added an item to your cart, you've reserved your copy (don't forget to log in or register before the day)
  • Purchase with Store Credit and Save 10%
  • Unlimited customer support and technical support for all of our customers

As articles are limited to 500 copies, but unlimited for "PLUS" members, I suggest you subscribe for free to a 7-day trial (you can cancel your subscription at any time).

This will prevent you from having to rush through all the products and stress for nothing. In addition, you will have an additional 10 to 15% discount!

------ CLICK HERE TO ACCESS THE ULTIMATE SALE AT $1 -------

Pen adapters for the Cricut

You are looking to use several types of pens with your Cricut. See my article on this subject.

And that's good, Springbok Craft Supply, a small Canadian company, has free shipping on their great pen adapters for your Cricut.

Design software

Sure Cuts A Lot 5 is on special right now and if you had the idea to get it, I think it's a good time!

Silhouette Studio Business Edition Waiting for validation for a special. You can see the engraving I made thanks to this software and the engraving tip of the Maker.

Other deals?

You found other deals or have any questions, leave me a comment below.

Holiday Showcase

Celebrate the Holiday Season with this Holiday Showcase!

What's the Holiday Showcase?

The Holiday Showcase is 14 creators who have joined together to bring you the most beautiful projects for the holiday season.

No need to search everywhere on the internet. The Holiday Showcase is the place where you will find fabulous projects to inspire you.

Whether it's for decorating or gift ideas, all of these Cricut projects will blow your mind for sure.

Below every picture, you'll find the name of the creator.

Click on the picture or their name to go to their tutorial.

Happy Crafting!

How To Make Paper Poinsettia Flowers And Add Them To A Table Arrangement

Abbi Kirsten from AbbiKirstenCollections

Make Hanukkah Dreidel Menorah earrings with your Cricut

Amy Romeu of AmyRomeu.com

Make a Christmas church box cards

Nick of the Bearded Housewife

Christmas Village for Advent

Lucy of PaperGlitterGlue.com

Paper craft spinning ornaments

Bette Daoust of BettesMakes.com

Wood door hanger

Laurie Clayton of CraftRoomTime.com

Gift labels

Jen Swift of WellCraftedStudio.com

Christmas Explosion Box

Emily Minor of MinorDIY.com

Holiday Explosion Card

Jenifer Stahr of MyScrapMenagerie.com

Paper Christmas Wreath

Gjoa Crandell of Special Heart Studio

Hand Lettered Holiday Cards

Maira Vial of Vial Designs

Scrapbooking Christmas Cards

Molly Quach of MollyCreates.com

Fun and Festive Side-Egde Cards

Sarah from Craft with Sarah

DIY Christmas pillows with flocked HTV

And finally, my own tutorial! 😉

Natalie of NeliDesign.com

Join me on Facebook and tell me which one of the projects are you most excited about? Are you going to make any of them?

Pin it to your favourite Pinterest board

DIY Christmas pillows using flocked HTV

This tutorial will show you everything you need to know to make beautiful Christmas pillow covers using something that you might not know existed: flocked HTV!

I love pillows for decorating! You can swap the cover according to the season and it doesn't take any space at all to store them!

And this season, what better than flocked HTV to make cozy Christmas pillows?

Don't know what flocked HTV is? You can read all about it in this post.

But let's just say that Flocked HTV is not a regular heat transfer vinyl (or Iron-on). First, it is much thicker and therefore will raise your design giving it dimension.

But the best thing about Flocked HTV is the feel. To the touch, it feels like felt or velvet which makes the design look more professional than the vinyl-looking kind.

These pillows were so easy to make but look soooo professional.

So follow along with me, you'll see how easy it is! This post contains some affiliate links for your convenience and at no extra cost to you. Click here to see my full disclosure policy.

Materials and tools required

  • A cutting machine (I have the Cricut Maker, but the Explore Air or even the Joy can do the trick)
  • Fine-Point blade (regular blade that comes with the Cricut machines)
  • Weeding tools
  • Green Cricut Mat (standard grip)
  • Easy Press (I have the 12 in x 10 in, but any size can do the trick, see video for more information)
  • Easy Press mat (I have the 20 in x 16 in and I would never go back to the smaller ones!)
  • Heat resistant tape
  • Scissors
  • Pillow cover (I'm using Gurli pillows covers from IKEA)
  • Inner cushion 20 in x 20 in

I found some Flocked HTV on Amazon here:

  • Craftables Flocked HTV
  • Firefly Craft Flocked HTV (not available in Canada)

But as a Canadian, my choices were more limited.

That's why I decided to go with a trusted brand: Siser.

Their flocked HTV is called Stripflock and comes in a variety of colours. From what I also learned, it is the only flocked HTV that can be layered and not only as a top layer but also on top of other Stripflock (although, since it's already thick, I'm not sure how it would look...).

If you're in Canada and want to buy the Siser brand too, I strongly recommend shopping at ScriptDesigns.

SVG cut files

The "Ho! Ho! Ho!" design I'm using comes from this bundle that I bought on Design Bundles made by Caluya Design: BIG!! Vintage Christmas Sign Making SVG Bundle Vol.2

If you prefer to use the "Joyeux Noël" design (that I also have in English), I'll have it free for you in my resources library

How to make custom Christmas pillows using Flocked HTV

If you prefer to follow along in a video (and learn a lot of tips and tricks at the same time) check out this video!


This post is part of the Holiday Showcase!

The Holiday Showcase is 14 creators who have joined together to bring you the most beautiful projects for the holiday season. Check out this post to see all the other beautiful creations


How to cut flocked HTV with your Cricut and apply it with your Easy Press

Step 1: Upload the design into Design Space

In Design Space, click on the upload button and get the SVG cut file where you've previously saved it.

Step 2: Change the size

Making sure the padlock is locked, change the size of the design. I went with the maximum height a Cricut 12 x 12 mat can make: 11.5 inches.

Step 3: Don't forget to Attach

While everything is selected, click on "Attach".

Step 4: Make it!

Click on "Make it". Flocked HTV is like any other HTV and will need to be mirrored. In the "Prepare" window, don't forget to toggle the "Mirror" button.

Step 5: Choose your setting

Did you know that Design Space already comes with a predefined setting especially for flocked HTV? 🙌

Click on "Browse All Materials".

Type "Flocked" in the search bar. You'll find "Flocked Iron-On". Select it and click on "Done".

Tip: When you come to this window, make sure to read everything that's written there!

I know, I know, I'm excited too when I get there and want to make the cut right away! But believe me, you'll be happy for these reminders:

  • Make sure Mirror is turned on
  • Material is shiny side down
  • Load the Fine-Point blade in Clamp B.

Step 6: You're ready to cut

Place the Flocked HTV shiny face down (well, shini-er face down!!) on your green Cricut mat. Insert in your Cricut and push the Go button!

Step 6: Weeding

Remove the HTV you don't need. You can use your weeding tools for the smaller pieces but this design is big enough that you almost don't need them.

Step 7: apply flocked HTV with your Easy Press

You should always check the brand's recommendation to know the heat setting for your Easy Press.

As for Stripflock, Siser recommends 320°F (160°C) with medium pressure for 15 seconds.

Since my Easy Press wasn't big enough, I heated it in two sections.

Step 8: Remove the backing

Now, I won't underline this enough!!! Siser recommends a COLD peal. If your flocked heat transfer vinyl is not sticking, the reason might be that you're not patient enough! 😉

Remove the Easy Press mat from under the pillow and really make sure it's cold to the touch before removing the backing.

Why you might need heat-resistant tape

I added heat-resistant tape to the material list because the flocked HTV makes the backing less sticky.

I was ok with the white, but if you're using other colours (like I did for the other pillow) you might need to use heat-resistant tape to secure your design in place.

If you want more details on how to use flocked HTV, check out this post.

Don't forget to also watch this video to have all the tips and tricks about flocked HTV!

Don't forget to pin this to your favourite board!

How to etch glass with your Cricut

This post will tell you everything you need to know about glass etching and how to use your Cricut to help you achieve awesome projects!

Glass etching is a cool permanent way to personalize all kinds of transparent dishes, pots and glasses. And the best part is that using your Cricut to do so can make this technique so easy.

How to etch glass?

Now it's important to note that the Cricut will not etch the glass. Even the Cricut Maker with the engraving tip will not be able to etch glass.

This glass etching technique is achieved using etching cream. Therefore, your Cricut will be used to make a stencil to apply the etching cream in order to make patterns and designs.

What is etching cream?

Etching cream is a cream that is specifically made to remove tiny bits of glass and therefore roughen the texture leaving a frosted look and coarse feel to the touch.

Is etching permanent?

That's the primary reason why you would like to etch glass: it's permanent and therefore dishwasher safe!

What surfaces can you use etching cream on?

Not all glass is created equal and you might not always have the same results on different types of glass. The best thing to do is to test it on a similar object before if you can.

Pyrex glass also seems to have different results. I found that it depends if you have an old Pyrex plate or a new one. New Pyrex seems to work better for etching. Again, testing is recommended.

How to etch curved surfaces like wine glasses?

Flat surfaces and cylindrical shape glasses are the easiest to make.

If you're looking to etch a wine glass, for example, try to find a simple design. Avoid designs that have a closed shape like a circle, square, etc. You'll never be able to apply it properly and the shape will then be distorted.

If you look at the image below, you should avoid the left one and instead go for a simpler image like the one on the right.

Because seeing is worth a thousand words, here's a short video I've made showing my best technique to apply vinyl (a stencil) to a curved surface.

What is the best vinyl to use for glass etching?

Honestly, the best vinyl to use as a stencil is the vinyl you have on hand and you think you will not use for a project. It can be either removable or permanent adhesive vinyl, it doesn't really matter.

The vinyl I'm using here is a leftover of Cricut removable vinyl and it worked like a charm!

Glass etching Step by Step

This post contains some affiliate links for your convenience and at no extra cost to you. Click here to see my full disclosure policy.

Materials and tools needed

  • Cutting machine (I have the Cricut Maker, but any other cutting machine can do. The Explore or even Cricut Joy can be used)
  • A glass object of your choice. In the video above, it's these IKEA wines glasses.
  • Leftover adhesive vinyl (removable or permanent)
  • Transfer paper
  • Etching cream (I used Rust-Oleum Speciality Tub & Tile Etching Cream but a lot of people use Armour Etch)
  • Small paint brush or popsicle stick
  • Scraper
  • Weeding tools
  • Parchment paper
  • Painter's tape
  • Old newspapers
  • Gloves
  • Security glasses
  • Paper towel
  • Rubbing alcohol
  • Scissors

Why did I choose Rust-Oleum instead of Armour Etch?

I honestly couldn't find Armour Etch anywhere. Well, at least not at a reasonable price! The best I found to be delivered to Canada was $26 for 10 oz (295 ml) + shipping. That's why I decided to take my legs and go to Home Depot and buy Rust-Oleum that was around $40 for 948 ml!!!

And just to help you, here's a picture of the Rust-Oleum Cream so you know how big is the container, because, confession, I've searched Home-Depot a lot before finding the container (even though I knew in what aisle it was!!). I don't know why but I was looking for something bigger!!!

If you don't know that hack on how to know exactly where something is at Home-Depot, check out this short video from my friend Lindsay, from A Butterfly House.

Although it does contain so much more than what I'll ever be able to use in a lifetime!! Buy it with your friends if you can!

Step 1: Cut your design with your Cricut and weed it

For this step, I strongly suggest that you make sure your letters are big enough. Look especially at the centers of the letters, like the hole of an "e". If they are too small, the etching cream might seep under it or you might just lose it when you transfer it to the glass.

Confession: this happened to me. Sometimes, you just have to let it go. We were still able to read it perfectly.

To weed, you'll need to remove everything that will be etched. In this case, all the letters needed to be weeded (I found blue letters everywhere for weeks after that! 🤣)

Step 2: Apply transfer paper

Cut a piece of transfer paper the size of your design and apply it to the vinyl using your scraper.

Step 3: Remove the transfer paper

Remove the transfer paper by pulling it perpendicularly as shown in the image below

Step 4: Apply Parchment paper

Cut two pieces of parchment paper and apply it to the sticky side of the vinyl, leaving a small space in the middle.

Step 5: Apply the vinyl on the glass

Use a paper towel and rubbing alcohol to wipe the glass clean.

Apply the vinyl. The parchment paper will enable you to move your vinyl until you are satisfied. When you are, press in the middle, so that the vinyl sticks to the glass.

Remove the right side of the parchment paper and cut between the words with scissors so the design can lay as flat as possible. Do the same thing for the left side.

Remove the transfer paper and make sure the vinyl lays flat on the surface, especially where the letters are. You'll want to flatten any crease you see to make sure the etching cream doesn't leak under the vinyl.

Step 6: Protect the glass

Add painter's tape around the design and cover the rest of the glass with newspaper. This is not mandatory, but I know how clumsy I can be and wanted to make sure not the etch something I wasn't supposed to!

Step 7: Add the etching cream

Make sure to use safety glasses and gloves. I used a popsicle stick to apply the cream. Make sure you cover all your design with a thick coat.

Leave it for 20 minutes.

When the time's up, you can put back the overflow of the etching cream into the container. Then wipe as much as you can with a paper towel.

Rinse it under running water and remove the newspaper and vinyl.

Step 8: Don't panic!!!

You might see these white spots appear. Just finish removing all the vinyl and rinse the glass again. They will dissapear.

How long should I leave glass etching cream on?

As I said, you definitely should make a test before if you can! I found that for the Rust-Oleum product, 20 minutes seems to work every time.

If you leave it for less than 20 minutes, you'll have an uneven frosted surface.

On the opposite side, leaving it for more than 20 minutes (I went up to an hour), didn't make the etch better or worse.

What's the difference between Armour Etch and Rust-Oleum?

Now, I haven't used Armour Etch Cream and therefore, this is only what I think.

Armour Etch seems to take less time to etch. I saw people recommend 3-5 minutes. This leads me to believe that the Armour Etch could be more corrosive? Maybe. Maybe not.

I know that the Rust-Oleum doesn't have a strong odour. If you have used Armour Etch and have an opinion on this, please leave me a comment below.

The Rust-Oleum is made for "Tubs and tiles" and therefore for large surfaces. Armour Etch specifies "Not recommended for etching large areas of glass over one inch by one inch".

I hear I need to keep the cream moving (brush it non-stop)

I've tried it both ways with the Rust-Oleum cream and brushing it doesn't make a difference at all. Just leaving it on for 20 minutes worked perfectly.

That seems to be a recommendation for Armour Etch Cream.

How to make etched glass stand out

Glass etching will stand out by itself if your glass is clear and you have something of a darker shade inside. It might not be the best idea to use this technique, let's say, on a jar of flour 😅

I've also seen other tutorials where they added Rub N' Buff to add colour to the etch but I have yet to try it! If you do try it, make sure it doesn't come in contact with food or the mouth since it's toxic!

Are you going to try glass etching? I hope this tutorial helped you gain the confidence to do it!

Don't forget to Pin it!

What is flocked HTV and how to use it with your Cricut?

Wondering what's the difference between regular HTV and flocked HTV? Want to know what to do with it? I have everything you need to know to be inspired and get started with confidence!

What is flocked HTV?

Flocked HTV is not a regular heat transfer vinyl (or Iron-on). First, it is much thicker and therefore will raise your design giving it dimension.

But the best thing about Flocked HTV is the feel. To the touch, it feels like felt or velvet which makes the design look more professional than the vinyl-looking kind.

Where can you get flocked HTV?

You can buy this kind of vinyl on multiple sites especially if you're in the U.S.

This post contains some affiliate links for your convenience and at no extra cost to you. Click here to see my full disclosure policy.

I found some Flocked HTV on Amazon here:

  • Craftables Flocked HTV
  • Firefly Craft Flocked HTV (not available in Canada)

But as a Canadian, my choices were more limited.

That's why I decided to go with a trusted brand: Siser.

Their flocked HTV is called Stripflock and comes in a variety of colours. From what I also learned, it is the only flocked HTV that can be layered and not only as a top layer but also on top of other Stripflock (although, since it's already thick, I'm not sure how it would look...).

If you're in Canada and want to buy the Siser brand too, I strongly recommend shopping at ScriptDesigns.

On what base material can you apply flocked HTV?

You can really apply flocked HTV on multiple projects. You should always check the manufacturer's instructions to make sure. As for Siser Sripflock, you can apply it to:

  • 100% cotton
  • 100% polyester, elastan
  • Poly/cotton blends (not for dye sublimated fabrics)

How to cut flocked HTV with your Cricut?

Once you're ready to cut your design, you'll want to make sure you don't forget to mirror your image.

Like any other HTV vinyl or Iron-on, you'll need to put the shiny side down (because the shiny side is actually the carrier sheet).

Cricut Design Space setting for flocked HTV

This one is going to be pretty easy! There's a custom setting especially for flocked HTV right in Cricut Design Space!

If you have a Cricut Explore Air with a dial, use the Custom setting and follow along in Design Space.

Click on Browse All Materials

Type "Flocked" in the search bar and select "Flocked Iron-On" and click Done.

Always carefully read this window before cutting. It will remind you if you need to do anything specific. In this case, as mentioned before, Design Space is warning you to Mirror your design and place the material shiny side down.

If you forgot to mirror, you can click on "Edit" on the left and mirror the design from there.

You can also see that only the Fine-Point Blade is required (which is the regular blade of the Cricut).

This setting worked perfectly for the Siser Stripflock I was using. But it might vary depending on what brand you're using.

Note that you should always make a test cut, especially when you're using a new material. Nobody likes to waste precious and expensive materials. Click here to learn how to easily make a test cut.

Heat Press setting for flocked HTV

You should always check the brand's recommendation. As for Stripflock, Siser recommends 320°F (160°C) with medium pressure for 15 seconds.

They also specify to wait until it's cold to the touch to peel. You absolutely need to follow this. If you try to remove it while it's hot, there's a good chance it will come off.

Make these Christmas pillows with flocked HTV

You could make so many things with this soft material.

It has especially inspired me to make these cozy Christmas pillows.

I have the free "Joyeux Noël" SVG cut file for you (I will also have the "Merry Christmas" version if you prefer!)

If you're looking for the "Ho Ho Ho" SVG cut file, you can find it here.

Subscribe to my newsletter so you don't miss a thing! If you do, I will send you this free Cricut Blades, wheels and tip cheat sheet and also give you access to a library full of free SVG cut files including the "Joyeux Noël / Merry Christmas" file!

Don't forget to Pin it to your favourite Pinterest board!

How to use Weld in Cricut Design Space

See what you can do with the Weld function in Cricut Design Space and learn how to use it with objects and text.

What does Weld do on Cricut?

The weld function does exactly what its name says: it joins (welds) two completely different objects together to form one single object that will be cut continuously.

Where is the Weld tool in Cricut Design Space?

You can find the weld button at the bottom right of the Canvas.

There are a lot of other functions there and if you're confused about them all, don't hesitate to download my free cheat sheet that will make everything clear for you!

How to weld objects

Check out the video to have all the details and subscribe to my channel so you don't miss anything!

In the example below, I want to weld the rectangle with the two circles so that they are cut as a single object. To do so, I must select the three layers by holding the "shift" key and pressing "weld".

Unlike Slice that only permits using this function on 2 layers at a time, it is possible to use weld on several layers at once.

It is even possible to weld objects that do not touch.

This is really useful if you want to slice several layers with another layer. If you use Weld before on the group of layers, they will be merged into only one layer and therefore, you'll be able to slice it in one single action which will save you a lot of time!

How to unweld

Unfortunately, Weld cannot be undone. The only way to unweld is to use the "undo" button to go back. That's why I always recommend making a copy of your design before welding.

The importance of Weld with text

Since the arrival of "Kerned fonts", Weld is less useful when it comes to writing with script fonts (cursive letters).

But, if you want to use a font that is not kerned and uncheck the box below, you'll still need to use Weld in order to have your words cut in one single piece.

You can reduce space by using "Letter spacing" but it's never equal and exactly what we want.

You'll need to do what we needed to do E-VE-RY time before kerned fonts arrived. That is to arrange letters one by one by clicking on "Advanced" and "Ungroup to letters".

That way, you will end up with one layer per letter and you'll be able to move them individually.

But that's not all! If you just "Attach" the letters, your Cricut will cut the letters separately. When I change the letters to pink, you can clearly see that they are not joined together.

That's why you'll need to select all the letters and press "Weld".

As shown below, the word "bonjour" will now be cut as a continuous object.

Troubleshooting

The Weld button is greyed out and I can't use it

To be able to use Weld, you need to select at least 2 objects (layers). You can do this by holding the "Shift" key on your keyboard and selecting the objects on your canvas or the layers in the layer panel. If you're using the app, long-press on the shape you want to add to the selection.

The letters get filled when I weld text

This is a bug in Design Space.

If you want to fix it here's a trick: scale everything you want to weld to see it better. Adjust the spacing between the letters (move apart the letters that are being filled)

Click on Weld. Are the letters ok? They should be!

Curious about the Christmas ornament I was designing in the video and at the beginning of this post?

You can see the full tutorial on How to make a balsa wood Christmas ornament here.

And don't forget to Pin it!

Image Pinterest written how to use weld in Cricut Design Space.

How to edit an SVG file in Cricut Design Space

Only using Cricut Design Space

In addition to being able to edit and customize your files, with this technique, you can even change the text of the majority of SVG or Cricut Access cut files.

This post contains some affiliate links for your convenience and at no extra cost to you. Click here to read my full disclosure policy.

Whether it's an SVG file that you upload to Cricut Design Space or a file from Cricut Access, sometimes you want to modify and customize it.

Why modify an SVG file?

There are several reasons that may lead us to want to modify a cut file. Often, not all elements are on separate layers and are therefore "attached" together.

In this image, each colour represents a layer.

Thus, the branches of the trees and the small dots of the same colour are on the same layer.

One might want to customize this design by removing or adding elements like this:

One could modify the cutting file to use part of the design, like this:

And what is most interesting is to change the text by something else entirely (in this case, I changed it from English to French)!

One might want to modify the image to change its colours (and thus cut it into several colours or materials).

In fact, for whatever reason, the ability to edit an SVG file and make it to your taste opens up a bunch of possibilities.

And the most interesting thing is that it is possible to edit an SVG file directly in Cricut Design Space!

Two main ways to edit an SVG file in Cricut Design Space

Want to edit a file, but some elements are on the same layer and you can't separate them? Here are two ways to easily edit an image in Cricut Design Space.

Edit SVG file with the "Slice" function

The "Slice" function can be used when what you want to remove from the image (or keep) can easily be covered with one of the shapes available in Design Space.

For that, we select the shape and image and press "Slice".

We then end up with four layers.

You only need to delete the ones you don't want to keep.

It is important to note that only two layers can be cut at once. But, I do have a trick to help you go faster.

Select all the layers you want to slice (except the shape that will be used to slice). Click on "Weld" so that all the elements end up on a single layer! All you have to do next is select this layer and the basic shape and use Slice.

If you want to learn more about the "Slice" function, check out my full article on the subject by following this link.

Edit a cut file with the "Contour" tool

The "Contour" tool is super convenient, but I must admit that it is very confusing.

Grey, pale grey, medium grey, selected, not selected 🤯😨, I often have difficulty seeing clearly!!!

The idea is to remove everything you don't want (hide the contours) by selecting the elements to remove.

Which tool or function is best to use?

Wondering if you're better off using Slice or Contour to modify an SVG cut file in Cricut Design Space? Well, it depends on what you want to change.

Verify that the items to be removed are easily identifiable in the Contour window.

If you think you'll have to pull your hair out to get there, use Slice.

On the opposite, if the shape is very sinuous and it is practically impossible to easily cover it with a basic shape, use Contour.

🙌

And if all these functions give you a headache, do not hesitate to download my free cheat sheet to clarify everything!

Have you ever modified a file to make it to your taste?

It opens the door to a lot of possibilities! Have a good time!

Don't forget to pin it to your Pinterest board!

When to use Flatten to Print and Cut

Cricut Maker 3 Print and Cut

In this article, I will demystify the famous "Print then Cut" and explain exactly when you need to use the "Flatten" tool.

It is not easy to know that "Flatten" is directly related to the "Print and Cut" feature because you don't always need to use it.

What is "Print and Cut" on Cricut?

"Print and cut" is a feature available in Cricut Design Space and with your Cricut (although it is not available for the Cricut Joy).

And no, it's not your Cricut that prints, but your printer. Don't worry, we've all asked ourselves the question at one time or another! 😉

The purpose of using "Print then Cut" is to print an image with your printer and then have it cut by your Cricut. This function is often used to make stickers for example as you can see in the photo below.

If you want to know at all times and at a glance what each function of Cricut Design Space does, download my free cheat sheet. In a few minutes, you will receive it by email!

This post contains some affiliate links for your convenience and at no extra cost to you. Click here to read my full disclosure policy.

Which Cricut can "Print and Cut"?

As mentioned above, the Cricut Explore Air 2, Explore 3, Maker and Maker 3 have the ability to "Print and Cut". Only the Cricut Joy does not have this feature.

Important information to note: Only the Explore Air 2 does not have the ability to "Print and Cut" on coloured cardstock.

How to print and cut with your Cricut?

The idea is to use Cricut Design Space to send an image to your printer (colour or not).

When printing, Design Space will include a black frame on the printed image, like this:

Then, you'll need to put the print on the cutting mat and the Cricut will cut around the image.

It will know exactly where to cut the image by "reading" the black frame using its sensor. Notice here the light of the sensor that makes the reading:

Detailed video

Watch the following video to understand all the details of the "Print then Cut" option and know how and when to use "Flatten".

Print and Cut a JPG or PNG image

Check out the following post to know the difference between a JPG and a PNG and when to use them. It will also explain exactly the difference between a JPG, PNG, SVG, etc.

When you import a JPG or PNG image file, you find yourself in front of this window:

This is when you will inform Design Space if you only want the shape of the image (to cut it out of coloured cardstock for example) or if you want to keep all the beautiful colours of the image to be able to print it.

Small note here: I have already made a post on How to turn an image file into a multilayer cut file. Feel free to check out this post if that's what you're looking for!

Print and Cut an SVG cut file

An SVG file is a file composed of one or more layers. These layers are automatically set to "Basic Cut" by Design Space since the latter recognizes them as a file to be cut.

If you want to transform an SVG file into an image to print and cut, you will have to inform Design Space by selecting the layer and going from "basic cut" to "Print Then Cut/Standard" in the operation menu.

But, it is not frequent that we want to directly use an SVG file to print it and cut it.

Imagine this little dog cut out of vinyl and applied to my dryer. Would it be worth it to print the black and cut every little piece? I don't think so!

The ideal would be to add a background so that the Cricut only cuts the outline. This is where "Flatten" comes in handy!

When should Flatten be used?

You should use Flatten when you have more than one object (or more than one layer) on top of the other and you only want your Cricut to cut the outline (think of a sticker for example).

Or simply if you want to add a background to your image so that the Cricut cuts only this background (as in the example of the small dog above and in the video).

If it's the case, you will select all the layers and simply click on "Flatten".

Be careful, once the layers are flattened, you will not be able to change their colours!

Troubleshooting

I don't see the outline of my image when I press "Make It"

It's totally normal to not see the white border of your image when you preview your mat. Cricut Design Space assumes that you are printing on white cardstock. Thus, you will only see what requires ink from your printer.

The cut is not accurate and there is an offset between the image and the cut

You probably need a calibration. In the menu at the top left (3 lines), click on "Calibration".

Then select "Print then Cut" and follow the instructions.

Design Space "loads" non-stop

It may be that your computer is not powerful enough or that there are too many images to print and cut at the same time and design Space cannot manage them.

You can either try to reduce the quality of the images to a minimum before importing them into Design Space or reduce the number of images you print and cut at the same time.

My Cricut is not able to read the black frame

This can happen for a variety of reasons:

  • It may be too dark or too bright in your room and the Cricut has difficulty "reading" the black frame. Solution: Change the intensity of the light in your room.
  • Your paper is too shiny. Solution: also change the intensity of the light or, retrace the black frame with a permanent marker.
  • You have printed on coloured cardstock. Solution: Only the Maker, Maker 3 and Explore 3 are able to "read" the black rectangle on coloured cardstock.

I have a warning next to my image in the layer panel

And when I press "Make It", it says "Project incompatible. This project is not supported by your current machine selection. To resolve, select OK and adjust affected layers."

In fact, what you need to know is that the Print and Cut feature is limited to 6.75" x 9.25" (17.1 cm x 23.4 cm).

If you click on the small warning icon in the layer panel, the information is clearer.

My images are distorted when I print

Wondering why the outline of your images "thickens" as shown in the image below?

Well, that's completely normal. This is to leave a margin to the Cricut during cutting and thus allow a cleaner edge.

This setting is controlled by the "bleed" button that can be found in the print window:

So you can toggle it off, but I advise you to keep it. Once your sticker is removed from the paper, your image will be like the orginal:

Other "Print and Cut" projects

You can really do a lot of fun projects with the "print and cut" feature. Here are a few others that might interest you:

  • School Labels
  • Valentine's Day notes
  • Separator tabs to organize DVDs

Don't forget to download the Free Cheat Sheet to help you see clearly the 5 main functions of Cricut Design Space

Please Pin It!

Engraving Speed Test: Maker vs Maker 3

Maker vs Maker 3 for engraving

You already know that the Maker 3 is faster when cutting Smart Materials only. But what about engraving? Well, that's what I tested!

Although Cricut mentions that there is no difference in speed for other materials, I still wanted to test it myself. And I'm telling you, you will be surprised at the result for sure!

Before we start, it's important to take note of some other important differences.

This post contains some affiliate links for your convenience and at no extra cost to you. I get commissions for purchases made through links in this post. Click here to see my full disclosure policy.

Differences between Maker and Maker 3

The Maker 3 is the latest model of the Cricut and the most powerful of all the Cricut machines.

The main difference between the two cutting machines is that the Maker 3 can cut without a mat allowing you to cut up to 12 feet (3,6 meters).

Matless cutting is possible only when using Cricut's"Smart Material". The use of this material also allows the Cricut Maker 3 to cut twice as fast as the original Maker.

To learn more, check out this post where you'll find all the details.

Although Cricut mentions that there is no difference in speed when using the other materials, I wanted to test it myself!

Other important differences

Before I do the test, I want to show you some differences, other than speed, that I noted and that nobody is talking about.

For the tests, I did them one after the other since I had only one engraving tip. And in both cases, I plugged the Cricut directly into my laptop to ensure a stable connection (and because I highly recommend it when it comes to engraving!).

The differences are very visual and... auditory! So I suggest you check out the video below for all the details!

In summary, the Maker 3 takes much longer to load the mat. I knew that for matless cutting with the Smart Materials, the Maker 3 took the time to unroll all the Smart Materials to confirm that there was enough for cutting.

But here, we're engraving which is only achievable with a mat. So why bring in the entire mat in? It's a total mystery to me! Especially since we have already specified the size of the mat in Design Space!

Another difference to note is the noise. For that, the Maker 3 is really less noisy.

First, when loading the mat, but also for engraving.

So quiet that I was forced to repeat the test once again with the Maker 3 because I had forgotten that it was engraving and had not noted the end time of the engraving!! 🙈

Speed test

The file used is one of the files of my course: "Dare to Try" on the Cricut engraving tip. If you're not sure where to start using this new tip, sign up today!

Although in the course, this design is engraved on metal, I decided to use Craft plastic leftovers for the sake of my budget!

This plastic has been used in several of my tutorials such as: How to paint on glass with your Cricut and How to make a custom LED lamp.

I can tell you right away that the quality of the engraving between the two Makers is identical! At least, I can't see any discernible difference.

Engraving projects are always much longer. So, engraving this project on metal in my "Dare to Try" class took me 1 hour 30 minutes.

And that's exactly what it took to engrave it on plastic with the original Maker!!!

But will you believe me if I tell you that for the same project, the Maker 3 took 15 minutes MORE? Yes, 1 hour 45 minutes!

I have to say I didn't expect that at all!

So much so that I did the test twice for each machine (yes, that's more than 6 hours of engraving!! But don't worry, I was doing something else while they were working! 😂).

And for each test, I arrived at the same time!

Watch the following video to see and hear the full details

Who would have thought?!

So if you have the original Maker, you have one more reason to keep it and enjoy it! 😉

Tell me in the comments if you are surprised too!

Don't forget to Pin this!

DIY custom boat decal with your Cricut

Save money by making your own vinyl decal for your boat or any other vehicle with your Cricut. It's not that hard! I will show you how!

My friends Will and Sophie asked me if it was possible to cut vinyl with my Cricut to identify their boat. It was really a great opportunity for me and I jumped at the chance!

photo of the boat and the boad decal made with a Cricut

In the video below, you will see the complete process in Design Space as well as how to install the vinyl.

This post contains some affiliate links for your convenience and at no extra cost to you. Click here to read my full disclosure policy.

What should be used to make a boat decal with a Cricut?

Well, first of all, you will, obviously, need permanent adhesive vinyl.

As the decal will be under harsh weather, I opted for what is called a marine-grade vinyl, the Oracal 751.

Difference between Oracal 651 and 751 vinyls

Oracal 651 is the vinyl used by most people for crafting with their Cricut. It is comparable to Cricut's Premium permanent vinyl.

One might think that the Oracal 751 vinyl, being more durable, would be thicker than the 651, but it is quite the opposite.

At 0.05 mm (2 mil) thick, Oracal 751 vinyl is about 25% thinner than the 651 making it more flexible and stable. So it is ideal for curved and multidimensional surfaces like vehicles.

The Oracal 751 vinyl also has a longer lifespan, about 8 years when continuously subjected to harsh sunlight. I imagine (and hope) it would be even longer for a boat that will be stored half the year!

The inconvenient

Oracal 751 vinyl is more expensive and sometimes more difficult to apply without stretching or breaking it (kudos to my friend Wil who applied vinyl on a boat for the first time!!!)

See Oracal 751 datasheet

Maximum size of the boat decal with a Cricut

Since I had to use a mat to cut this vinyl, I had to limit the design to 11.5" X 23.5". See the video below to see all the tricks used to optimize the size of the image.

At the time, I didn't have the Cricut Venture. This would have saved me the trouble of separating the design.

Cut setting to use in Cricut Design Space

As the Oracal 751 vinyl is thinner, we cannot use the same cut setting as the Oracal 651. I used the "Outdoor Premium Vinyl" setting in Design Space, but I always suggest doing a test cut to confirm that the chosen setting is adequate.

You can check out this article to learn my technique to make an easy test cut.

Materials and tools required

  • A cutting machine (Maker or Explore series can do and the Cricut Venture)
  • Marine-grade Vinyl - Oracal 751
  • Transfer tape of the same size
  • Scraper (or credit card)
  • Rubbing alcohol
Image of the boat with the boat decal made with a Cricut and adhesive vinyl

Update

This design has been in the water for 3 summers and it is still holding on strong!

Some people wrote to me saying they did the same thing with regular Cricut Premium permanent vinyl and after 3 years it was still holding strong, even in salty water!

I guess only time will tell if the Marine grade was really worth it. Let's just say that if you have a Cricut and your decal doesn't hold, you can always cut a new one! (haha) But when you do this for friends, I really wanted it to be the best.

How much does it cost to make your own boat decal with a Cricut?

I bought 36" of this marine-grade vinyl and the same dimension of transfer paper. With the delivery and taxes, it costs me $25.

I have no idea how much similar lettering can cost on a boat (if you know, feel free to tell me in a comment!), but I'm pretty sure making my own boat decal with my Cricut makes it a good deal! What do you think?

See the installation of the boat decal

So, are you willing to try it too?

P.S. Thanks to my friends Will and Sophie for documenting the whole process and trusting me to carry out their project!

Share it by pinning it to Pinterest

Use adhesive vinyl and your Cricut to decorate your washer and dryer!

Washer and dryer with Cricut vinyl

With this project, washing will now make you smile! In addition, the files are available for cat and dog lovers!

This post contains some affiliate links for your convenience and at no extra cost to you. Click here to read my full disclosure policy.

When I saw people post photos of their washers and dryers using Karima's SVG cat file from SVG Bundles Karimza in English, I thought it would be really fun to have it in French!

So I contacted Karima and she agreed to make a French version! That's why you'll see French writing on the pictures and the project I made. Awesome isn't it? In fact, they are even two versions since she made the cat and the dog!

And here's the one I did!

Note that the vinyl of the washer looks higher, but it is really the shape of the glass that gives this impression.

Seen from inside the washer

Besides, it was not easy to install the vinyl on this door. See the video below for more details!

Materials and tools

  • Cricut Maker or Explore
  • White Permanent Premium Vinyl
  • Transfer tape
  • Tools for weeding
  • Rubbing alcohol
  • Scraper
  • Parchment paper
  • SVG file of cat or dog made by Karima of SVG Bundles Karimza

How to install vinyl on the washer and dryer

My devices are front-loading. So I used white vinyl. On the other hand, the glass of the washer is particular in the sense that it is like recessed from the inside (see photo above).

Watch the video to see all the details of the vinyl installation and also to see my parchment paper trick!

Import an SVG file into Design Space

If you're having trouble or just wondering how to upload an SVG file in Design Space (or you're wondering what an SVG is?). Don't worry, we've all been there!

Check out this post which will give you all the details on how to download an SVG cut file

If you have already decorated your appliances, even very small ones, come and share your project with us in my Facebook group"Create with confidence with Cricut".

Don't foget to pin it to Pinterest!

Customize ceramic coasters with Cricut Infusible Ink

It's such an easy and fun project to do! These coasters personalized with Infusible Ink will impress your guests!

In a previous post, I was telling you how I was not convinced about the Infusible Ink. My tests were then done only on fabric blanks.

Since then, I have tried a few other blanks. You can see the beautiful wall decor that I made as part of my course on the engraving tip: Dare to try.

This time, I'm trying the Cricut Ceramic coasters. And for the occasion, I created an SVG file of funny wine quotes! You can get it by subscribing to my newsletter below. (Note that the quotes are in French in the picture, but I have the English version too!)

    This post contains some affiliate links for your convenience and at no extra cost to you. I get commissions for purchases made through links in this post. Click here to see my full disclosure policy.

    Materials and tools required

    • Cutting machine (I have the Cricut Maker, but the Explore and Joy can do)
    • Cricut's ceramic round coasters
    • Infusible Ink Transfer Sheet "Splash Pad"
    • Brayer (you'll see in the video why I needed it!)
    • Cricut Easy Press 2 (I own the 12x10 which allowed me to make the 4 coasters at the same time!)
    • Easy Press mat (Required for the ceramic coasters)

    Quotes about wine

    I really searched for which quotes to make. Since I also wanted to make them in French, I needed some quotes that would make sense once translated!

    If you want to try to make your own wine quotes, here are other fun ones that I had found:

    • I only drink wine on days that end in Y.
    • Liquid therapy
    • Wine is the answer. What was the question?
    • Shut up liver, you're fine.
    • Novinophobia: The fear of running out of wine
    • Wine improves with age. I improve with wine.

    I had many others in English, but these didn't translate very well.

    • Wine. It's Win with E on the end.
    • Sip me baby, one more time
    • I NEED A HUGe glass of wine
    • Time to Wine down
    • SIP happens
    • Wine flies when you're having fun.
    • I tend to wine a lot
    • Wine not?
    • Screw it

    If you have any other ideas, leave them in the comment below!

    Steps to make Infusible Ink coasters

    Follow all steps in the video and stay until the end to see what I forgot and the mistakes I made!

    Have you ever used the Infusible Ink? How did you find the experience?

    I have to say that I'm starting to love it more and more. I even made a t-shirt and I really like it a lot, even if it is white!! Who would have thought!

    You can see it on my Facebook page by following this link. And while your there, don't forget to like my page!

    Grab my free wine quote SVG here, by subscribing to my newsletter.

      P.S. ADD THIS IMAGE TO YOUR FAVOURITE PINTEREST BOARD!

      Should you replace your Cricut with an Explore 3 or Maker 3?

      The new Cricut models are available. Should you replace your "old" model? This is what I will tell you in this post.

      This post contains some affiliate links for your convenience and at no extra cost to you. Click here to read my full disclosure policy.

      Starting today, June 10, 2021, for online purchases only, the two new Cricut machine models: The Explore 3and the Maker 3 are now available!

      For an in-store purchase, you will have to wait until June 27, 2021.

      What are the differences?

      Quite honestly, there is not much difference. You can see for yourself in the following comparison chart.

      comparison chart

      Image courtesy of Cricut Canada

      The biggest change is the possibility of cutting without a mat. This feature was introduced with the Cricut Joy. But you will need to buy the "Smart Materials" for it to work.

      What are Smart Materials?

      The Smart Materials are composed of Smart Iron-On, Smart Vinyl and Smart Paper Sticker Cardstock. These 3 products can be cut without a mat using the Explore 3 and Maker 3.

      Image courtesy of Cricut Canada

      Thus, no more cuts limited to 11.5 inches x 23.5 inches (29.2 cm x 59.6 cm). The Smart Iron-On goes up to 4 feet (1.2 m) and the Smart Vinyl goes up to 12 feet (3.6 m).

      As for the Smart Paper, they are still 12 inches x 12 inches sheets (possible cutting dimension of 11.7 x 11.2) but already have a coat of glue.

      It is also interesting to know that the leftovers of these Smart Materials will have to be used with a mat. As a matter of fact, you'll need the full width of roll to be able to insert them into the new Cricut machines without a mat.

      You're probably wondering: Will I be able to cut other vinyl brands without a mat with the new Cricut machines? The answer is no! Only Smart Materials can be cut without a mat.

      Also note this roll holder which will be available (but not mandatory) to keep the materials aligned and that comes with a built-in trimmer. Really convenient!

      Image courtesy of Cricut Canada

      Twice as fast

      Yes, but be careful! The new Cricut machines are faster, but only when you load Smart Materials into them. For example, the engraving time between the Maker and the Maker 3 should be the same (I would sure like to test this myself!)

      Where did the Maker 2 go?

      Yes, I know, Cricut skipped a number! But quite honestly, I find it more logical and especially less confusing!

      Also, if you notice, they dropped the word "Air" for the Explore 3. Cricut mentions that Air meant the machine had Bluetooth capability and as this is now standard for all Cricut machines it was no longer necessary to mention it in the name.

      Who should change for the new models?

      I would tell you to replace your Cricut with the new model if you think you really need to make very large projects regularly or you have a company and produce the same image in large quantities (and smart materials could save you time by avoiding changing mat every time).

      Otherwise, your Cricut is still well up to date and I would tell you to keep it!

      If you buy, get yourself a bundle!

      Honestly, Cricut.com bundles are definitely worth it whether it's for the Maker 3 or the Explore 3. In the comparison chart above, you may have noticed that the new Cricut machines have a cutting width of 13 inches (instead of 12 inches). Well, Cricut thought of making a new trimmer to cut 13 inches wide. And it is included in the bundles.

      Here is a comparative chart of the bundles available (not counting the machine and its accessories that would come when buying the machine alone). Note that the bundles are the same whether you pair them with Maker 3 or Explore 3:

      DescriptionEssential Materials Bundle- Maker 3 or Explore 3Everything Materials Bundle Maker 3 or Explore 3
      Smart Vinyl - 3' Permanent Sampler - Red, White, BlackXX
      Smart Vinyl - 3' Permanent Matte Metallic Sampler - Champagne and SilverX
      Smart Vinyl -3' Removable Sampler - Red, Black WhiteXX
      Smart Vinyl - 3' Removable Sampler - Grass, Ocean, Maize YellowX
      Transfer tape - 21 ftX
      Iron-On Smart, Black - 3 ftX
      Iron-On Smart, White - 3 ftX
      Iron-On Smart, Glitter, Gold - 3 ftXX
      Iron-On Smart, Glitter, Silver - 3 ftX
      Iron-On Smart, Holographic Blue - 3 ftX
      Smart Paper Sticker cardstock Bright BowX
      Multi-Pen Set, Black (5 ct.)X
      Essential tools set (including 13-inch trimmer)XX
      Basic tool setXX

      What about you Natalie, are you going to change your Cricut?

      If I were among the people who tinker "normally" I would keep my Maker. But I want to have all the options to be able to serve you and make all the tutorials you might need.

      So, yes, I'm going to splurge and buy myself a Maker 3! And you can rely on me to do an engraving speed test when I get it! haha 😉

      If you have any other questions, feel free to leave me a comment below!

      Font Kerning has arrived in Cricut Design Space

      Here it is! Finally! Kerning has arrived in Cricut Design Space. I will tell you what it is and everything you need to know.

      I hear you say "what?". Yes, I know, after glyphs, SVG and other terms, what does kerning means?

      Get ready, because when I'm going to explain it to you, I promise you will do a happy dance too!

      What is kerning?

      Kerning is the adjustment of the spacing in the letters of a font. This refers to the process of grouping letters within a word to join them or put them closely so that they read better.

      Impact in Cricut Design Space

      This question came up so often: Why are the letters not attached or how do you link the letters?

      Well, we had to ungroup the word and then, one by one, move the letters! 😓

      I've often told you in my videos that this is what I hate to do the most! Well, with this new option, the letters of the font with kerning will be automatically attached!!!! 🎉

      Now you understand why I'm doing a happy dance!

      Here's an example with the Annie Leu font of Cricut Access.

      Before kerning, here's what we had:

      With kerning 😍:

      Small note you need to know! By changing the colour of the font you might notice that the word do not seem to be welded!

      But if you hit "Make it" you'll see that it is welded and everything is perfect!

      What you need to know about kerning in Design Space

      Not all fonts have the ability to kern.

      The kerning option will be checked by default in Design Space. So, if you're looking for one of your favourite fonts and can't find it, you may need to uncheck the box to find it.

      In addition, kerning is only available on the desktop version of Cricut Design Space.

      Check out the video!

      If you have any other questions, feel free to leave them in the comments or better yet, come and ask them in my Facebook group!

      P.S. Spread the word by pinning it!

      How to add new fonts into Cricut Design Space

      Ajouter de nouvelles polices dans Cricut Design Space

      People often think that installing new fonts into Cricut Design Space is complicated. This post will show you how to do it with a PC or Mac and you will see how simple it is!

      If you're looking at how to add glyphs (you know, those little swirls) to your words, head to this post instead.

      Where to find free fonts

      There are several sites on the Internet that allow you to download new free fonts. A very popular site is Dafont.com.

      A small warning, however, is required.

      The fonts found on these sites are mostly for your personal use only. Meaning that you can't create a product from these fonts to sell it (such as writing a quote, cutting it into vinyl, applying it on a t-shirt and then selling it).

      For more details, read this post on copyrights. This post contains links to affiliated products for your convenience and at no additional cost to you. Click here to read my full disclosure policy.

      Since I create SVG files for you (I don't sell them, but it's not for my personal use either) I often turn to Design Bundles and its sister site for fonts, Font Bundles.

      The benefits of these two sites are in my opinion:

      1. Their Premium license that comes with any purchase allows the sale of derivative products. See all the details here.
      2. The quality of files and fonts is much higher.
      3. The $1 Deals Event once a month

      For the 3rd point, if you don't know about the $1 Deals Event,this is really something you shouldn't miss. These are 30 products (SVG, images, Bundle, fonts) put on sale for $1 each.

      The only problem is that the sale is once a month and lasts only one hour. So you need to be ready! But I'm here for you! Sign up for my newsletter below 👇 and I'll remind you every month, I promise!!! (in addition, it will give you access to my free library which includes several free SVG cut files for your Cricut!)

        While waiting for the $1 sale, you can always check out the free fonts section on Design Bundles' site. 🙌

        "Free Fonts" section of Font Bundles

        Install fonts in Cricut Design Space

        People think that installing fonts in Cricut Design Space is very complicated. The truth is that it is the same process that if you wanted to install a new font on your computer to have access to it in Word, Excel or any other software.

        In other words, what I show you below will allow you to have access to your new fonts with the majority of the software on your computer, including Cricut Design Space.

        In Design Space, in the "Fonts" menu if the word Cricut is in green, you have access to Design Space's exclusive Fonts.

        In addition, by clicking on "Filter" and "My Fonts" you will only see the fonts you have access to. Thus, if you are not a Cricut Access member, you will only see the free fonts and those you have already purchased. (This feature seems to be missing in the 6.10 version of Cricut Design Space. I hope it comes back).

        On the other hand, if you are a Cricut Accessmember, you will see all the fonts with the green "a".

        If you click on "System" you will see all the fonts that you personally have on your computer. These are the same fonts as if you open Word or other software.

        It is also here that the new installed fonts will be found.

        If you have a PC

        If you prefer, feel free to scroll down to see the video!

        I show you here as an example, how to install a free font from Design Bundles.

        First of all, you need to register and create an account. This account will be valid for both Design Bundles and Font Bundles.

        Click "Download Free Now".

        In Chrome and Microsoft Edge, your download will appear at the bottom left.

        Press the small arrow and select "Show in folder".

        You will then find a folder with a zipper. It is a ZIP, a compressed folder.

        To unzip it, select it, press the right button of your mouse and select "Extract All".

        Choose where you want to save the file and press "Extract".

        You can delete the folder with the zipper and keep only the "normal" one.

        By clicking on it, you will find all these elements. The font file to install is the "OTF" or OpenType font file.

        Right-click on the "OTF" and click "Install for all users". (You can also double-click on the "OTF" and click on the "Install" button)

        Your new font is installed!

        If you have a Mac

        Follow the same steps to download the folder to your computer. Open the folder and double click on the "OTF".

        This window will appear. All you have to do is click on "Install Font".

        After installation, your "FontBook" font manager will open and confirm the installation.

        Don't forget!

        In either case, to see the font appear in Design Space, you must close it if it was open during installation.

        Also, you need to be in "All" or "System" to see your new font. You won't see it if you're in the "Cricut" section of Cricut design space's fonts menu.

        Check out the video for all the details!

        Don't forget to sign up to have access to NeliDesign's free library AND be notified of the $1 sale of Design Bundles and also many other deals!

          Do you have a favourite font that you downloaded yourself? Leave it in the comments below!

          P.S. Please pin to Pinterest

          Free teacher SVG files to use with your Cricut

          I love making personalized gifts myself.

          I had already made this pencil case for my daughter's teacher with heat transfer vinyl and a quote that I had created myself.

          This time, I have created several other quotes specifically to create gifts for your kid's teachers.

          You will have the English and French versions in case your kid has a French teacher you would also like to give something special to! 😉

          To get the SVG files, sign up for my newsletter below and get access to my free library filled with SVG files including these.

            What to do with these SVG files and your Cricut?

            Last year, with these files, I personalized acrylic tumblers to give my son's teachers and those of my friend's children too.

            These tumblers are really nice and I ordered them at one of the few places where it is possible to order in Canada at a reasonable price "Save a Cup".

            I even customized the back so the teachers could remember who this gift came from.

            This post contains some affiliate links for your convenience and at no extra cost to you. Click here to read my full disclosure policy.

            If you want to do the same, here are the fonts I used:

            • The word "Teacher" is the"Starburst" font from KA Designs and if you want to make a good purchase, I bought it in this bundle with 13 other fonts that are just as cute as the Starburst one!
            • The words "teach, love, inspire" are written with the"Smudge Factory"font from A Little Smidge. But it is extremely expensive at the regular price. So I suggest you wait for a sale before buying it!

            Don't forget to sign up to get access to these SVG cut files and much more in NeliDesign's library.

              Don't hesitate to show me on Facebook what you've made with your Cricut for teachers!

              Don't forget to Pin it!

              How to add special characters to fonts in Cricut Design Space

              When we start adding special characters (or flourishes or glyphs...) to our texts in Design Space, the possibilities become almost endless! And it's also super easy! I'll show you how!

              This post contains some affiliate links for your convenience and at no extra cost to you. Click here to read my full disclosure policy.

              It's a question people often ask me, but the question more often begins with "How can I do that?" including an image with circled letters or arrows, much like below.

              Image from Font Bundles.net - Bebilya Font

              "That" is very pretty! But what's it called? Good question!

              If I rely on Adobe Photoshop or Illustrator, they call them "glyphs", but I'm not sure they are known by that name by the regular people who don't use these softwares on a recurring basis! I chose to call them "special characters" in the title.

              If I did a survey, here are some names I would have for you:

              • Flourishes
              • Additional characters
              • Alternative characters
              • Stylized characters
              • Ligatures
              • Swirls
              • Letter ornaments
              • Fantasies

              Do you have any more?!! You can always leave me a comment below!

              Do all fonts have these glyphs?

              Not all fonts have special characters! In fact, the majority do not. You need to download a special font or buy one.

              Often, free fonts will have some glyphs available. The ones purchased are often much more complete.

              How do I find fonts with glyphs?

              You can find several free ones on Dafont.com, but I personally have trouble finding what I want on this site. Also, the fonts are for your personal use only (which means you can't, for example, create a quote, cut it into vinyl, put it on a mug and sell the mug.) If I just surprised you, read this article on copyright for more details.

              If you know me, you know my favourite site is Design Bundles. The latter has a sister site for fonts (you can use the same account and password for both sites), it is Font Bundles.

              The benefits of these two sites are in my opinion:

              1. Their Premium license that comes with any purchase allows the sale of derivative products. See all the details here.
              2. The quality of the product is much more constant
              3. The $1 Deals event once a month

              Regarding the 3rd point, if you do not know about the $1 Deals event, let me tell you that you should not miss it. These are 30 products (SVG, Bundles, fonts) that are on sale for $1 each. Last month, I just bought this bundle of fonts with swirls for $1. Yes, yes!!

              The only problem is that the sale is once a month and lasts only one hour. So you need to be ready! But I'm here for you! Sign up for my newsletter below and I'll remind you every month, I promise!!!

              In the meantime, you can also check out the"Free Fonts" section.

              Free Font Section of Font Bundles

              By clicking on one of the fonts, you can see if it contains glyphs. Usually, it says "Alternate" which means alternative characters.

              Note that to download anything, even free, you need to create an account.

              How to insert glyphs into Cricut Design Space

              For more details, you can see the video at the end of this post where I give you my trick to EASILY insert special characters directly into Design Space.

              But in short, the easiest way is to use a character table. Whether you have a PC or Mac, you already have one included in your computer. Here's how to do it.

              With a PC

              In the start menu of your PC (bottom left) type "character map". Here's what's going to pop up:

              Do you find it convenient? I know I don't! It must be my age, but it seems to me that it is far too small!!! In addition, there are plenty of extra characters and the actual glyphs are hard to find.

              But don't worry, I have a solution for you, and it's free!

              You'll need to download Microsoft's"Character Map UWP" app (take the time to see if your computer has the required configuration to download it). Once installed, here's the visual you'll have:

              Much better, isn't it?

              But if it's still not enough, you can click on the gear at the top right and still make the characters bigger. Now I'm sure you can not say that it is not big enough!

              Once there, all you have to do is find the desired font, select the character you want, press "copy" at the bottom right and paste it into Design Space using CTRL-V in the text window!

              Of course, don't forget to select the same font in Design Space before doing CTRL-V.

              Note: With the new version of Design Space, you can insert a special character in the word (meaning, you won't see a content box appear as in the image below).

              With a Mac

              If you have a Mac, you're lucky! There is a basic software called "FontBook" that does the same thing as "Character Map" from Windows.

              To see the glyphs, press on the icon with 4 little squares. You can then search for your font by typing its name into the search bar.

              Then, it's the same as with a PC. So just copy/paste using the Edit>Copy menu (or Cmd+C) and paste your glyph in the Design Space text window by pressing Cmd+V.

              Don't forget to select the same font in Design Space before you press Cmd+V to see your glyphs appear!

              For all the details, check out the video.

              Don't forget to sign up for my newsletter to be notified of the next $1 Deals event from Design Bundles! You'll also get free cheat sheets and access to a library full of free SVG files!

              P.S. Don't forget to pin it!

              How to make a reusable wall stencil with your Cricut

              Learn how to create a reusable stencil in Design Space and cut it with your Cricut so you can paint your walls.

              Do you have projects that start super small and end up taking on incredible proportions?

              Well, that's kind of what happened with this project. My goal was simply to do some cleaning in my little entry way.

              I started by buying two IKEA shoe storage cabinets. Then I thought it was probably better if I painted the walls before fixing the furniture on them.

              And while I'm at it, why not remove the wallpaper that I've wanted to remove for a very long time?!!

              I wanted to keep this project very simple and I decided to paint everything in white. But I ended up thinking that a white IKEA storage on a white wall might not have the same shade of white and that it might not look very nice!

              So I decided to add some colour, but only on the wall behind the shoe storage. For this, I chose the colour Frozen Toundra from Sico paint (6184-42).

              I also had this idea of a stencil that was stuck in my head after falling in love with the wall that my friend Brianna from Bloom in the Black had made. See how amazing it is!

              Credits: Bloom in the Black

              I then told myself that I was probably able to make a reusable stencil with my Cricut and I'm happy to tell you that I succeeded and am very proud of the result!

              Although, If you've never used a stencil, I suggest you start with a slightly smaller project. You can see as an example and for inspiration this beautiful wood plank that I made using a stencil!

              This post contains some affiliate links for your convenience and at no extra cost to you. I get commissions for purchases made through links in this post. Click here to see my full disclosure policy.

              What material to use to make a reusable stencil

              Can Cricut stencil vinyl be used as a wall stencil? Unfortunately, the answer is no.

              Unless your design is extremely simple, the plastic is too flexible and it's extremely difficult to move it (and even stick it properly for the first time) on a wall. You really need a stiffer material.

              So I found this craft plastic that is 0.007" thick. Be careful not to confuse it with the one of the same company, that I used in the post on engraving or in the one on "glass" painting which has a thickness of 0.020".

              So this 0.007" plastic is perfect since it is easily cut with the fine point blade (the basic blade that comes with the Cricut Explore Air 2, Maker or even Joy).

              Materials and tools required

              • A cutting machine (I have the Cricut Maker, but the Explore Air or even the Joy can do the trick)
              • Fine point blade (the basic blade that comes with the Cricut)
              • Green mat (standard)
              • Craft plastic 0.007" thick
              • Repositionable spray adhesive(I have this one from Krylon)
              • Foam roller and tray
              • Foam brush for stencil
              • Paper plate or bag
              • Paper towel
              • Acrylic paint of your choice

              Making the pattern in Design Space

              For more details, I invite you to see the video you will find at the bottom of this post. But in summary, here's how I made my stencil in Design Space.

              Cricut Access images used in the stencil design

              To find the images, use the search bar in the Design Space Images and copy the item number by including the #.

              • Flower #M14791884 of the "Flower in Spring" image set
              • Leaves #M14791A48 of the "Flower in Spring" image set

              You can also find the final stencil by following this link.

              If you're not a member of Cricut Access yet and want to access all of these designs for free, you can click here to subscribe!

              Steps in Design Space

              The two elements chosen had small lines inside that I removed using the "Contour". They could not have been preserved anyway since it is the stencil that is kept and not the cut-out shape.

              Duplicate both shapes and click on "flip horizontal". The idea is to organize these 4 elements so that they fit into a rectangle of 11.5 inches X 11.5 inches, which is the maximum size of the stencil. This creates the main pattern.

              Duplicate the main pattern by aligning it horizontally and vertically. If you do not align it, it creates a diagonal and the result on the wall is not as nice, at least, in my opinion!

              Once satisfied with the pattern, use "Slice" to keep only the main pattern as well as pieces of the left, right, top and bottom patterns to serve as registration marks. Watch the video for more details.

              To cut the stencil, I used the setting "Foil Acetate" which has a pressure of 292 and will cut twice.

              Make sure you do a test beforehand and check if the cut has been successful before removing the mat from the Cricut.

              A stencil story

              This is not the first time I paint a wall with a stencil. You can see the wall I made in my bedroom the first time. I thought it was the last time because I'm not very patient and I always want everything to be perfect which is very difficult with a stencil.

              Stencil a wall for a $100 bedroom makeover. . . . .

              For more precision, some friends suggested at the time to use a stencil brush so I thought that the small wall of my entryway was the perfect opportunity to try it!

              But I did not like it at all!

              There really must be something I didn't understand. I have from far preferred my old stencil sponge brush.

              Technique to use

              I ended up using a mix of techniques. The foam roller at the beginning, then adding paint with the sponge brush on top and finally the stencil brush by making circular movements to get the paint to go into the very thin stems of the flowers.

              For the roller (and the brushes too), it is important to use a dry technique.

              You have to remove the paint on paper (I used a paper bag) and then wipe it off a paper towel. So when you apply the paint to the stencil, there is almost no paint that transfers.

              It's really not easy, especially at the beginning, but once the paint is well absorbed into the roller, it becomes easier to apply.

              Do you really need to use repositionable spray adhesive?

              I am sure you are thinking that you do not need repositionable spray adhesive. I know, I said the same thing at first, too. Until I did the test.

              To make a stencilled wall, I really think that you must use repositionable spray adhesive! It will avoid a lot of bleeds under the stencil. And if you're as thorough as I am, you'll really appreciate it!

              It's really the only way to have a design as crisp as this one.

              Make junctions with walls, floor and ceiling

              When all that was left was to make the edges with the other walls, floor and ceiling, I simply cut my stencil with a metal ruler and a utility knife. It hurts less than cutting a stencil that you paid forty dollars for!

              Ideally, you should put painter's tape before painting to make a nice clean line. But I hate doing this, I prefer to eyeball it!!

              And I'm not that bad at it I think!!! 😉

              How to move the stencil

              Little tip! How to avoid putting the stencil in paint that is not dry?

              Well, just start by placing the stencil in the center of the wall. Then, alternate from bottom to top to avoid putting the stencil on very fresh paint. With the registration marks made in Design Space, it's very easy to align.

              The benefits of cutting your stencil with your Cricut

              There are several benefits in cutting your stencil yourself instead of buying one already made:

              1. You can do any design that goes through your mind (well, almost!)
              2. Your stencil will cost you less (and if you buy the pack of 25 sheets as I did, you'll have plenty left for a lot of other projects!!!)
              3. You won't be afraid to break your stencil since you can cut it as many times as you want!

              If you prefer to buy a stencil

              There's a lot of stencils on the market and although I enjoyed making this one myself, the"Cutting Edge" ones are really good. This is the company I used when I made the wall of my bedroom.

              So if the idea of making your own stencil is overwhelming you, go check out the beautiful stencils ofCutting Edge Stencils.

              Final thoughts

              You can see the video for all the details:

              I'm really happy and impressed with the result. It really went better than the first time I stencilled a wall! On the other hand, I want to tell you that despite the very small wall it took me the whole day to paint it! I was completely burned out!

              Am I going to stencil a wall again? I should say no, but it's so beautiful! (So I guess it's a yes 😂haha!)

              If you want to know how I'm going to organize the rest of my little entryway, leave me a comment below!

              Don't forget to Pin it!

              Easter decoration and new offset feature from Design Space

              In addition to showing you the details of Cricut Design Space's new "offset" feature, I will show you how to create an original Easter decoration using the new feature.

              We've been waiting for it for a long time! There were a lot of tutorials on the internet that showed how to do it outside of Design Space. But finally, with just a few clicks, we can add an offset to our project, directly inside Design Space!!

              A little caveat though. This feature is currently in Beta which means it is being tested. So you may not have access to it yet or if you do, it may be doing some strange things. Don't hesitate to report any bug to Cricut! They need it to know what to improve!

              It is not a tool that is very difficult to understand. I'll show you the basics, but I'll also show you how to make this original project, step by step using images found in Design Space.

              Easter frame made with the offset function of Design Space.

              If you like 3D crafts, join my 3D Papercraft Challenge, it's free for a limited time!

              Click here for more information.


              The new offset tool

              "Offset" allows you to add an offset layer to an image, a text, an object.

              By clicking on the new button in the top menu bar, you'll have the option to change the distance as well as the shape of the corners. Note that you need to select an object to access the "offset" tool.

              In the image below, you can see the result when the round corner option is selected.

              If the option is changed to square corners, here's what happens.

              As for the distance bar, if you drag it to the left of the center, you will have an inset instead of an offset. It is also when the Beta version has a little more difficulty.

              You can also choose to enter the offset dimension yourself. At this point, to see the preview, you'll have to click in the offset box before clicking "Apply."

              By selecting 2 or more objects, a new option appears: "Weld offsets".

              When this option is checked, the result of the offset will be welded into a single layer even if the original objects were not welded.

              If the "Weld Offsets" option is not checked, each offset will be individual. This is also true for the text where each letter will be on its own layer.

              This can be useful, for example, if you have multiple images and want to add an offset all at once but still want to keep each offset on its individual layer.

              Easter decoration with the "offset" tool

              Instead of just showing you a simple sticker project, I decided to do a slightly more complex project.

              So I'm going to show you how to make a cute Easter decoration using only those images available in Design Space and the "offset" function.

              These three images will become this pretty decoration that you can put in a frame or just leave as-is:

              3D Easter decoration made with the offset function of Design Space

              Design Space files used

              Use the number in brackets, including the hashtag, in the search bar in the "images" section of Design Space to find the image. Only the rabbit needs a subscription to Cricut Access, but I also suggest a free one in the video.

              • Pattern (#M3E217)
              • Bunny (#M257C06EC)
              • Text "C'est Pâques!" (#M1B9DDCBE)

              This post contains some affiliate links for your convenience and at no extra cost to you. I get commissions for purchases made through links in this post. Click here to see my full disclosure policy.

              Materials and tools required

              • Cutting machine (I have the Cricut Maker, but the Explore Air2 can do the trick. The Joy also if you limit the project to 4.5 inches wide)
              • coloured cardstock
              • Glue (I love my glue pen for small details)
              • Foil tip
              • Foil transfer sheets - Jewel
              • Cricut Access subscription (optional)

              It's still not a simple tutorial and I'll be honest, I had to test at least 3 times the steps in Design Space before I had anything coherent to present to you! So don't worry if you find it complicated and if you have to click "undo" several times!

              The idea is really to show you how far you can go with the "offset" function besides making stickers!

              So I invite you to watch the following video to see all the steps that would not be well represented in simple text and images!

              In the video, I scale the pattern so that it can fit into an 8" x 10" frame. I offset it twice from 0.1". This means that every time I offset it, 0.1" is added to the left and 0.1" is added to the right. So, after 2 offsets, the width will be 8.4 inches.

              For the final width to be 8 inches, I subtracted 0.4" from 8". Thus, the starting width of the pattern will be 7.6 inches! Whoa, I know, it's a little confusing!!! 😉

              Can foil transfer sheets be place side by side?

              The foil transfer sheets I wanted to use (purple) are only available in 4" x 6". So I placed 2 sheets side by side on my cardstock. I wasn't sure of the result! But I'm here to do tests for you!

              Two foil transfer sheets placed side by side.

              Well, the answer is yes! You can place more than one foil sheet side by side to make a drawing larger than a sheet. But you should expect to have a slightly less clear line where the foil tip touches the tape.

              You can see up close that the lines that make up the tips of the bunny's ears as well as the top of the letters of the word "Pâques" are a little less sharp. These lines were under the tape at the center.

              The result of two foil transfer sheets placed side by side.

              I also misaligned the foil and the bottom left of the rabbit was also under the tape (bah... it happens to everyone!!)

              The result of two foil transfer sheets placed side by side.

              But honestly, you have to be very attentive to see these little flaws! I think the test was worth it! I love the 3D effect, and you?

              The result of two foil transfer sheets placed side by side.

              If you like 3D crafts, join my 3D Papercraft Challenge, it's free for a limited time!

              Click here for more information.

              And don't forget to Pin it!

              Make glass painting with your Cricut and vinyl

              In a previous post, I showed you how to use a marker and your Cricut to make glass paintings (or plastic paintings). What if we used vinyl instead?

              Seeing my last post, a friend asked me if it was possible to do the same thing with vinyl. As I am always ready to do tests, I decided to take up the challenge. And believe it or not, I think I prefer this technique to the previous one!

              The advantage of using vinyl instead of a Sharpie

              Using a Sharpie and the "draw" function of Design Space required a simple line drawing or at least something whose outline was not double.

              Because, when you import an image (JPG, PNG) into Design Space and "clean" it leaving only the black drawing line, that line automatically doubles. You can see it in the image below. On the left, the image cleaned, specified to "cut" and on the right, the same image to "draw".

              Thus, cutting remains the simplest option if you want to use an image that has been cleaned leaving only the outline.

              In addition, vinyl can be used for real glass. Indeed, to draw with the Sharpie, I had to use plastic craft since I couldn't insert glass in the Cricut (too thick, a maximum of 2.4 mm is allowed).

              It was my daughter who did the final step of painting and she told me she preferred the technique with vinyl since she found it acted as kind of a barrier for the paint

              Materials and tools required

              • Cutting machine (I have the Cricut Maker,but the Explore Air 2 or the Joy can also do)
              • Premium Permanent Vinyl Black
              • Transfer paper
              • Scraper
              • Weeding tools
              • Plastic Grafix 0.020 (or a frame with plastic or glass!)
              • Acrylic paint
              • Brushes of different sizes
              • Toothpick (optional)
              • Metal rule and utility knife (to cut the craft plastic if required)

              Finding your image

              I've talked about it a lot lately: copyrights. You can read my post on the subject if you want to know more. Just know you need to be careful when using images from the Internet.

              In my case, I chose (or rather my daughter chose!) an image of Shikamaru, a character from the Naruto series.

              What to consider when choosing the image

              To make it easier to clean the image in Design Space, here's what you should look for:

              • An image with a well-defined and clear black border (the pencil stroke).
              • Good contrast between the background and the chosen design.
              • A high-quality image (the smaller the number of pixels, the more difficult it will be)

              You can see all my tricks in the video at the bottom of this post.

              How to clean your image

              The image will be cleaned using the advanced options of Design Space. You can also see this other post for more details on the use of the advanced "Reduce Colors" and "Color Tolerance" options.

              I must confess that I did not follow my own advice when choosing my image. I had a hard time eliminating the background because it had a lot of shades of green, just like the character.

              You can see the video at the bottom of this post to see exactly how I did it!

              Cutting and laying the vinyl

              Before you press the "Go" button on your Cricut, don't forget to mirror it! Because paint and vinyl will go to the back of the craft plastic.

              Also, to make it easier for me, I decided not to immediately cut my craft plastic and I strongly suggest you do the same!

              Once the vinyl is cut by the Cricut, weed to remove the excess vinyl.

              Then apply transfer paper to the vinyl and rub very hard with the scraper. (Trick: lay parchment paper on your work surface to prevent transfer paper from sticking everywhere!!)

              Gently remove the backing of the vinyl, making sure all the pieces are on the transfer paper.

              Then apply the transfer paper to the parchment paper, letting the bottom of the vinyl exceed just a little, like the image below.

              This will allow you to easily position your image on the craft plastic. When it's aligned, press firmly on the transfer paper that exceeds to make it stick on the plastic.

              Lift the image from the parchment paper (being careful that the bottom edge remains stuck to the plastic) and remove the parchment paper.

              Lay down the image by pressing with the scraper from bottom to top.

              Again, scratch very hard to make the vinyl stick to the plastic and then remove the transfer paper.

              Remember that you can keep your transfer paper by putting it back on its backing!

              Finally, cut the craft plastic to the size of your design with a metal ruler and a utility knife. Then you only have to paint your drawing!

              Make glass painting with Cricut and vinyl

              I invite you to watch the video to discover several other tips and tricks. There are things that communicate much better visually than simply in writing. You'll also know:

              • How to filter images on the internet to find only large or medium images;
              • How to make sure your vinyl is perfectly cut;
              • What to do if you don't have enough transfer paper;
              • How to print your drawing to use as a guide while painting;
              • And a lot of other tips.

              Natalie

              Please don't forget to Pin it!

              New - Cricut Mug Press - Everything you need to know!

              Last Thursday, Cricut announced its new product: a Mug Press. It will be available on March 11th, 2021 including in Canada!

              This post contains some affiliate links for your convenience and at no extra cost to you. Click here to see my full disclosure policy.

              Now, I didn't get to try the new Cricut Mug Press myself, but I did get a personal presentation from Cricut where I got to ask all the questions (and I'm someone who asks a lot of questions😄)!! So here's everything you need to know.

              What is the Cricut Mug Press

              The Cricut Mug Press is a heat press for mugs. It enables you to make vibrant, pro-quality and personalized mugs.

              Image courtesy of Cricut

              What do I need with the Cricut Mug Press?

              To use the Cricut Mug Press you'll also need these:

              • Infusible Ink transfer sheets and/or Infusible Ink pens
              • Cricut mugs
              • Heat resistant tape
              • Lint roller
              • And of course, a Cricut machine (either the Maker, the Explore Air 2 or even the Joy can work!)
              Image courtesy of Cricut

              What's the difference between adding vinyl to a mug and this new product?

              Iron-on (HTV) or adhesive vinyl are both attached to the mug using adhesive. Infusible Ink will become one with the mug which means your designs will be permanent as well as dishwasher and microwave safe.

              What's the difference between this Mug Press and other mug press out there?

              Cricut states that their Mug Press is easier, more efficient, safer to use and way less bulky than the other mug press.

              Image courtesy of Cricut

              It's simple because there are no heat plate or pressure adjustments to make.

              Efficient because it makes beautiful transfers every time because of the heat plate that applies even and consistent heat.

              It's safer because all touchpoints are cool plastic. The handle of the mug stays cool and there's an auto-shutoff feature (probably made especially for people like me 😆)!

              Can I use any type of mugs?

              You'll need "sublimation compatible" mugs if you want to use other types of mugs than the Cricut brand but Cricut cannot guarantee the results.

              As for the Cricut mugs, they come in two sizes:

              • 12 oz mugs
              • 15 oz mugs

              Both sizes are sold in packs of 2, 6 and 36. The 15 oz mugs also come with one plain white box that can be used for gifting.

              How will I know what size to make my design?

              This is where Cricut makes your life easier!

              Cricut is selling sheets of Infusible Ink that are the right size for the mugs.

              Plus, Design Space has a mug design set up that will help you know exactly what size to scale your design and where it will end up on the mug. No mistakes can be made!

              In addition to the straight regular border, this template offers 4 other borders for a chic finish look. Cricut really thought of everything!

              Who is this for?

              Now, the Cricut Mug Press is not cheap. Even considering everything that I've told you before. You know I'm always straightforward and that's why I would personally not advise it for everyone.

              I think the Cricut Mug Press is awesome for:

              • People that make mugs for sale and are looking for a pro-quality finish;
              • Someone that is not tech-savvy and wants something that is simple to use;
              • Someone that is looking for a mug press and doesn't have a lot of space.

              If like me, you make mugs once or twice a year, I don't think it's worth it unless you have money to spare (does that really happen?) or want to splurge on yourself for once because you really deserve it (that, I do understand!!🤣).

              If you really want to buy it, I suggest you do it by buying it in a bundle as you can read in the next paragraph.

              Where can I buy the Cricut Mug Press in Canada?

              In Canada, you'll be able to buy the Cricut Mug Press and accessories at Michael's and on Amazon.ca.

              Whether you are Canadian or American

              What I like to do when starting with a new product where I'll definitely need specific materials to make it work is to buy it as a bundle on Cricut.com even if the prices are in USD (That's what I did when I bought my Easy Press 2).

              As an example, the Essentials Materials Bundle is hardly more expensive than the Cricut Mug Press alone and has more than $45 in materials included.

              You can see the difference in the bundles here:

              Cricut Mug PressEssentials Materials BundleEverything Materials Bundle
              Ceramic Mug Blank, White - 12 oz/340 ml 4 mugs8 mugs
              Infusible Ink™, - 4.5" x 12" (varied colours)2 boxes6 boxes
              Infusible Ink™ Pens (0.4)05 pens
              Infusible Ink™ Markers (1.0)5 markers5 markers
              Heat Resistant Tape1 roll2 rolls
              source: Cricut.com

              Also, if you want to save even more, you can subscribe to Cricut Access for one month. This will give you 10% off on your order and access to all Cricut Access projects, images and fonts for a month.

              Furthermore, you can install the Honey extension on your browser. This extension will search for you if there's a discount available and apply it automatically to your order if it's the case.

              And for you my Canadian friends, don't you worry, you'll have no customs fees if you order from Cricut.com.

              Want to see more?

              To see the Cricut Mug Press in action, check out this video:

              If there's something I didn't cover and you still have a question, don't hesitate to write it in the comments below!

              Happy crafting!

              Natalie

              How to make glass painting using your Cricut

              This tutorial will show you how to use your Cricut to make this glass painting technique as you might have seen on TikTok.

              I have kids who love to listen to anime. You know, those Japanese animes like Naruto, Haikyuu and Attack on Titan.

              I must say that I'm not a super fan myself (a real boring mother!!), but I must admit that the drawings are very beautiful.

              A trend on TikTok right now is to take images of these anime, duplicate them on glass and add acrylic paint to the back.

              My daughter made several of them and I was very impressed! Look for yourself:

              That's when I thought: Why not use my Cricut to make this technique?

              Obviously, I took a cute little fox for the demonstration.

              And I also tried with a funny quote.

              In addition, instead of using glass, I used Grafix 0.020 plastic. The same one I used for engraving in this tutorial. This post contains some affiliate links for your convenience and at no extra cost to you. Click here to read my full disclosure policy.

              Required tools and materials

              Note that I also have another tutorial on how to make the same thing with vinyl!

              • Cutting machine with the option to draw (I have the Cricut Maker, but the Explore Air 2 can also do)
              • Sharpie Oil-based felt adapter (Warning, these don't work with the Cricut Joy)
              • Sharpie Oil-based black tip extra-fine
              • Craft Plastic - Grafix 0.020 (or a frame with plastic instead of glass)
              • Acrylic paint
              • Brushes of different sizes
              • Toothpicks
              • Glitters (optional)
              • Mod Podge (optional)

              SVG files used

              • Fox single line SVG file
              • SVG quote "This Home is filled with endless love and laundry"

              Making glass painting

              It is important to understand that not all SVG files are ideal for the "draw" function. Here are some examples I took on Design Space:

              By changing to "Draw" we can see the result of each. Thus, the dog, the cat and the young lady end up with a double border.

              In the case of our project, it's not the end of the world because we want to paint, but it still means that we will have to fill this border with colour. That's why I chose the single-line fox.

              In Design Bundles, to find more single-line files, just select the menu "Crafters" and "Single Line Designs" or click here.

              You can also see in the video below where I show you how to find other single-line images directly in Design Space.

              Step 1 - download

              Download the previously saved image to your computer.

              The one chosen is this quote purchased from Design Bundles.

              Step 2 - mirror

              I usually "Flip" the image immediately if I want my drawing to be drawn or cut upside down. I do not like to do "Miroir" on the mat because by the time I get there, I know I'm going to forget!! (I'm sure it has already happened to you too!)

              Step 3 - template

              Draw a rectangle that will represent your plastic.

              Enter the required dimensions. My plastic was cut to 8" x 10" to fit into a frame of the same size.

              Select everything and in the "Operation" menu, choose "Pen" in the "Draw" section.

              (Note that this is Design Space's new drop-down menu. Previously, in the classic version, we found the two menus "Linetype" and "Fill" which were merged into the new version to become "Operation")

              Resize your quote to the size that suits you and, while everything is selected, choose "Align" and "Center."

              Step 4 - position the drawing

              Here's my trick to make the pen draw exactly at the right place on your plastic.

              Select everything and change the position of (x, y) to (1, 1). Thus, the top left corner of the rectangle is in the position (1", 1").

              Then draw a circle.

              Change the size to 0.1 x 0.1 and its position to (0.25",0.25").

              Without moving anything else, close the eye of the rectangle layer.

              Select everything and click "Attach."

              Step 5 - create

              By pressing "Create" you will see that the small circle automatically positions itself in the upper left corner of the mat so at (0.25", 0.25") from the edge of the mat. This means that if our plastic is installed at (1", 1"), our drawing will automatically be in the right place!

              Press "Continue" and choose the material "Acrylic, thin (1 mm)".

              Step 6 - install plastic

              Install the plastic on the purple mat so that the top left corner is at (1", 1"). You can add a piece of tape to protect your mat when the Cricut draws the little circle that serves as our guide.

              Step 7 - adapter

              Unfortunately, Cricut does not yet have a permanent pencil (oil-based) that can draw on acrylic or plastic.

              So, I used an adapter that I bought from Springbok Craft Supply. (I don't recommend using products that aren't from Cricut if yours is still under warranty, so if you've had it for less than a year).

              To install it, the Cricut adapter must be gently removed by pushing gently, but firmly, from below.

              Then insert the new adapter and pen into clamp A of the Cricut. Be sure to shake and prime the pen beforehand as the pen has a tip that needs to be pressed to get the ink out.

              Step 7 - drawing

              Watch your Cricut as it draws. If you see some lack in the ink, press pause, remove the pen and prime it again.

              Tip: when the drawing is finished, before removing the mat, press the "Go" button to make a second pass and fill in the gaps if you have too many of them. It's not always required, it depends on the wear of your pen and the size of the drawing.

              Step 8 - Paint

              The last step: paint! Note that you're going to have to put a very thick layer of paint. I also recommend you dab your paint instead of brushing it to keep it as thick as possible. (See the video below to better understand).

              And if you ever exceed the design with the paint, no problem! Simply use a toothpick or cotton swab to remove anything that exceeded.

              Put on a lot of Paint

              When I mention that you really have to put a lot of paint I'm not exaggerating! You can see here the back of the various drawings made by my daughter and me.

              Video tutorial for all the details

              I suggest you see the video for all the details as well as, as usual, some bonus tricks like:

              • Create shading
              • Use glitters
              • Layer the paint

              I think this technique can be super fun when you don't have a very stable hand (like I do!) to draw a continuous line.

              Also, making the Cricut do the base of the drawing and giving the rest to the kids can be a good way to keep them busy. The result is really satisfying!

              How to convert an image to a multi-layer cut file using only Design Space

              Here's a question I'm often asked: How do you use a JPG or PNG image and turn it into a cut file. I will show you how and only by using Design Space.

              What images to use

              This technique is great when we try to use an image that we have drawn ourselves or even an image made by our children.

              But, I will allow myself a little advice and a caveat.

              If you use this technique to transform an image taken on the Internet, you have several things to check. Especially if it's for commercial use. You can see my article on the subject here.

              And if you use this technique to avoid paying for an existing cut file, well you are no longer my friend!

              Seriously, designers offer great beautiful files and what better way than to pay them to encourage them to make some more for us! It takes a long time to do this kind of file and we have to support them. This post contains some affiliate links for your convenience and at no extra cost to you. Click here to read my full disclosure policy.

              You can buy them at very reasonable prices on my favorite sites:

              • Design Bundles
              • Dreaming tree

              That was my editorial before I started! 😉 Now, let's have fun!

              Advanced Options for Design Space when importing images

              You may never have noticed them because they are almost as well hidden as the storage panel in the door of your Cricut!! 🤣

              No kidding, I'm talking about the advanced options available when importing images into Design Space. They are only visible if you click the button!

              And yes! By clicking this button, you will see two new options:

              • Reduce colors
              • Color tolerance

              For this tutorial, I use a free file that I found on Design Bundles. These are only available in EPS and JPG. So I'll show you how to take the JPG file and turn it into a cut file.

              File used in this tutorial:"Peru Printable Patches"

              If you prefer to see instead of reading, feel free to watch the following video (I also add more tips!)

              Reduce colors

              As the name suggests, reducing colors reduces the number of colors in the image. This is the equivalent of "simple, moderate, complex" options when importing.

              If we select "complex" and try to remove the background of this image, we still have some grey spots.

              On the other hand, if you reduce the number of colors to "5" as in the example below, the background becomes a single color and will be very easy to remove.

              But you can also notice that the two shades of green have disappeared.

              If we increase the number of colors to "10", the background is still only one color, but the two shades of green are still present which is much better.

              Color tolerance

              For color tolerance, the larger the number, the more similar colors will be erased.

              If we go back to the starting point, we remember that a "color tolerance" of 16 failed to remove all shades of white-grey from the background.

              By changing the tolerance to 100 or event only 50, all shades of grey are captured and the background can be completely eliminated.

              The best trick to avoid abusive use of the eraser!

              Suppose we want to keep only the shades of green and eliminate the black and white.

              It may be that despite our best efforts and manipulation of advanced options, we end up with these kinds of unwanted lines.

              You could, of course, use the eraser and clean the image by removing all these small lines one after another.

              No!

              Stop!

              Don't do that!!!

              I don't know about you, but I'm really not patient enough for that!!!!

              The best trick to clean an image quickly

              The best trick is to forget the eraser! Press "Continue" and save the image as a cut image, with all its small littles lines.

              Once on the canvas, press "Contour."

              Click "Hide all the contours."

              Then select only the shapes you want to keep.

              Click the X to close the "Contour" window

              And that's it, your shape cleaned in the blink of an eye!

              I hope you now have one more trick up your sleeve.

              Don't forget to support SVG file creators by purchasing their files. They create so many beautiful things!

              You can also buy them at very reasonable prices on my favourite sites:

              • Design Bundles
              • Dreaming tree

              Cut files, images and copyright

              copyright acronym against the backdrop of Cricut Design Space

              Did you know that the majority of images found on the Internet are copyrighted? And what about SVG cut files (or other formats)?

              In this post, I will try to make things a little bit clearer for you.

              My goal is not to tell you what to do or not to do.

              My goal is simply to turn on some "lights" in your mind so that you are aware of what exists and to encourage you to inform yourself before using anything found on the Internet.

              Also, the laws may vary depending on where you live, it's up to you to verify.

              Also, note that I am not a lawyer and that this text should not be used as a legal opinion.

              Copyright on images

              We often see "Copyright" or "©."

              The majority of images found on the Internet are copyrighted. This means that they belong to the author who created them.

              It is your responsibility to verify if you are entitled to use the desired image and in the affirmative, what use is allowed.

              How to find copyright-free images

              You may have seen this logo before:

              "Creative Commons logo" by Peter Leth is licensed under CC BY-NC 2.0

              "Creative Commons" is a non-profit organization that offers free legal tools to facilitate the distribution of images.

              Thus, "CC0" (or CC zero) indicates that the creator has given his image to the public domain and that it can be used without conditions.

              But beware, the letters "CC" can be accompanied by different other letters that require different actions when using this image (like the one just above that required CC BY-NC)

              You can click here to see all the definitions, but basically, the images you're going to prefer are the ones using "CC0." 😉

              Here is a site where the images (and SVG files) are of this type:

              • SVG SILH

              Cut files

              Did you know that the majority of SVG cut files, even if you paid for them, are probably only for your personal use?

              For this too, it is your responsibility to verify this information yourself in particular if you want to use the files for commercial purposes.

              Most sites will offer you to pay an additional amount to obtain a commercial license if that's what you want. This article contains links to affiliated products for your convenience and at no additional cost to you. Click here to read my full disclosure policy.

              That's one of the reasons why I love Design Bundles and Font Bundles. Their "Premium License" automatically comes with a commercial license. No confusion or extra charges. You can see the details of their licenses available here.

              Also, watch out for some independent sellers of SVG cut files (such as on Etsy) who do not respect copyright laws and will sell you SVG files of licensed images, logos, etc. Again, it is your responsibility to properly get the information.

              What about the Cricut Design Space files?

              Cricut has an"Angel policy" that allows the sale of products made from files included in Design Space (except licensed images like Disney, Marvel, etc.).

              There are still several conditions that you can read here. Tip: scroll down to the "FAQ" section.


              In conclusion, I won't tell you what to do and what not to do!

              My goal was simply to encourage you, for your safety, to make some verifications when using different images or SVG files. I hope I succeeded!

              The Best Cricut Boxing Day Deals in Canada

              Best Cricut deals on Boxing Day

              This is where you will find in one place all the best Canadian deals on Cricut products and other related products for Boxing Day.

              Christmas is already gone. We put our needs in the background and we spoiled everyone. Now is the time to think about yourself!

              If you want to find out if you have the best price, I have listed for you what I believe to be the best Canadian deals (because we, unfortunately, do not have access to all the beautiful stores of our American neighbours!)

              I did the same thing for Black Friday so I was even able to compare if the deals were better, worse or the same. This post contains some affiliate links for your convenience and at no extra cost to you. Click here to read my full disclosure policy.

              Cricut Design Space beginner course

              My course Cut Learn Conquer is on special on Boxing Day. Check out the details here!

              Important notes

              **Note that coupons and prices may vary depending on where you live. So your savings might not be exactly like mine. I always do my best to share honest and neutral information. I only recommend products and places I trust and use.

              Cricut.com

              The prices on the Cricut website are always in USD (and I have never had any customs fees for delivery to Canada). You can always use Google to see the conversion to CAD.

              Honey extension

              You'll see that often, Cricut.com will have the best price even after converting USD to CAD. What you absolutely need to try, is to install the Honey extension on your Browser. This extension will search, try and find the best coupons that you can apply to your order. It will prompt you with this window:

              Once you click the orange button, you'll see this window:

              And this is when the magic happens! So don't be shy to install the extension by clicking on this link.

              UPDATE 2020: As shipping isn't offered for free this year on Cricut.com, it's the free shipping coupon that seems to always appear to be the best deal. (if you buy more than $99).

              METHODOLOGY FOR CALCULATING PRICES ON THE CRICUT SITE:

              USD Price - 10% Access Member + Free delivery (SHIPDEC or access member) + Quebec taxes X 1.30 (USD to CAD).

              Cricut Access

              Do you know that when you subscribe to Cricut Access, you also get 10% off all purchases at Cricut.com? Yes, on all purchases, even Cricut machines. Considering that the subscription is about $ 10 / month, it's worth it to subscribe even before buying a Cricut! (just make the calculation. It starts to be advantageous as soon as your order is more than $100)

              Not to mention all the projects and fonts to which you will have access for free!

              You can also subscribe for one year (or ask for it as a gift!), The annual price is a little cheaper than the monthly one.

              By subscribing to Cricut Access (even for one month) and using Honey, you'll save a lot of money on your orders and that's often what makes Cricut.com win against Amazon and Michaels.

              Amazon.ca

              If you are a Prime member, delivery is free for all products identified as "Prime". If not, you'll need to verify because delivery will vary depending on items and the total price.

              Michaels Canada

              You can buy everything online and pick it up in stores. It will save you from going there for nothing! They even have a Curbside pick-up available since the pandemic. But in Quebec, all Michaels Stores are closed from December 25, 2020, to January 10, 2021. During this time, you can only shop online and have it delivered to your home. Check for your store here: https://canada.michaels.com/

              Note that the prices might vary depending on where you live. Please check the website. Also, be informed that Michaels will equal any prices found on Amazon.


              Boxing Day deal!

              NOTE: Most of the deals I found were the same on Black Friday. So if you regret not purchasing something on that day, don't worry, it's still a good price!

              Shortcuts to all the deals

              • Cricut Design Space course for beginner
              • Cricut Access
              • Cricut Maker
              • Cricut Explore Air 2
              • Cricut Joy
              • Easy Press 2
              • Easy Press 2 Mini
              • Foil
              • Cricut Brightpad
              • Cricut mats
              • Cricut tools
              • Vinyl
              • Cricut Maker tools
              • Design Bundles - Ultimate $1 event
              • Cricut Pen adapters
              • Design Software

              Cricut products

              Often, it's really a good deal to buy a Cricut machine in a bundle. Cricut.com has many of them. I'll tell you which ones I think are the best.

              To understand the difference between the Cricut Maker, the Explore Air 2 and the Cricut Joy and know everything you need when you begin in the Cricut world, follow this link.

              Here are the materials and tools inside the Bundles (apart from the Cricut Explore Air 2 or Maker) - In pink: useful for Iron-On; in orange: adhesive vinyl.Essential BundleEverything Bundle
              Foil Iron-On Sampler, BejeweledX
              Everyday Iron-On Sampler, EleganceXX
              Adhesive Foil Metallic Sampler, BejeweledX
              Premium Vinyl Sampler Removable, EleganceXX
              Dry Erase VinylX
              Stencil vinylX
              Vinyl ChalkboardX
              Foil Poster Board Sampler, BejeweledX
              Glitter Cardstock Sampler, BrightsX
              Cardstock Sampler, BasicsX
              Iron-On Protective SheetXX
              Transfer TapeXX
              Pen Set, Classics (5 ct.)X
              Scoring StylusX
              True Control Knife, BlueXX
              Cutting Mat Varietry Pack, 12" x 12" 3 pk (one blue, one green and one purple)XX
              Tools Basic SetXX
               Portable TrimmerXX

              Cricut Maker

              The Maker seems to be out of stock almost everywhere.

              But for the Cricut alone:

              1. If you still find it at Costco, this is still the best price at 399$
              2. Michaels has it for 20$ more (verify the stocks)

              **On Cricut.com, you can get the Maker with the Essential Bundle for $359 USD and even the Everything Bundle for a bit more. Do the math, I personally think it's worth it.

              If you see that it's out of stock. Come back later. Sometimes The Maker comes back on stock for a short period.

              Cricut Explore Air 2

              The Explore Air 2 alone is also out of stock at Cricut.com. However, if you do the math, the Essential bundle is less than 10$ more than buying your Explore Air 2 on its own from Michaels.

              1. Cricut Explore Air 2 Essential Bundle

              Cricut Joy

              • Cricut.com has the best price
              • Followed by Michaels

              Easy Press 2

              One thing I regretted when buying my Easy Press was buying only the 9" x 9". At the time, I didn't think I was going to like Heat transfer vinyl. But OMG was I wrong!

              The Cricut as a 12" mat, so I wish I would have bought the 12"x 10". See this post for more details.

              Therefore, I will give you the prices of the 12" x 10". the prices of the other sizes are always proportional.

              Once again Cricut.com wins hands down on the Easy Press award and for all sizes. It's not even worth mentioning the other places because the difference is so big

              Easy Press 2 mini

              Cricut always has the best price for the mini and by far.

              New Foil kit

              No specials are available for the new kit, unfortunately.

              Cricut BrightPad

              Although not essential, the BrightPad is very useful to weed small pieces of vinyl (or maybe it's my eyes are getting old!!)

              Only Cricut.com has it at an affordable price but it's currently out of stock. If you really need that kind of tracing pad, you could always check what's available here.

              Cricut mats

              I always suggest buying Cricut mats on Amazon.ca since these are often really cheaper than on the Cricut website or at Michaels.

              BUT NOT TODAY!!! Amazon is even more expansive than Michaels

              The best price is, again Cricut.com and by far.

              Almost all materials and accessories are at 50% OFF on the Cricut site until December 31st. Also, Cricut access members get free shipping with no minimum. All other customers can get Free Economy Shipping on orders $99+ with code SHIPDEC or DECSHIP

              Useful Cricut tools

              Less than 25$

              • Basic tools
              • Wedding tools
              • 12x12 mat for the Easy Press
              • 30 Cricut Pens

              If you have the Cricut Maker

              Take the opportunity to buy or to ask Santa for specialized blades.

              • Knife Blade
              • Set of 2 scoring wheel (including the QuickSwap housing, allowing you to buy only the tips of other blades).
              • QuickSwap tip (this is the perforation tip but you'll also find other tips to emboss, engrave and cut wavy lines.)
              • The new Cricut tool organizer

              Design Bundles

              Design Bundles is having a Christmas Plus Event.

              6 free products each day for 10 days for people who subscribe to their Plus Membership.

              Click here to know more.

              Software

              Sure Cuts A Lot 5 is the same price that it was on Black Friday.

              But Silhouette Studio Business Edition is even lower than it was. Check out how I used it in How to use a custom LED lamp with the Cricut engraving tip.

              Cricut Design Space beginner course

              My course Cut Learn Conquer is on special on Boxing Day. Check out the details here!

              Other deals?

              You found other deals or have any questions, leave me a comment below.

              How to make a 3D shadow box with lights

              3D shadow box of a Christmas gnome with snowflakes

              Learn all my tips to help you make this very beautiful 3D shadow box. Ideal for a last-minute Christmas present!

              We've seen a lot of shadow boxes lately and I'm always amazed at how simple cardstock can have such a spectacular effect.

              I had to make one.

              3D shadow box with Gnome and snowflakes

              Being so close to Christmas, it's also a nice gift to give and relatively quick to make. In my opinion, it's the Cricut that has to work the hardest on this project!!! This article contains links to affiliated products for your convenience and at no additional cost to you. Click here to read my full disclosure policy.

              Do you like 3D projects? Join the challenge!

              If you like 3D crafts as much as I do, check out my 3D Papercraft Challenge You'll be able to make 3 incredible projects, (including one from the same designer as this gnome!)

              What can be used as spacers in a shadow box

              Shadow boxes require more than just small adhesive foam squares.

              To give a nice depth effect, it is recommended to use acid-free foam board as spacers in the shadow boxes.

              3D shadow box with Gnome and snowflakes

              Usually, it is recommended to cut foam board "frames" and insert them between the layers. But this results in a lot of losses and, if you are used to my projects, you know that if there is one thing I hate, it is to waste materials!!

              So check out the video below to see my tips on how to save foam board.

              What types of lights can be put in a lighted shadow box?

              Of course, LED lights are recommended because they do not heat up. Despite this, you should never leave a lighted shadow box unattended. It's cardstock after all!

              It is possible to use LED light strips, but you will find that your shadow boxes are expensive!!

              What I recommend are Fairy LED lights. They are very small and twisted with a wire that allows easy installation.

              3D shadow box lit with Gnome and snowflakes

              How to install the lights in the shadow box

              For an easy installation of the fairy lights in the shadow box, simply wrap it around a frame made with foam board.

              Again, for more details, you can check out the video below.

              Everything you need

              First, the file used in this tutorial comes from Design Bundles and the designer is Lindsey from Sea Salt and Samphire.

              I completely fell in love with her creations. They are very original and I love their details.

              Click here to see the Christmas gnome file used in this tutorial.

              I'm really amazed by the details and the effects it gives! 😍

              Tools

              • Gnome SVG file
              • Cutting machine (the Cricut Explore Air 2 or the Maker work. On the other hand, the Joy is not wide enough to achieve a frame of 9-¾" x 9-¾")
              • Glue (I like Aleene's tacky glue or Tombo glue)

              Materials

              • 3D frame (I took mine from IKEA)
              • Fairy lights (here are the ones I bought (Canada) and other similar available in the US)
              • Foam board (there are some at the store for $1)
              • Cardstock
                • cardstock leftovers: red, skin colour and black)
                • 1 cardstock 12 x 12 dark green
                • 4 cardstocks 12 x 12 white
                • 1 cardstock 12 x 12 grey
                • 1 cardstock 12 x 12 medium green
                • 1 cardstock 12 x 12 darker medium green
                • 1 cardstock 12 x 12 dark blue
                • 1 cardstock 12 x 12 metallic / yellow

              See all the steps in the video

              I really loved this project and you will also surely love it too. I will surely do more of them very soon!

              Don't forget to Pin it!

              Tips to make a 3D shadow box with lights.

              DIY Christmas gift tags with foil transfer

              12 Christmas tags made with Cricut Foil tip

              This article will show you how to use my free SVG files to make awesome gift tags with Cricut's foil transfer kit (or a pen if you don't have the foil tip yet!).

              Every year, I exchange gifts with my family. Last year, I used these tags made with the Maker's perforation blade.

              My niece had a fun time peeling them off and finding out who the gift was for!!

              This year, I wanted to make something more durable to go with our new fabric gift bags made by my super mother-in-law who is an excellent seamstress (just the opposite of me haha! So we complement each other!!)

              My first idea was to make leather-like tags with a fabric insert that would match each bag. I abandoned this idea for several reasons:

              1. I designed the tags with far too many details to be cut in faux leather (100% my fault, I got a little excited in the design!!).
              2. The foil transfer does not look super good on faux leather. So disappointing!
              2 Christmas labels made with Foil tip on faux leather

              As I still liked the designs that I made, I told myself that I could still offer them to you and make them on cardboard.

              The more "sustainable" tahs will go to next year! This article contains links to affiliated products for your convenience and at no additional cost to you. Click here to read my full disclosure policy.

              Gift tags with Foil or Pen

              Tools required

              • Cricut Explore Air 2 or Cricut Maker
              • Foil tip (if you don't have it, you can also use a gold pen and the "draw" function. Watch the video for more details)
              • Tool to install eyelets (I own the Crop-A-dile)
              • Adapter for Sharpie Metallic (optional)
              • SVG file of the 12 Christmas tags available in the free library by signing up for my newsletter below 👇

                Required materials

                • Coloured cardstocks
                • Gold Foil Transfer Sheets
                • Eyelets
                • Christmas ribbon or twine
                • Metallic Sharpie

                How to make labels with Foil

                You will see in the video that I use foil transfer sheets but you can also use the same file and instead of foil, use "draw" and make a similar effect with a golden pencil or whatever colour you choose!

                I also use a Metallic Sharpie as well as the Cricut adapter that I tested in this article.

                Can Foil transfer sheets be reused?

                The answer Cricut will give you is no! But you know how I like to save! Well, I tested it! I used the same sheet to make the front and back of the tags.

                The front is more detailed and was made first.

                12 Christmas tags made with Cricut Foil tip

                For the back, there was only the border of the tag to make in foil. I thought that the worst that could happen is that there would be small gaps in the foil lines.

                But not even tiny bits! (Note that the foil is pretty hard to photograph...)

                The back of the Christmas labels made with Cricut's Foil tip

                Of course, there are limits to the reuse of the transfer sheets. There has to be some foil left on the sheet to transfer!!!!

                I figured that if it didn't work, I could just replace a new foil sheet before removing the mat (after cutting) and press the button to restart the Cricut.

                If you ever want to try it, don't hesitate to tell me if it worked for you!!!

                SVG file of 12 gift tags

                Don't forget to sign up for my newsletter to receive the password giving you access to the free library as well as several SVG files including the 12 free Christmas tags!

                  12 Christmas tags made with Cricut Foil tip

                  Do you also exchange gifts in your family?

                  Come and show me on Facebook how you will use these tags and for what occasion!

                  And don't forget to pin it!

                  How to make metal engraving stand out with your Cricut Maker

                  Galvanized and engraved metal sheet with the engraving tip of the Cricut and using China ink to make it stand out

                  See how two easy techniques can make metal engraving stand out with your Cricut Maker

                  You have the engraving tip of the Cricut Maker but do not dare to engrave metal because you think you won't get a nice result?

                  I understand your concern!

                  The best trick to enhance metal engraving made with the tip of the Cricut Maker is to use these two combined techniques: fill in the letters or drawings with hatches and use a product to darken the design.

                  This tutorial will show you both techniques so that you too can make an engraving just like this one.

                  Use China ink to make the engraving of the galvanized aluminum stand out.

                  But first, here's what you need. This article contains links to affiliated products for your convenience and at no additional cost to you. Click here to read my full disclosure policy.

                  Required materials

                  Several kinds of metal can be used. Here are a few:

                  • Galvanized aluminum sheets (this is what I use in this tutorial and I found them in the liquidation section at Michaels)
                  • Cricut Aluminum sheets

                  Tools required

                  • Cricut Maker (it can be done with the Explore Air but it takes a tool that is not Cricut brand. Be careful not to cancel your warranty if you use it.)
                  • Maker's engraving tip (and Quick Swap base)
                  • Purple mat
                  • Masking Tape

                  SVG Files

                  The SVG files used in this tutorial come from this Bundle made by Caluya Design.

                  How to fill with hatches to make the engraving stand out

                  To fill your design with hatches you can either use a drawing software like Silhouette Studio Business Edition (as I did for engraving the plastic for this LED lamp) or use my SVG files.

                  I have indeed created 2 SVG files, a file of hatches spaced at 0.020 inches with an angle of 60 degrees and another with the same spacing but at 120 degrees.

                  You can find these files in NeliDesign's free library. To get access, sign up for my newsletter below:

                  You can see in the following video, all the details on how to use these files.

                  I chose 0.02" after doing several tests with different spacings and hatching. Here's a preview, but you can see it in detail in the video.

                  Several spacing tests to make the engraving stand out on the metal

                  How to darken the design to make the engraving stand out even more

                  There are several products to darken the design and make your metal engraving stand out. My friend Jen, from "Well Crafted Studio" tested a lot of them. She even developed her own technique for engraving aluminum flashing. Go take a look at it!

                  Me, I would have loved to use Gilders Paste, but being in Canada, I could not find any (at least, not at a reasonable price!).

                  Jen also told me about Ranger's Vintaj Patinas and I promise to try them next time.

                  Also, did you know that you can use Infusible Ink (pencils or transfer sheets) on Cricut Aluminium sheets? I think that sounds very interesting. Another project to add to my enormous list!!!

                  All this to say that I finally decided to try 2 products that I had on hand to darken my design:

                  1. China Ink (or India Ink)
                  2. Acrylic paint

                  You can see in detail in the video that China Ink is much more effective and that the acrylic does work but the result is more subtle.

                  Several darkening tests make the engraving on the metal stand out

                  I hope it inspired you to try your own engraving!

                  If so, come and show them to me in my Facebook group. It's always nice to see your projects!

                  Which pens and markers can be used with the Cricut?

                  Cricut pen and marker adapters

                  Learn how you can use the pens and markers you already have at home in your Cricut by getting simple adapters.

                  This post is sponsored by Springbok Craft Supply. All opinions are 100% my own. This article contains links to affiliated products for your convenience and at no additional cost to you. Click here to read my full disclosure policy.

                  UPDATE: I also found this universal adapter that fit the Cricut Maker, Maker 3, Explore Air, Explore Air 2 and Explore 3 and are tested to adapt to more than 80 pens style! A friend tested it and was very satisfied.

                  The holiday season is approaching and you're wondering what to put on your wish list? Well, I have a great idea for you!

                  Not only will this idea save you money and make you discover a lot more possibilities, but you will also encourage a small Canadian company!

                  Pen and makers adapters for the Cricut

                  It was while researching my article on How to Use Crayola Markers with the Cricut that I came across the Canadian company Springbok Craft Supply.

                  I was immediately impressed by the number of positive reviews related to their products, especially the Cricut pen adapters.

                  These are compatible with Cricut Explore, Explore Air, Explore Air 2 and Cricut Maker.

                  They have 14 models of adapters and what I particularly liked is that you don't have to buy the 14 at once. You can compose your own groups of 3, 4, 6 or 8 in addition to being able to buy them individually! ?

                  Springbok Craft Supply Adapters

                  Here are all the pens and markers that can be used:

                  (I would like to advise you that some of the links lead to exorbitant prices on Amazon for Canadians. But you can at least have a visual of the pens.)

                  • Sharpie Fine Point Marker / Metallic / Neon
                  • Sharpie ultra-fine point marker
                  • Sharpie Art Pen marker (fine tip)
                  • Sharpie oil-based marker (fine and extra fine tips)
                  • Crayola Fine Line Marker
                  • Crayola Super Tips (latest version)
                  • Crayola Pipsqueaks washable marker (Small Size Big Color or Skinnies)
                  • Sakura Gelly Roll
                  • Pilot Fine Liner
                  • Prismacolor Premier Fine Line
                  • Staedtler Triplus Fineliner
                  • Pilot Twin Tip fine point and extra-fine (2 adapters are available for this 2-sided pencil)
                  • Muji Gel Ink Ballpoint

                  How to install the adapters in the Cricut

                  I invite you to view the video for all the details. There's nothing better than seeing it to understand and see how easy it is.

                  Note that using a product other than Cricut is at your own risk. If your Cricut is still under warranty and you break something with a product other than the Cricut brand, Cricut may refuse to honour the warranty!

                  Testing adapters

                  Sharpie

                  For sharpie pens, I did not have the Sharpie ultra-fine point, but considering the superb result of Sharpie fine point, I would be very curious to try it.

                  Sharpie markers and adapters for the Cricut

                  Sharpie fine point markers are really in a category of their own. You will see below, I could not compare them to any Cricut pens I had. It looks like an in-between between the medium tip and the calligraphy tip. But oh! What a result!

                  Sharpie writing test with Circut adapter

                  As a matter of fact, Springbok Craft Supply offers a set of 3 Sharpie pens or 4 Sharpie pens.

                  Crayola

                  The 3 Crayola markers worked great too.

                  Crayola with adapters for cricut
                  Crayola writing test with Cricut adapter

                  Parents or grandparents will be able to search in the children's markers and use their Pip-Squeak markers! They really impressed me!

                  And the other two Crayola markers were just as effective. And just like the Sharpie pens, Springbok also offers the Crayola in a bundle.

                  And all the others

                  The Sakura pen had trouble, but it has nothing to do with the adapter. This type of gel pen is known for not having a continuous flow of ink.

                  Writing test with several other pens and markers with adapters for the Cricut

                  The best pen to use (best result)

                  I compared the results above with the 3 main Cricut markers: the "Fine Point 0.4", the "Medium Point 1.0" and the "Calligraphy" pen.

                  Cricut Fine point 0.4

                  Among the markers I tried, Sharpie Art Pen markers, Staedtler Triplus, Prismacolor Premier Fineline and Pilot Fineliner are very similar to the Cricut Fine point.

                  And even better than the others, the Pilot Fineliner did not leave small dots where the Cricut made stops. However, it is difficult to insert into the adapter. This is normal according to the Springbok owner because this pen requires to be very tight in the adapter to get nice writing. If you struggle with this pen and the adapter, check out the video above to see my trick.

                  Cricut Medium point 1.0

                  The pens that most closely resemble the Cricut Medium point are the 3 Crayola. Strangely, they are even a little bit more accurate than the Cricut!

                  Cricut calligraphy

                  Unfortunately, I didn't find a calligraphy-tipped pen that worked in the adapters so I couldn't compare it.

                  FAQ

                  Is it worth buying adapters with pens or markers?

                  Difficult to compare all prices, sales, etc. For Crayola, these are very inexpensive markers and you will probably save if you buy these with adapters instead of the Cricut medium-point pens. It's probably the same for the Sharpie brand.

                  On the other hand, the other markers are almost as expensive as the Cricut brand. So if you already have these markers at home, it's probably worth using them with an adapter instead of spending money on new Cricut pens.

                  So my best advice is for you to do the math and see if it's worth it for you.

                  Do adapters work with the Cricut Joy?

                  No. The Springbok website states that the adapters are compatible with Cricut Explore, Explore Air, Explore Air 2 and Cricut Maker.

                  In conclusion

                  If you're looking to use new colours or markers you already have at home, I invite you to encourage Springbok Craft Supply, a small Canadian company. Ben and Helaine offer excellent service.

                  DIY wood slice wreath with vinyl

                  This tutorial will show you how to make a personalized wood slice wreath using vinyl and your Cricut. You'll even see how to cure real tree slices.

                  This tutorial was born from a collaboration idea between my friend Lindsay and I. Lindsay blogs at "A Butterfly House" and makes projects that often involve a mitre saw and safety glasses!!

                  She doesn't own a Cricut and knows absolutely nothing about it! But she's my friend anyway! 😆 We've been helping each other with our blogs for over a year and talking to each other every week. Even though she lives in the U.S., she's probably the friend I've seen the most lately! (pandemic social distancing!) Haha

                  DIY wood slice wreath

                  As she's the one skilled with a saw and I, with a Cricut, Lindsay was in charge of making this beautiful wood slice wreath.

                  DIY wood slice wreath written Ho Ho Ho with vinyl.

                  It's amazing, don't you think?

                  So I invite you to visit her blog to find out:

                  • How to cure wood slices (honestly, I didn't think it was that easy!)
                  • How to build a wreath with wood slices

                  For my part, I was responsible for making the letters with vinyl and mailing them to Lindsay (don't tell her, but I think I was the one who had the easy job!!!!) This post contains some affiliate links for your convenience and at no extra cost to you. Click here to read my full disclosure policy.

                  Cut vinyl to apply to wood slices

                  Tools required

                  • Cricut (I have the Maker, but the Explore Air and even the Joy will do)
                  • Weeding tools
                  • Scraper (optional but very useful!)

                  Required materials

                  • Wood slices (you can buy them if you can't make them yourself!)
                  • Permanent Vinyl (such as Cricut Premium Permanent or Oracal 651)
                  • Transfer paper
                  • SVG file (see below)

                  By subscribing to my newsletter, you will have access to these words in SVG, DXF, PNG and PDF files. You can also choose between these 4 types of writings.

                  Sign up here to get access:

                    As for my friend Lindsay, by subscribing to her newsletter, you will find the same fonts, but with different words (except for the Ho Ho Ho).

                    Click here to see her tutorial and subscribe.

                    In case you'd rather write what you want, these fonts come from this "20 Christmas Fonts" bundle I bought.

                    They are called "Snug Sweater" and you can also find them individually here.

                    Should you add a sealer on wood or not?

                    To apply permanent vinyl on wood, you don't necessarily need to seal the wood. If your wood is smooth and clean and you use permanent vinyl, a sealer or protective layer on the wood is not necessary.

                    On the other hand, if your wood is very uneven, I would add something like Minwax polycrylic underneath to help the vinyl adhesion. If in addition your decoration is outdoors and subject to the weather, I would use an exterior varnish, under, and maybe even on it to increase its lifespan.

                    (Note: I'm doing an outdoor test on different types of vinyl. I will come back to you soon with the results and recommendations. If the types of vinyl get through a Quebec winter, nothing will stop them!!)

                    Preparing vinyl to send to another person

                    My friend Lindsay being in the United States, I had to mail her the vinyl.

                    So I did the layering of the vinyl on the transfer paper as if I were to install it myself. Then I simply put the transfer paper back on its carrier sheet. 🙌

                    Layering several layers/colours of vinyl

                    Speaking of layering vinyl, do you know the easiest and most precise way to layer multiple colours of vinyl?

                    You use parchment paper!

                    Apply the vinyl to a piece of parchment paper, allowing a small portion of the vinyl at the top to exceed.

                    Then press the parchment paper onto the piece of vinyl on which you want to layer it by bending the top to prevent it from sticking.

                    As parchment paper slides and is transparent, it will allow you to align the vinyl perfectly.

                    Using parchment paper to layer multiple colours of vinyl

                    Once perfectly aligned, press the top part to make it stick.

                    Using parchment paper to layer multiple colours of vinyl

                    Lift the transfer paper by making sure the top doesn't move and remove the parchment paper.

                    Using parchment paper to layer multiple colours of vinyl

                    Re-apply the transfer paper by gradually pressing down from top to bottom with the scraper.

                    Using parchment paper to layer multiple colours of vinyl

                    There you go! Two layers of vinyl perfectly aligned!

                    Detailed tutorial

                    To see the tutorial in detail, watch the video!

                    I'm really happy to have done this project with my friend! Proof that, even physically far away, we can collaborate! Awesome isn't it?

                    Don't forget to pin it for later!

                    How to personalize a wood slice wreath with vinyl and a Cricut + Free SVG, DXF, PNG, PDF

                    How to make a custom led lamp with the Cricut Maker's engraving tip

                    An engraved led night light written it's the season to be freezing

                    See how to engrave and cut craft plastic to make custom LED lights. By changing the design, they can make beautiful home decor throughout the year.

                    You see a lot of these assorted LED lamps made with round, square or rectangular acrylics that have been engraved with super beautiful designs, often personalized.

                    That's not quite what I'm going to show you because I won't be using acrylic. But the end result will be virtually identical.

                    And why not just use these acrylics? Well, because here in Canada they are very difficult to find. And when we find them, they are so expensive!!!

                    Besides the fact that I like to keep the cost of my projects low, I also find a circle, a rectangle, etc very boring!!! 😉

                    So I am going to show you that it is possible to make a custom LED lamp, engraved with the Maker, at a reasonable price even if acrylics for the lamp bases are not available or are overpriced.

                    Before you start, a suggestion!

                    I would first like to say: practically everything I learned, I owe it to the Facebook group " Cricut Engraving with Clever Someday ". I highly suggest it!

                    The people in this group are so generous and dedicated to solving whatever engraving problem you have. Not to mention all their inspiring projects!!! 😍

                    What I'm going to show you in this tutorial is not taken directly from their group (I would never dare to literally copy their stuff anyway!!).

                    It's a bit of a mix of techniques that I gathered and put together to make a complete project.This post contains links to affiliate products for your convenience and at no additional cost to you. Click here to read my full disclosure policy .

                    How to engrave a custom LED light with the Cricut Maker

                    As acrylics for LED lamps are hard to find in Canada, I used craft plastic 0.020 " (500 micron) to do my projects.

                    The advantage of this plastic is that it can be cut with the knife blade of the Maker. The downside is that you have to add thickness at the bottom of the design to prevent it from moving in the base.

                    How to enhance the engraving effect

                    The engraving can be enhanced by adding hatches (very close lines) inside the text and/or drawings.

                    Engraved craft plastic for led light written every day i'm Shovelin

                    This tutorial will show you two ways to enhance the engraving effect.

                    Add hatches with Cricut Design Space

                    In the video, I will show you how to import a hatch file that I made especially for this project. You will then see how I use it to enhance the engraving.

                    Engraved craft plastic for led light written it's the season to be freezin made in Design Space

                    This file is available in the NeliDesign library. All you have to do is subscribe to my newsletter to access it.

                      Add hatches with Silhouette Studio Business Edition

                      This technique is really my favourite. Yes, Silhouette Studio is the software used with Silhouette brand machines. But, if you get the " Business" version, you can then export your SVG files to import them back into Design Space.

                      (Update: If you have the free version of Silhouette Studio, you can also use this free converter to change your studio file to an SVG. But I still strongly suggest you buy the real thing if you can. Companies do work hard on their products!)

                      There is also the "Sure Cut A Lot" software which is similar. However, in terms of hatching, Silhouette Studio Business Edition is really "a cut above"!

                      You will see in the video how easy it is to modify the design as well as all the available options.

                      Engraved craft plastic for led light written It's the season to be freesin

                      There are a lot of steps to make engravings for LED lamps!!!

                      As a matter of fact, the method that I am going to show you requires several steps but gives a super nice result!

                      That's why I've made a Step by Step printable to help you with your first LED lamp engraving. (And I will tell you, even I use it because the steps are not yet well engraved in my head!! 🙈)

                      So subscribe to my newsletter below and I will send you the printable file. If you are already registered, you will find it in the library with all the other practical files and free SVGs!

                      Click here to subscribe

                      SVG files used

                      You can find all the files used in the tutorial in the " Christmas Craft Bundle Volume 4 ". However, the latter is available approximately until mid-December 2020. So here is also the list of the individual files:

                      • " Tis the Season to be Freezin "
                      • " Every Day I'm Shovelin "
                      • " Let it Snow somewhere else "
                      • " Full of Holiday spirit (AKA wine) "

                      Tools required

                      • Cricut Maker
                      • Engraving tip and "Quick Swap" base
                      • Knife Blade
                      • Cutting mat (or Green Cutting mat with reusable double-sided nano tape)
                      • Cricut Design Space
                      • Silhouette Studio Business Edition (optional)

                      Required materials

                      • Craft plastic 0.020"
                      • LED lamp
                      • Painters Tape
                      • Reusable mounting tab

                      Make an engraving for a LED Lamp, Step by Step

                      It's not the easiest project to do, but it's so satisfying! I hope you will give it a try. Come show me your achievements on my Facebook group!

                      Click here to subscribe

                      Don't forget to Pin it!

                      Pinterest image of engraved craft plastic with the writing How to make an engraving for a led night light

                      How to make a frame with fabric scraps and your Cricut

                      frame made with fabric scraps and rotary blade of the Cricut

                      Looking to make an original frame? Well, this tutorial will show you how to use fabric scraps and the rotary blade to make beautiful art to hang on a wall!

                      I wanted to do a special project for my friend's birthday. She has a sewing business "Mes petites chooses" (meaning "My little things" in French).

                      But, sewing and me... hmmm, let's just say that it's not my best talent! 😂

                      But yes, it is possible to cut fabric with the rotary blade of the Cricut without needing to sew anything!

                      So I decided to make her a frame with her fabric scraps and my Cricut. Yes, these are "her" scraps!. I subtly asked her to provide me with fabric scraps without telling her what I was going to do with them!

                      Frame made with Cricut rotary blade and fabric scraps.

                      And I couldn't be happier with the result! This article contains links to affiliated products for your convenience and at no additional cost to you. Click here to read my full disclosure policy.

                      Required materials

                      For the frame

                      • Frame (or see this post if you want to make a frame like mine with recycled planks)
                      • Fabric scraps
                      • Cricut Maker
                      • Rotary blade (the fabric blade that comes with the Cricut Maker)
                      • Fabric cutting mat (pink)
                      • Transfer tape (or paper to cover book from the Dollar store)
                      • Cardstock to make the template
                      • Mod Podge and foam brush
                      • Embroidery thread
                      • Cardstock for small flowers

                      for text only

                      • Stencil vinyl
                      • Transfer tape
                      • Paint
                      • Sponge brush for stencil
                      • Scraper (very useful in this case!)

                      How to make a frame with your Cricut and fabric scraps

                      If you prefer the video, see at the bottom of this post!

                      Steps to cut fabric in Cricut Design Space

                      First, in Cricut Design Space, click "download" and find the image of the sewing machine that you previously downloaded from NeliDesign's library.

                      import an SVG to make a frame with fabric scraps in Cricut Design Space

                      Cut the sewing machine on a cardstock. This one will only serve as a template for the moment. Then select the shape you want under "Shapes".

                      Use the free SVG to make a frame with fabric scraps in Cricut Design Space

                      I used a triangle that I unlocked and shortened as follows.

                      Draw a triangle to make a frame with fabric scraps in Cricut Design Space.

                      Close the eye of the sewing machine's layer and use the "duplicate" button to make multiple triangles.

                      Duplicate shapes to make a frame with fabric scraps in Cricut Design Space.

                      Since the triangles will be cut into fabric scraps, they must be manually placed on the Design Space mat depending on the placement of the fabric scraps on the cutting mat.

                      Place the shapes on the mat to make a frame with fabric scraps in Cricut Design Space.

                      Place the fabric scraps on the mat to make a frame with your Cricut.

                      Assembling fabric scraps.

                      Once the fabric triangles are cut, place the sewing machine template on your work surface, taking care to turn it upside down (mirror).

                      Then use a piece of transfer paper and fix it with scotch tape over the template so that the sticky side is up.

                      Place the transfer sheet to make a frame with fabric scraps in Cricut Design Space.

                      Then use all your patience (!!) to place the fabric scraps in order to make a beautiful arrangement of colours and patterns.

                      Warning: don't forget to place the triangles face down (meaning that the pattern needs to be on the side of the table).

                      Place the fabric scraps to make a frame with fabric scraps in Cricut Design Space.

                      Transfer the fabric triangles and transfer paper to the Cricut cutting mat

                      With the template, estimate the positioning that the sewing machine should have.

                      Transfer to the Cricut mat to make a frame with fabric scraps.

                      On the Design Space mat, position the silhouette of the sewing machine at the same place using the grid as guides. Don't forget to do "mirror."

                      Don't forget to mirror.

                      Use the rotary blade and fabric settings to cut out the silhouette of the sewing machine.

                      You will notice that the transfer paper has also been cut. It doesn't matter.

                      Lift the mat of the carpet using the spatula if required.

                      Remove with the spatula to make a frame with fabric scraps and your Cricut.
                      Once all the fabric scraps are cut to make a frame with your Cricut.

                      My first idea was to transfer the fabric to the frame but the Dollar store paper was way too sticky. I had to take each triangle of fabrics one by one and stick them on the frame with Mod Podge. 🤷

                      It was a bit long, but it was worth it!

                      Note that I didn't add Mod Podge over the fabric because I wanted to keep the texture of the fabric.

                      How to write the text on the frame

                      First, cut the letters into stencil vinyl. Cricut's stencil vinyl has a sticky side. So I used transfer paper to apply it to the frame so I could keep all the small pieces in place (such as the holes of the "o" and other letters).

                      Use a stencil in the Cricut to make the frame text with the fabric scraps.

                      Apply the stencil with the transfer paper on the frame with fabric scraps.

                      The transfer paper sticks a lot on the stencil vinyl! I always forget to do it, but I strongly suggest pressing your transfer paper a few times on your sweater or towel to decrease the "intensity" of stickiness!

                      Gently remove the paper transfer from the frame with the fabric scraps

                      Plus, because my wood planks were rough, the stencil vinyl didn't stick perfectly. So I had to use masking tape to help me.

                      The scraper was also handy for removing the transfer paper that was absolutely keen to stick!!!

                      Gently remove the paper transfer from the frame with the fabric scraps

                      Before adding the paint, apply a layer of Mod Podge to seal the stencil. This is all the more necessary when the frame is uneven like mine.

                      Apply Mod Podge to the stencil to make the letters on the frame with the fabric scraps.

                      Once the Mod Podge is dry, apply the paint by "dabbing" the foam brush on the stencil. Be careful not to paint outside the stencil! I say it because that's totally my kind of mistake!!!

                      Apply paint on the stencil to make the letters on the frame with the fabric scraps.

                      You even have the right to change your mind about the colour along the way (I finally put dark pink over the pale pink)!!!

                      When the paint is dry, gently remove the stencil.

                      Remove the stencil to make the letters from the frame with the fabric scraps.

                      Making touch-ups is required and this is perfectly normal!

                      Paint touch-ups are needed to make the letters on the frame with the fabric scraps.

                      The final touch

                      I used embroidery thread to mimic the thread of the sewing machine. Again, just put a little Mod Podge to stick it.

                      Glue the embroidery thread with Mod Podge to make the frame with the fabric scraps and your Cricut.

                      I also found a flower to cut with my Cricut and I added it as a decoration. 🙂

                      Add a cut flower with the Cricut to make the frame with the fabric scraps.

                      It's a project that took quite a long time to do, but still very pleasant. And I love the result.

                      Frame made with Cricut rotary blade and fabric scraps.
                      Frame made with Cricut rotary blade and fabric scraps.

                      I must admit that creating an original frame like this is very satisfying! It's even better when you do it to give it to someone else!

                      Are you like me? I always have more patience for complicated projects when it's for a gift!!!

                      Check out the video for all the details

                      Want to know more about Cricut Design Space?

                      Get my free cheat sheet by subscribing below.

                      Don't forget to Pin it!

                      How to use Crayola markers with a Cricut

                      Crayola markers to replace Cricut pens

                      Buying Cricut pens can be expensive. This post will show you how to use other markers, such as Crayola, in your Cricut machine.

                      Did you know that it's not just Cricut-branded pens that you can use in your machine?

                      Several other markers, including fine-line Crayola markers, can work in your Cricut Explore or Cricut Maker without the need for an additional adapter.

                      However, there is a caveat! If your Cricut is still under warranty and you break the pen holder (the clamp A) using a product other than a Cricut product, Cricut may well refuse to replace it. So be very vigilant!

                      You can visit the Cricut website for specific information about your machine's warranty. This post contains links to affiliated products for your convenience and at no additional cost to you. Click here to read my full disclosure policy.

                      How to use Crayola markers in a Cricut

                      First, I need to tell you right away that these markers will work for the Cricut Explore and Maker families. Unfortunately, the Cricut Joy doesn't have the same pen holder so I can't include it in this test.

                      So to lighten the text, when it's written "Cricut," I mean the Explore and Maker families.

                      Second, not all types of Crayola markers work in the Cricut. I tested a few other Crayolas I had at home and most of them were too big to fit inside the Cricut pen holder.

                      The ones I tested that work very well are the Crayola fine line markers.

                      When a Cricut pen is inserted into the pencil holder, it must be pushed down until a "click" is heard and the small triangle disappears.

                      For the Crayola marker, there will be no "click." It will just hold tightly in the pen holder.

                      It is therefore necessary to determine how high to place the marker. For this, I use washi tape to mark first the height of the Cricut pen in clamp A.

                      Identify the Cricut pen with Washi tape to compare it to the Crayola marker.

                      Then, by pressing the two markers side by side on a sheet of paper, I add washi tape to the Crayola marker, at the same height as the one on the Cricut pen.

                      Compare the height of the Cricut pen with the Crayola marker

                      All that remains is to gently insert the Crayola marker into the Cricut's pen holder until the washi tape is at the right height.

                      Add washi tape on the Crayola marker at the same height as the Cricut pen.

                      It is important never to force the pen holder, even for Cricut pens. The clamp should never be hard to close. If it's difficult, there is probably something wrong.

                      Don't hesitate to watch the video to see exactly how I do it.

                      Cricut pens vs Crayola markers

                      I chose to compare Crayola markers to Cricut's 1.0 medium tip. These are the two tips that are the most similar.

                      The result is quite impressive! The only major difference is that Crayola's black is less intense than Cricut's.

                      Writing test with the Cricut pen and the other with the Crayola marker.

                      And if it bothers you, you can always use the Crayola for colours and the Cricut pen for black. A good compromise that still saves money!

                      It is still important to note that the tip of the Crayola markers is still wide and that the smaller the drawing or font, the less these markers will give a beautiful result.

                      Still, the Crayola marker gave more detailed writing for the smaller font than the Cricut pen. You can see it on the smallest "d" of Wanderlust.

                      No matter which marker you use, if the chosen design or font contains very close lines, you'll need a fine tip like Cricut 0.4.

                      Other markers

                      I tested several other markers I had at home thanks to my daughter who really likes pens and markers!

                      4 other styles of markers to replace Cricut pens that did not work, unlike Crayola markers.

                      I have not been able to make these markers work.

                      • The Midliner was too big to fit in the pen holder.
                      • Although smaller, the Gelly Roll didn't want to enter and I didn't want to force it.
                      • I thought I had succeeded with the Staedtler triplus fineliner but when I closed the clamp, it bounced off!!
                      • The Crayola supertips were also too big to fit into the pen holder.

                      If you want to use other types of pens in your Cricut, I think it's best to get adapters for each pen. This will prevent you from breaking the Cricut pen holder.

                      I found these adapters that are made by a company called Springbok Craft Supply.

                      Canadian company that offers adapters to use with Cricut

                      The feedback is all positive, delivery is included and you have the choice to make your own combo of adapters. This allows you to buy only the adapters you need! Awesome!

                      I even tested them all and was very impressed! You can see the detail of the testing in this post by clicking here.

                      A good gift idea to ask for Christmas!!

                      Other Single line Fonts and SVG

                      People often ask the question of why the letters are outlined when drawing with the Cricut.

                      If you use standard SVG cut files or standard fonts to draw with your Cricut, you'll end up with a double line.

                      In fact, you have to imagine that what the Cricut would have cut with the blade is what will be drawn with the pen.

                      How to find single-line images in Design Space

                      In Cricut Design Space, click "Images."

                      Cricut Design Space to find single line images to use with Crayola markers.

                      Then click "Browse All Images."

                      Cricut Design Space to find single line images to use with Crayola markers.

                      In the "Art type" category select "Draw only."

                      Cricut Design Space to find single line images to use with Crayola markers.

                      If you also want to see the free images, you can also click "Free".

                      How to find single-line fonts in Design Space

                      In The main window of Design Space, click "Text" and immediately click the "Font" drop-down menu.

                      Cricut Design Space to find single line fonts to use with Crayola markers.

                      At the top right you will click "Filter" and select "Writing".

                      Cricut Design Space to find single line fonts to use with Crayola markers.

                      If you only want to see the fonts you don't have to pay, you can also click on "Free".

                      If you're not a Cricut Access member you'll only see free fonts and fonts you've already purchased, if that's the case.

                      If you're a Cricut Access member, you'll see all Cricut Access fonts as well as those you've already purchased, if you have purchased some.

                      Other places you can find single-line fonts and SVG

                      The SVG files and fonts that will be adapted to the drawing are also those that are designed for engraving, embossing and Foil Quill. In other words, they are single-line files.

                      In addition to Design Space, you can find them in several places.

                      On the Design Bundles website, just search for "Single line SVG".

                      Its twin site, Font Bundles, also offers some single-line fonts. To find them, click on this link and enter "Single line" or "Hairline" in the search bar.

                      On the SoFontsy website, by clicking on"Foil Quill" you will have access to many super interesting files!!!

                      You can also check out the Single Line Fonts website which sells, obviously, single-line fonts!

                      If you've tried other pens, markers or pencils that work in the Cricut, leave it to me in the comments!

                      P.S. Want to figure out the different Cricut blades, wheels and tips? Sign up for my newsletter and I'll send you my cheat sheet for free!

                      Don't forget to share and pin!

                      Pinterest image of Crayola markers to use with your Cricut

                      Which Cricut machine to choose and Cricut essentials for beginners

                      Cricut essentials for each type of project

                      Want to know what Cricut supplies are essential for beginners? This post will tell you exactly which tools are essential and which Cricut machine to buy, by type of project!

                      This question must be the one I hear most often: Which Cricut machine should I buy and what other products are essential for Cricut projects for beginners?

                      And the first thing I always say is: What kind of project are you interested in?

                      It's the most important thing to know when you want to make the leap into the Cricut world. As a matter of fact, someone whose passion is scrapbooking will not need the same products as someone who sews.

                      So, instead of just explaining the difference between each Cricut product, I decided to tell you what are the essential tools and materials according to the type of project you want to make.

                      This list can also be a great gift guide if you know someone who owns a Cricut!

                      Get a Cricut discount and free shipping by using my promo code when you order at Cricut.com. Click here to see the details.

                      If you're looking to know where to get the best price when you buy a Cricut, please check out this post.

                      Cricut Machines

                      To avoid repetition, I'll describe here the differences between the 4 main families of Cricut machines: the Joy family, the Explore family, the Maker family and finally the Cricut Venture.

                      Further down, in the types of projects, I'll just name what machine I think is better or at least the minimum to have.

                      You can also see the comparison table for a quick visualization of the characteristics of each machine.

                      Update 2021: I've also added the Maker 3 and Explore 3 to the table below so you can really see the difference. If you'd like to find out more, take a look at the following post.

                      Update 2023: I've added the Cricut Joy Xtra and the Cricut Venture.

                      This post contains links to affiliated products for your convenience and at no additional cost to you. Click here to read my full disclosure policy.

                      The Cricut Joy

                      Credit: Cricut.com

                      The Cricut Joy is the least versatile of the Cricut machines.

                      It is, in my opinion, a companion Cricut. In fact, it's perfect for accompanying you on your travels or to "Cricut" at a friend's house. In fact, Cricut even sells a tote bag to carry it!

                      Its maximum material width is 13.9 cm (see the table below for full details).

                      Also, it is important to note that it does not support the "Print and Cut" feature.

                      I've seen several people turn to the Joy as their only machine (due to lack of space or fear of "big machines"), but these people quickly realized its limitations. Personally, I'd go for the Joy Xtra or one of the Explore family, unless you want to do very occasional and limited DIY, or unless you want an easily transportable Cricut.

                      My first Cricut also had, like the Joy, a 6-inch wide mat and I found myself very limited by this feature.

                      I also want to point out that the Joy's blades and pens are exclusive to the Joy family. In other words, do not think about using the Cricut Pens of the Explore or the Maker with the Joy machines, they are not interchangeable.

                      The Cricut Joy Xtra

                      The Cricut Joy Xtra is wider than the Cricut Joy, but narrower than the Explore and Maker. This makes it the ideal Cricut for people who are just starting out and feel intimidated by the bigger machines, or people who simply don't have room!

                      The Cricut Joy Xtra uses all the same tools and blades as the Cricut Joy.

                      It offers a cutting mat width of 8.5 inches (21.59 cm) (see table below for all comparisons).

                      Blades and pens from the Joy family are exclusive to them. In other words, do not think about using the Cricut Pens of the Explore or the Maker with the Joy machines, they are not interchangeable.

                      Find out more about the Cricut Joy Xtra in this post.

                      The Cricut Explore Air 2 / Explore 3

                      Cricut Explore Air 2
                      Credit: Cricut.com

                      The Explore Air 2 is, in my opinion, the basic Cricut machine. It's perfect for everyday DIY. By adding the deep point blade to your purchase, you can increase the amount of material you can cut and get up to 2 mm thick.

                      For more information on the various blades, see my post on the purposes of Cricut blades, wheels and tips.

                      The Explore 3 is the latest model and will also enable you to cut "Smart Materials" without a mat and at greater speed. See this post or the table below for full details.

                      The Cricut Maker

                      Cricut Maker
                      Credit: Cricut.com

                      The Maker is perfect for the crafter who always wants to try new things. It is 10 times more powerful than the Explore and offers a wide variety of blades and tips.

                      By the way, to clearly see the difference between all the blades, wheels and tips available, you can see this post.

                      The Maker 3 is the latest model, and will allow you to cut Smart Materials without a mat, and at higher speeds. See this post or the table below for full details.

                      The Cricut Venture

                      The Cricut Venture is a large-format machine designed for small businesses that are looking to mass-produce. So I won't say any more about the Cricut Venture in this post.

                      If you're interested in the Cricut Venture, take a look at this post.

                      Cricut Design Space

                      To run your Cricut, you need to use Cricut Design Space. And it is free. But, if you subscribe to Cricut Access, you will have free access to projects, images and fonts.

                      But I repeat, it is not mandatory to be subscribed to Cricut Access in Cricut Design Space to operate your Cricut.

                      If you want to learn Cricut Design Space while making hands-on projects, take a look at my guide:


                      Click here to have all the details on the Maker's guide to getting started with your Cricut

                      Comparison table

                      FunctionalitiesCricut JoyCricut Joy XtraExplore Air 2Explore 3MakerMaker 3
                      Ideal forQuick projects and travelBeginners and those with limited space.Pro DIY performance and great versatilityPro DIY performance and great versatilityProfessional-level performance and versatilityProfessional-level performance and versatility
                      Maximum material width13.9 cm
                      (5.5 in.) with Smart materials -- 11.4 cm
                      (4.5 in.) on mat
                      24.1 cm (9.5 in.) with Smart -- materials
                      21.6 cm (8.5 in.) on mat
                      30.5 cm
                      (12 inches)
                      33 cm
                      (13 in.) with Smart materials --
                      30.5 cm
                      (12 in.) on mat
                      30.5 cm
                      (12 inches)
                      33 cm
                      (13 in.) with Smart materials --
                      30.5 cm
                      (12 in.) on mat
                      Maximum cutting length1.2 m
                      (4 feet)
                      with Smart materials
                      1.2 m
                      (4 feet)
                      with Smart materials
                      61 cm
                      (2 feet)
                      with large mat
                      3.6 m
                      (12 feet)
                      with Smart materials
                      61 cm
                      (2 feet)
                      with large mat
                      3.6 m
                      (12 feet)
                      with Smart materials
                      Material compatibility50+
                      300+ Materials
                      50+
                      300+ Materials
                      100+
                      300+ Materials
                      100+
                      300+ Materials
                      300+
                      300+ Materials
                      300+
                      300+ Materials
                      Maximum material thicknessLimited to what the fine-point blade of the Joy family can cutLimited to what the fine-point blade of the Joy family can cut2.0 mm (Limited to what fine and deep point blades can cut) 2.0 mm (Limited to what fine and deep point blades can cut) 2.4 mm (Limited by the metal bar under which the mat fits) 2.4 mm (Limited by the metal bar under which the mat fits)
                      Tools/ Capabilities3
                      (for cutting, drawing, foil)
                      3
                      (for cutting, drawing, foil)
                      4
                      (for cutting, drawing, foil and score)
                      4
                      (for cutting, drawing, foil and score)
                      12+
                      (for cutting, drawing, foil, score and much more)
                      12+
                      (for cutting, drawing, foil, score and much more)
                      Double tool holderXXXX
                      Commercial-grade cutting technologyXX
                      10X more power to cut hundreds of materialsXX
                      Works with "Smart" materials for long, continuous cuts without a cutting mat.XXXX
                      Works with card mats for quick custom cardsWith Joy card matWith Joy Xtra card matWith the card mat 2 x 2With the card mat 2 x 2With the card mat 2 x 2With the card mat 2 x 2
                      Print Then Cut capabilityXXXXX
                      ConnectivityBluetooth® onlyBluetooth® onlyBluetooth®, USB Bluetooth®, USB Bluetooth®, USB Bluetooth®, USB
                      Partially taken from the Cricut website.

                      Types of projects

                      So you will have understood that in order, from the Cricut machine that does the least things to the most versatile, we have:

                      1. The Cricut Joy
                      2. The Cricut Joy Xtra
                      3. The Cricut Explore Air 2
                      4. The Cricut Explore 3
                      5. The Cricut Maker
                      6. The Cricut Maker 3

                      Here is the list of essentials, in my opinion, by type of project. Note that the essentials are the minimum. So, if I list the Explore family as sufficient, that doesn't mean the Maker won't be sufficient.

                      As mentioned above, I won't name the Cricut Venture as essential. Think of it as a Cricut Explore, wider and faster, but without the Maker's tools. This is definitely not a machine for a beginner unless you have a business. As such, it will not be discussed here. Refer to this post to find out more.

                      Paper / Cards

                      Although the Cricut Joy makes it possible to make pretty cards quickly, I still recommend the Joy Xtra or, even better, the Explore family for the reasons listed above.

                      What's more, the Cricut from the Explore family lets you create your own flat cards thanks to the cutting width and the scoring stylus for making folding lines (the Joy family doesn't currently have a scoring stylus, and the Cricut Joy isn't wide enough to make flat cards).

                      On the other hand, if you like Cricut insert cards, you can make them with any Cricut, thanks to the card mats available in all sizes.

                      Find out more about the 2 x 2 card mat in this post.

                      Here is the list of essentials:

                      • Cricut Explore (you can also take advantage of theEssential bundle, which is cheaper than buying everything separately)
                      • Scoring stylus
                      • Spatula and scraper

                      Optional:

                      • Deep point blade (to cut thicker materials)
                      • Cutting mat StandardGrip, green and LightGrip, blue(important: only the blue cutting mat comes with the Explore Air 2 and Maker. No mat included with Explore 3 and Maker 3)
                      • Card mats 2 x 2
                      • Cricut pens (note that the Explore Air 2 already comes with a black fine-tipped pen, but the Explore 3 does not)

                      Scrapbooking

                      The reason I put scrapbooking apart from the previous category is that scrapbooking often involves the use of chipboard. If you want to create your own design with this material, you will absolutely need the deep-point blade.

                      I also suggest at least the Explore family, since Scrapbooking pages are often 12x12 (30 cm x 30 cm). The Cricut Joy Xtra might do the trick if you're thinking of doing only small cuts and don't want to cut chipboard.

                      The essentials:

                      • Cricut Explore family (you can also take advantage of theEssential bundle, which is cheaper than buying everything separately)
                      • Scoring stylus
                      • Spatula and scraper
                      • Deep point blade (to cut thicker materials)
                      • Cutting mats StandardGrip, green and LightGrip, blue (important: only the blue cutting mat comes with Explore Air 2 and Maker. No mat is included with Explore 3 and Maker 3).

                      Optional:

                      • Cricut pens (note that the Explore Air 2 already comes with a black fine-tipped pen, but the Explore 3 does not)

                      Stickers

                      The "Print then cut" function is a really interesting feature, allowing you to print all kinds of things (with your printer) and have them cut out by your Cricut.

                      Note that all Cricut machines except the Cricut Joy can print and cut.

                      The "Print then cut" function is not the easiest to understand. I suggest at least seeing this post (and especially the related video) for a good understanding.

                      The essentials:

                      • Cricut Joy Xtra (You can also buy the bundle to save money)
                      • LightGrip mat (blue) (only the blue Cutting mat comes with the Explore Air 2 and Maker. No mat is included with Joy Xtra, Explore 3 and Maker 3)
                      • Printable materials (self-adhesive paper, vinyl, etc.) Read this post to see the different products available)
                      • A printer (inkjet if you use the Cricut products above)

                      Foil transfer

                      See this project to make your own Christmas labels with the foil tip

                      Foil transfer can be performed on multiple materials and Cricut has its own tools. And what's great is that it fits on the Maker, Maker 3, Explore Air 2 and Explore 3.

                      The Cricut Joy and Joy Xtra also have their own foil tips. However, once again, this tip is specific to this family and cannot be used in the Explore and Maker families.

                      The essentials:

                      • Cricut Joy Xtra (You can also buy the bundle to save money)
                      • Foil Transfer Set
                      • Additional foil transfer sheets
                      • Spatula and scraper

                      Keep in mind that you won't be using the Foil set alone. You will need to combine it with another category on this page such as cards, paper, scrapbooking, etc.

                      Adhesive Vinyl

                      Want to make projects with self-adhesive vinyl like these glasses above, this mug I made or this candle? Here's what you'll need:

                      • Cricut Joy Xtra (You can also buy the bundle to save money)
                      • Basic tool set
                      • Choice of adhesive vinyl(permanent or removable);
                      • Transfer tape

                      Optional:

                      • Cutting mat LightGrip (blue) or StandardGrip (green) (only a blue cutting mat comes with Explore Air 2 and Maker. No mat is included with Joy Xtra, Explore 3 and Maker 3).
                      • Cricut Brightpad(see my post on the Cricut Brigthpad Pro)

                      If you're confused about the different types of vinyl, that's normal! I suggest you read this post to fully understand the differences.

                      Heat transfer vinyl (HTV)

                      Iron-On Valentine's Day gnome on a gray sweater

                      Are you passionate about adding heat transfer vinyl to fabrics such as T-shirts and bags? It's more addictive than I thought! You can see the t-shirt I made and the trick for layering different colours of vinyl here.

                      So you'll need:

                      • Cricut Joy Xtra (You can also buy the bundle to save money)
                      • Basic tool set
                      • Cricut EasyPress (I strongly recommend the 12" x 10" (30 cm x 25 cm) see note below) or the Cricut Autopress if you really want to make a lot and sell it). If you can, the EasyPress in the Essential bundle can save you a lot.
                      • Heat transfer vinyl (Cricut's is called Iron-on )
                      • Lint roller

                      Optional:

                      • EasyPress mat (instead of towel)
                      • Cutting mat LightGrip (blue) or StandardGrip (green) (only a blue cutting mat comes with Explore Air 2 and Maker. No mat is included with Joy Xtra, Explore 3 and Maker 3).
                      • Cricut Brightpad(see my post on the Cricut Brigthpad Pro)
                      • Teflon sheet, cookina style or other

                      Note on the EasyPress:

                      When I bought my EasyPress, I wanted to make sweaters to go to Disney and I really didn't think I would like to make more. I just bought the Easy Press 9" x 9" and told myself that I would never do anything wider than that. Well, that was a mistake!

                      Indeed, since the Cricut Explore and Maker families can cut designs up to 11.5" (29 cm), it wasn't long before my 9" Easy Press wasn't enough. Well, with vinyl, you end up getting away with it anyway (since you can apply in multiple presses), but my advice to you is not to hesitate and go for the 12" x 10" (30 cm x 25 cm). It's not true that you're only going to make baby onesies!

                      And even if you have the Joy Xtra, which can cut designs up to 8 inches wide (20 cm), the design can easily be flipped on its side to the same width as the Maker and Explore families, using the length of the Joy Xtra's mat.

                      EasyPress 2 or EasyPress 3?

                      Read this post to find out the difference between EasyPress 2 and EasyPress 3.

                      What is the Cricut Autopress?

                      See my post on Cricut Autopress to find out if it's really for you.

                      What if I want to customize hats?

                      Cricut also has a specialized EasyPress for caps and hats, called the " Hat Press". With the caps sold by Cricut, you can even apply Infusible Ink! Read this post to find out more!

                      Infusible Ink

                      Unlike vinyl, the Infusible Ink is very particular to work with. You will need blanks with a very high percentage of polyester or those sold by Cricut . And since the EasyPress must not be allowed to move a hair during application, and there's absolutely no way of getting it right with more than one press, the Easy Press 12" x 10" (30 cm x 25 cm) and heat-resistant adhesive tape become essential.

                      You can read my full post on Infusible Ink.

                      I'd also like to suggest the Explore family as the minimum you should have, since most Ink infusible sheets come in 12 x12 (30 cm x 30 cm). But you could cut them and use the Cricut Joy Xtra.

                      The must-have:

                      • Cricut Explore family (you can also take advantage of theEssential bundle, which is cheaper than buying everything separately)
                      • Blanks for Infusible Ink
                      • Standard Grip mat (Green) (only a blue cutting mat comes with Explore Air 2 and Maker. No mat is included with Joy Xtra, Explore 3 and Maker 3)
                      • Basic tool set
                      • Cricut EasyPress (I strongly recommend the 12" x 10" (30 cm x 25 cm) see note above) or the Cricut Autopress if you really want to make a lot and sell it). If you can, the EasyPress in the Essential bundle can save you a lot.
                      • EasyPress mat (unlike iron-on, it is highly recommended for Infusible Ink)
                      • Infusible Ink sheets
                      • Additional butcher paper or parchment paper
                      • Heat-resistant tape (to hold your design and prevent it from moving. An absolute must!)
                      • Lint roller

                      Optional:

                      • Cricut Brightpad(see my post on the Cricut Brigthpad Pro)
                      • Teflon sheet, Cookina type or other
                      • Infusible Ink felts and laser copy paper (for another Infusible Ink application technique)

                      EasyPress 2 or EasyPress 3?

                      Read this post to find out the difference between EasyPress 2 and EasyPress 3.

                      What is the Cricut Autopress?

                      See my post on Cricut Autopress to find out if it's really for you.

                      What if I want to customize hats?

                      Cricut has a specialized EasyPress for caps and hats called Hat Press. With the caps sold by Cricut, you can even apply Infusible Ink! Read this post to find out more!

                      Custom mugs

                      You can use permanent adhesive vinyl to apply to ceramic mugs. Be aware, however, that these mugs can not be put in the microwave and special attention must be taken when putting them into the dishwasher (hand washing is strongly recommended).

                      So if you love customizing mugs, I suggest the Cricut Mug Press. This requires the use of Infusible Ink and mugs with a specialized coating to "absorb" the Infusible Ink.

                      The advantage? They can go in the microwave and dishwasher without worry!

                      See my post on making Halloween mugs with the Cricut Mug Press.

                      The must-have:

                      • Cricut Mug Press (You can also take advantage of the "Everything material" or "Essential material", which are ideal for getting started with the Mug Press.
                      • A Cricut machine (even the Cricut Joy can make mugs!)
                      • Standard Cutting mat (green) (only blue cutting mat comes with Explore Air 2 and Maker. No mat included with Joy, Joy Xtra, Explore 3 and Maker 3)
                      • Special mugs for the Mug Press
                      • Basic tool set
                      • Infusible Ink sheets
                      • Additional butcher paper or parchment paper
                      • Heat-resistant tape (to hold your design and prevent it from moving. An absolute must!)

                      Optional:

                      • Cricut Brightpad(see my post on the Cricut Brigthpad Pro)
                      • Teflon sheet, Cookina type or other
                      • Infusible Ink felts and laser copy paper (for another Infusible Ink application technique)

                      Felt (flowers or other objects)

                      5 crocus flowers in white and purple felt- free SVG

                      Felt is really special to cut since it all depends on the type of felt you use. The felt sold by Cricut is very thin and cuts easily with the fine point blade (basic blade). The same goes for wool felt, which is more expensive.

                      If you use the craft felt (acrylic), found at the Dollar stores or Michaels, for example, you will need the rotary blade of the Maker. This one will be able to cut all types of felt perfectly. That's why I'm going to consider it essential.

                      For full details on felt, see this post.

                      The must-have:

                      • A Cricut from the Maker family
                      • Rotary blade (included with the Maker, but not with the Maker 3)
                      • Cutting mat for fabrics (pink) (included with Maker, but not with Maker 3)
                      • Spatula and scraper
                      • Cricut felt or acrylic craft felt

                      Check out the post about the Felt Crocuses for details of the different felts and all the tricks for cutting them.

                      Engraving

                      Oh! Once you start having fun with it, it quickly becomes addictive. You can see how I made an LED lamp, as well as my post on metal engraving.

                      Here is also a test I did with a photo of my dog!

                      If you want to get into engraving, here are the essentials:

                      • A Cricut from the Maker family
                      • Engraving tip, #41 (including Quick swap base if you don't already have it with another tip. See this post to understand all the differences between Cricut blades, wheels and tips)
                      • StrongGrip mat (purple)
                      • ScotchTape
                      • Acrylic or plastic sheets 0.020"
                      • Cricut Aluminum sheets or other metal

                      Interested in photo engraving?

                      Photoengraving is an even more advanced technique and can do some really beautiful things. It's enough of a push that my friend Kay Hall of CleverSomeday has written an entire book on the subject! With his permission, I've translated it!

                      Please note, however, that in addition to the book, you'll need the Silhouette Studio Business Edition software to be able to perform the same technique.

                      Get the book in French here

                      Sewing

                      Sewing is not one of my talents! But I've made a nice collage by cutting small triangles of fabrics with my Maker. It's a gift I made for a friend. You can see the tutorial here.

                      I would never have cut all this by hand! Whoa!!!

                      If your passion is fabric and sewing, you will need the Maker (or Maker 3)! Yes, there is a fabric blade for the Explore Air 2, but you will need bounded fabric (i.e., that is glued to a rigid material). It can do the trick, but it's not ideal. That's why I recommend the Maker that comes with the rotary blade.

                      • A Cricut from the Maker family
                      • Rotary blade (included with the Maker, but not with the Maker 3)
                      • Pink Fabric mat (included with Maker, but not with Maker 3)
                      • Spatula and scraper
                      • Brayer
                      • Fabric

                      I want to make everything!

                      Ha ha! Then you're like me! Obviously, it will take you the Maker or the Maker 3! But no need to buy it all at once! Unless you can get the"Everything material bundle" that will save you a lot of money when you're starting.

                      If you really only want the base to start with, I suggest at least this:

                      • A Cricut from the Maker family
                      • Basic tool set
                      • Scoring wheel (You can buy it with the Quick Swap which can then be used for all other tips)
                      • Set of 3 mats (one blue, one green and one mauve)

                      Then refer to the types of projects above to add the essential tools depending on what you want to do.

                      An essential for all types of projects

                      No matter what type of project you want to do, you're going to have to learn how to use Cricut Design Space.

                      Indeed, it is only this free program that can send the projects to your Cricut.

                      Many people think they have to watch tons of videos before they can finally understand Cricut Design Space and use their Cricut. But this is not the case, because I have the solution for you!

                      I suggest you use my ebook "A Maker's Guide to getting started with your Cricut". This digital book will guide you in making your first projects. You'll learn Cricut Design Space while crafting 3 easy projects.

                      Click here for full details

                      If you have any other suggestions for project types or questions, please leave them in the comments below.

                      Don't forget to pin it!

                      Cricut Essentials classified according to the type of projects you want to carry out.

                      How to DIY Chrysanthemum paper flowers

                      DIY chrysanthemum paper flowers on a wreath

                      Paper flowers are extremely fun to make and can be a beautiful home decor project. In this tutorial, I will show you how to DIY paper Chrysanthemum flowers using my free SVG cut file.

                      I've always loved Chrysanthemums or should I say, mums. I can't really explain why. Maybe it has something to do with fall being my favourite season. All the earthy colours this flower comes in really underline the autumn vibe.

                      Since I loved them so much I decided I had to find out how to DIY Chrysanthemum paper flowers.

                      Now, I'll be totally honest with you (am I not always?😆). I'm far from being the expert when it comes to paper flowers but I did research the topic extensively.

                      Scroll at the bottom of this email, I'll link to my favourite flower crafters. This post contains some affiliate links for your convenience and at no extra cost to you. Click here to see my full disclosure policy.

                      After my research, I made a lot of trials and errors (you know I always want to find the best and easiest solutions for you!).

                      I found the secret to easily and rapidly DIY Chrysanthemum paper flowers and bought this paper blossom toolkit.

                      Before that, I was trying to curve the petals with the handle of a paintbrush. I sincerely thought it would be enough. I did get the petals to curve a bit but it took me forever!

                      I didn't think the paper blossom toolkit would make any difference. But my mind was blown away!

                      It's so easy and fast to curve petals!

                      And a bit addictive and satisfying if I might add!🙈

                      I'm not here to pressure you into buying this, but if you plan on making more than one flower, you really need this!

                      You also need a foam mat but while researching the topic, I saw crafters use sponges covered with fabric. Personally, I used my Cricut Easy Press mat and it worked like a charm!

                      Materials and tools

                      • Coloured cardstock (preferably earthy, Fall colours. Optional: get each colour in a dark and lighter shade)
                      • Glue
                      • Jute twine
                      • Acrylic paint and paintbrush
                      • Cutting machine (I have the Cricut Maker. You'll be able to do it with an Explore Air except for the veins of the leaves)
                      • Fine Debossing tip of the Cricut Maker (for the veins of the leaves)
                      • Embroidery needle
                      • Paper blossom toolkit
                      • Paper blossom foam mat (I don't have this but I used my Cricut Easy Press mat and it worked perfectly 🙌)
                      • Free SVG cut file that you can get by subscribing to my newsletter right here 👇

                      How to DIY paper chrysanthemum flowers

                      1- Upload the SVG file to Cricut Design Space

                      First, go to Cricut design space and click upload and go to browse to find the files you have downloaded from NeliDesign's library.

                      Cricut Design Space upload SVG for DIY Chrysanthemum paper flowers

                      The first thing to do with all of my SVG files is to ungroup so you are left with groups for each flower.  

                      Cricut Design Space ungroup SVG for DIY Chrysanthemum paper flowers

                      The only thing you need to do with the flowers is to attach everything. Each of the layers your need to attach is already grouped together. Therefore, click on each group and then click "Attach".

                      Cricut Design Space attach layers for DIY Chrysanthemum paper flowers

                      Notice that there are two shades of orange? That's because if you look closely at a flower you'll find that the centre of a flower is usually darker than the outside.

                      Cricut Design Space 2 shades of petals in the SVG for DIY Chrysanthemum paper flowers

                      Therefore, if you have the materials I suggest you make the 2 smallest petals a shade a little darker than the 2 bigger ones. You'll see how nice the flowers are going to look with that trick.

                      You'll also notice that the leaves have little lines inside.

                      Cricut Design Space line in leaves in the SVG for DIY Chrysanthemum paper flowers

                      If you have a Cricut Maker you can use the Fine Debossing tip (#21) to mimic veins in the leaves. Just select the layers and change the "Linetype" from "Cut" to "Deboss".

                      Cricut Design Space changing to Deboss in the SVG for DIY Chrysanthemum paper flowers

                      Note that if you want to know more about all the Cricut blades, wheels and tips available, you can check out this post and download the free cheat sheet.

                      If you don't have the Cricut maker you can just turn off the layer by clicking on the eye.

                      Cricut Design Space close the eye of the layer for the SVG for DIY Chrysanthemum paper flowers

                      2- Curve the petals

                      The first thing to do is to take a piece of jute twine and make a knot at one end. This will act as the centre of the flower.

                      Make a knot to make the DIY paper Chrysanthemum

                      Take some paint that is almost the same colour as your flower but darker and paint the knot. By doing this first, it will be dry when you need to use it. 

                      Remove the petals from the mat and arrange them in a pile from the largest one to the smallest ones on top.

                      The petals are in a pile to make the DIY paper Chrysanthemum

                      Take the foam mat (I'm taking my Cricut easy press mat because I didn't have the mats that go with the blossom tool, but it worked just as good)

                      Get the blossom tool that is the same size as the petals.

                      The blossom tool is the same size as the petal to make the DIY paper Chrysanthemum

                      Apply pressure from the extremity of the petals to the inside of the flower. You'll see the petals curving without any effort. 

                      Applying pressure with the blossom tool from the extremity of the petal to make the DIY paper Chrysanthemum

                      3- Assemble the petals

                      In order to insert the jute twine into the petals, I made a little X at the center of each petal. Thread the extremity of the jute twine into the embroidery needle.

                      Threading the jute twine to make the DIY paper Chrysanthemum

                      Then, insert the needle through the X of the petal. Gently pull so that the knot of the jute twine becomes the centre of the flower. The first petals need to be held very delicately so that the jute twine is inserted without opening the petals too much.

                      Pulling gently on the petals to make the DIY paper Chrysanthemum

                      Then continue with the other petals, adding glue between each of them. 

                      Try to overlap all the petals so that it looks prettier. This is going to be more important when you get to the larger petals.

                      Making sure the petals overlap to make the DIY paper Chrysanthemum

                      I just love how they turned out!

                      5 chrysanthemum paper flowers that was DIY

                      4- Curve the leaves

                      As for the leaves, I used the blossom tools to make them curve and look more realistic.

                      Curving the DIY chrysanthemum paper leaves with the blossom tool.

                      Then I used the handle to bend some parts of the leaves.

                      Curving the DIY chrysanthemum paper leaves with the blossom tool.

                      And here's the result

                      The 3 DIY chrysanthemum paper leaves.

                      Adding mum paper flowers to a wreath

                      Tools and materials for the wreath

                      • Grapevine wreath
                      • Other flower ornaments
                      • Minwax polyurethane spray
                      • Hot glue or floral tape
                      • Wire and wire cutter

                      Paper flowers outside?

                      Having paper flowers on a wreath that I wanted to put outside was a little problem! 

                      I decided to test and spray them with Minwax polyurethane and see how long it lasts.  I'll keep you posted right here on how well (or not!) they last!

                      DIY Chrysanthemum paper flowers sprayed with Minwax polyurethane

                      Decorating a grapevine wreath

                      I have made a lot of versions of fall and spring wreaths with this grapevine wreath and I must say I really love it and it's still in pretty good shape. This one was the last spring wreath I made with Crocus felt flowers.

                      Removing the spring crocus flowers from the wreath to add the DIY chrysanthemum paper flowers to the grapevine wreath

                      You can check out all the other wreaths I made with the same base. 

                      • 15-minute Spring wreath for less than $15
                      • Turn your Spring wreath into a Fall wreath for $1
                      • How to make a Spring wreath with terracotta pots
                      • How to make a Fall wreath with mini terracotta pots

                      To complement my paper mums, I found some other flower ornaments at Michaels and the Dollar Store to add a bit of colour. I honestly don't even think it costs me $5. 

                      Other flowers purchased to add with the DIY chrysanthemum paper flowers to the grapevine wreath

                      Decorating a wreath is really up to you, I mean there's no recipe for that. It's just a creative process and you stop when you're happy. 😊

                      How to make a grapevine wreath last

                      You will notice that I never glue anything to my grapevine wreath and that's why I was able to use it so many times. I only twist and turn the stem of the flowers so that they are really attached inside of the branches of the grapevine.

                      Not using glue to add the DIY chrysanthemum paper flowers to the grapevine wreath

                      How to add the chrysanthemum paper flowers to the wreath

                      Using the tweezers, pass the jute twine around some branches of the wreath and just make a knot. You could also use some flower wire but you would need to cut a little piece of jute twine to make the center of the flower.

                      Using knots to attach the DIY chrysanthemum paper flowers to the grapevine wreath

                      I did use wire for the leaves and added hot glue but I think it would have been better with floral tape but I did have some on-hands. 

                      Using wires to add the DIY chrysanthemum paper flowers leaves to the grapevine wreath

                      I'm soooo happy with the result! This is definitely my favourite wreath of all the ones I have made!

                      The wreath with the DIY chrysanthemum paper flowers.

                      You can check out this video for all the details on how to DIY Chrysanthemum paper flowers.

                      Best paper flower crafters

                      Here are some of my favourite paper flower crafters:

                      Brianna from Craft your happy place is a good friend of mine that I met at a blogging conference. Her style is fabulous. I'm completely in love with how she decorated her girls' bedroom. In it, she made these paper flower lanterns. They are amazing and so easy to make. Go check them out!

                      Paper flower lanterns from Bloom in the Black

                      And I have a secret for you: if you ask Brianna for an SVG file of her flowers I'm sure she'll be willing to make it for you! Even though she doesn't own a Cricut, she keeps telling me she'll end up buying one because of me!😆

                      Another girl I like that makes beautiful flowers is my friend Abbi from Abbi Kirsten Collections. She has a wide variety of them from giant flowers to tiny ones! Go take a look!

                      I hope you're going to try to make some paper flowers. Tell me in the comments if you do and how you liked it.

                      If you want the Free Chrysanthemum paper flower SVG file, subscribe to my newsletter right here and you'll also get a free Cricut Cheat Sheet.

                      And don't forget to Pin it!

                      Pinterest image written How to make Mums paper flowers + free SVG cut file
                      t

                      What are the different Cricut blades, wheels and tips used for?

                      Cricut blades wheels and tips

                      Stop being confused and overwhelmed by all the blades, wheels and tips available for the Cricut. This post will tell you exactly what they are used for and what mat to pair them with.

                      With the Cricut Maker, there are now so many Cricut blades, wheels and tips out there that it can be really confusing!

                      You would like to know what you can do with them, how to use them and which mat to pair them with? I've got all the answers for you! This post contains some affiliate links for your convenience and at no extra cost to you. Click here to see my full disclosure policy.

                      3 main Cricut blades

                      First of all, there are 3 principal Cricut blades that work for both the Cricut Maker and the Cricut Explore Air series.

                      Now if you're already overwhelmed just thinking of reading all of this, grab my free cheat sheet right now! One look at it and you'll understand everything!

                      Fine point blade

                      The fine point blade, which has a silver or gold housing, is the standard blade in all Cricut machines.

                      Cricut fine point blade silver

                      If you have a gold housing, it means it's a Premium blade that is more durable.

                      Both silver and gold housing blades have a 45-degree angle and can cut all sorts of basic materials like paper, card stock, iron-on vinyl, adhesive vinyl, faux leather and more.

                      This blade is usually paired with the blue or green mat, depending on the material.

                      Deep point blade

                      You'll recognize the Deep point blade by its black housing.

                      Cricut deep point blade black

                      This blade has a steeper blade angle (60 degrees) and harder, more durable steel. It can be used to cut thick cardstock, chipboard, rubber sheets, magnets, corrugated cardboard, foam sheets, Cricut genuine leather and more.

                      It's often preferable to use the purple mat with this blade. But depending on the material, a brand new green mat could also do the trick.

                      Bonded fabric blade

                      This blade has a pink housing. It is used to cut bonded fabric (a fabric that is attached to another material like an adhesive).

                      They made the housing pink to match the pink mat that you can use with fabric.

                      Cricut bonded fabric blade pink

                      2 special Maker blades

                      You'll easily recognize these special tools by their gold gear at the top that is specially made to fit the Cricut Maker.

                      Rotary blade

                      The rotary blade comes in the box with the Cricut Maker. You can identify it by its round blade (that looks like a small rotary cutter) and gold gear.

                      Cricut rotary blade for fabric

                      Paired with the pink mat, this blade can cut fabric, craft felt, crepe paper and more.

                      In my opinion, this blade is really the best for cutting craft felt. You can see how I did it for these crocus flowers.

                      Knife blade

                      This blade looks like a small utility knife (X-Acto) with the gold gear on top.

                      Cricut Maker knife blade

                      It can cut thicker materials like Balsa (up to 3/32"), Cricut corrugated cardboard (2 mm), Matboard (2-ply or 4-ply), Basswood (up to 1/16"), Tooling leather (up to 7 oz), Garment leather (up to 5 oz), craft foam (up to 3 mm) and more.

                      You can check out this Christmas ornament I made with it and also the Balsa sled ornament.

                      With this blade, you'll need to use the purple mat and you'll often need to add masking tape to secure your materials to the mat.

                      Foil transfer kit

                      This blue housing is the newest of the Cricut tools (September 2020) and comes with 3 tips (fine, medium and bold) that are used to make foil accent onto your material.

                      foil transfer kit

                      The kit comes with 12 foil transfer sheets that you absolutely need to make these tips work. A major difference between this tool and other foil tools out there is that it doesn't require heat.

                      Quick Swap system

                      The quick swap system is a housing that is used to install the Cricut Maker tips listed below. All tips have their own number to easily identify them.

                      Cricut Quick swap housing

                      People usually buy this housing with one of the tips and then buy the rest of the tips individually, without the housing.

                      Tip: To easily change the tips, press on the button on top of the housing and pull gently on the tip.

                      Single scoring wheel (#01)

                      The scoring wheel is used to create a scoring line to fold material. It is more efficient that the scoring stylus.

                      Single scoring wheel

                      Double scoring wheel (#02)

                      The double scoring wheel will, obviously, create a double scoring line and is used for thicker materials.

                      Double scoring wheel

                      Perforation blade (#11)

                      The perforation blade is pretty fun. It will create a tear-off part on paper, cardstock, acetate, poster board, Cricut genuine leather and much more.

                      Perforation blade

                      You can check out this cute postal card I made using the perforation blade. It's a good way to avoid envelopes when sending a card!

                      Fine debossing tip (#21)

                      The fine debossing tip can be used to create debossed designs on cardstock, poster board, Kraft cardstock, balsa, faux leather, Cricut genuine leather, corrugated cardboard and much more.

                      Fine debossing tip

                      Wavy blade (#31)

                      The wavy blade is a simple way to make wavy cuts. It can be used on cardstock, adhesive vinyl, Heat transfer vinyl, fabric, faux leather, Cricut genuine leather and more.

                      Wavy blade

                      I have used it, with the perforation blade, to make a secret Santa gift tag. It was a hit during my family gift exchange!

                      Engraving tip (#41)

                      The engraving tip will be able to engrave all sorts of flat materials like soft metal, acrylic, plastic, anodized aluminum, faux leather, Cricut genuine leather, acetate and more.

                      Engraving tip

                      Lately, I started to experiment with it and engraved this on acrylic.

                      result of engraving with the engraving tip on acrylic

                      It was my first time trying this technique. It's so addictive! I promise there will be posts on engraving soon!

                      How can you remember all of this?

                      Don't forget to grab the cheat sheet to help you remember, at a glance, everything there is to know about all the Cricut blades, wheels and tips!

                      You'll even get a bonus! A summary version that you'll be able to stick inside the panel of your Cricut, like this:

                      Cricut with a summary of the cheat sheet stuck to the inside panel

                      Isn't that cool?

                      I even made a video to show you how to use "Print and Cut" and avery sticker paper to cleanly install it inside the tool panel of your Cricut just like the picture above.

                      You can see the short video right here.

                      I hope all of this helps you use your blades even more!

                      Natalie

                      Pin it for later!

                      Pinterest image written Cricut blades, what are they used for? Download the free cheat sheet.

                      Should you DIY back to school identification stickers with your Cricut?

                      I'm always very honest in my posts. No sunshine and rainbows and everything always going perfectly as planned. No, that's not me, and certainly not real life!!! In this post, I'll tell you if you should DIY stickers with printable vinyl to label school supplies.

                      Now, I was pumped to do it all by myself (well, with the help of my Cricut and kids of course!) I even made free templates for you. You'll have over 40 shapes and styles of stickers that you can personalize and use.

                      What I wasn't ready for is my plan not working as perfectly as I wanted! You see, I wanted them to really stick to pencils, pens, etc. in order to last at least a whole year.

                      My tests making stickers with printable vinyl and Cricut

                      I've tested a couple of things in order to find the best way to make stickers that will last at least a whole school year. This post contains some affiliate links for your convenience and at no extra cost to you. Click here to see my full disclosure policy.

                      I didn't want to take the regular Avery Sticker paper since it is repositionable. I instead found a printable vinyl that I thought would stick better.

                      Also, what attracted me to try this vinyl is that it was labelled "waterproof".

                      2024 UPDATES:

                      I added Cricut printable vinyl to my tests and got better results.

                      Even more recently, I tested the Cricut waterproof printable sticker set and boy oh boy, these are a game changer! Continue reading to get all the details!

                      Materials and tools

                      • A Cricut machine (Maker family, Explore family, Cricut Venture or a Cricut Joy Xtra would work. Unfortunately, the Cricut Joy doesn't work for "Print and Cut")
                      • Inkjet printer
                      • Printable vinyl (here's the one I was using in the video, but for school supplies, I recommend the Cricut printable vinyl, or even better, the Cricut waterproof printable sticker set and you'll see why at the bottom of this post!)
                      • My free SVG file that includes 40 different styles and sizes of back-to-school stickers that you can download just below:

                      Is printable vinyl waterproof?

                      Now, even though it is written "waterproof" directly on the package, it is not completely waterproof. I would say more, water-resistant... to a certain point.

                      It can withstand a bit of water but don't submerge the sticker completely in water. If you do and don't touch it while it's wet, it will stay unharmed.

                      Craftables vinyl

                      I was not that nice with the Craftables vinyl!! I submerged it in water and then tried to scratch it. After all, I'm making the stickers to put on school supplies. I need them to last at least a whole year!!

                      Well, what I thought would happen did:

                      Stickers made of printable vinyl where you can see the scratches

                      Cricut printable vinyl

                      Despite being told that the ink would smudge directly when the Cricut printable vinyl came in contact with water, it didn't happen!

                      Two things to note: I waited at least 24 hours after printing before putting it under water. Also, the quality of the ink or the printer may have an impact on this test. I can't confirm since I only have one printer and no way to compare!

                      So, on this point, Cricut printable vinyl is identical to the Craftables brand: The ink stays put when wet, as long as you don't start scratching!

                      How to make printable vinyl stickers more durable?

                      I searched the web to find the best solution to make my stickers waterproof, if not, at least more durable.

                      Mod Podge

                      So I first tested with Mod Podge. You can add the Mod Podge with a foam brush before of after you cut the stickers.

                      What I don't like it's that you can definitely see that something was added on top of the printable vinyl.

                      Stickers made of printable vinyl where you can see the Mod Podge

                      It will protect the vinyl from wear but you know what? Once I added water, it was the same thing. I could easily scratch the printable vinyl.

                      Minwax Polyurethane

                      Then I got out the big guns 😆! I went outside and sprayed my printable vinyl with Minwax Polyurethane. I was sure this would be the perfect solution.

                      The finish was beautiful. Way better than the Mod Podge. It also added nice protection from wear.

                      But still, the water test failed as soon as I scratched the stickers while it was wet. I repeat, if you don't touch it while wet, it will dry and everything will be fine.

                      Stickers made of printable vinyl where you can see the scratches

                      Even with 2 and 3 coats of Minwax Polyurethane!

                      Needless to say, I was soooo disappointed!

                      But I had not said my last word... yet!

                      Strangely, for the Cricut printable vinyl, one single coat of Minwax polyurethane was enough to make it waterproof and resistant to my "scratches". I have a hard time understanding why it didn't work with the other brand!

                      Cricut printable vinyl before adding water:

                      After adding water and scratching:

                      Self-adhesive protective film

                      Yes, you know what I'm talking about right? The protective film that you can buy at the Dollar Store? The one to cover books. The one we often use as transfer paper?

                      Yes, that one!

                      Photo of protective film from the dollar store to protect stickers made with printable vinyl
                      Photo credit: Dollarama

                      It was the most effective protection against water.

                      But there was a major inconvenience. Adding the protective film made the vinyl a lot thicker and therefore, difficult to bend.

                      So it was then impossible to make it stick to pencils.

                      Stickers made of printable vinyl that doesn't stick to flat surfaces

                      But I did push my luck and put it in the dishwasher 😱!

                      To my surprise, they stayed there! There was a little water that slid through the left label, but not that bad! I agree though, they wouldn't last a lot of wash like that but it was worth trying.

                      Stickers made of printable vinyl that I added to the dishwasher

                      The final solution:

                      Cricut printable vinyl is a good choice. If you want to add Minwax polyurethane, it's even better.

                      But if you can, I would recommend Cricut waterproof printable sticker set.

                      This product is not a vinyl but a regular sticker paper that you feed in your printer. You then add a protective film (sort of like the protective film above) and ask the Cricut to cut it.

                      Just like the protective film from the Dollar Store, water will end up slipping under it if you put the stickers in the dishwasher (but is pretty resistant to water and even rain! I tested them intensively!)

                      The big difference is that when applied on curved surfaces such as pencils, the Cricut printable waterproof sticker set holds super well!

                      Furthermore, since it's a Cricut product, you won't struggle to find the best setting to cut it! You'll just choose it from the list in the materials settings.

                      Check out the video!

                      Whatever you do, I invite you to check out this video. I will show you:

                      • How to use my free identification template (that has 40 different sticker styles that you can personalize)
                      • How to add a pattern to the stickers
                      • How to print and cut
                      • How to create a new material and what pressure to use if you're adding a layer of the protective film.

                      Want to have access to the library to get the free templates and SVG files?

                      Subscribe to my newsletter right here:

                        Don't forget to pin it!

                        Pinterest image written Should you make your own back to school Stickers?

                        3 quick and easy DIY no-sew face mask

                        photo of 2 seamless face coverings credit Passion for savings

                        No mistake about that, it's always better to stay home, but if you have to go out in a public place, you will probably need a mask. If you don't have one on hand, here are 3 ways to quickly make a no-sew face mask.

                        Wearing a face mask is now mandatory in public places in several states and cities.

                        I also have mine, made by my dear friend Cathie because you know, sewing and I, we do not really get along!!

                        Right now, it's a wild mask race here in Quebec and the seamstresses have endless orders. Maybe it's the same where you are? I thought I could offer you a list of the best tutorials showing you how to make a no-sew face mask quickly.

                        1- From a Bandana

                        This one seems a fast solution although I'm worried the elastics would pull too much on my ears.

                        I invite you to check out Passion for Savings' Post which has a super visual tutorial.

                        Credit: Passion for savings

                        Hair elastics, a piece of fabric and hop, a mask quickly made!

                        2- From the sleeve of an old t-shirt

                        Well yes, I did say a sleeve of a t-shirt! I should have thought about it! Raegun Rambligs did!

                        Credit: Raegun Ramblings

                        The tutorial even has a video and it's super easy to make! Love this idea!

                        One thing I would change: I would use something thinner to attach the mask on my ears instead of using the edge of the sweater with the seam. I would probably make t-shirt yarn by cutting thin strips into the same sweater and stretching it. Seems to me it would be more comfortable!

                        3- With your Cricut (or scissors!)

                        Of course, using the Cricut Maker to cut fabric of this size can be a great idea (or the Cricut Explore Air by merging the fabrics with freezer paper). Even better if you don't need to sew after (well, in my opinion anyway!! haha!).

                        So it's hard to ignore Jennifer Maker's tutorial and her downloadable templates: SVG, PDF. She even tells you how to trace on your screen if you don't have a printer.

                        Credit: Jennifer Maker

                        Although I think she's awesome, I find that her tutorial makes me completely overwhelmed. There is A-LOT of information, almost too much!

                        My suggestion for you is the model that is found directly on Cricut Design Space Simple to make and you can even cut it by hand if you don't have a Cricut.

                        Credit: Cricut

                        They also detailed all the Steps in this post.

                        So while you wait to receive your mask made by an expert seamstress (that is currently overwhelmed), these 3 ideas will allow you to go out in a public place if you really need it. Remember that it's still best to limit your travel.

                        Stay safe!

                        Don't forget to download the Free Cricut Cheat Sheet

                        Please pin for later!

                        Pinterest image showing 3 quick and easy ways to make a no-sew face mask.

                        How to flawlessly paint wood signs using a stencil made with your Cricut

                        Painted Wood sign made with a Cricut Stencil saying Welcome Playa del patio

                        You've seen painted wood signs everywhere but you don't really know what to use and how to make your stencil with your Cricut? I'll show you the best trick and you'll see how easy it is!

                        I made this sign for my patio. This is really where I'm going to spend my vacations this summer (in case you're reading this later, it's 2020 and we're in the middle of Covid-19). But it's ok. I try to put this in perspective and it could be much worse. I feel good in my home. So this is where I'll be this year.

                        Painted Wood sign made with a Cricut Stencil hung on a wall saying Welcome Playa del patio

                        Don't you think I'll be comfortable? This post contains some affiliate links for your convenience and at no extra cost to you. Click here to see my full disclosure policy.

                        I'm really glad how this wood sign turned out. I wasn't sure the paint wasn't going to leak everywhere considering the wood I use was very grainy and rough. But I had a trick up my sleeve: Mod Podge!

                        Material and tools required to build the wood sign

                        Of course, you don't need to do exactly as I did, but if you are curious, here's what I used to build the wood sign:

                        • Recycled pallet wood
                        • Kreg jig (I have the K5 and it's the best purchase I have ever made!)
                        • 1-¼ Kreg screws
                        • Americana Decor Chalky finish chalk acrylic (colour: primitive)
                        • Paintbrush

                        Note that I could add an outdoor sealer since I'm hanging it outside but it probably won't get any bad weather where it will be so I chose to leave it like that (and also, I like a vintage look! ?)

                        Material and tools required to make the stencil

                        • A cutting machine (I have the Cricut Maker, but the Explore could also do or even the Cricut Joy if you scale down the design)
                        • Stencil vinyl (or any adhesive vinyl you don't mind using. Like a colour you don't like would do great!) Or use the new Cricut Stencil film. Check out this post to know everything about it
                        • Weeding tools
                        • Transfer tape
                        • Foam brush and Matte Mod Podge
                        • Acrylic paint and ideally a stencil paintbrush

                        How to paint a wood sign with a Cricut stencil

                        You can see all the details in this video, from building the wood sign to painting it.

                        2022 update: You can also check out my post on the new Cricut Stencil film and why it is better than the original stencil vinyl.

                        Wondering how I hung my wood sign?

                        This is the best trick I have to hang anything on vinyl siding without damaging it.

                        First, I simply added a wire (that you can usually find in picture hanging kits like this one) using two small screws.

                        The back of the painted wood sign made with Cricut stencil

                        Then, I use these vinyl siding hooks. They are easy to install and you won't need to make holes in your siding. Cool right?

                        vinyl siding hook to hang painted wood sign made with Cricut stencil
                        vinyl siding hook to hang painted wood sign made with Cricut stencil

                        I'm sooooo happy with how this painted wood sign turned out.

                        Painted Wood sign made with a Cricut Stencil saying Welcome Playa del patio next to a adirondack chair

                        Some subscribers have told me they were going to make this sign with vinyl on their patio door. That's a great idea!

                        Where would you put it? Leave me a comment below!

                        P.S: Don't forget to pin it!

                        Pinterest image of the painted wood sign made with a Cricut stencil written Make this wood sign with your Cricut + free SVG, DXF, PNG, PDF

                        How to use Contour in Cricut Design Space

                        Image of Cricut Design Space written The Best trick to understand Contour in Cricut Design Space

                        The Contour tool in Cricut Design Space is difficult to understand at first. But once you get my awesome trick, you'll easily be able to hide portions of a design and modify existing SVG files like a pro.

                        Do you know the Contour function? It's the one at the bottom right in Cricut Design Space.

                        Image of Cricut Design Space with an arrow showing the Contour tool

                        It enables you to hide portions of an image or an SVG file giving you the possibility to modify an image that you wouldn't be able to change otherwise.

                        Now, I hear you saying: "When I tried it, there were just grey shades and I couldn't understand anything!"

                        Image of Cricut Design space showing what you see when clicking on Contour

                        Yes, I know. That's the first reason why it's hard to understand!

                        But with my simple trick, you'll get it in no time! Just watch the video.

                        In it, I'll show you how you can modify this SVG file:

                        Free SVG file to test Contour in Cricut Design Space. Welcome to Playa del Patio made by NeliDesign

                        This is one of my numerous cut files that you can get when you subscribe to my newsletter. If you're interested, you can do it by filling up this form:

                          I will also use one of Cricut Design Space free images and show you how to change the colour of part of it.

                          Check the video now!

                          The best trick to use Contour in Cricut Design Space

                          I hope you now understand the Contour tool and will be using it all.the.time!

                          If other Cricut functions are giving you headaches, just see these other tutorials:

                          PS: Don't forget to Pin it to remember it!

                          Pinterest image written The best trick to understand Contour in Cricut Design Space
                          « Previous Page
                          Next Page »

                          Hi! I'm Natalie

                          I help crafters create with confidence, useful DIY and craft projects with their Cricut.

                          More about me

                          Popular

                          • Cricut Maker 4 and Cricut Explore 4: Everything you need to know about these new cutting machines!
                          • Cricut's Value materials
                          • How to engrave on a curved surface with the xTool S1 laser cutter
                          • Difference between xTool M1 and xTool S1 laser cutters

                          Seasonal

                          • Cricut printable Iron-on for light and dark fabrics - everything you need to know
                          • How to cut felt with the Cricut Joy and Joy Xtra
                          • Using Infusible Ink on cotton
                          • Buying a Cricut: where to find the best price

                          Footer

                          ↑ back to top

                          Informations

                          • Privacy Policy
                          • Disclosure
                          • CCPA
                          • Do not sell my personnal information

                          Newsletter

                          • Sign up for emails and updates

                          Resources

                          • Access the library
                          • Discount codes
                          • About NeliDesign
                          • Contact
                          • Français

                          .

                          As an Amazon Associate I earn from qualifying purchases.

                          Copyright © NeliDesign

                          Manage Cookie Consent
                          We use technologies like cookies to store and/or access device information. We do this to improve browsing experience and to show (non-) personalized ads. Consenting to these technologies will allow us to process data such as browsing behavior or unique IDs on this site. Not consenting or withdrawing consent, may adversely affect certain features and functions.
                          Functional Always active
                          The technical storage or access is strictly necessary for the legitimate purpose of enabling the use of a specific service explicitly requested by the subscriber or user, or for the sole purpose of carrying out the transmission of a communication over an electronic communications network.
                          Preferences
                          The technical storage or access is necessary for the legitimate purpose of storing preferences that are not requested by the subscriber or user.
                          Statistics
                          The technical storage or access that is used exclusively for statistical purposes. The technical storage or access that is used exclusively for anonymous statistical purposes. Without a subpoena, voluntary compliance on the part of your Internet Service Provider, or additional records from a third party, information stored or retrieved for this purpose alone cannot usually be used to identify you.
                          Marketing
                          The technical storage or access is required to create user profiles to send advertising, or to track the user on a website or across several websites for similar marketing purposes.
                          Manage options Manage services Manage {vendor_count} vendors Read more about these purposes
                          View preferences
                          {title} {title} {title}
                          Manage Cookie Consent
                          To provide the best experiences, we use technologies like cookies to store and/or access device information. Consenting to these technologies will allow us to process data such as browsing behavior or unique IDs on this site. Not consenting or withdrawing consent, may adversely affect certain features and functions.
                          Functional Always active
                          The technical storage or access is strictly necessary for the legitimate purpose of enabling the use of a specific service explicitly requested by the subscriber or user, or for the sole purpose of carrying out the transmission of a communication over an electronic communications network.
                          Preferences
                          The technical storage or access is necessary for the legitimate purpose of storing preferences that are not requested by the subscriber or user.
                          Statistics
                          The technical storage or access that is used exclusively for statistical purposes. The technical storage or access that is used exclusively for anonymous statistical purposes. Without a subpoena, voluntary compliance on the part of your Internet Service Provider, or additional records from a third party, information stored or retrieved for this purpose alone cannot usually be used to identify you.
                          Marketing
                          The technical storage or access is required to create user profiles to send advertising, or to track the user on a website or across several websites for similar marketing purposes.
                          Manage options Manage services Manage {vendor_count} vendors Read more about these purposes
                          View preferences
                          {title} {title} {title}