When we start adding special characters (or flourishes or glyphs...) to our texts in Design Space, the possibilities become almost endless! And it's also super easy! I'll show you how!
This post contains some affiliate links for your convenience and at no extra cost to you. Click here to read my full disclosure policy.
It's a question people often ask me, but the question more often begins with "How can I do that?" including an image with circled letters or arrows, much like below.

"That" is very pretty! But what's it called? Good question!
If I rely on Adobe Photoshop or Illustrator, they call them "glyphs", but I'm not sure they are known by that name by the regular people who don't use these softwares on a recurring basis! I chose to call them "special characters" in the title.
If I did a survey, here are some names I would have for you:
- Flourishes
- Additional characters
- Alternative characters
- Stylized characters
- Ligatures
- Swirls
- Letter ornaments
- Fantasies
Do you have any more?!! You can always leave me a comment below!
Do all fonts have these glyphs?
Not all fonts have special characters! In fact, the majority do not. You need to download a special font or buy one.
Often, free fonts will have some glyphs available. The ones purchased are often much more complete.
How do I find fonts with glyphs?
You can find several free ones on Dafont.com, but I personally have trouble finding what I want on this site. Also, the fonts are for your personal use only (which means you can't, for example, create a quote, cut it into vinyl, put it on a mug and sell the mug.) If I just surprised you, read this article on copyright for more details.
If you know me, you know my favourite site is Design Bundles. The latter has a sister site for fonts (you can use the same account and password for both sites), it is Font Bundles.
The benefits of these two sites are in my opinion:
- Their Premium license that comes with any purchase allows the sale of derivative products. See all the details here.
- The quality of the product is much more constant
- The $1 Deals event once a month
Regarding the 3rd point, if you do not know about the $1 Deals event, let me tell you that you should not miss it. These are 30 products (SVG, Bundles, fonts) that are on sale for $1 each. Last month, I just bought this bundle of fonts with swirls for $1. Yes, yes!!
The only problem is that the sale is once a month and lasts only one hour. So you need to be ready! But I'm here for you! Sign up for my newsletter below and I'll remind you every month, I promise!!!
In the meantime, you can also check out the"Free Fonts" section.
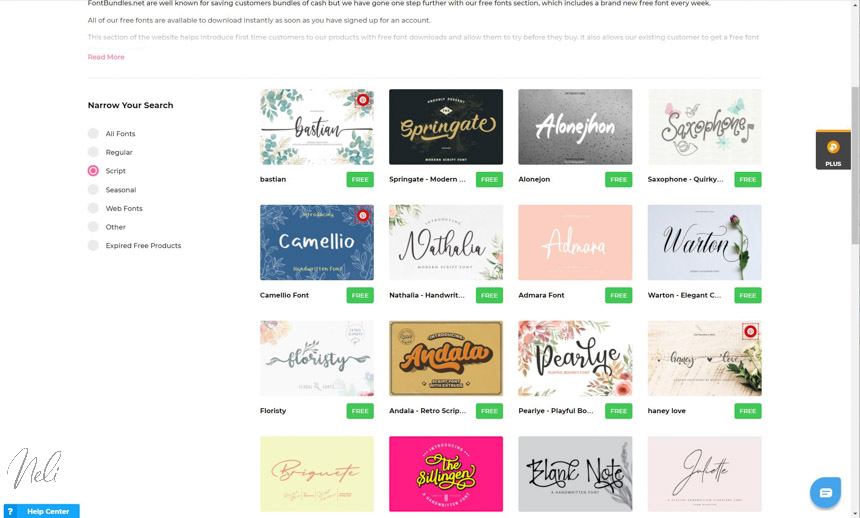
By clicking on one of the fonts, you can see if it contains glyphs. Usually, it says "Alternate" which means alternative characters.

Note that to download anything, even free, you need to create an account.
How to insert glyphs into Cricut Design Space
For more details, you can see the video at the end of this post where I give you my trick to EASILY insert special characters directly into Design Space.
But in short, the easiest way is to use a character table. Whether you have a PC or Mac, you already have one included in your computer. Here's how to do it.
With a PC
In the start menu of your PC (bottom left) type "character map". Here's what's going to pop up:

Do you find it convenient? I know I don't! It must be my age, but it seems to me that it is far too small!!! In addition, there are plenty of extra characters and the actual glyphs are hard to find.
But don't worry, I have a solution for you, and it's free!
You'll need to download Microsoft's"Character Map UWP" app (take the time to see if your computer has the required configuration to download it). Once installed, here's the visual you'll have:

Much better, isn't it?
But if it's still not enough, you can click on the gear at the top right and still make the characters bigger. Now I'm sure you can not say that it is not big enough!

Once there, all you have to do is find the desired font, select the character you want, press "copy" at the bottom right and paste it into Design Space using CTRL-V in the text window!
Of course, don't forget to select the same font in Design Space before doing CTRL-V.
Note: With the new version of Design Space, you can insert a special character in the word (meaning, you won't see a content box appear as in the image below).

With a Mac
If you have a Mac, you're lucky! There is a basic software called "FontBook" that does the same thing as "Character Map" from Windows.

To see the glyphs, press on the icon with 4 little squares. You can then search for your font by typing its name into the search bar.

Then, it's the same as with a PC. So just copy/paste using the Edit>Copy menu (or Cmd+C) and paste your glyph in the Design Space text window by pressing Cmd+V.
Don't forget to select the same font in Design Space before you press Cmd+V to see your glyphs appear!
For all the details, check out the video.
Don't forget to sign up for my newsletter to be notified of the next $1 Deals event from Design Bundles! You'll also get free cheat sheets and access to a library full of free SVG files!
P.S. Don't forget to pin it!