Looking to make an original frame? Well, this tutorial will show you how to use fabric scraps and the rotary blade to make beautiful art to hang on a wall!
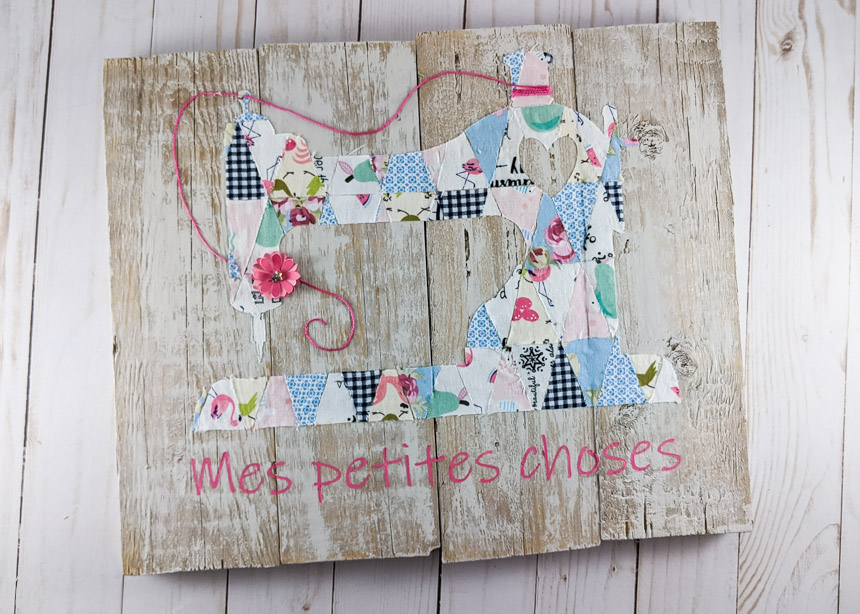
I wanted to do a special project for my friend's birthday. She has a sewing business "Mes petites chooses" (meaning "My little things" in French).
But, sewing and me... hmmm, let's just say that it's not my best talent! 😂
But yes, it is possible to cut fabric with the rotary blade of the Cricut without needing to sew anything!
So I decided to make her a frame with her fabric scraps and my Cricut. Yes, these are "her" scraps!. I subtly asked her to provide me with fabric scraps without telling her what I was going to do with them!
And I couldn't be happier with the result! This article contains links to affiliated products for your convenience and at no additional cost to you. Click here to read my full disclosure policy.
Required materials
For the frame
- Frame (or see this post if you want to make a frame like mine with recycled planks)
- Fabric scraps
- Cricut Maker
- Rotary blade (the fabric blade that comes with the Cricut Maker)
- Fabric cutting mat (pink)
- Transfer tape (or paper to cover book from the Dollar store)
- Cardstock to make the template
- Mod Podge and foam brush
- Embroidery thread
- Cardstock for small flowers
for text only
- Stencil vinyl
- Transfer tape
- Paint
- Sponge brush for stencil
- Scraper (very useful in this case!)
How to make a frame with your Cricut and fabric scraps
If you prefer the video, see at the bottom of this post!
Steps to cut fabric in Cricut Design Space
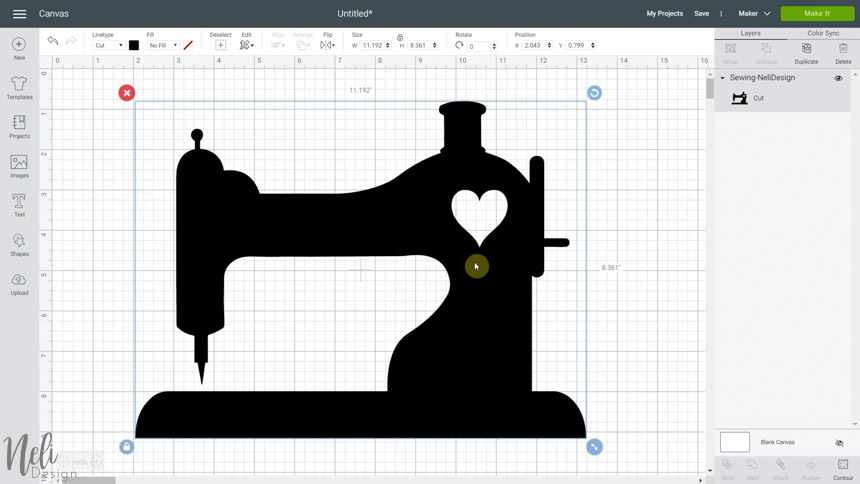
First, in Cricut Design Space, click "download" and find the image of the sewing machine that you previously downloaded from NeliDesign's library.
Cut the sewing machine on a cardstock. This one will only serve as a template for the moment. Then select the shape you want under "Shapes".
I used a triangle that I unlocked and shortened as follows.
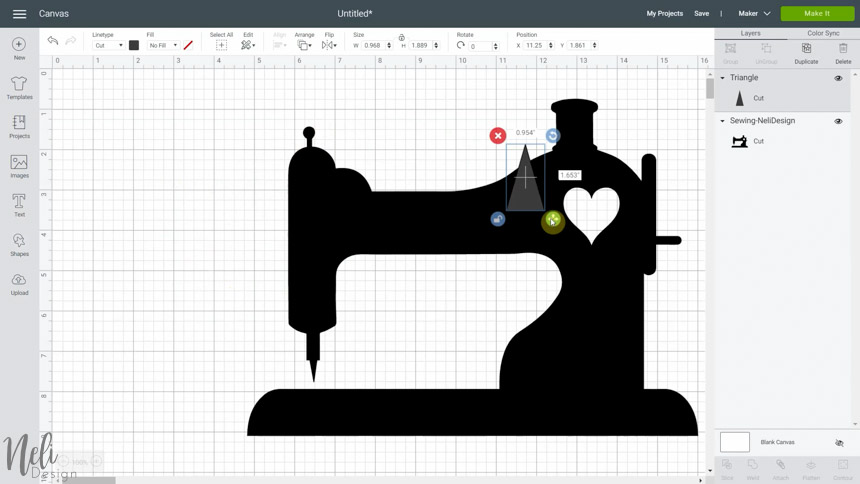
Close the eye of the sewing machine's layer and use the "duplicate" button to make multiple triangles.
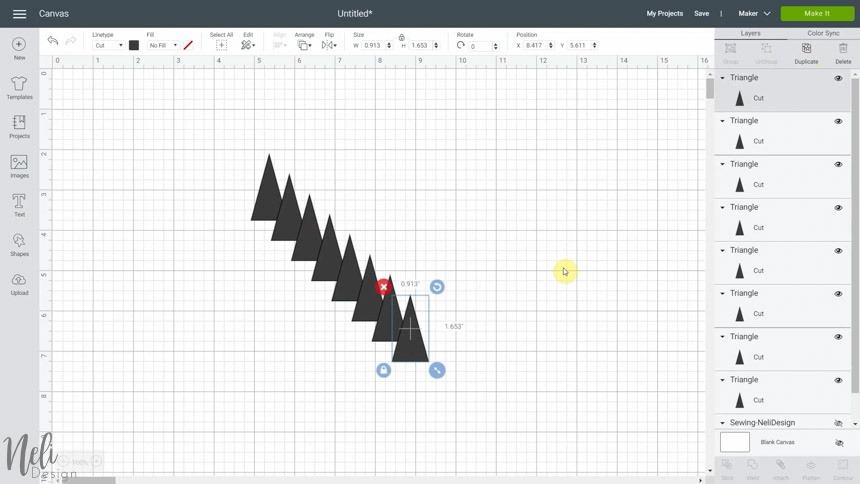
Since the triangles will be cut into fabric scraps, they must be manually placed on the Design Space mat depending on the placement of the fabric scraps on the cutting mat.

Assembling fabric scraps.
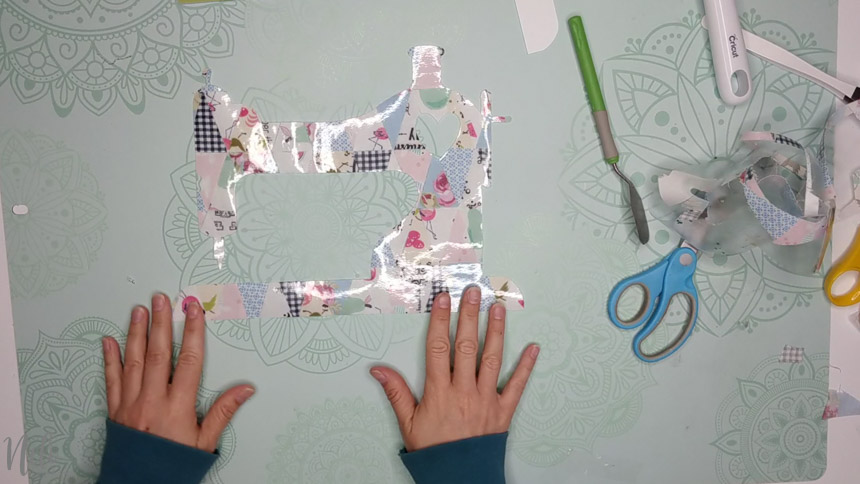
Once the fabric triangles are cut, place the sewing machine template on your work surface, taking care to turn it upside down (mirror).
Then use a piece of transfer paper and fix it with scotch tape over the template so that the sticky side is up.

Then use all your patience (!!) to place the fabric scraps in order to make a beautiful arrangement of colours and patterns.
Warning: don't forget to place the triangles face down (meaning that the pattern needs to be on the side of the table).

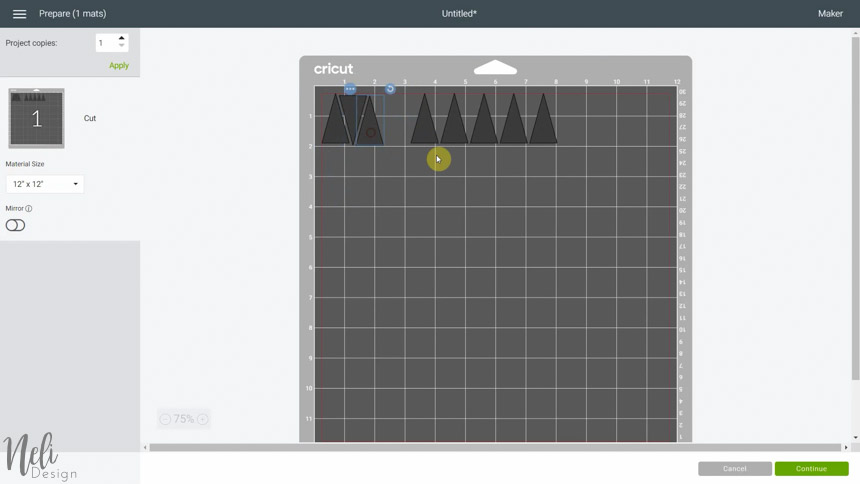
Transfer the fabric triangles and transfer paper to the Cricut cutting mat
With the template, estimate the positioning that the sewing machine should have.

On the Design Space mat, position the silhouette of the sewing machine at the same place using the grid as guides. Don't forget to do "mirror."

Use the rotary blade and fabric settings to cut out the silhouette of the sewing machine.
You will notice that the transfer paper has also been cut. It doesn't matter.
Lift the mat of the carpet using the spatula if required.

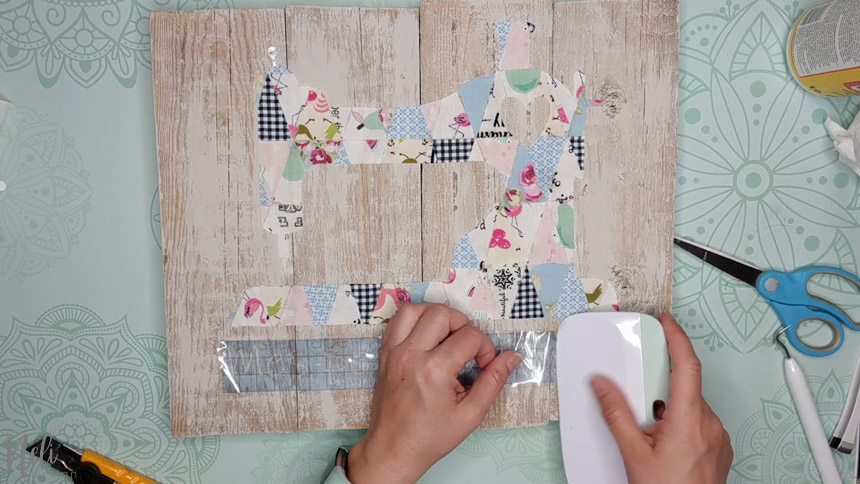
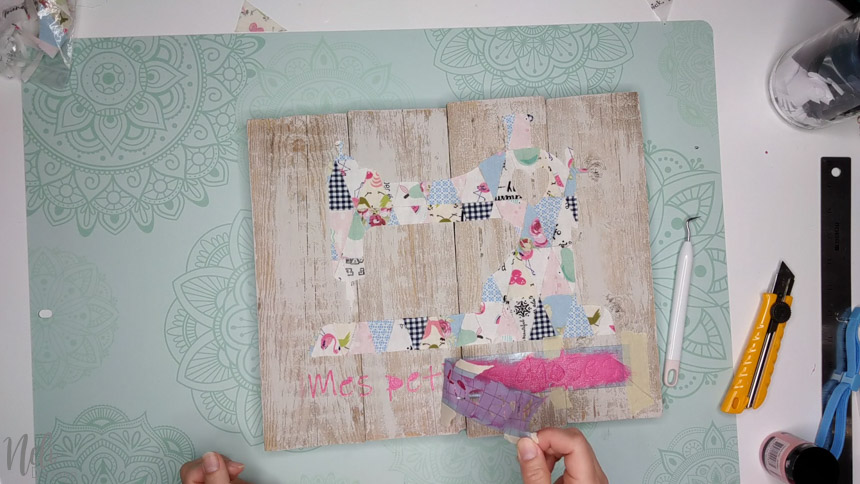
My first idea was to transfer the fabric to the frame but the Dollar store paper was way too sticky. I had to take each triangle of fabrics one by one and stick them on the frame with Mod Podge. 🤷
It was a bit long, but it was worth it!
Note that I didn't add Mod Podge over the fabric because I wanted to keep the texture of the fabric.
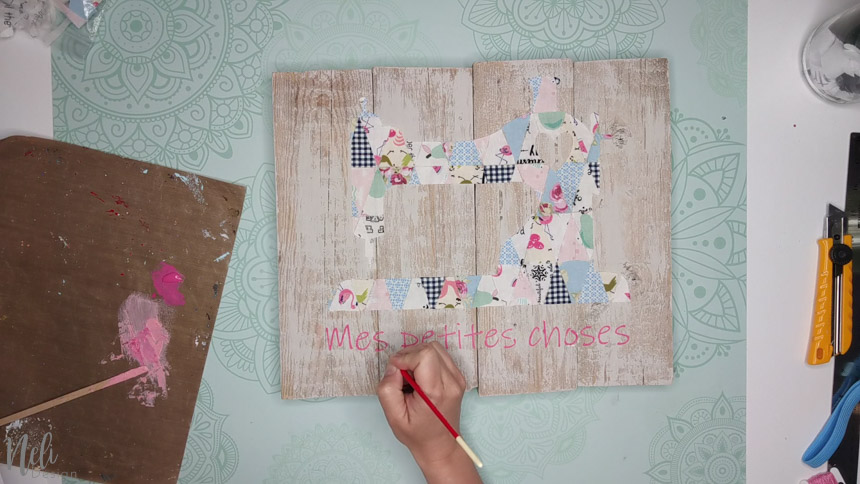
How to write the text on the frame
First, cut the letters into stencil vinyl. Cricut's stencil vinyl has a sticky side. So I used transfer paper to apply it to the frame so I could keep all the small pieces in place (such as the holes of the "o" and other letters).


The transfer paper sticks a lot on the stencil vinyl! I always forget to do it, but I strongly suggest pressing your transfer paper a few times on your sweater or towel to decrease the "intensity" of stickiness!

Plus, because my wood planks were rough, the stencil vinyl didn't stick perfectly. So I had to use masking tape to help me.
The scraper was also handy for removing the transfer paper that was absolutely keen to stick!!!
Before adding the paint, apply a layer of Mod Podge to seal the stencil. This is all the more necessary when the frame is uneven like mine.

Once the Mod Podge is dry, apply the paint by "dabbing" the foam brush on the stencil. Be careful not to paint outside the stencil! I say it because that's totally my kind of mistake!!!

You even have the right to change your mind about the colour along the way (I finally put dark pink over the pale pink)!!!
When the paint is dry, gently remove the stencil.
Making touch-ups is required and this is perfectly normal!
The final touch
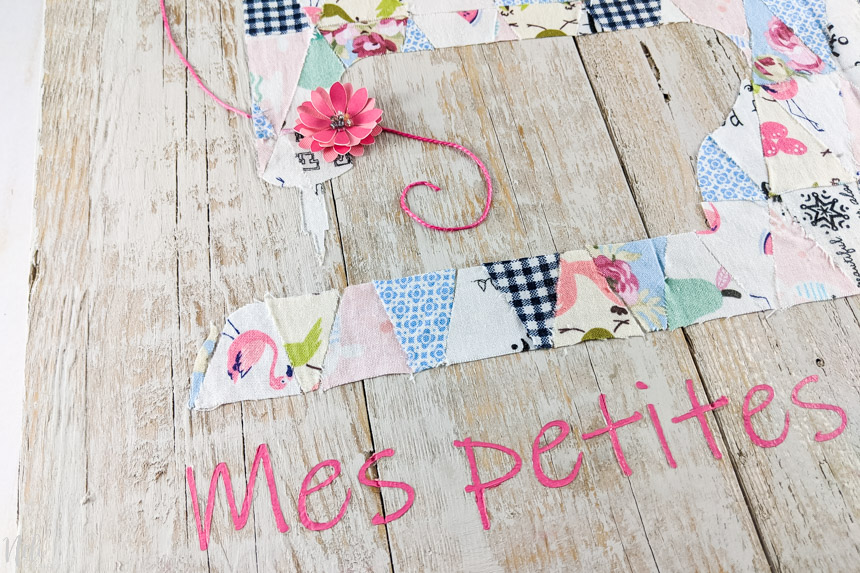
I used embroidery thread to mimic the thread of the sewing machine. Again, just put a little Mod Podge to stick it.

I also found a flower to cut with my Cricut and I added it as a decoration. 🙂

It's a project that took quite a long time to do, but still very pleasant. And I love the result.
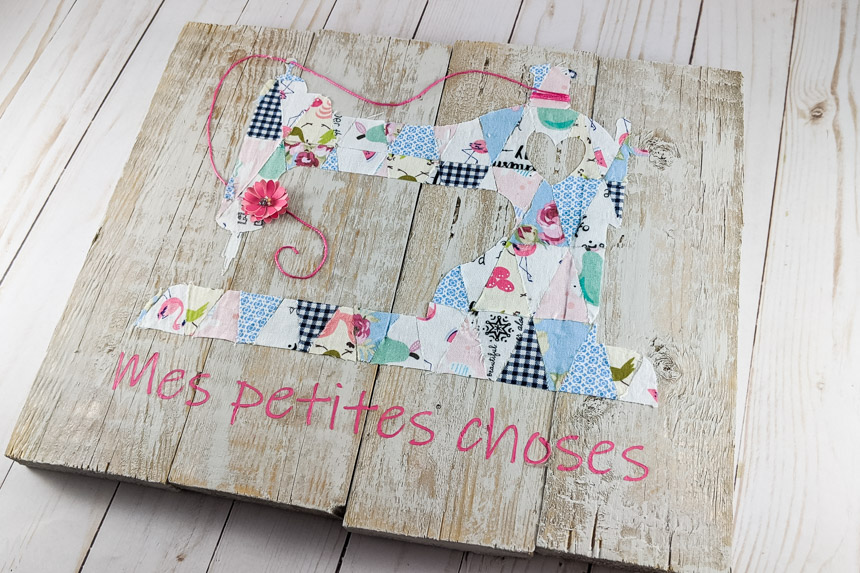
I must admit that creating an original frame like this is very satisfying! It's even better when you do it to give it to someone else!
Are you like me? I always have more patience for complicated projects when it's for a gift!!!
Check out the video for all the details
Want to know more about Cricut Design Space?
Get my free cheat sheet by subscribing below.
Don't forget to Pin it!