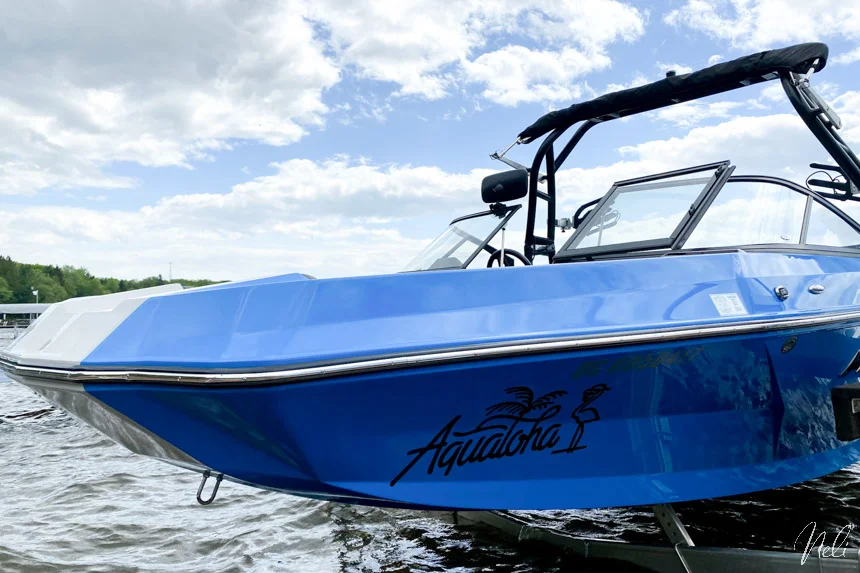
Save money by making your own vinyl decal for your boat or any other vehicle with your Cricut. It’s not that hard! I will show you how!
My friends Will and Sophie asked me if it was possible to cut vinyl with my Cricut to identify their boat. It was really a great opportunity for me and I jumped at the chance!

In the video below, you will see the complete process in Design Space as well as how to install the vinyl.
This post contains some affiliate links for your convenience and at no extra cost to you. Click here to read my full disclosure policy.
What should be used to make a boat decal with a Cricut?
Well, first of all, you will, obviously, need permanent adhesive vinyl.
As the decal will be under harsh weather, I opted for what is called a marine-grade vinyl, the Oracal 751.
Difference between Oracal 651 and 751 vinyls
Oracal 651 is the vinyl used by most people for crafting with their Cricut. It is comparable to Cricut’s Premium permanent vinyl.
One might think that the Oracal 751 vinyl, being more durable, would be thicker than the 651, but it is quite the opposite.
At 0.05 mm (2 mil) thick, Oracal 751 vinyl is about 25% thinner than the 651 making it more flexible and stable. So it is ideal for curved and multidimensional surfaces like vehicles.
The Oracal 751 vinyl also has a longer lifespan, about 8 years when continuously subjected to harsh sunlight. I imagine (and hope) it would be even longer for a boat that will be stored half the year!
The inconvenient
Oracal 751 vinyl is more expensive and sometimes more difficult to apply without stretching or breaking it (kudos to my friend Wil who applied vinyl on a boat for the first time!!!)
Maximum size of the boat decal with a Cricut
Since I had to use a mat to cut this vinyl, I had to limit the design to 11.5″ X 23.5″. See the video below to see all the tricks used to optimize the size of the image.
At the time, I didn’t have the Cricut Venture. This would have saved me the trouble of separating the design.
Cut setting to use in Cricut Design Space
As the Oracal 751 vinyl is thinner, we cannot use the same cut setting as the Oracal 651. I used the “Outdoor Premium Vinyl” setting in Design Space, but I always suggest doing a test cut to confirm that the chosen setting is adequate.
You can check out this article to learn my technique to make an easy test cut.
Materials and tools required
- A cutting machine (Maker or Explore series can do and the Cricut Venture)
- Marine-grade Vinyl – Oracal 751
- Transfer tape of the same size
- Scraper (or credit card)
- Rubbing alcohol

Update
This design has been in the water for 3 summers and it is still holding on strong!
Some people wrote to me saying they did the same thing with regular Cricut Premium permanent vinyl and after 3 years it was still holding strong, even in salty water!
I guess only time will tell if the Marine grade was really worth it. Let’s just say that if you have a Cricut and your decal doesn’t hold, you can always cut a new one! (haha) But when you do this for friends, I really wanted it to be the best.
How much does it cost to make your own boat decal with a Cricut?
I bought 36″ of this marine-grade vinyl and the same dimension of transfer paper. With the delivery and taxes, it costs me $25.
I have no idea how much similar lettering can cost on a boat (if you know, feel free to tell me in a comment!), but I’m pretty sure making my own boat decal with my Cricut makes it a good deal! What do you think?
See the installation of the boat decal
So, are you willing to try it too?
P.S. Thanks to my friends Will and Sophie for documenting the whole process and trusting me to carry out their project!
Share it by pinning it to Pinterest


