NeliDesign

menu icon
go to homepage
  • Projects
    • Cricut Help
    • Home Decor
    • Crafts
    • Organization
  • Materials
    • Adhesive Vinyl
    • Heat transfer vinyl
    • Foil
    • Infusible Ink
    • Paper and Cardstock
    • Pens and Markers
    • Other
  • Free cut files
    • See the free cut files
    • Get the free cut files
      • Get a password
      • Access the Library
  • Shop
  • Français
search icon
Homepage link
  • Projects
    • Cricut Help
    • Home Decor
    • Crafts
    • Organization
  • Materials
    • Adhesive Vinyl
    • Heat transfer vinyl
    • Foil
    • Infusible Ink
    • Paper and Cardstock
    • Pens and Markers
    • Other
  • Free cut files
    • See the free cut files
    • Get the free cut files
      • Get a password
      • Access the Library
  • Shop
  • Français
×
Home

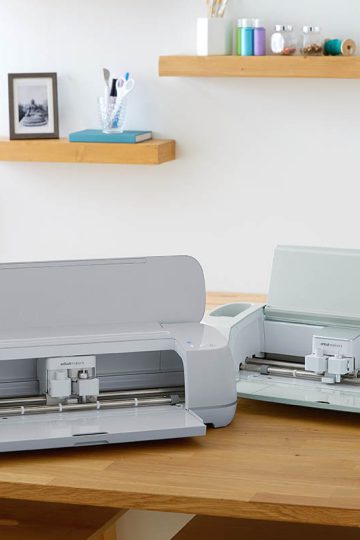
Cricut Maker 4 and Cricut Explore 4: Everything you need to know about these new cutting machines!

Cricut has just launched its latest cutting machines, the Cricut Maker 4 and the Cricut Explore 4. But what do they offer that their predecessors don't? What are their strengths, and are they worth the money? Here's a complete roundup of what's new!

Disclosure: Thanks to Cricut for providing me with the product to review. I am not paid or sponsored by Cricut to produce this post. All reviews and opinions are 100% my own and completely honest.

This post contains some affiliate links for your convenience and at no extra cost to you. I get commissions for purchases made through links in this post. Click here to see my full disclosure policy.

Improved cutting speed

One of the great improvements of these new models is their cutting speed. Cricut announces that the Maker 4 and Explore 4 are up to 2 times faster than their predecessors, especially when using a cutting mat. (Speed may vary according to the material setting chosen).

This enhancement means you'll be able to complete your projects faster and save precious time, especially for large projects or series of identical objects.

Available colors

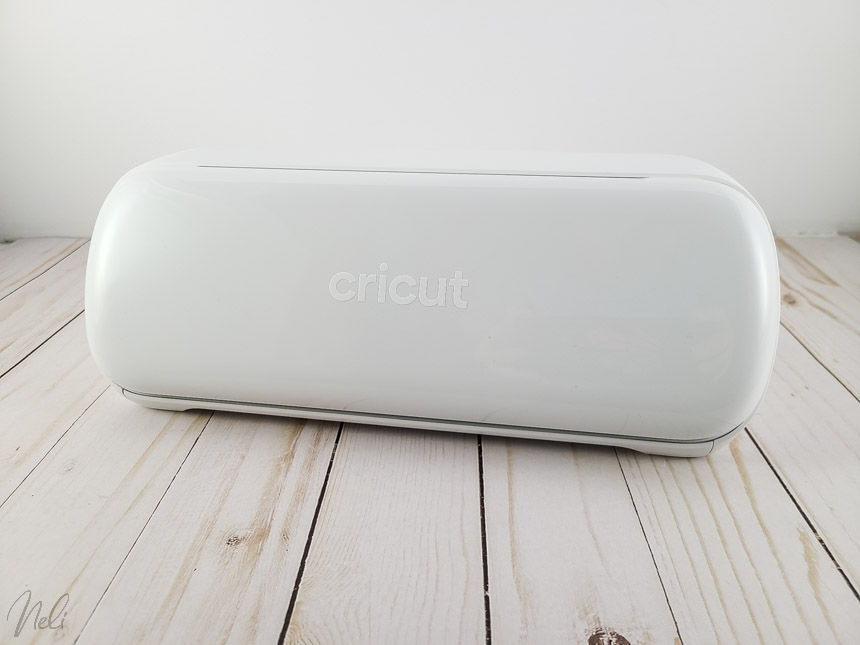
In terms of colors, they are available in Seashell and Sage. For both colors, Explore 4 has a matte finish, while Maker 4 has a glossy finish.

  • In North America (United States, Canada, Mexico): Explore 4 and Maker 4 are available in Seashell everywhere and Sage exclusively at Michaels.
  • For France and Europe: Explore 4 will be available in Seashell and Maker 4 in Sage only.
Image courtesy of Cricut

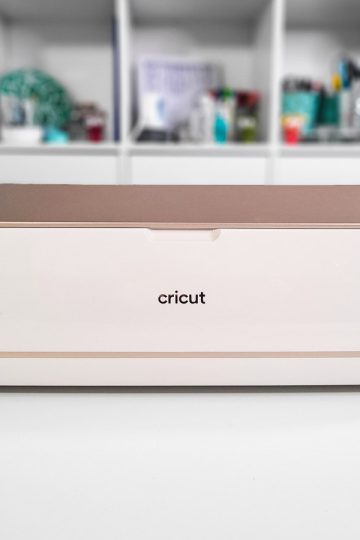
*The colour Seashell is, in my opinion, a pinkish white. I say this because I didn't expect it when I saw the photos, but it really is a pinkish colour!

Box contents : Ready to create!

Good news: Cricut includes far more materials in these machines than in previous versions, so you can get started straight away. Unlike versions 3, for example, which didn't even include a mat, these new models now include everything you need. Here's what you'll find in the box:

  • Cricut Explore 4 or Cricut Maker 4
  • Fine point blade + case
  • Accessory adapter (already installed in clam A)
  • Power cord
  • Three sheets of Smart Vinyl (13 x 6 in.), two sheets of cardstock (11 x 4.25 in.), one sheet of Smart Iron-On (13 x 6 in.) and two sheets of Transfer Tape (12 x 6 in.)
  • LightGrip mat (12 x 12 in.)
  • Fine point pen 0.4, black
  • Mini weeding tool
  • Quick start guide and warranty documents

Enough for up to 10 projects right out of the box!

Price

These new machines are offered at a lower price than the previous versions when they were launched, even though they contain more materials in the box:

  • Cricut Explore 4: $249 USD
  • Cricut Maker 4: $399 USD

They can also be purchased as a bundle that will be different on Cricut and on Amazon.

Compatibility with tools and accessories

The Cricut Explore 4 and Maker 4 are compatible with a wide range of tools and blades. All accessories designed for the Explore family are also compatible with the Cricut Explore 4. Similarly, everything that works with the other Maker models is compatible with the Cricut Maker 4. Here's the rundown:

  • Explore 4: Fine point blade, Deep point blade, Fabric Blade, Foil transfer tip, Pens & markers, Scoring stylus.
  • Maker 4: Same accessories as Explore 4, plus knife blade, scoring wheels, rotary blade, wavy blade, engraving tip, debossing tip and perforating blade.

Maximum cutting size

Like their predecessors, these machines are still compatible with Smart materials, allowing long projects to be cut without matting.

MaterialMaximum size Explore 3 and 4 and Maker 3 and 4
Iron-On Smart11.7 in x 12 ft (29.7 cm x 3.6 m)
Smart Vinyl11.7 in x 12 ft (29.7 cm x 3.6 m)
Smart paper11.7" x 11.2" (29.7 cm x 28.4 cm)
On a 12 x 12 mat (30 cm x 30 cm)11.5" x 11.5" (29.2 cm x 29.2 cm)
On a 12 x 24 mat (30 cm x 60 cm)11.5" x 23.5" (29.2 cm x 59.6 cm)

To find out more about the different types of vinyl and Smart materials, take a look at this post.

Release date and availability

The Cricut Explore 4 and Maker 4 will be available on the following dates:

Canada and United States: from February 28, 2025 *.

  • Seashell color on Cricut.com only
  • Sage color available exclusively from Michaels

*from March 14, 2025 for other stores such as Amazon, etc.

International (excluding USA, Mexico, Canada) from March 14, 2025

  • Seashell color only for Explore 4
  • Sage color only for Maker 4

Should you fall for these new machines?

If you already own a Cricut Explore 3 or Maker 3, these new versions mainly offer an increase in speed. If speed is an essential criterion for you, then the upgrade could be worthwhile.

On the other hand, if you have an older version (Explore Air 2 or original Maker), buying the Explore 4 or Maker 4 will enable you to benefit from Smart materials and greater speed.

What do you think of these new machines? Are you looking forward to testing them?

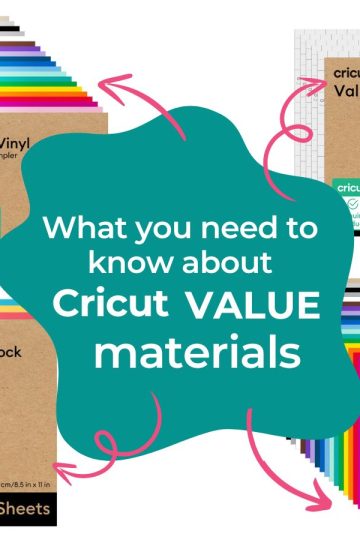
Cricut's Value materials

Cricut continues to expand its product offering with a new range of cost-effective materials that promise to make your creative projects more accessible than ever.

Today, I'm exploring with you the new options joining the Cricut family: Value Vinyl, Value Iron-On, Value Transfer Tape and Value Cardstock.

This post contains some affiliate links for your convenience and at no extra cost to you. I get commissions for purchases made through links in this post. Click here to see my full disclosure policy.

Why these materials are economical

Cricut value materials have been specially designed to combine quality and economy.

Although the low-cost materials meet Cricut's quality standards, Cricut has made a few adjustments to reduce costs:

  • Vinyl has no printed grid on the liner
  • Materials are slightly thinner
  • Minimal packaging

The last point is important. If you order a pack of 50 sheets of adhesive vinyl, for example, this is what you'll receive:

Each value product has its own specific cut setting in Design Space, so you can cut without worry. Just look for "Value" when choosing materials.

These products are ideal for those looking to maximize their budget without sacrificing quality.

Where to find these value materials

As packaging is reduced. These materials will never find their way into stores. They will only be available from Cricut.com and Amazon. This includes Canada and the United States for the time being. For France, it will be very soon too! (Some products may not yet be in stock or available in your area, but it won't be long).

If you are a Cricut Access member, I strongly suggest that you order from the Cricut website. You'll get an extra 10% off your order. And don't forget to combine it all with the exclusive promo code (if you meet the conditions) you'll find on this page at all times.

You can also order from Amazon. If you're an Amazon Prime member, you'll receive your package super fast!

Value Vinyl

Cricut's Value Vinyl is a permanent vinyl designed to offer excellent value for money. This vinyl is easy to weed and apply while being weather and UV-resistant. Perfect for long-term projects, it can be used for stickers, decorations and much more. What's more, it's compatible with all Cricut cutting machines, guaranteeing effortless, precise cuts.

Image courtesy of Cricut.com

Main features :

  • Permanent vinyl: resistant to outdoor conditions, weathering and UV. But can still be removed without leaving residues.
  • Ease of application: Vinyl is easy to cut and weed, making your projects faster and more enjoyable.
  • Dishwasher-safe: Like most Cricut vinyl. Hand washing is recommended to extend the life of your projects.
  • Colour options: Available in many colours and lengths, this vinyl is perfect for all your creative needs.
  • Cricut machine compatibility: Optimized for all Cricut machines, this vinyl offers precise, long-lasting results.

Difference between Cricut Value Vinyl and Cricut Premium Vinyl?

To save you money, Cricut has reduced the thickness of the vinyl slightly, and the backing is transparent without a grid.

This transparency actually helps with weeding, especially if you have a light table like a BrightPad.

As the back is transparent and unmarked, it's important to leave the sheets in the envelope to avoid mixing the value vinyl with the Iron-On vinyl.

To findvalue vinyl on the Cricut website, click here.

To find it on Amazon, follow this link.

Available options :

  • Pack of 25 sheets (12x12 inches or 30.5 cm x 30.5 cm)
  • Pack of 50 sheets (12x12 inches or 30.5 cm x 30.5 cm)
  • Pack of 100 sheets (12x12 inches or 30.5 cm x 30.5 cm)
  • Set of 10 rolls, each 5 feet (1.5 m) long
  • 10-foot (3 m) roll
  • 35-foot (10.7 m) roll

Value Transfer Tape

Cricut's value transfer paper is designed to accurately transfer your vinyl designs to a variety of surfaces.

This transfer paper is adhesive enough to capture and move vinyl, yet soft enough not to leave residues on your final surface. It's a perfect option for those looking for quality transfer at an affordable price.

Image courtesy of Cricut.com

Main features :

  • Residue-free adhesive: this transfer paper is easily removed without leaving any sticky residue.
  • Compatible with various vinyls: Works perfectly with all types of Cricut vinyl, including permanent and removable vinyl.
  • Easy to use: Designed for ease of use, it makes the transfer process fast and efficient.

What is the difference between Cricut value transfer paper and regular transfer paper?

I've tested transfer paper sheets myself and they work great. Like the value vinyl, however, it's thinner. I was in a big cup production and managed to make 25 cups with the same piece of regular transfer paper.

When I used the value transfer paper, I only managed to make 5 cups before it tore.

To find ValueTransfer Paper on the Cricut website, click here.

To find it on Amazon, follow this link.

Available options :

  • Pack of 75 sheets (12x12 inches or 30.5 cm x 30.5 cm)
  • 75-foot (22.8 m) roll (linerless, without backing)

Value Iron-on

Cricut's Value Iron-On is slightly thinner than other Iron-On materials, but no less powerful. Designed to last over 25 washes, this iron-on is easy to use and compatible with Cricut press tools as well as a domestic iron.

Image courtesy of Cricut.com

Main features :

  • Durability: Withstands over 25 washes.
  • Multi-layer: up to 4 layers can be layered for complex designs.
  • Ease of use: Precise, easy-to-apply settings in the Cricut Heat application and Cricut Heat Guide.

What's the difference between Cricut's Value Iron-on and regular Iron-On?

Value Iron-On is thinner. It can be layered, but Cricut still recommends using the slice technique when applying multi-colour designs, since some colours may be more translucent and it's possible to see the other colours through. In other words, avoid layering vinyl if this is something you're concerned about.

To find the Value Iron-on on the Cricut website, click here.

To find it on Amazon, follow this link.

Available options :

  • Pack of 20 sheets (12x12 inches or 30.5 cm x 30.5 cm)
  • Pack of 40 sheets (12x12 inches or 30.5 cm x 30.5 cm)
  • Set of 10 rolls, 3 ft. each (0.9 m)
  • 5-foot (1.5 m) roll
  • 20-foot (6 m) roll

Value cardstock

This lightweight cardstock (65 lb - 176 g/m2) is perfect for a variety of creative projects, from cardmaking to decorations and embellishments. It is compatible with Cricut pens and markers and is optimized for all Cricut cutting machines.

Image courtesy of Cricut.com

Main features :

  • Superior quality: High-quality, smooth, solid-core cardstock.
  • Acid-free: This paper is acid-free, making it perfect for creations that stand the test of time.
  • Compatible with Cricut pens: Works perfectly with Cricut pens and markers for precise detail.

What is the difference between Cricut value cardstock and regular cardstock?

Value cardstock is thinner and smaller in size than regular cardstock:

  • Cricut economy cardstock: 65 lbs (176 g/m2) and 8.5 x 11 inch (21.6 cm x 27.9 cm) format
  • Cricut cardstock: 80 lbs (216 g/m2) and format 12x12 inches (30.5 cm x 30.5 cm)

It is also smooth, whereas regular Cricut cardstock is textured.

At the moment, only two sets of colours are available. But I'm inclined to believe that other colours will follow.

To find value Cardstock on the Cricut website, click here.

To find it on Amazon, follow this link.

Available options :

  • Pack of 80 sheets (8.5 x 11 inches or 21.6 cm x 27.9 cm) in various colors

Cricut's value materials are ideal for crafters who want to save money without compromising quality. Whether you're a beginner or an expert, these materials are designed to deliver impressive results at an affordable price. What's more, with automatic cutting setting in Design Space, you can be sure of getting every cut right, every time.

Explore these new products today and discover how Cricut continues to make creativity more accessible to all.

How to engrave on a curved surface with the xTool S1 laser cutter

Using the xTool S1's curved surface function to engrave on objects such as a wooden spoon may seem complex, but here you'll see the essential steps to make your project a success.

Disclosure: Thanks to xTool for providing me with the product to review. I am not paid or sponsored by xTool to write this post. All opinions are 100% my own and honest.

This post contains some affiliate links for your convenience and at no extra cost to you. I get commissions for purchases made through links in this post. Click here to see my full disclosure policy.

If you'd like to know more about what the xTool S1 laser cutter and engraver can do, check out this other article.

When writing this article, only the xTool P2 and xTool S1 laser cutters can engrave curved surfaces.

And I'm not talking about using the RA2 Pro extension, but about a feature specific to these machines.

This feature is found in xTool Creative Space (XCS) and is called "Curve process" in the right-hand menu.

Required materials

To test the curved surface feature, I decided to use a wooden spoon I'd found at Dollarama. That's really all you need.

Test first

Making a test arry is really the secret of success with a laser machine. As I didn't want to buy a spoon just for testing purposes, I used a leftover of 1.5 mm basswood.

You'll notice that my matrix has only one row. This is because the ability to engrave on a curved surface is limited to a speed of 30 mm/s.

So, keeping the speed at the maximum, I used different power percentages. There's no point in going higher than 15%. Wood burns at 20%, so be careful.

If you'd like to get this test array (and the SVG files for the spoon quotes), simply register below and you'll find them in the free library!

File preparation in xTool Creative Space

I'm using version 1.7.8 of xTool Creative Space. If you're using beta version 2.0, your visuals may not be exactly the same.

To begin, go to "Import an image" to load the SVG file.

You don't need to resize the design precisely at this stage. However, I suggest that you immediately set the processing type to "Engrave".

Project preparation

When engraving on a curved surface such as a wooden spoon, it is crucial to position the engraving area correctly.

When writing this post, the feature for engraving curved surfaces does not allow you to identify the shape of the surface other than with a rectangle.

So, to center the quote, I suggest drawing a rectangle on the spoon, marking dots at the top left and bottom right with an erasable pencil. These points will serve as markers for the laser.

Then use magnets to attach the spoon to the xTool's honeycomb. Make sure the laser can move without touching the magnets. To do this, I suggest putting the spoon handle down. If you don't have a honeycomb base, use a double-sided adhesive to prevent the spoon from moving.

Curvature measurement

Place the laser on the points marked with a pencil and measure the curvature. Click on "Measure curve" and follow the instructions to place the laser on each point.

The default measurement density is 5 by 5. You can increase this number for greater precision, but it will take longer. I didn't find it was necessary for the spoon.

Design and Settings

Once the surface has been measured, insert your design within the defined area. Make sure the design does not extend beyond this area.

As mentioned above, the maximum speed for curved engraving is 30 mm/s. For this wooden spoon, I used 10% power and a speed of 30 mm/s.

Engraving

Once the parameters have been set, press "Process" and start engraving. The laser will follow the curve of the spoon.

Make sure air assist is activated for best results. Leaving it on "Automatic", the airflow of the Air assist will be done automatically on the xTool S1.

Results

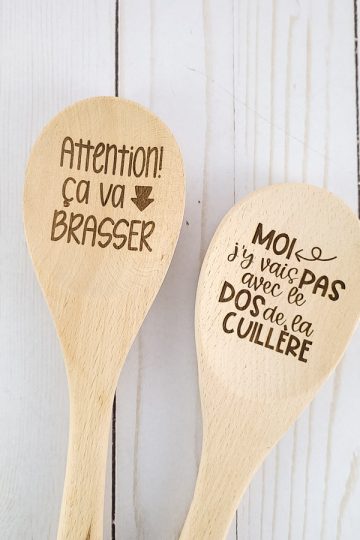
Engraving took about 12 minutes. The result is a clean, dark engraving, perfectly centred on the spoon.

Do I need to apply a protective coating over the engraving?

These wooden spoons are sold to be used without protection.

It's certain that once the spoon has been engraved, you can smell the engraving. This smell will disappear after a few days.

I took care to wash the spoon well, and the colour of the engraving has faded a little (in the photo, the one on the left is washed, but not the one on the right).

There's no smell at all and the engraving gives no particular taste (yes, I've tested it, hihi!).

I'd feel comfortable using it as is, but it's up to you to use your good judgment!

Conclusion

Following these steps will enable you to engrave curved surfaces efficiently with the xTool S1. For those who would like to try out this project, the engraving files are available in the free library. Simply register below.

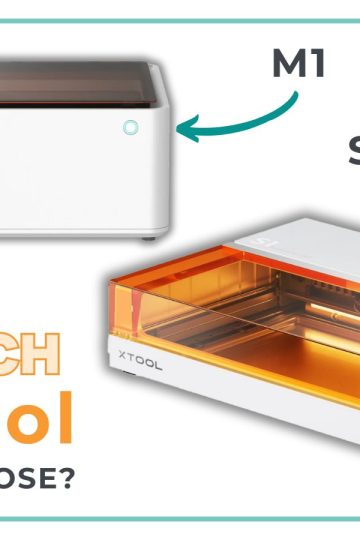
Difference between xTool M1 and xTool S1 laser cutters

Laser cutting machines have caught your eye, but you're wondering which one to choose? This post will tell you the difference between the xTool M1 and the xTool S1 so you can make an informed choice.

Disclosure: Thanks to xTool for providing me with the product to review. I am not paid or sponsored by xTool to write this post. All opinions are 100% my own and honest.

This post contains some affiliate links for your convenience and at no extra cost to you. I get commissions for purchases made through links in this post. Click here to see my full disclosure policy.

Which laser cutter should I choose: the xTool M1 or the S1?

The xTool S1 laser cutter was initially available in 20W and 40W versions. When xTool released the more affordable 10W model, I wondered why. The xTool M1 also features a 10W laser. But after comparisons and research, I figured it out.

I'll get straight to the point. Personally, if I had to choose between the xTool M1 and the xTool S1-10W, I'd go for the xTool S1-10W. In the next few lines, I'll explain the background of this choice and why I made it.

*Note that throughout the post, for the sake of brevity, I'll refer to "xTool S1", but please note that this is the 10W version we're talking about here.

Similarities between xTool M1 and S1

Diode vsCO2

The xTool M1 and S1 are two of the least expensive laser-cutting machines available. Why? Well, because they're diode laser machines.

In fact, there are two types of laser: diode and CO2.

CO2 laser machines are more powerful and faster and can cut and engrave more materials. These are also much more expensive machines, more appropriate for people who do laser cutting professionally. When we think of aCO2 laser machine, we think of the Glowforge Pro, for example, or xTool's xTool P2.

The xTool M1 and S1 each feature a diode laser, which is slower and may require more passes to cut certain materials than a CO2 laser. Diode lasers also have a shorter lifetime, but are much cheaper to manufacture.

That's why the xTool M1 and S1 are ideal machines for everyday DIY enthusiasts. In the same diode laser category, there's also the Glowforge Aura, but beware, this one has a much lower wattage than the xTool. I'll tell you more about it below.

It's also important to note that diode lasers don't cut clear acrylic (and other transparent and opaque colours). You can engrave transparent acrylic, but you'll need to add masking on the surface.

External connection

Laser-cutting machines absolutely need external evacuation. A hose is located at the rear of the unit and must be connected to an external window or door.

Laser power

As mentioned above, the xTool M1 and xTool S1-10W have a 10-watt laser. The one on the xTool S1, on the other hand, is removable. This means that you can choose the 20W or even 40W version at the time of purchase while keeping the same base for the machine.

You might even decide to change your mind later and simply buy the module without replacing the entire machine.

I won't explain the difference between 10W, 20W and 40W lasers here, but you can guess that the higher the power, the thicker the material you can cut.

Laser filter cover and automatic shut-off

Both the xTool M1 and S1 have a laser filter cover, allowing you to look at your project without the need for protective eyewear.

They also shut down instantly as soon as the lid is opened to prevent laser leakage.

RA2 Pro

Both machines have the option of the RA2 Pro which is an adapter that allows cylindrical engraving such as glasses, mugs, balls, cups, etc.

It's important to note that the RA2 Pro for the xTool M1 is the same as that for the xTool S1. However, they don't have the same cable. So it's important to buy the right one or get the right cable if you already have the RA2 Pro on one machine and want to use it on the other.

I've never used the RA2 Pro on my xTool M1. From what I've read, this tool requires a lot of trial and error, and I'm personally not very patient about that. That's why I decided not to use it for the xTool S1.

Differences between xTool M1 and xTool S1-10W

Some elements are very different, while others are more subtle. Let's start with the obvious.

Dimensions

The xTool S1 is longer and deeper than the xTool M1. There's nothing like a graph to show the difference:

In terms of height, however, the xTool M1 is about 2 inches higher.

Working area

As the xTool S1 is larger, the work area is necessarily larger too.

The dimensions of the work areas are as follows:

  • The xTool M1 is 385 mm x 300 mm (15" x 11.8") in size.
  • The xTool S1 is 498 mm x 330 mm (19.61 in. x 13 in.) in size.

It should also be noted that a conveyor can be added as an option to the xTool S1, modifying its working area to 470 mm x 3000 mm (18.5 in. x 118.11 in.)! This is not possible with the xTool M1.

For the conveyor to work, the riser base must also be added (see below).

The camera

A camera is often used to position projects on materials. Such is the case with the xTool M1. On the other hand, the xTool S1 has no camera!

You'd think this would be a problem, but on the contrary, it increases precision. Indeed, the xTool M1's camera is positioned at the top center, which means that the photos taken are often distorted. Especially if you want to cut or engrave something on the bottom of the M1.

The xTool S1 requires you to move the laser with your hands to identify precise points on the object to be cut and/or engraved. This method takes a little getting used to, but gives the machine hyper-precise information, so you can be perfectly centered every time.

The cut

Although both machines are 10W, the xTool S1 offers a higher maximum speed than the xTool M1: 400 mm/s versus 250 mm/s. I did, however, cut an identical project with both machines and it took almost the exact same time.

The S1's laser is also more precise at 0.04 x 0.06 mm than the M1's 0.08 x 0.08 mm.

On the other hand, the M1 can cut basswood up to 8 mm thick in a single pass, while the S1 can cut up to 6 mm.

Engraving (curve)

What really impressed me about the xTool S1 was its ability to engrave curved surfaces thanks to the "3D CurveTM Engraving" function.

And it's not about using the Ra2Pro adapter. No, it's the laser that will measure the surface at several points to know exactly how to adjust the laser for uniform engraving.

I'll soon show you a tutorial for making an engraving on a wooden spoon like this.

Smart air assist

The air-assist system circulates air and prevents burns, particularly charring on wood.

The xTool S1's air assistance system is "smart". Simply set it to "Auto" and it will automatically adjust the air sent to the machine according to whether it is engraving or cutting.

It's also much better integrated and follows the laser at all times.

In the case of the xTool M1, it's immediately obvious that the air assist is a feature that wasn't created with the machine but rather added afterwards.

I've had to add tape myself to hold it in place, and I'm always afraid when the laser cuts at the front of the xTool M1.

Honeycomb and raiser base

Both the xTool M1 and xTool S1 come with triangular prisms onto which to install materials that have the need of air circulation underneath when cutting, such as wood.

These prisms are not always convenient, and I've often dreamed of having the honeycomb with my xTool M1.

For the xTool M1, the honeycomb comes with the riser base. For the xTool S1, the honeycomb and raiser base are sold separately, but there's also a bundle with the purchase of the xTool S1 that includes the honeycomb and smart air assistance (I recommend it!).

The Honeycomb also comes with handy magnets to keep materials securely in place.

Software

Both laser cutters require the free xTool Creative Space (XCS) software.

For the xTool M1, this is a must. For the xTool S1, LightBurn software can also be used, but you'll need to go back to XCS for special features such as engraving on curved surfaces and real-time laser positioning.

The blade

The xTool M1 also has a blade that can cut materials similar to the Cricut.

The xTool S1 laser cutter has no blade. However, its laser module is interchangeable and can even be replaced by an infrared module (see next paragraph).

Infrared laser module for xTool S1

The infrared laser module does not cut. It enables more beautiful engraving on surfaces that are difficult to engrave with a blue laser (diode laser).

Here's a comparison from the xTool website.

Courtesy xTool.com

The infrared laser module is not included with the xTool S1 and is a separate purchase. It's not cheap either, so I suggest you see if you really plan to use it before you buy.

To use it, unscrew the 10W laser module and replace it with the infrared module. It's quite simple to do.

xTool M1 and S1 laser cutters price comparison

You'll need to visit your local xTool website to compare prices:

  • xTool M1
  • xTool S1

On the other hand, I can tell you that the base price of the two laser-cutting machines is comparable and among the most affordable for machines of this type.

Recommendation

To sum it up, as I said at the start, if I had to choose between the xTool M1 laser cutter and the xTool S1, I'd go for the xTool S1.

The machine's working area, the ability to make curved engravings, the ease of use of the air-assist and also its precision for placing designs on materials are all factors that favour the choice of the xTool S1.

Also, people like me who own a Cricut don't need the xTool M1's blade functionality.

Only once did I use a blade+laser combo when making faux leather earrings.

So you might want to choose the xTool M1 if you don't have a Cricut, or if you really plan to use the blade+laser combination in your projects.

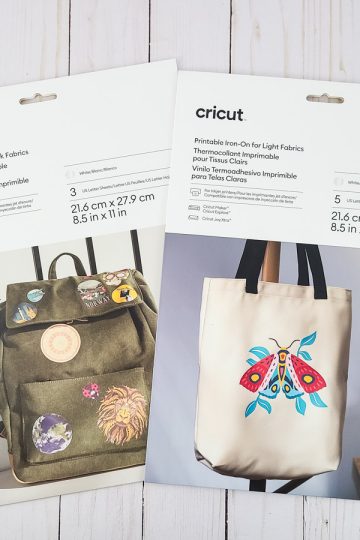
Cricut printable Iron-on for light and dark fabrics - everything you need to know

What is Cricut printable Iron-on and how do I use it? That's what you'll learn in this tutorial.

This post contains some affiliate links for your convenience and at no extra cost to you. I get commissions for purchases made through links in this post. Click here to see my full disclosure policy.

What is printable Iron-on

Heat transfer vinyl, also known as, HTV or Iron-on, is a type of vinyl that is applied with heat, with an iron or press. It is mainly used to apply to fabrics.

The printable version an iron-on that can be printed on with a printer. This Iron-on comes in two versions, one for light fabrics and one for dark fabrics.

This is NOT sublimation, which requires special ink and a dedicated printer. Cricut's printable Iron-on only requires an inkjet printer with regular ink. (It is not compatible with laser printers)

To find out all about the different types of vinyl and how to tell them apart, check out my post on the subject here.

Why use printable Iron-on

Printable Iron-on is a great alternative when your design is too complex to use regular HTV.

It also lets you use images with color gradations, opening up a whole world of possibilities.

As mentioned above, this is NOT sublimation. Sublimation requires polyester fabric. Printable iron-on can be applied to many materials, even cotton (see the Cricut Heating Guide for details).

It's important to note that you'll need to use Cricut Design Space's "Print then Cut" feature. This function is not available for the Cricut Joy, but you can use it with all other Cricut models, including the Cricut Joy Xtra, the Explore family, the Maker family and even the Cricut Venture.

How to choose between Iron-on for light or dark fabrics

You might think that Iron-on for light fabrics goes on light fabrics and iron-on for dark fabrics goes on dark fabrics.

And yes, that's right, but I'd like to add a small recommendation, let me explain.

Iron-on for light fabrics

Iron-on for light fabrics is semi-transparent. In fact, everything white is transparent. The colors will be translucent.

Here we see Iron-on for light fabrics applied to a t-shirt with stripes. The stripes are clearly visible even through the unicorn colors.

Iron-on for dark fabrics

Iron-on for dark fabrics is completely opaque. So what's white will remain pure white. And the color of the fabric will have no effect on the printed image, as can be seen in the image below.

My recommendation between iron-on for light and dark fabrics

Here are the same images applied to my striped t-shirt after several washes (I'd say at least 10!).

The white seems to have yellowed a little. If the image didn't have so much white, you probably wouldn't notice the difference.

So my recommendation is this: if you have an image that has a lot of white and it's important to you that the white stays bright, use the dark fabric iron-on even if your t-shirt (or any other blank) is white.

I also find it important to note that iron-on for light fabrics is thinner and more elastic. I find it more difficult to work with, especially if you have thinner pieces.

As you can see in the photo, the hummingbird's beak is shorter. I had to cut it since it was stretched when I lifted it from its backing.

You can subtly see that the one on the left is more colorful. The one on the right looks more "melted" (look especially at the gray of the wing).

The same is true of the texture. As iron-on for light fabrics is thinner, it seems to be more integrated into the fiber. Iron-on for dark fabrics, on the other hand, is more like a standard iron-on installed on the fiber.

Size and identification

Printable iron-on is available in Letter size for North America or A4 size for Europe.

It is sold in flat packs, in 3-sheet packs for dark fabrics and in 5-sheet packs for light fabrics.

Iron-on for light fabrics has a green grid on the back. I advise you to always keep it in its packaging, as it's not the only printable material with a green grid!

Iron-on for dark fabrics has no grid. It simply has a QR code on one side, so you understand that you have to print on the opposite side.

Settings for printing on printable Iron-on

I'm not a printer specialist. Plus, there are so many models to choose from! All I can recommend is that you use a higher quality (or "photo") print setting.

This type of setting takes more ink, but you won't regret it.

As both printable Iron-on have a "matte" finish, I personally use "matte photo paper" and it has always worked well.

Cutting the printable Iron-on

Warning! A few recommendations before cutting:

  • You don't need to use the "Mirror" mode for printable Iron-on, light or dark fabrics. (This is valid for Cricut Iron-on. Beware, because for some other brands, mirroring must be done for printable HTV for light fabrics but not for dark fabrics).
  • If you've never used the "Print then Cut" feature, I suggest you take a look at this post. This is by far the most complex feature in Design Space to understand, so don't worry if you need my tutorial to understand the Flatten function (because yes, unless you've imported an image into Design Space or chosen an image specifically for print and cut, you're going to need to use Flatten).
  • If you're a Cricut Access member, you may want to use "Create sticker", but this is optional.
  • And finally, if you've never used the "Print then Cut" feature, or haven't used it for a long time, I strongly suggest you calibrate your Cricut before you start printing.
  • If you haven't added an offset and you're wondering why your image looks distorted compared to what you see on the screen, you should know that it's called "bleed" and that it's normal. Don't listen to all the people on social networks who tell you to turn off the "bleed", because this feature is required for the Cricut to do a nice cutting job. Check out this post on full bleed instead.

The rest is pretty straightforward. Once your print has been retrieved from your printer, simply place the material on the blue mat (LightGrip). Make sure your print is positioned in the same direction as what you see on the screen.

Choose the setting in Design Space according to your material:

  • "Printable Iron-On, Light" or
  • "Printable Iron-On, Dark"

Transfer printable Iron-on

Cricut printable Iron-on should be removed from its backing in the same way you would do with a sticker. In other words, there is no transfer sheet.

Simply place it on its blank, cover it with the protective sheet found in the packaging and apply with the press, following the settings of the heat guide according to your fabric.

This applies equally to iron-on for light and dark fabrics.

Care instructions for printable Iron-on

Cricut recommends waiting at least 48 hours before washing your project.

It's best to wash inside out in cold water and hang to dry.

How to cut felt with the Cricut Joy and Joy Xtra

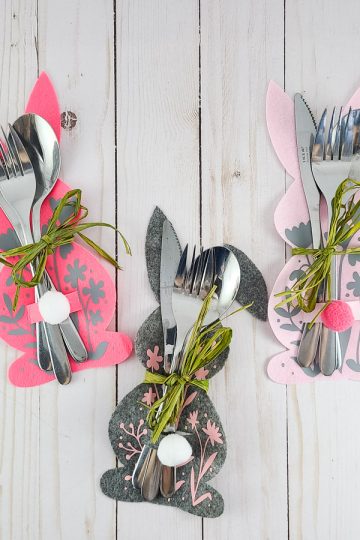
Did you know that it is possible to cut felt with a Cricut Joy or Joy Xtra even if the setting is not found in Cricut Design Space? I'll tell you how. And we'll do it with a pretty Easter decoration.

This post contains some affiliate links for your convenience and at no extra cost to you. I get commissions for purchases made through links in this post. Click here to see my full disclosure policy.

Felt can be cut with the fine point blade. The fine point blade is the basic blade that comes with any Cricut.

In short, what's important to know is that not just any felt can be cut with the fine point blade. You'll need Cricut felt or thin felt.

If you're working with thick acrylic felt, you'll need to use the rotary blade, and therefore, a Cricut from the Maker family.

To find out more, I invite you to read the post on The different types of felt and how to cut them with your Cricut.

How to cut felt with a Cricut Joy or Joy Xtra

If you have a Cricut Joy or Joy Xtra, you'll notice that the "felt" is not available in the cutting settings in Cricut Design Space.

However, I just mentioned that the fine point blade can cut thin Cricut felt.

I've done several tests and yes, the Joy family's fine point blade can cut thin felt, but you'll need to create your own cut setting.

So, in Design Space, click on "Browse all materials" and scroll to the bottom.

Then click on "Add new material", give it a name and click on "Save".

Move up to the top to adjust the new material.

To cut felt with the Cricut Joy or Joy Xtra, you'll need to set the cutting pressure to 130 and multiple cutting to 2x (so that the blade passes twice).

This setting should be sufficient to cut the bunnies for the project. On the other hand, it's less effective on very small, precise cuts.

Making felt bunny flatware holders

This project was made with felt, but can also be made with cardstock. It's a quick and easy project to decorate your table for Easter!

Required materials and tools to make the Easter flatware holders

  • Cricut from the Maker, Explore, or Joy families or even the Cricut Venture
  • Fine point blade supplied with the machine
  • Standard green mat 30x30 cm(Joy)
  • Iron-on (color of your choice, I use Everyday Iron-On gray)
  • Cricut felt (I use the "Spring Rain" sampler). Cardstock can also be used.
  • Weeding tools
  • Brayer (optional but very useful)
  • EasyPress medium + mat (any EasyPress will do, even the Mini)
  • Masking tape
  • Ribbon or raffia
  • Pompoms (Dollarama)
  • Hot glue gun + glue sticks
  • SVG files of Easter flatware holders

SVG files for Easter flatware holders

Click here for SVG files of the Easter flatware holders to decorate your table for Easter.

Watch the video for all the details

Using Infusible Ink on cotton

To use Infusible Ink on cotton or even dark fabrics, we'll need to add a step and a material to our project. This post explains the process in detail.

Infusible Ink uses the same process as sublimation. This is an ink transfer that penetrates the fibre of a fabric or a surface specifically prepared for this type of transfer.

As far as fabrics are concerned, a polyester fabric is required. And since the ink has to penetrate the fibres, we're pretty much limited to very light fabrics.

To use Infusible Ink on cotton or even on a dark colour, you need to use another compatible material that will be placed between the Infusible Ink and the fabric.

This post contains some affiliate links for your convenience and at no extra cost to you. I get commissions for purchases made through links in this post. Click here to see my full disclosure policy.

How to use Infusible Ink on cotton

There are several materials available for applying Infusible Ink to cotton or dark fabrics. The principle is that this material must contain polyester and itself be very light.

Glitter iron-on is usually made of polyester. The one recommended by Cricut is silver prismatic glitter iron-on.

So I tested the Infusible Ink on regular silver glitter iron-on (below) and prismatic glitter iron-on (above).

You can see right away that prismatic Iron-on gives a much better result:

Some people say that white (regular) glitter iron-on works just as well! I didn't have it on hand, but I'd love to try it! If you have, please leave me a comment.

What is prismatic glitter Iron-on?

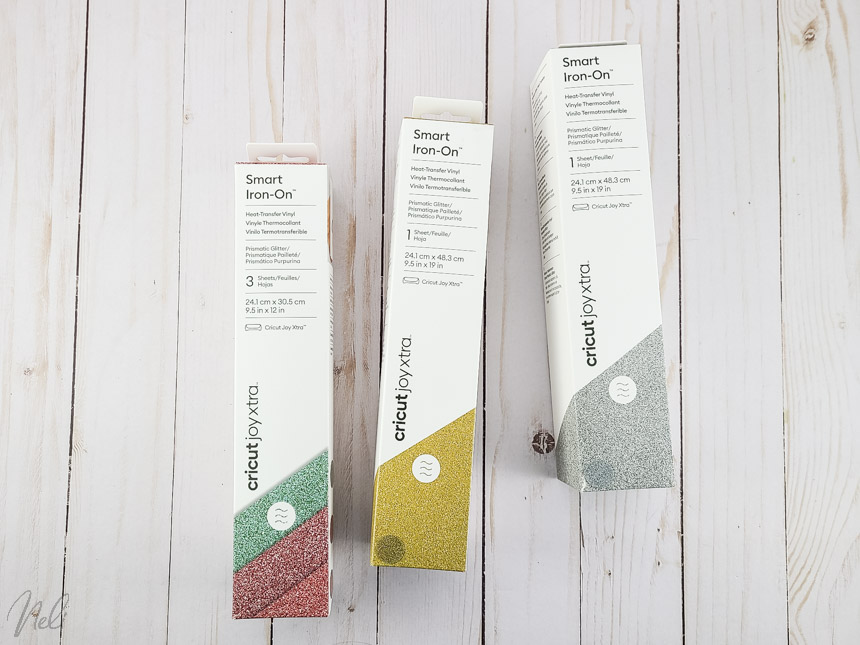
Prismatic glitter iron-on is a product that came out at the same time as the Cricut Joy Xtra.

This is a Smart material (which can be inserted without a mat) and is currently only available in the Cricut Joy Xtra size. However, there's nothing to stop you from cutting it on a mat with any Cricut.

The difference between regular glitter and prismatic glitter is that the latter is smooth and non-scratchy.

Personally, glitter makes me cringe when I rub against it. Prismatic is completely smooth and soft. On the other hand, it also has a more "plastic" effect.

Use Infusible Ink with glitter iron-on

To use Infusible Ink with prismatic glitter iron-on, you'll need to layer the two products.

You can decide to layer everything evenly so that the Infusible Ink lines up perfectly with the Iron-on or you can create an offset.

For my part, I decided to create an offset and even leave some letters in glitter only.

Required materials

  • A cutting machine (I used the Cricut Joy Xtra)
  • StandardGrip mat (green)
  • Infusible Ink of your choixe
  • Silver prismatic glitter iron-on (other colours are too dark to allow Infusible Ink through)
  • Weeding tools
  • Brayer (optional)
  • EasyPress (I used the Cricut Autopress)
  • EasyPress Mat
  • T-shirt (of your choice)
  • Lint roller

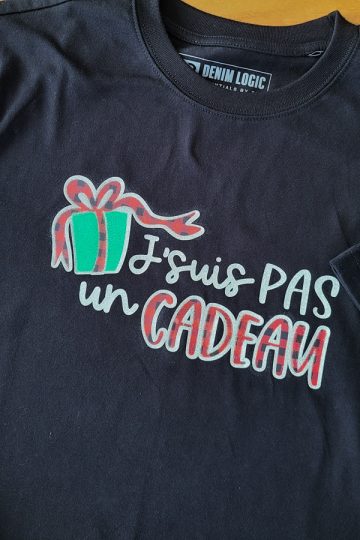
J'suis pas un cadeau" cut file

There are two ways to get the "J'suis pas un cadeau" SVG file completely free of charge (I also have the "Je suis pas un cadeau" version)

If you are a Cricut Access member, the files are available directly in Cricut Design Space at no extra cost to you. Click on this link to open a project in your browser. Simply click on "Open in Design Space" to save it in your profile.

If you're not a Cricut Access member, you can get the SVG files for free by subscribing to my newsletter below (Already subscribed? Find the link and password at the bottom of all my e-mails).

If you'd like to make the same project as me, you can also follow this link to get the exact project realized in the photo, directly in Design Space and already prepared for you.

Can I use any HTV to layer Infusible Ink?

For Infusible Ink to work, you can't use just any heat transfer vinyl. Only materials containing polyester will react perfectly with Infusible Ink.

This is precisely what prismatic glitter iron-on is made of.

Not all HTV and Iron-on products are compatible.

How to use Infusible Ink on cotton

The simple trick is to first add the glitter Iron-On for a couple of seconds and then add the Infusible Ink.

For the Prismatic Glitter Iron-On, Cricut recommends 325°F for 45 seconds.

Check out this video on how to do it!

How to layer Infusible Ink

Infusible Ink cannot be layered as such. Rather, it should be juxtaposed. So you'll need to modify your file so that it works like a puzzle.

Every colour must not overlap with any other colour!

Buying a Cricut: where to find the best price

This post will give you all the tips and tricks you need to get the best price when buying a Cricut machine.

If you're trying to figure out which Cricut to choose, I strongly suggest you check out my post on Cricut Essentials.

To find out which Cricut is right for you, you first need to know what kind of projects you're interested in. That's why I'm referring you to this post, which will tell you in detail which Cricut and which basic tools you'll need to complete your projects!

This post contains some affiliate links for your convenience and at no extra cost to you. I get commissions for purchases made through links in this post. Click here to see my full disclosure policy.

Where to find the best price

Except on special occasions, the best place to get a Cricut at the best price is Cricut.com. However, there are a few things you'll need to do, and here are the details.

How to get an extra 10% off your purchase

To operate your Cricut, you'll need to download "Cricut Design Space". This software is free of charge.

But Cricut offers an optional subscription called "Cricut Access".

The Cricut Access subscription entitles you to unlimited use of projects, images and fonts in Cricut Design Space. What's more, you'll be entitled to a 10% discount (up to a maximum savings of $50) on all your purchases on the Cricut website.

At the time of writing this article, a one-month subscription costs C$12.99 ($USD 9.99).

So if you buy an item for $200 and add a month's subscription at $12.99, you'll get 10% off your item, like this:

Item at $200 - 10% = $180

180 + 12.99 (one-month subscription) = $192.99

So your total is lower, even with the subscription.

And the discount increases the higher the item's value. So for a Cricut Maker 3, which is often around $500, you'll get a maximum discount of $50 with a one-month subscription.

In fact, the Cricut website now displays it for you. You don't even have to do the math anymore. See the screenshot below from the Cricut.com website. It reads "Access Members Pay C$ 499.00".

image from Cricut.com

It also happens that we see an identical price in a store. However, with this 10% discount (even adding the price of the one-month subscription), the price is still lower than in-store.

Buy the Cricut alone or as a bundle

On the Cricut website, you'll find groups of machines and materials called"Bundles".

These bundles vary according to the machine selected.

They are cheaper than buying materials separately. And let's face it, you're going to need materials to make your projects!

Once again, Cricut shows you the price with and without Cricut Access subscription.

image from Cricut.com

However, make sure that the materials included in these bundles are materials you will actually use.

Click here to see the available bundles.

And don't forget to check out my post on"Cricut Essentials for beginners" to get a clear idea of what you need!

Delivery charges, customs duties?

The Cricut website offers free shipping on all purchases of $100 or more, so when you buy a Cricut machine, there will be no shipping or other fees.

Delivery time is usually about a week in America (unless you're in busy periods like Christmas or Black Friday).

The exceptions

Of course, every good rule has its exceptions. So, from time to time, a store will make a sale that has a better price than the Cricut site.

What I've seen so far is that the bundles are often different from those on Cricut. This makes comparison more difficult. It also frequently involves discounts on older models.

It's really up to you to analyze your needs to see what's right for you and do your research!

Additional discount

NeliDesign is offering an additional promo code. Although the Canada and USA discount does not apply to Cricut machines, it may apply to any materials or accessories you add to your shopping cart.

I invite you to visit this page for the latest promo code and conditions.

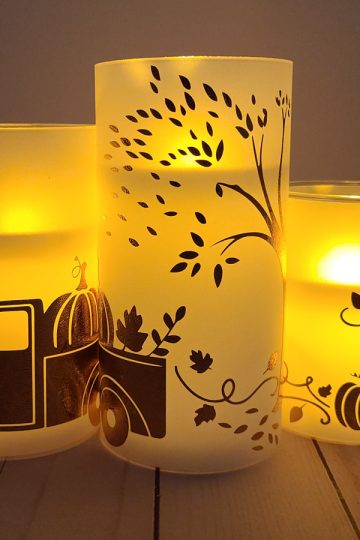
Make interchangeable candle wraps with your Cricut

Use vellum paper and your Cricut to transform your candles to match the seasons.

You'll love this tutorial if you're like me and lack the space to store your seasonal decorations!

The principle is to use vellum paper (or tracing paper) and adhesive vinyl to wrap your candles.

Simply fix the tracing paper around the (electric) candle with a tiny piece of tape.

This way, when the season ends, you can simply remove the tape and store the decoration flat! You can then replace it with the next decoration!

This post contains some affiliate links for your convenience and at no extra cost to you. I get commissions for purchases made through links in this post. Click here to see my full disclosure policy.

Materials

  • Cricut from the Maker, Explore, or Joy families or even the Cricut Venture
  • Standard mat (green)
  • 3 LED battery candles
  • Measuring tape
  • Weeding tools
  • Scraper
  • Trimmer
  • Scissors
  • Adhesive vinyl (permanent or removable, it doesn't matter) in your choice of colour and finish. In the tutorial, I'm using Smart matte silver vinyl.
  • Transfer tape
  • Vellum paper
  • Parchment paper
  • ScotchTape

Two ways to get free SVG files

The files to make the 3 versions of these candles are available free of charge.

Decoration for autumn:

Halloween decoration:

Christmas decoration :

If you're a Cricut Access member, the files are available directly in Cricut Design Space at no extra cost to you. Click on this link to open a project containing autumn, Halloween and Christmas files.

If you're not a Cricut Access member, you can get the SVG files to make these candles absolutely free by subscribing to my newsletter below (Already subscribed? Find the link and password at the bottom of all my e-mails).

How to make the candle wraps

Watch the video for all the details

Internet outage? How to use Cricut Design Space without an Internet connection

Learn how to set up Cricut Design Space for offline use during an Internet outage or simply how to craft without an Internet connection!

In this post, I'll explain the steps you need to take to successfully cut your projects with your Cricut without an Internet connection.

In short, the secret to successfully cutting a project from Cricut Design Space without an internet connection is to save the project before shutting down the internet (or before the outage) and making sure you have selected the correct save setting beforehand.

A must: save settings

The first thing to do, especially if you experience unexpected Internet outages, is to set up your save settings properly.

To do this, open your Cricut Design Space session, and click on your name to bring up the menu. Then click on "Settings".

Note: At the time of writing this post, this is the new Cricut Design Space visual available in the "Beta" version. If you're in the "Live" version, you'll still see the "hamburger" menu in the top left-hand corner, so you'll find "Settings" underneath it.

In the settings, under the "General" tab, you'll find "Saving for offline". Select "Cloud and computer". By default, this will save your projects on the Internet, but also on your device.

Saving for offline use

The important thing to remember is, that to use a project offline, you must first save it while an Internet connection is available.

Here's an example where, while I'm connected to the Internet, I download the file "I may be 70 years old, but in Celsius, it's like 21". (By the way, this design is available in the free library or directly on Cricut Design Space, as an editable image allowing you to change the numbers, for Cricut Access members).

I then simulate an Internet outage and the following message appears: "Hmm. Looks like your connection was lost. But keep working! Only certain features and content will be unavailable."

At that point, I hadn't saved my project at all. So, if I try to save it while I have no internet connection, I'm still able to. So my project is not lost!

However, if I press "Make it" to cut my project with my Cricut, I'm stuck at this window where the "Continue" button is missing and there's only the "Cancel" button.

Why? Well, you have to understand that the imported image, which came from the Internet, was not saved on my computer. This action can only be performed when connected to the Internet.

So, by saving while my computer is connected to the Internet, I also save the images and objects inserted on my canvas for offline use.

And the same goes for fonts or any other images or objects.

Connecting to the Internet to save a project

If my computer is connected to the Internet again, I save my project and try to press "Make it", I encounter this bug and Cricut Design Space displays this message: "Project Preview Could Not Load".

The way I've found to get around this bug is to save the project again, but under a different name (once again, while my computer is connected to the Internet).

Once my project has been successfully saved while my computer is connected to the Internet, I'm able to press "Make it" even if I'm "Offline", and have access to the "Continue" button to cut my project.

How to download images for offline use

It's also possible to download images, objects or fonts individually for future offline use.

Under the "Images", "Phrases", "Editable images" or even "Upload" buttons, you can select images and then press the "Download" button at the bottom left.

Next, a small icon will appear next to the image telling you that it is "Saved for offline".

The same goes for fonts. Press the "Text" button and, in the drop-down menu, click on the small arrow icon to save the fonts for use without an Internet connection.

Note that any images or fonts that have been saved for offline use for a previous project will remain available for any future project unless you change your computer or decide to manually remove them.

To remove them manually, simply reverse the download process above. So instead of a "Download" button, you'll have a "Remove" button.

Can I work with Cricut Design Space without any Internet connection?

Unfortunately, it will be impossible to work with Cricut Design Space without an Internet connection at all.

First, a connection is required to download the application.

Second, you'll need the Internet to log in to your Design Space account.

Last but not least, you need an Internet connection to save your projects, images and fonts at least once, so that they're available on your computer.

On the other hand, once all the above steps have been completed, you'll be able to work offline for a while.

However, you'll need to come back online periodically for updates and, above all, so that your projects can also be saved in the Cloud, giving you the security of being able to retrieve them if your computer ever crashes.

Cricut foil transfer kit: Everything you need to know!

Using the Cricut foil kit can often create uneven results. In this article, I will tell you everything you need to know about it and also, how you can test it to get the best results.

This post contains some affiliate links for your convenience and at no extra cost to you. I get commissions for purchases made through links in this post. Click here to see my full disclosure policy.

The Cricut foil transfer kits can be used to add some shine to your projects.

The idea behind this type of project is to use the foil tip you insert in your Cricut to apply pressure on the foil sheet to transfer some foil onto your material.

You might have seen other transfer tool that uses heat but the Cricut brand only uses pressure to make the transfer.

Cricut foil transfer kits

First, you need to know that there are two different kinds of foil transfer kits. There's one that fits the Maker and Explore families and the Cricut Venture. And one specially made for the Joy family.

Both of them are blue so they can be easily identified.

The Cricut foil tip for the Makers, Explores and Ventures has 3 tips, the fine, the medium and the bold tip. It comes in a kit that includes 12 foil transfer sheets so you can get started right away.

Foil tip that fits the Cricut Maker, Explore or Venture

The Cricut foil tip for the Joy and Joy Xtra has only one tip, a medium one. It also comes in a kit that includes 12 foil transfer sheets so you can get started right away.

Foil tip that fits the Cricut Joy and Joy Xtra

Foil transfer sheets

Foil transfer sheets can also be bought separately.

They come in 4x6 (inches) in different colours, and you also have them in 12x12 (inches) in gold or silver. You will also find them in some of Cricut's insert card packages. You'll need to look for "foil transfer insert card" written on the packaging. That will mean that you'll have also some foil transfer sheets inside.

What material can I transfer foil onto?

The foil transfer technique can be used with multiple materials. The result can vary a lot. And the suggested materials are even different depending on the Cricut machine you have. You can see the detailed list on Cricut's website:

  • Suggested Materials for the Explore, Maker and Venture
  • Suggested Materials for the Joy and Joy Xtra

Let's just say that it goes from cardstock, and watercolour, to even faux leather. And a little note on faux leather, If you want to see my trick on how to make the foil stay on the faux leather, go check out this post that will tell you how I avoid the foil to rub off.

Test it!

What I strongly recommend is that you make a test before using the foil tip.

I know, I know, that's not what we want to do, we want to go straight to making our project. But I promise, you won't regret your test!

It doesn't need to be very large. Just use a small 4x6 sheet and test the different tips on different cardstock. You'll see, it really varies!

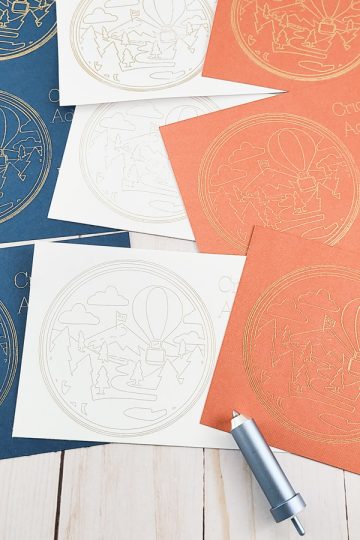
You can see all the different tests I made here:

The white cardstock is a plain, no texture, 60 lbs cardstock. On this one, the fine tip gave a way better result than the 2 other tips.

The blue cardstock also has no texture but it's an 80 lbs cardstock. Again, very good result with the fine tip. The medium also looks good. The bold is not perfect as it has some parts of the circle missing but is still acceptable I think.

The last one, the orange, was a Cricut cardstock (an 80-lb cardstock with texture). The foil transfer worked perfectly for the 3 tips!

How to use the foil transfer kit

Check out the video to learn step-by-step how to test and use your foil transfer kit

The different types of vinyl for your Cricut - Beginner's guide

This post will explain the difference between all types of Cricut vinyl, whether it's adhesive vinyl, heat transfer vinyl, printable vinyl or even writable vinyl!

When you start in the Cricut world, you are often overwhelmed by all the possibilities and products.

Vinyl alone can be a complicated category to navigate. In this post, I'll give you a summary of the different types of vinyl, what they are used for and how to differentiate them!

Generally, adhesive vinyl is used with transfer paper to apply to wall and to objects (such as glasses, mugs, etc.), while heat transfer vinyl must be applied with a press. Printable vinyl is used with a printer while writable vinyl is used with pens and markers.

Keep reading to have all the details and do not hesitate to download my No Mistake cheat sheet that will help you to understand how to use all the different materials and above all, prevent any mistakes!

This post contains some affiliate links for your convenience and at no extra cost to you. I get commissions for purchases made through links in this post. Click here to see my full disclosure policy.

Smart or not Smart

Let's start right away with a parenthesis. Cricut has a range of materials called "Smart"

So all types of vinyl mentioned below (except printable vinyl and writable vinyl) are available in "Smart" version and regular version (not "Smart").

What is Smart vinyl? These are products that can be inserted without a mat. Be careful, these only work with the most recent Cricut (at the time of writing this post: the Joy, Joy Xtra, Explore 3, Maker 3 and Venture).

If you have an original Explore Air, Explore Air 2 or Maker, it is possible to use Smart materials but you will have to cut them and put them on a mat.

But honestly, these materials are also more expensive so if they exist in the regular version and you have one of these Cricut, it's not worth buying Smart materials.

How to identify Smart vinyl

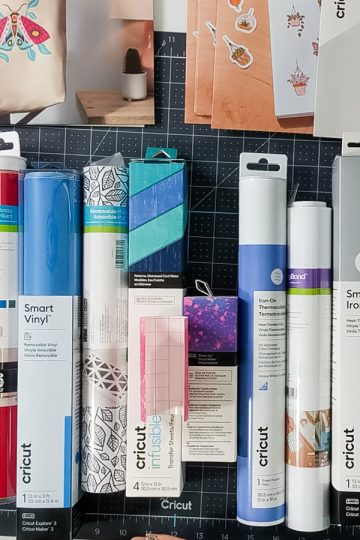
Smart vinyl is almost 100% of the time in a box (like the boxes on the right in the photo below) and is clearly marked "Smart".

Also, it comes in different widths so, when buying, it is important to choose the width that suits your Cricut:

  • Joy: 5.5 inches wide (13.9 cm)
  • Joy Xtra: 9.5 inches wide (24.1 cm)
  • Explore 3 and Maker 3: 13 inches wide (33 cm)
  • Venture: 13 inches wide (33 cm) or 25 inches wide (63.5 cm)
on the left, the "regular" vinyl (not Smart) and on the right, the "Smart" vinyl

Adhesive Vinyl

Adhesive vinyl comes in two categories, permanent vinyl and removable vinyl.

Removable adhesive vinyl

Removable vinyl is best suited for projects that you'll want to remove at a certain point. I am thinking, for example, of walls or seasonal decorations.

Permanent adhesive vinyl

Permanent vinyl is made to last and is ideal for exterior surfaces or permanent projects. It is not that it can't be removed, but you'll have much more difficulty. If you apply it to a wall, you risk peeling off the paint.

How to identify adhesive vinyl

What's really confusing is that Cricut has changed its vinyl packaging. Before, there was a blue bar at the top that indicated if it was a permanent or removable vinyl (see roll on the right in the photo)

Left: Cricut's new packaging; On the right, the old packaging that is still available.

Cricut has now improved the packaging a lot by using small symbols (see the list of symbols at the end) but also because they are now tubes in which we can insert all our small pieces of leftover vinyl.

How to identify adhesive vinyl leftovers

We always have little pieces of vinyl left after cutting! Fortunately, Cricut identifies the backing of its vinyl by writing "Permanent" or "Removable" (and even "Smart" if it is a Smart).

On the other hand, if you have a small piece of vinyl and there is no writing, you can still identify it. Cricut's permanent vinyl has a green grid while removable vinyl has a gray grid. And it's the same colours for the Smart.

Now, how to differentiate Smart from "Non-Smart"? Well, with experience!! Seriously, the Smart is much thicker (to compensate for the lack of mat) so you'll feel it to the touch.

Here are some tutorials that use adhesive vinyl:

  • Custom boat decal
  • Make an etch glass lantern
  • Glass painting with your Cricut

Transfer tape

Transfer tape is not vinyl per se, but is used to transfer your adhesive vinyl projects.

Without going into too much detail, let's say that, for example, you wrote a nice quote that you want to apply somewhere. The transfer tape will therefore save you from having to install the project letter by letter!

Be careful, there are several types of transfer tape:

  • Regular transfer tape(the one in the photo below) is made for the majority of types of vinyl;
  • Regular linerless transfer tape is also made for the majority of types of vinyl but produces less waste since it has no backing (or lining) and is rolled up on itself like adhesive tape;
  • The Strong transfer tape is to be used only with textured vinyl like Glitter vinyl, etc. It is far too sticky for regular non-textured vinyls.

How to identify transfer tape

The transfer tape is written "Transfert tape" and has a grid, not on the back, but directly on the transfer tape, which is transparent.

Heat transfer vinyl

Heat transfer vinyl is vinyl that is applied with heat with an iron or a press.

It can have different names:

  • The "Iron-on" is the name used by Cricut (trademark);
  • I often hear 'flex' from Europeans;
  • Here in America, we often say "HTV" which means "Heat Transfer vinyl"

Even if the application with heat immediately makes us think of fabrics, we can also apply the HTV on different porous surfaces such as wood (see the tutorial in the box below), faux leather, cardstock and many others.

How to identify heat transfer vinyl

Again, there are different packaging for heat transfer vinyl.

The old Cricut packaging is identified as "Iron-on" (as on the right in the image below).

The new Cricut packaging has the small symbol of 3 waves (see all the symbols at the bottom of this article) which allows easy identification. The Iron-on is also in a resealable tube that allows us to put in our leftovers.

Left: the new heat transfer vinyl packaging; On the right, the old packaging (but still available)

Do not forget that there is also Iron-On in "Smart" sizes and it is easily identifiable since it is in a box!

How to identify heat transfer vinyl scraps

Heat transfer vinyl has no grid.

One side is glossy and the other is more matte.

The shiny side is the transfer liner which, for Heat transfer vinyl, is always integrated (no need to add transfer tape as for adhesive vinyl)

Now, how to differentiate Smart from "Non-Smart"? Well, with experience!! Seriously, the Smart is much thicker (to compensate for the lack of mat) so you'll feel it to the touch.

Here are some tutorials that use heat transfer vinyl:

  • Glow-in-the-dark pyjama t-shirt
  • DIY Christmas pillow with Flocked HTV

Printable vinyl

Printable vinyl is made especially for inkjet printers (it does not work with laser printers).

The idea is to print your project from Design Space to your inkjet printer. Registration marks will also be printed which will allow the Cricut to cut out your prints.

Printable vinyl also comes in several categories and colours

  • Adhesive printable vinyl (available in white, transparent, silver or gold)
  • The printable Iron-On for clear fabrics
  • The printable Iron-On for dark fabrics

Adhesive printable vinyl

Be aware that there is also a printable sticker paper. I won't talk to you more about it here since this post is about vinyl and this is paper.

But know that printable vinyl is like a better version of printable paper. It is brighter and creates bright and durable stickers, ideal for notebooks, laptops and organization.

The visual of the packaging is subject to change. This photo may therefore differ from the packaging currently available.

How to identify printable vinyl

This vinyl comes in Letter-size sheets (or A4 for Europe). The back of these sheets has only a green grid written "Cricut" (which is the same for other printable products!). Therefore, I strongly suggest you keep it carefully in its packaging to avoid confusing it with other products!

In addition, there is an old version of this vinyl and a new improved version. How to differentiate the new printable vinyl from the old one? The new version has, on the back, the small "C" of Cricut without the antennas. While the old version has antennas.

Here are some tutorials made with printable vinyl:

  • School identification labels
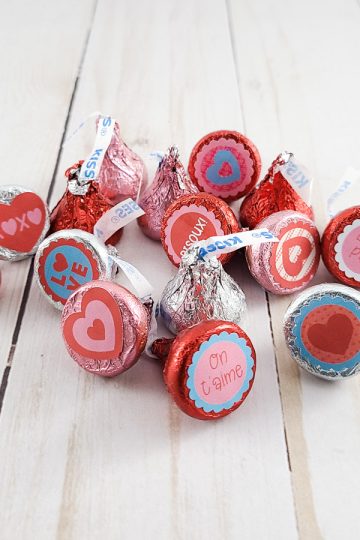
  • Stickers to decorate Hershey's kisses

Printable heat transfer vinyl

Printable heat-transfer vinyl is also applied with heat. It comes in two categories, one for light fabrics and the other for dark fabrics.

What's the difference between the one for light fabrics and the one for dark fabrics? The one for light fabrics will have some transparency, especially for places in the image that are white. So if you have a pale pink t-shirt, for example, the pink will show through where your design is white.

The one for dark fabrics has a white background that does not allow transparency. So the white will remain white even if your fabric is a dark color.

How to identify printable Iron-on

This Iron-on is available in Letter size sheets (or A4 for Europe). The back of these sheets has only a green grid written "Cricut" and no more information. Therefore, I strongly suggest you keep it carefully in its packaging to avoid confusing it with other products!

Writable vinyl (Smart Label)

Writable vinyl is made to be used with the majority of Cricut pens which means that you can write on it to make beautiful labels (hence the name "Smart Label").

This vinyl is available in permanent or removable (note in the photo below that there is also a "paper" version)

It should also be noted that it is only available in "Smart" format (in different widths depending on the Cricut machine you own). On the other hand, it is not rolled (except for the Explore and Maker widths, i.e. 13 inches (33 cm)). It is usually sold flat like this:

How to identify writable vinyl

Writable vinyl is easier to identify since it says "Smart Label, Writable" on the back. Like adhesive vinyl, the grid is green for permanent vinyl and gray for removable vinyl.

List of symbols

Here are the symbols you will find on the new packaging and their meaning.

Permanent
Removable
Iron-on
Writable

Infusible Ink

And what about the Infusible Ink? Well, Infusible Ink is not a vinyl!

Infusible Ink, as the name suggests, is ink that penetrates the fibre (and is not applied over fabric, like vinyl).

It must also be applied to specialized products (e.g. special cups for sublimation or fabrics with a very high polyester content (more than 70% for best results))

So it's a separate category, but I still wanted to tell you a bit about it.

It can be easily recognized by its packaging in a box clearly marked "Infusible Ink".

Its texture is also like a rigid cardstock and therefore easy to differentiate from vinyl. Its back has a grid and says "Infusible Ink" (although I've seen some without grids).

Here are tutorials that use the Infusible Ink:

  • Halloween Mug with Cricut Mug Press
  • How to use Infusible Ink pens on a Mug
  • Infusible Ink coasters

Who is the Cricut Joy Xtra for?

After the Cricut Venture last August, Cricut is now launching the Cricut Joy Xtra. This article will explain exactly why Cricut adds yet another machine to its arsenal and who it is for!

In addition to the Cricut Joy Xtra, Cricut is also launching a series of new materials. You can learn all the details here.

Disclosure: Thanks to Cricut for providing me with the product for review. I am not paid or sponsored by Cricut to write this post. All opinions are 100% my own and honest.

What is the Cricut Joy Xtra

If you know the Cricut machines, you will immediately notice the name in common with a machine that already existed at Cricut, the Cricut Joy.

The Cricut Joy is a small machine that is super portable given its size, but at the same time, it greatly limits the projects that can be made with it.

Image courtesy of Cricut

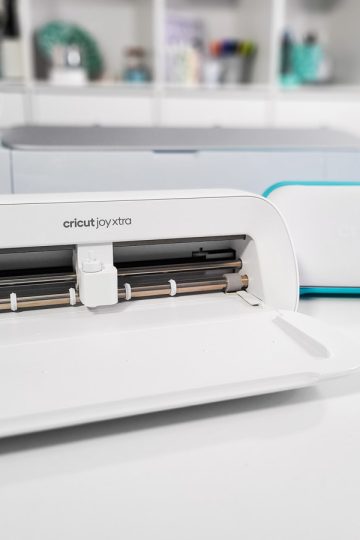
The Cricut Joy Xtra has, as you surely guessed, little "extras"! She remains smaller than the Explore and Maker families, but larger than the "baby Joy".

It offers a cutting width of 8.5 inches (21.59 cm) compared to the Joy which offers only 4.5 inches (11.43 cm).

An 8.5-inch width, does that ring a bell? Here in America, this is the exact width of a letter-sized sheet, which is the equivalent of an A4 size in Europe!

So yes, the big "extra" compared to the little Joy is that the Cricut Joy Xtra has the ability to print and cut!

That's why Cricut is releasing a whole set of printable products at the same time!

Who is the Cricut Joy Xtra for?

Cricut diversifies its range of Cricut machines to meet the varied needs of different people. As was the case with the Cricut Venture, the Cricut Joy Xtra is not for everyone.

In fact, if you've been following my tutorials for a while, it's probably because you already have a Cricut and thus, the Cricut Joy Xtra is not for you!

On the other hand, if you have a friend or family member who has been watching you for a long time and dreams of doing like you but is way too intimidated by your "big machine". And if in addition, this person adds "I do not even have enough room for that" well, the Cricut Joy Xtra is exactly for this type of person. (I know you know what I mean, I have a lot of people around me who repeat this to me too!)

With the Cricut Joy Xtra, Cricut targets beginners who do not have a Cricut machine.

So, it's a perfect machine to have new friends to "Cricut" with! haha

If you're starting with your Cricut, check out this page to help you get started on the right foot!

Features of the Cricut Joy Xtra

La Cricut Joy Xtra utilise les mêmes outils et stylos que la Cricut Joy originale. Tandis que les familles Explore et Maker ainsi que la Venture ont d'autres boitiers pour les lames et stylos.

I invite you to download my free cheat sheet on Cricut Blades, Wheels, Tips and Pens to see more clearly!

Here are a few important features of the Cricut Joy Xtra:

  • Cuts out all the same materials as the original Cricut Joy.
  • Uses the same fine point blade (included) as the original Cricut Joy.
  • Use the same pens and foil tip as the original Cricut Joy.
  • Uses Smart materials (new 9.5-inch (24.1 cm) materials are available).
  • Mats of 8.5 inches x 12 inches (21.59 cm x 30.48 cm), "StandardGrip" (green) or "LightGrip" (blue) can be purchased separately
  • A specific card mat is also available and can cut all card sizes, even the largest S40 and R40!
  • Compatible for Print then Cut

Availability of the Cricut Joy Xtra

The Cricut Joy Xtra will be available for purchase on September 7, 2023.

In Canada and the United States, it will be possible to buy the machine alone or in a bundle while internationally, the machine will only be sold in bundles (except on the Cricut's website) including a grouping of practical materials and links to projects to do with them, ideal for beginners!

What I think of the Joy Xtra

Previously, the type of person mentioned above often went for the original Cricut Joy. I have seen many of them quickly become disappointed because they were not able to carry out large enough projects or because they could not print and cut and were limited by the small Cricut Joy.

I've said it many times, the original Cricut Joy is an accompanying machine, ideal for carrying wherever you want. So I'm very excited about the new Joy Xtra that settles the two complaints I often hear from the Joy.

I think the Cricut Joy Xtra will be the perfect machine for beginners who want to get started in the Cricut universe without being limited in width and functionality!

New Cricut materials Fall 2023

In addition to the new Cricut Joy Xtra, Cricut is releasing today new materials that, just as those of spring 2023, were in demand and eagerly awaited!

Disclosure: Thanks to Cricut for providing me with the product for review. I am not paid or sponsored by Cricut to write this post. All opinions are 100% my own and honest.

This post contains some affiliate links for your convenience and at no extra cost to you. I get commissions for purchases made through links in this post. Click here to see my full disclosure policy.

If you're shopping on Cricut.com, don't forget to check this page for the latest up-to-date promo code!

Cricut is now improving and adding to its "print then cut" product offering as well as a few others that I will tell you all about.

For each new product, new specific material settings will be available directly in Design Space to achieve a perfect cut.

Help for "print then cut"

Never tried the "print and cut" feature of your Cricut? Know that, to use the print then cut feature, you need to know how to use "Flatten". I invite you to see this post (and video) for all the details!

Packaging of new materials

It could be that the photos you see here are not identical to the upcoming packaging of these new materials. Cricut is indeed working to improve the legibility of these new materials and different and clearer packaging is coming.

Printable sticker paper

Yes, printable sticker paper already existed. But it tended to get stuck in some printers because of its thickness. So Cricut released a new version, much thinner, which will surely delight people looking to make stickers at a low price.

The printable sticker paper is for inkjet printers and is available in matte white only and in 8-sheet packs in Letter size for Canada and the United States and in A4 size for Europe.

How to differentiate the new printable self-adhesive paper from the old one? The new version will have, on the back, the small "C" of Cricut without the antennas. While the old version has antennas.

Printable vinyl

Printable vinyl is like a better version of printable sticker paper. It is brighter and creates bright and durable stickers, ideal for notebooks, laptops and organization.

This printable vinyl is for inkjet printers and is available in packs of 10 or 12 and in four colours: White, transparent, silver and gold! It is also available in Letter or A4 version depending on your location.

How to differentiate the new printable vinyl from the old one? The new version will have, on the back, the small "C" of Cricut without the antennas. While the old version has antennas.

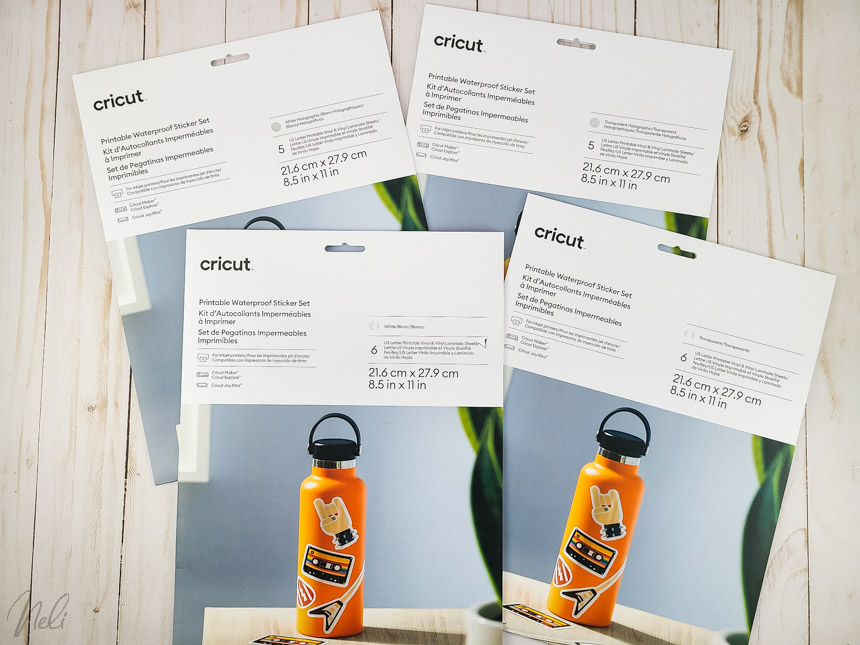
Printable waterproof sticker sets!

Finally! We could see a lot of "hacks" on the internet to make the stickers waterproof.

The problem was that even though some suppliers said their sticker vinyl was water-resistant, it was never 100% resistant. You can see my tests done in this article.

In fact, even though vinyl itself is resistant, the problem is that the ink on an inkjet printer is not.

Cricut solves this problem with these new waterproof stickers. You print and then cover your sheet with a self-adhesive film that will protect the ink. You insert everything into your Cricut and it cuts the sticker and film at the same time! Awesome!

In addition to being waterproof, they are also resistant to UV rays. This keeps the material from cracking and chipping in sunlight. You may still experience some fading of colours depending on the type of ink you have in your printer. If it happens, Cricut recommends trying a different ink or using UV-resistant ink.

Printable waterproof sticker sets are made for use with an inkjet printer. They are available in four colors White, Holographic White, transparent and transparent holographic.

They come in packs of 5 or 6 sheets of Letter or A4 size depending on your region.

Warning: Only the Explore Air 2 does not have a sensor powerful enough to read the printed registration marks with such shiny paper. It is therefore necessary to have a Joy Xtra, an Explore 3 or a Cricut from the Maker family to use this product.

Printable Iron-on

There are plenty of companies that make a similar product, but I personally had trouble getting great results (especially for cutting) so I have a lot of hope for this product! I'll tell you more about it when I've tested it!

I'm talking about printable Iron-On. One is made for light fabrics and the other for dark fabrics.

Unlike Infusible Ink, the ink does not penetrate the fabric. It will be a printed applique that will be heated and installed on the fabric.

What's the difference between the one for light fabrics and the one for dark fabrics? The one for light fabrics will have some transparency, especially for places in the image that are white. So if you have a pale pink t-shirt, for example, the pink will show through where your design is white.

The one for dark fabrics has a white background that does not allow transparency. So the white will remain white even if your fabric is a dark color.

You can see how to use this product and the tests I made here.

These two new printable Iron-On are also for inkjet printers and are available in packs of 3 or 5 sheets of Letter or A4 size depending on your locality

Prismatic glitter Iron-On

What does prismatic glitter Iron-On mean? Well, it's the same as normal glitter, but soft and smooth! So now you can put glitter on your t-shirts without grinding your teeth (or skinning your arms!)

The prismatic glitter Iron-On is currently only available in Smart version for the Cricut Joy Xtra. On the other hand, nothing prevents you from using it on a mat

  • 19-inch long (48.3 cm) roll in Gold or Silver
  • 3-sheet sampling roller 12 inches long (30.4 cm)

New Smart formats for the Cricut Joy Xtra

Many formats will be added to the Smart materials to have rolls of the size of the new Cricut Joy Xtra.

What I find awesome is that, as the Joy Xtra is aimed at a new clientele, Cricut has thought of making sample rolls to allow those who are starting out, to have a greater variety even if they just buy a box!

There is so much size and variety that I invite you to check out this page and filter according to the Cricut Joy Xtra machine to see them all!

"Create stickers" function in Cricut Design Space

Cricut also announces a new feature that will not be immediately available in Design Space: the "Create Stickers" feature.

This feature will be reserved for Cricut Access members and will aim to facilitate the process of creating stickers in a few steps.

This function is coming later in 2023.

How to easily remove heat transfer vinyl

By doing some research on the internet, you will find a multitude of products and techniques to remove heat transfer vinyl (Iron-On or HTV) from fabrics.

The result of all these techniques can really vary and depends on several factors:

  • The type of heat transfer vinyl;
  • The type of fabrics (cotton, etc.);
  • The size of the design to be removed;
  • and also how long the HTV has been installed.

You will understand that it is impossible for me to test everything and in all situations.

So, here are my experiments on my 100% cotton pillow with Cricut's Iron-on vinyl that changes color under UV rays.

Materials and tools used in this tutorial

  • EasyPress
  • Gloves to protect from heat
  • Pliers
  • Goo Gone
  • VLR (Alba Chem)

Remove heat transfer vinyl by heating the back

Yes, it is possible to remove HTV by heating the back with your press. Here's how.

Protect your hands with heat-resistant gloves.

Put the press upside down and press the fabric on the hot plate.

In my case, since it is a pillow, I inserted the EasyPress inside.

To get the heat transfer vinyl to come off, I used the same temperature as for the installation. Here, as it was the Cricut Iron-on that changes color under UV rays, the temperature recommended by the Cricut Heat Guide was 315°F (155°C).

Just wait a few seconds to see the HTV wrinkle. Then, the pliers can be used to remove it.

It really comes off very easily.

Note that if you only have a small section to remove, the ideal would be to use a smaller press like the EasyPress mini.

Remove glue residue

Unfortunately, once the heat transfer vinyl is removed, there is still glue residue.

To remove the glue residues, I used photocopy paper (the most basic kind).

Simply place the sheets on top of the glue residue, put the press on top and heat as if installing HTV.

Again, I used the same temperature and time I had used to apply the Iron-on that changes under UV rays, which is the recommendation of the Cricut Heat Guide of 315°F (155°C) and 30 seconds.

Then remove the paper and continue on the remaining glue residue. Make sure you don't reuse the same paper so you don't reapply the glue to the fabric or even worse, to your press.

It is clear that the glue has transferred to the paper.

Note that I also tried this technique with parchment/parchment paper and that I had much less success! Copy paper is really much better.

Oh no, there's still a halo!

Once all the HTV is removed, we can still see a halo of the design (like a shadow).

I initially thought it was glue so I continued my test. See at the bottom the result, because, in the end, it was not glue!

Remove heat transfer vinyl with Goo Gone

The Goo Gone was the only product I had on hand. It is a solvent for glue and adhesives and several articles on the internet recommended it.

Well, I'll tell you right now: I don't recommend it.

It is an extremely oily product and is perfect for non-porous surfaces. For fabrics, it's a different story. My fabric also became oily and I was afraid that it would not go away after washing it. Besides, the halo was still there!

Remove Heat transfer vinyl with VLR

I wanted to continue with the VLR which is THE most recommended product for this (it is even written "letter removing solvent")

But when I saw the price ($50 at that time) to do a simple test, I really hesitated. My pillow is a $5 IKEA pillow so buying a new one really made more sense!!!

So I thank my friend Cathy who lent me her big bottle of VLR to complete the test and come to a conclusion for you!

So I applied VLR to part of the halo of my cushion according to the manufacturer's recommendations.

Nothing.

The halo was still there.

I started again leaving it longer.

Still nothing.

And that's when I wondered if the halo was due to using my press. Could it be?

So I reapplied two rectangles of vinyl on the back of the cushion and left it for a few days.

I removed one with the warmth of my press and the other with the VLR.

In both cases, impeccable results! No halo, no glue residue (for the press I had to use the paper trick to remove glue residue as mentioned above).

And that's WHEN I figured it out: my pillow stayed several weeks outside (partially in the sun) and the halo is simply due to the fact that the color of the pillow faded in the sun and everything under the vinyl did not fade (insert here a little emoji that taps its forehead!)

The best way to remove heat transfer vinyl

Again, results may vary depending on the HTV, the fabric used and the amount of time the HTV has been installed.

The conclusion of my tests is that the trick of using the press and copy paper is more than enough to remove the heat transfer vinyl or correct a small error. In my opinion, there is no need to use a chemical!

The problem is especially if you want to remove a piece of heat transfer vinyl that has been there for several days, weeks or even months! It must be assumed that the condition of the fabric will probably have changed and that you will probably see a demarcation.

Cricut Venture: the new large format Cricut machine!

People have been asking for a Cricut that can cut wider than 12 inches (30 cm) for a long time and here it is, the new Cricut Venture that can go up to 25 inches (63.5 cm)!

This post contains some affiliate links for your convenience and at no extra cost to you. I get commissions for purchases made through links in this post. Click here to see my full disclosure policy.

In this post, I explain in detail what the new Cricut Venture is so you can see if it's really for you.

Cricut took 6 years to develop the Cricut Venture. There is no need to say, they have studied everything and they have thought of everything.

Image courtesy of Cricut

The specifications of the Cricut Venture

Instead of launching into a big explanatory text, here are important points of the Cricut Venture.

  • For sizes of 13" and 25". (33 and 63.5 cm) wide (adjustable when Smarts materials are used or any size when using mats)
  • Cuts more than 100 materials
  • Can make extra long cuts (single image up to 3.6 m (12 feet) and repeated images up to 22.8 m (75 feet))
  • Works at incredible speed and accuracy (cutting up to 25.4 in/sec)
  • Can write, draw and score.
  • Can do Print and then cut (see below)
  • Works via Bluetooth
  • The desktop version of Design Space must be used (cuts cannot be launched from the application)
  • Its angled design saves space (imagine otherwise the space you would have to have behind the machine!!). The Cricut Venture is made to be installed on the edge of a table or on the docking station (table) sold separately or in a Bundle.
  • Its dimensions are 88.3 cm (34.8 in) wide by 22.4 cm (8.8 in) deep and 26.4 cm (10.4 in) high
Image courtesy of Cricut

Tools that can be used

The Cricut Venture is compatible with all the tools of the Explore family:

  • The basic fine point blade (on the other hand, it will wear out quickly and that's why the Venture comes with its own extra-durable fine tip: the Performance blade)
  • Scoring stylus
  • The foil tip
  • Pens and markers (but you have to understand that on a very large surface, these will also wear out very quickly and that's why Cricut also releases new pens! See below.)
  • Bounded fabric blade (pink)
  • Deep point blade (black)

A blade dedicated to the Cricut Venture

Although the fine point blade of the Maker and Explore families is compatible with the Cricut Venture, Cricut still decided to create a specific blade for the Cricut Venture.

The new Performance fine point blade (included with the Cricut Venture) is specially created to withstand the speeds, forces and pressures generated by the machine.

New Cricut pens and markers

Cricut is also launching new markers with a larger tank. There are two pieces of good news in there:

  1. These are permanent markers!
  2. They can also be used in the Cricut of the Maker and Explore! (As for the Venture, it will be necessary to remove the pen adapter)

Can the same mats be used?

Unfortunately not. Cricut tried everything so that the same mats could be used. But they quickly realized that the Cricut Venture was so fast and powerful that it cracked and undulated the original mats to finally shred them!

Ultra-resistant mats have therefore been created. They are called "Performance mats" and are in the same colour ranges as other Cricut mats, but darker. So dark blue for "Light", dark green for "Standard" and dark purple for "Strong".

Performance mats are available in two sizes:

  • 12" x 24" (30 cm x 60 cm)
  • 24" x 28" (60 cm x 71 cm)
Image courtesy of Cricut

There will also be a card mat coming soon for intensive productions!

Materials that can be used

New Smart materials the width of the Cricut Venture will be sold:

  • Permanent Smart Vinyl (1.5 m rolls. (5 feet); 6.4 m (21 feet); 23 m (75 feet))
  • Removable Smart Vinyl (1.5 m rolls. (5 feet); 6.4 m (21 feet); 23 m (75 feet))
  • Smart stencil (1.5 m rolls. (5 feet); 3.6 m (12 feet))
  • Smart Iron-On (1.5 m rolls. (5 feet); 3.6 m (12 feet))
  • Smart Iron-On Glitter and Holographic (1.5 m rolls. (5 feet); 3.6 m (12 feet))
  • Smart Sticker Paper (33 cm (13") x 63.5 cm (25")

Cricut will also have new 24" x 28" cardstock, the same size as the mats.

For other materials, it will be possible to use them with mats as is the case with other Cricut! The Cricut Venture cuts more than 100 materials. You can see the full list here.

Can 13-inch Smart materials be used?

Note that the Cricut Venture is adjustable from 33 cm (13 in.) to 63.5 cm (25 in). It is therefore possible to use the 13-inch Smart materials that have been designed for the Explore 3 and Maker 3.

Does the Cricut Venture do "Print and Cut"?

Image courtesy of Cricut

Yes! The Cricut Venture does Print then cut. In addition, an update of Design Space will allow a really larger print and cut (obviously, you have to have the printer capable of doing that!) Here are the sizes that will be available:

  • 8.5" x 11" (Letter)
  • 8.3" x 11.7" (A4)
  • 8.5" x 14" (Legal)
  • 9" x 12"
  • 11" x 11"
  • 11" x 17" (Tabloid)
  • 11.7" x 16.5" (A3)
  • 12" x 12"
  • 12" x 18"
  • 16.5" x 23.4" (A2)
  • 24" x 12"
  • 24" x 28"

-13" x 19" will also be available soon.

The Cricut Venture price

The Cricut Venture is not for everyone because of its features, but also because of its price which is above $ 1000

It is particularly aimed at people who have a business and who are looking for a reliable, easy-to-use, fast and successful machine for batch projects.

But the Cricut Venture can also cater to people who want to take their passion to the next level!

I invite you to follow this link to see the prices in your area. Here are the materials and accessories contained in the box of the Cricut Venture:

  • The Cricut Venture machine (obviously!)
  • The Performance fine point blade (already installed in clamp B)
  • Accessory adapter (already installed in clamp A)
  • Cutting tools (a kind of small knife to be inserted into the slot to cut the roller once the cutting is complete)
  • Roller holder
  • Cleaning tools
  • USB-C Cable and USB-A Adapter
  • Electrical cable
  • Extension to support mats
  • Black Removable Smart Vinyl 33 cm x 76.2 cm (13" x 30")
  • White Removable Smart Vinyl, 63.5 cm x 1.8 m (25 in x 6 feet)
Image courtesy of Cricut

The docking stand will be sold separately or in a Bundle. The latter is designed specifically for the Cricut Venture since it has cavities that make the machine interlock on the support to avoid any displacement.

It has a roller stand, anti-static baskets (to prevent your materials from falling to the ground and dust sticking to them) and casters that can be locked!

Availabilities

The Cricut Venture will go on sale online only for Canada and the US on July 25, 2023. We will have to wait until August for the compatible stand and the bundle.

For England, Ireland, Germany and France it will be in the fall!

Craft deals on Amazon Prime Day!

image saying Amazon Prime Day all the best craft deals you've been waiting for. Yes, Cricut products are on sale!

Amazon Prime Day 2024 is October 8-9

So let's get ready for Amazon Prime Day! This post contains some affiliate links for your convenience and at no extra cost to you. Click here to see my privacy policy.

What is Amazon Prime Day?

Amazon Prime Day is a HUGE sale event that runs for 48 hours. In order to benefit from this awesome sale, you need to be a Prime member. I am a Prime member myself and I can't tell you how many times it has saved my life!

Not having to go to the store and being able to get something delivered in two days or even the next day with just one click is awesome!

What's the benefit of being a Prime member?

Well, apart from the super fast delivery and the Prime Day sale, you also get access, for no additional cost to:

  • Prime Video, which includes exclusive Amazon Originals, popular movies, TV shows, sports, and live events.
  • Prime Music
  • Prime Reading gives you access to a regularly updated catalogue of novels, comics, thrillers, children's books and more.
  • and much more!

In order to get ready for Prime Day, sign up for an Amazon Prime membership 30-day free trial here.

Craft deals on Amazon Prime Day

Find all the current Prime Day deals right here

Cricut products

  • You can see all the Cricut products on Amazon here

Remember to check often during the two days because deals come and go fast!

Other sales

Because Amazon Prime is so popular, other brands will often respond with similar sales.

Cricut

You can see what Cricut has on sale now - There's 50% off materials and accessories.

I'm particularly amazed at the price of the Cricut Autopress! But the other Easypress are also on sale. And I'm telling you, I take notes every Black Friday and these prices are similar to or better than Black Friday last year!

xTool

xTool also has Prime days. You can see their discounted prices here.

Cricut Glow-in-the-dark heat transfer vinyl

Learn how to use the Glow-in-the-dark heat transfer vinyl from Cricut. In this tutorial we have fun making a t-shirt for children (or adults) that may surprise everyone once in the dark!

Cricut has released a series of exciting new products. To see all the products, check out this post. You will discover, among other things, watercolour markers!

But back to our project! The product I want to talk to you about today is glow-in-the-dark vinyl!

This post contains some affiliate links for your convenience and at no extra cost to you. I get commissions for purchases made through links in this post. Click here to see my full disclosure policy.

We've been waiting for it for a long time and it's now here. And not just one type of vinyl, but two! Yes, glow-in-the-dark vinyl is available in removable adhesive vinyl and heat transfer vinyl.

Glow-in-the-dark adhesive vinyl

When we think of removable glow-in-the-dark adhesive vinyl, we immediately think of putting it on the walls. Who hasn't dreamed of having a ceiling full of stars when they were little?

Photo courtesy of Cricut

Since it is removable, it can easily be removed.

Note that under the light, this vinyl is really pale green.

Glow-in-the-dark Iron-on vinyl

Heat transfer vinyl is vinyl that can be applied mainly to fabrics and requires heat for application, so a press like an EasyPress or other.

Unlike adhesive vinyl, under the light, this vinyl is almost white but still has a slight greenish touch.

To find the right settings to apply it, refer to the Cricut Heat Guide.

Also, note that it is possible to layer glow-in-the-dark heat transfer vinyl, but it is recommended to put it on the top layer only.

See this post for more information on how to layer vinyl (adhesive or heat transfer vinyl).

When washing fabrics that have glow-in-the-dark Iron-on applied to them, Cricut recommends waiting at least 24 hours before washing.

Also, to extend the life of your project, it is recommended to wash and dry it upside down. The product was tested on 10 washes.

Scroll to the bottom of the post to see the pyjama t-shirt project I made. I even have the SVG files for you!

How long does the vinyl glow?

I've seen a lot of people on Facebook telling me they'd love to use adhesive vinyl to locate switches when it's dark or orient themselves at night! These are really good ideas! But unfortunately, it won't work!

Adhesive and Iron-on glow-in-the-dark types of vinyl do not shine for very long! First, they must be "charged" under bright light before they can glow.

So if your glow-in-the-dark t-shirt has been folded in a drawer for several days, nothing will happen when you turn off the light unless you have exposed it to bright light before.

It's the same for the duration of the lighting or the number of minutes that the vinyl remains phosphorescent.

I did the test with removable adhesive vinyl (excuse my lack of originality, but I simply cut a corner of the roll!?)

So it's great for multiple projects, but not for something that needs to glow for several hours.

Make a children's t-shirt with glow-in-the-dark Iron-on vinyl

I was trying to find an original project to do. My kids aren't really at the age of being amazed by things "glow-in-the-dark" anymore. But luckily this fun twist made my kids happy (and I'm sure even adults would like it!)!

So here's what I made, a pyjama t-shirt that looks like this under regular light:

And do you want to know what happens when you turn off the light?

As mentioned above, unlike adhesive vinyl, glow-in-the-dark heat transfer vinyl is practically white which allowed me to play this little trick by also using white Iron-on vinyl.

So no more excuses once in the dark! You do have to sleep!

Here are the tools and materials you need to make the project

  • Cricut from the Maker or Explore Families
  • EasyPress (I'm using the EasyPress 2 10"x 12")
  • EasyPress Mat (I'm using the 20" x 16" EasyPress mat)
  • Glow-in-the-dark Iron-On
  • White Everyday Iron-On
  • T-Shirt
  • Cricut standard grip mat
  • Brayer (optional)
  • Weeding tools

You can get this SVG cut file and 3 more designs here. You can also find them right in Cricut Design Space. So it means they are going to be free for you if you're a Cricut Access member.

Watch the video!

To see the entire tutorial and learn how to layer glow-in-the-dark and regular Iron-on, watch the following video:

How to make two Infusible Ink projects in one

In this project, I will show you how to tweak a design in Cricut Design Space in order to make two infusible Ink projects in one.

This project is fun to make and will even save you some materials! And it can be done with other Infusible ink blanks too, not only mugs!

This post contains some affiliate links for your convenience and at no extra cost to you. I get commissions for purchases made through links in this post. Click here to see my full disclosure policy.

Materials

Here are the materials and tools you'll need if you want to make this project (Note that I've done this project with a mug and a Mug Press, but it can be done with other Infusible ink blanks):

  • A cutting machine (I'm using the Cricut Maker 3, but you can use any Cricut from the Maker or Explore families and even the Cricut Joy if you're making a Mug design)
  • Cricut Mug Press
  • Cricut Mug (I'm using the "Beveled Mug blank, Miami")
  • Cricut Infusible Ink (I'm using the "Rainbow triangles")
  • Standard grip mat
  • Brayer
  • Weeding tools
  • Spatula
  • Heat resistant tape

If you're a Cricut Access member, you can find my file ready to make in Cricut Design Space by following this link.

You can also check out all the other Inspirational quotes that I have in Cricut Design Space.

You could make this project with any of them.

Not a Cricut Access member? Don't worry, you can still get my Inspirational quotes here.

How to make a 2 in 1 project?

Check out the video to know all the details!

What is the purpose of bleed in Cricut Design Space

What is the "bleed" option? Here I explain what it's for and why you should almost always leave it on!

We commonly see on social media people who recommend turning off the "bleed" option in Cricut Design Space when you want to use the "Print then cut" function.

People mistakenly believe that this option distorts the image. Yes, that's right, at first glance, it seems to have affected the printed image, but in fact, this option is there to help your Cricut!

What is bleed

"Bleed" is an option that is found when printing from Cricut Design Space when you make a "Print then cut" project.

"Bleed" is an option that adds a border to your image. In fact, it adds a border of the same colour as your image only where the blade of the Cricut will pass to cut it.

In the image below, we can clearly see the offset made by the bleed option:

This is only for "give a chance", a margin of maneuver, to your Cricut if the cut made by the blade is not super precise.

By removing this option, you may see a slight white border after the cut (the colour of your paper) all around your image.

By leaving "bleed" on, Design Space offsets the colour of your image for a clean cut without any white edges or borders! As you can see, the majority of this "bleed" will remain on your sheet after cutting.

What if I don't see any "bleed"?

In the photo below, we can see very well the bleed of the bee. But why does the bird have no "bleed"?

Well, it has one, it's just that it's white! As a matter of fact, if we look more closely at Design Space, we see that the colour around the bird is a very thin white line:

Therefore, the colour that is offset to act as a bleed is white and white is not printed by the printer so we do not see anything!

Even after cutting, on a dark background, the slight white outline of the bird is seen:

It will be the same if you make labels with a white background or even stickers that have a white border.

Where it gets confusing

One of the main reasons why people absolutely want to turn off "bleed" is that they do not know how to use the Flatten function.

As mentioned above, the "bleed", the offset of the colour, will only appear where the blade will cut. So, if you're printing and the result is this kind of image (see below), you probably should have used Flatten.

I would be surprised that your intention is really to "Print and Cut" and then have the Cricut cut each letter individually!?

This is unfortunately the answer that is often given on social media: "Just uncheck the bleed and it's going to work!" FALSE! If you turn off "bleed", you don't solve the problem. Yes, the print will be better visually, but the Cricut will still cut the letters one by one!

That's why you have to use Flatten. The offset of the "bleed" will be done only around the background image (where the blade will pass)

Click here to learn more about Flatten and when to use it.

The only time you should uncheck the "Bleed" option

The only time you should uncheck the "bleed" option in Cricut Design Space is when you don't intend to cut the image.

For example, some people use Cricut Design Space to print images on a sublimation printer. These images will then be applied directly to a blank, without cutting.

Therefore, no cutting means that bleed is not required.

This is really the only example I found! If you have any others, feel free to let me know in the comments!

So, are you now convinced why you should use "bleed"? I hope so!

By using it, you will ensure a more precise cut that will result in a more professional and polished final project.

Cricut new materials - Spring 2023

Cricut is releasing today awesome new materials that we've all been asking for and even more! Vinyl, Iron-on and even a special dissolvable product!

Disclosure: Thanks to Cricut for providing me with the products to review. I am not paid or sponsored by Cricut to write this post. All opinions are 100% my own and honest.

This post contains links to affiliated products for your convenience and at no additional cost to you. Click here to read my full disclosure policy.

If you shop on Cricut.com and order $100 or more of materials, accessories or supplies, don't forget to check out this page to get the last promo code and get 10% off and free shipping (valid in Canada and the US only, certain conditions apply).

You've probably seen similar materials in other brands but personally, I'm so glad to have them in the Cricut brand. Cricut branded materials are always easy to use and specially made to work flawlessly with Cricut machines.

For each new product, you'll have specific material settings to cut them right into Design Space.

Colour-Changing Vinyl

People have been asking this for so long. Well, I know I have. I do own all kinds of colour-changing stuff, even nail polish! So you can imagine how excited I am about this.

The colour-changing vinyl is permanent vinyl that will be available in Cold and Hot!

The cold version changes colour when it comes in contact with a surface this is below 50°F (10°C)

Image courtesy of Cricut

The hot version changes colour with a surface that has a minimum temperature of 88°F (31°C)

Image courtesy of Cricut

In both cases, vinyl will revert to its original colour as the stimulus is removed.

Note that this vinyl is not recommended for automotive or long-term applications. But just imagine all the fun projects you could make like mugs, glassware, bowls, etc!

As with all vinyl, it is not microwave safe. Handwashing is also recommended.

Colour-changing vinyl comes in different colours:

  • Cold: Roll of 12" x 24" available in Light Pink (changes to dark pink), Blue (changes to Turquoise) and Turquoise (changes to purple)
  • Hot: Roll of 12" x 24" available in Dark Pink (changes to light pink), Turquoise (changes to blue) and Purple (Changes to turquoise)

UV Color-Changing Iron-On

After hot and cold colour-changing Vinyl, here comes an Iron-on vinyl that changes colour when exposed to sunlight!

Image courtesy of Cricut

This heat transfer vinyl starts by being white and changes colour when exposed to sunlight. It will also work if exposed to UV light, except for the yellow which will only work under the sun.

It is tested to outlast multiple washes.

As it is a specialty Iron-On, it can only be used as a top layer if you're layering multiple heat transfer vinyl.

This Iron-On comes in a 12" x 19" roll in Blue, Purple, Red and Yellow once under the sun (all the colours will start white before exposure to the sun)

Reflective Iron-On

When we read reflective, we immediately think of reflective stripes for protection but this is NOT what this reflective Iron-On is made for.

Actually, it also looks way better than the reflective material that we're used to seeing. But the principle is the same meaning that it will shine in rainbow hues when light hits the material.

You'll also be able to see this effect day or night!

Image courtesy of Cricut

It is important to note that it is not a product that glows. It really only reflects the light.

This product is also not classified as "high visibility" and not certified to be used for safety.

As it is a specialty Iron-On, it can only be used as a top layer when layering multiple types of Iron-On. It is ideal for cotton, poly-cotton blends and polyester.

The reflective Iron-On comes in a 12" x 19" roll

New colours for Smart Labels Writable Vinyl

The Smart labels Writable Vinyl already comes in white, transparent and black and these three are also available in permanent and removable.

Today, Cricut is launching three new metallic colours of smart labels writable vinyl: silver, gold and silver holographic.

Image courtesy of Cricut

These three colours are permanent vinyl and are only available in the Joy size. You use them just like the other Smart labels writable vinyl meaning you write on it with Cricut pens, cut and peel!

These three new colours are only available for the Cricut Joy in a flat pack of 4 sheets of 5.5" x 13"

Cricut Smart Label Paper - Dissolvable

Yes, you read right! Dissolvable!!!!

This product is made to dissolve under water, leaving no sticky residue. You can put it in the dishwasher or simply in water for 30 seconds.

Image courtesy of Cricut

It works with all Cricut pens (except of course Infusible ink pens and fabric pens). It is a "Smart label" so made to be inserted without a mat into the Cricut Maker 3, Explore 3 and Joy. But nothing prevents you from cutting a piece and using it on a mat for the other Cricut machines.

This dissolvable material would be awesome for home canned goods, party cups, kid's lunches and so much more!

It is even Microwave and freezer safe! Wow!

What would you do with it?

The Dissolvable Smart Label paper comes in:

  • Joy: 1 roll 5.5" x 36"
  • Explore 3 et Maker 3: 1 roll of 13" x 24"

Skin tone samplers

These new colours will be available in Iron-On and Permanent premium vinyl.

Of course, it's called "skin tone" so we obviously think of people cut out of vinyl but it can also be used for any neutral designs and projects.

Image courtesy of Cricut

If you wondering how to use these designs, Cricut Artists have come up with awesome designs that you'll find right in Design Space. I'm telling you, they are beautiful!!!

I have also made a couple of them that you can find in my Design Space profile.

This material is available in both Iron-On and Vinyl and comes in a sampler pack containing all the colours.

  • Iron-On: 1 roll of 10 sheets (one of each colour), 12" x 12" each sheet
  • Permanent Premium vinyl glossy finish: 1 roll of 10 sheets (one of each colour), 12" x 12" each sheet

*The skin tones are only available in a sampler pack at the moment. The colours cannot be purchased individually.

Linerless Transfer Tape

Linerless means no backing meaning also less waste! This new transfer tape unrolls right from the roll and sticks directly to your projects. Think of a roll of adhesive tape (a.k.a. scotch tape).

Image courtesy of Cricut

Now, nothing prevents you from unrolling a piece and using my parchment paper trick.

It seems that people like or dislike this new transfer tape! (it's either one or the other!) The user experience is really different from the regular transfer tape. If you want to give it a try, make sure to use it 4-5 times to get past the learning curve and see which one you prefer!

Therefore, it's important to note that the regular transfer tape (the one with a liner) will still be available so you'll always be able to choose the one you prefer!

Also, note that this new linerless transfer tape is comparable to the StandardGrip transfer tape and is therefore not compatible with Shimmer vinyl or textured vinyl.

The linerless transfer tape comes in different sizes

  • Roll of 5.5" x 10'
  • Roll of 13" x 15'
  • Roll of 13" x 30' (available online only)
  • Roll of 13" x 75' (available online only)

3 new colours of Everyday Iron-On

Last but not least, there are now 3 new colours of Everyday Iron-On: Mint, Rose Gold and Coral.

The new colours of Everyday Iron-On are Mint, Coral and Rose Gold and are available in a roll of 12" x 24"

How to fill a shape with a pattern and upload new patterns in Cricut Design Space

Patterns in Cricut Design Space are particularly useful to "Print and Cut" your own personalized stickers. This tutorial will show you how to import new patterns and how to fill any shape with a pattern to make beautiful stickers and many other projects.

Did you know that you can fill any shape with a pattern in Cricut Design Space? You can either use a pattern that is included in Design Space or you can even upload your own.

How to fill a shape with a pattern

This feature is somewhat hidden and probably not used enough in my own opinion!

To find the pattern option, you'll need to first change the shape to "Print Then Cut" in the Operation menu. Because, of course, filling a shape with a pattern means that you want to print.

Then, click on the colour swatch and choose "Pattern" in the "Print type" drop-down menu.

This is where you'll see all the patterns already available and in Cricut Design Space.

You can click on "Filter" to find a pattern in a particular colour.

By selecting a pattern and clicking "Edit pattern" you'll even be able to modify the scale, the position and the orientation of the pattern.

"Scale" will change the size, making the pattern bigger or smaller

"Horizontal" and "Vertical" will move the pattern from left to right or up and down allowing you to maybe focus on a particular item in the pattern.

"Rotate" will, of course, rotate the pattern and "Flip" will mirror the pattern.

How to import your own pattern

This is not an obvious option to find and use.

First, you'll need to go to click on "Upload" but instead of an "Image" you'll need to click on "Pattern fill" at the top (Do you see it? Because it's not obvious it's there!)

This post contains some affiliate links for your convenience and at no extra cost to you. Click here to see my full disclosure policy.

You can upload many patterns from the Internet as long as they are JPG, GIF, PNG or BMP files.

For example, you can find awesome free "backgrounds" or digital papers on Design Bundle's site.

Once you have uploaded your file, you just select it and click on Upload Pattern.

You need to do the same first steps as for a Design Space pattern: change the shape to "Print Then Cut" in the Operation menu, select the colour swatch and choose "Pattern".

Then the tricky part: You'll need to find the imported pattern!!! (I wish the tiles were larger don't you!!)

Another way to use a pattern fill

You can also import the pattern as a Print and cut image! And then use "Slice" to cut the shape you want in the pattern

To know more on how to use "Slice" check out this tutorial or download my free cheat sheet

What can you make using a pattern?

Of course, you need to print for that feature to be useful, and therefore you need a printer. A simple Ink Jet printer will do the trick.

Planner stickers

Something you can do and the first thing that comes to mind are stickers. Planner stickers are trendy right now and I found many beautiful ones already made for you and ready to print.

But sometimes, they are not exactly what you're looking for and it can be fun to have some personalized specifically for you! In a case like this, you could buy sticker paper and make some original ones using regular cut images that you transform into "Print and cut" images in Design Space!

Use a pattern on many types of stickers

Go check out my Hershey's Kisses stickers I made for Valentine's Day using Cricut printable vinyl and only Design space cut images.

And what about name stickers for your kid's school supplies? A lot of websites sell these kinds of stickers but you can totally make them yourself! For that, I would suggest Cricut printable vinyl to make sure it stays in place (sticker paper is usually removable and repositionable). You can check out all the tests I made on that subject here.

Printing a pattern on Cardstock?

One thing that we don't always think about is printing on cardstock. You could print patterns on cardstock and even add writing to it. It could be for a card, an invitation, scrapbooking ornaments, etc.

Another cool thing to add a pattern to!

And did you know that you can buy printable magnet sheets? This is so fun and can be a nice simple gift. Especially for grandparents!

Do you have any other suggestions on what you could use to print and add a Pattern to in Cricut Design Space? Don't hesitate to leave me a comment below.

If Design Space still confuses you, check out my free cheat sheet:

Don't forget to Pin it for later

Pinterest image saying "How & When to use pattern fill in Cricut Design Space"

Difference Between Slice and Subtract in Cricut Design Space

See the difference between the Slice function and the Subtract function of the Combine menu in Cricut Design Space. And I will explain why choose one over the other.

Toward the end of 2022, Cricut added a new menu to Cricut Design Space featuring four new functions: Unite, Subtract, Combine and Exclude.

If you have trouble figuring out these functions, feel free to download my free cheat sheet that will help you visualize what each function does.

Today we will talk about the Subtract function and how it is different (or similar) to the Slice function.

For all functions of Cricut Design Space

It is important to know that all the functions of Cricut Design Space will remain grayed out as long as you do not have at least two layers selected.

Slice in Cricut Design Space

To know everything about Slice, you can refer to this post which also includes a video.

But basically, the slice function acts like a cookie cutter in cookie dough. You end up with several pieces named "Slice result". A "cleaning" of the layers will need to be done to keep only what interests you.

Also important to know, Slice can only be done on TWO layers at a time. Which can make the task longer.

Subtract in Cricut Design Space

Subtract is found under the Combine menu.

By using Subtract, all top layers will be removed (or subtracted) from the layer that is completely below.

A new group called "Subtract" is created and we can still see all the pieces that were used to compose our house project.

By clicking on one of these layers (from the layers panel only) you can move the objects (here, I move the door).

As soon as you release the mouse button, the "Subtraction" is reapplied and you see the result of the new positioning of the door.

This means that Subtract remains editable. While Slice is permanent and there is no way to change it (unless you cancel by going back).

If the multiplication of all these layers bothers you, you can also select the function group and click on the Combine menu and choose "Merge layers". This will make the Subtraction permanent, on a single layer, much like the Slice function.

Which one to choose, Slice or Subtract?

Je vous dirais que c'est un choix bien personnel. J'apprécie de plus en plus Retirer surtout quand j'ai plusieurs calques. Par contre, quand on multiplie les opérations, on peut se retrouver avec énormément de calques à gérer.

I would use Slice, especially in situations where I want to keep the layer removed. Here, I show the example of an object larger than mat that we would like to separate into several mats.

Watch the video!

Watch the video to see Slice and Subtract in action and also to learn how to separate an object larger than a mat to cut it into several pieces.

And don't forget to download the free cheat sheet!

Make a 3D Christmas ornaments in cardstock

Learn how to make these pretty ornaments with cardstock leftovers.

Can you believe that before I got my Cricut, I made these Christmas ornaments by cutting them by hand? 😱

It's so much easier with the Cricut and my SVG file!

This post contains some affiliate links for your convenience and at no extra cost to you. I get commissions for purchases made through links in this post. Click here to see my full disclosure policy.

Required materials

  • Cricut from the Maker or Explore families or Cricut Joy
  • Standard grip mat (green) or for the Joy
  • cardstocks of your choice
  • Scoring stylus or Scoring wheel (Maker only) or use the already scored file if you do not have these tools or if you have the Joy (see next paragraph)
  • String
  • Liquid glue
  • File available in the NeliDesign library. Get access below

The file is available in two versions. So even if you don't have a scoring stylus or scoring wheel or if you own the Cricut Joy, you'll be able to make this project.

Make a 3D Christmas ornament in cardstock

Watch the video to know how to make the different ornaments and also how to use the two files.

Create felt Scandinavian Christmas ornaments with your Cricut

In this project, you'll learn how to create IKEA-inspired Scandinavian felt ornaments.

Last year, I saw some pretty Christmas ornaments on the IKEA website. Obviously, they were out of stock and anyway, I thought they would be so easy to make with a Cricut!

So today, I'm going to show you how to create these IKEA-inspired ornaments.

And I'm not going to give you an SVG file ready-made, no no no! I will show you how to create them using only Cricut Design Space and free images and shapes.

As these Scandinavian ornaments are made with Cricut felt, they can be cut with any Cricut since only the fine point blade (the basic blade of all Cricuts) is required.

If you want to know more about the different types of felts and what to cut them with, refer to my complete post on felt.

This post contains some affiliate links for your convenience and at no extra cost to you. I get commissions for purchases made through links in this post. Click here to see my full disclosure policy.

Required materials

  • Cricut from the Maker or Explore or Cricut Joy families
  • Standard mat (green)
  • Cricut felt
  • Jute string

Create your Scandinavian felt ornaments

In this tutorial, I'll show you how to create your ornaments from A to Z with free shapes and images found in Design Space.

Running out of time to recreate the Scandinavian ornaments yourself? Find my complete project, ready to use, in Cricut Design Space by following this link.

DIY wood veneer earrings

Learn how to use wood veneer to make beautiful earrings whether you have a Cricut from the Explore or Maker family!

This tutorial is for beginners looking for a challenge.

If you're no longer a beginner, that's okay! This project still is a nice challenge, but the video may be a bit too detailed for you!

This post contains links to affiliated products for your convenience and at no additional cost to you. Click here to read my full disclosure policy.

How to create wood veneer earrings

In this tutorial, you will learn how to create your own earring design in Design Space (yes yes, by yourself!).

Next, I'll show you the best tricks for cutting wood veneer. Did you know that you can cut it with the deep point blade? You know, the one that has a black housing?

This means you can do this project as much with a Cricut from the Explore family as with a Cricut from the Maker family!

Tools and materials required

  • Cricut of maker or Explore families
  • Wood veneer
  • Adhesive foil vinyl (or other adhesive vinyl, see note at the bottom of the post!)
  • Transfer tape
  • Purple and green mat
  • Deep point blade (black) and fine point blade (the one that comes with the Cricut)
  • Jewelry pliers
  • Hooks and rings for earrings
  • Masking Tape
  • Scissors or trimmer
  • Tools for weeding
  • Small piece of sandpaper or nail file (optional)
  • A small piece of parchment paper (optional)
  • Brayer(optional)

Size of earrings

Earrings are designed simply from circles, which are free in Design Space. Here are the dimensions mentioned in the video:

  1. Small circle: 0.6 in (1.5 cm)
  2. Cutting circle: 0.85 in (2.2 cm)
  3. Large circle: 1.2 in (3 cm)
  4. Holes: 0.07 inches (0.18 cm)

Design Space images used in the project

This project was initially part of the 2021 Homemade Event. At that time, the Foil cut images on the earrings were included in the event. Currently, you must be a Cricut Access member to have free access to the images.

To find these images in Design Space, click on the "Images" button and copy and paste the numbers including the "#".

  • Leopard #M21C6453C
  • Flower #M2745ED72

Note that you can also use any other image you like!

Design Space Project

The best way to learn is to do all the steps to create the earrings in Design Space yourself. I highly recommend it!

On the other hand, I understand that you may be in a hurry or maybe you just mastered Design Space and would like to skip this step!

Well, I have good news! I shared my project publicly in Design Space. You can access it, simply by clicking here.

Would you also like to share a project in Design Space? Follow this link to find out how to do it!

Also, take the opportunity to subscribe to my Design Space profile and be notified when I share a new project or make available to you a new image that I have created!

A word about the Foil adhesive vinyl

The adhesive Foil is not a vinyl that is easy to work with. You'll see the trick I do in the video.

It is indeed very rigid. So combined with a tiny pattern, it's not ideal! The cut must be set perfectly otherwise it is impossible to weed.

On the opposite, too much cutting pressure and all the small pieces we want to keep (as here, the flower petals) will pop off the backing.

If you are a beginner and want to simplify your life, use a different type of adhesive vinyl than "foil" and you will have way less trouble!

Did you know that you could even use heat transfer vinyl on wood veneer? Even the Iron-on Foil!

As a matter of fact, in general, heat transfer vinyl is much easier to weed. The fact that it is already on a backing also helps a lot! heat transfer vinyl is also ideal for application on bare wood.

Read this post that will explain when it is best to use adhesive vinyl and/or heat transfer vinyl (Iron-on) on wood.

Make your own earrings in wood veneer

Watch the video to see all the steps!

How to use Cricut watercolor markers

September 2022, Cricut launches new watercolor markers and cards. Here's what you need to know and more!

Disclosure: Thanks to Cricut for providing me with the products to review. I am not paid or sponsored by Cricut to write this post. All opinions are 100% my own and honest.

If you are an experienced watercolor artist, I do not think this product is for you.

On the other hand, if you have always wanted to try watercolor but have never dared, I sincerely think that you will appreciate this new product. Especially with the additional special techniques I will show you!

New watercolor markers

The new Cricut watercolor markers come in two formats. One for the Joy and the other for the Explore and Maker families (like all the other Cricut pens and markers!)

Each package contains 8 colors and a brush.

New watercolor cards

Watercolor markers are designed to be used with the new Cricut watercolor paper cards. 3 sizes are available: R20, R40 and S40.

But be careful, only the R20 watercolor cards will work for the Cricut Joy.

Are you confused by all the dimensions and types of Cricut cards? I have a solution for you! Download my free cheat sheet about Cricut cards! It will clarify everything for you:

How it works

The principle is that the Cricut draws the image and you use the brush to fill the design by hand.

So the Cricut takes away the most difficult part which is drawing.

You will find in Cricut Design Space and especially if you have a Cricut Access subscription many images made especially for watercolor. These have been designed to prevent the colors from overlapping.

How do I find the images in Cricut Design Space? It's simple, just go to "Images" and search for "Watercolor cards".

See the video at the bottom of this post for more details.

Can other techniques be combined with watercolor?

Of course! You can add pens and makers on top and even foil. The important thing is to make sure that the water does not spoil your design.

You can see in the video, the combinations I made and how I made them!

What if coloring between the lines doesn't resonate with you?

I totally understand that! Adding water and coloring between the lines don't speak to me at all! But wait until you see the other techniques I've tried!

Yes, it takes a bit of "letting go" but it's so much fun and satisfying!

If you are interested to see how far we can go with Cricut watercolor markers, watch the video!

Frequently Asked Questions

Do I need a glass of water to use the markers?

No, but you need to fill the brush with water. Then simply press on it to make the water come out and clean it. It is recommended to do this between each color change.

Can I use any type of watercolor paper?

There is a lot of variety and thickness in watercolor paper. It would be up to you to test. On the other hand, I tested myself on watercolor paper that I had at home and it worked well.

Note that the paper had the same characteristics as the Cricut cards, i.e. 140 lbs (300 gms) and cold-pressed.

Can I use any Design Space image?

Cricut has created images in Design Space specially designed for watercolor. The idea is that lines of different colors do not intersect. To find them, click on "images" and type "watercolor cards".

But you could try other images!

Besides, the image of the candles I used was not a watercolor image!

Are there envelopes in Cricut card packs?

Yes, Cricut card packs always include envelopes.

How thick are Cricut watercolor cards?

Cricut cards are made from cold-pressed 140 lbs (300 gms) watercolor paper.

What parameter should I use in Design Space?

In order for your Cricut to draw on the cards with the watercolor markers, you can select the "Watercolor cards" setting. Just type "water" in the search bar and you will find it easily.

Any other questions?

Feel free to leave me your questions in the comments. And don't forget to watch the video! You'll be amazed at what you can do!

New Cricut Products - Fall 2022

Fall 2022 and Cricut releases many new products. Some will make you say "Didn't that already exist?" so I suggest you read carefully to understand the subtleties!!!

Disclosure: Thanks to Cricut for providing me with the products to review. I am not paid or sponsored by Cricut to write this post. All opinions are 100% my own and honest.

This post contains links to affiliated products for your convenience and at no additional cost to you. Click here to read my full disclosure policy.

? If you shop on Cricut.com and order for $100 or more of materials, accessories or supplies, don't forget to check out this page to get the updated promo code and get 10% off and free shipping (valid in Canada and the US only, certain conditions apply).

Watercolor markers and cards

Of all the products launched this fall, this one is without a doubt the one I was most excited about!

I was so eager to tell you about it that I already have a complete post on the subject as well as a video showing you several special techniques.

Basically, Cricut launches watercolor markers and cards. The markers come in two sizes. One for the Joy and the other compatible with the Explore and Maker families.

The idea is that the Cricut draws with the markers. Then, with the help of the brush provided, you add water to "color" the image.

I will not say more, I will let you check out the full post by following this link... but not right away! There are still several other new products to see!

Glow-in-the-dark vinyl

We asked for it and had been waiting for it for a long time, the one and only "Glow-in-the-dark".

Image courtesy of Cricut.com

And there is not just one type of Glow-in-the-dark vinyl, but two: removable vinyl (for walls, etc.) and Iron-On heat transfer vinyl (for clothing).

Under each new product, I will put you the same information in the same format:

  • Compatibility : all Cricut machines
  • Mat : required
  • Size : 12" x 24" roll (30.5 cm x 61 cm)
  • Price according to your locality: Glow-in-the-dark removable vinyl ; Glow-in-the-dark Iron-on vinyl

Smart labels, writable vinyl, permanent and removable

Ok, that's where it gets tough and you're going to tell me it already exists! Yes and no.

Smart Labels in writable vinyl, permanent, sold in a roll and for the Joy only already existed.

Cricut is launching the same thing today, in an improved version!!

Image courtesy of Cricut.com

For the Cricut Joy

For the Joy, this vinyl will no longer be sold in a roll but flat.

In addition, it will be available in black, matte and transparent. These three colors will also be available in removable and permanent versions!! Did you follow me?

If like me you are a little lost looking at the packaging, I will draw your attention to the small logo, it helps to understand!!

On the other hand, you will have to look on the back to find the color of the Smart Label ?

  • Compatibility: Cricut Joy
  • Mat : no
  • Size: 4 sheets of 5.5" x 13" (14 cm x 33 cm)
  • Colours: Black, white, transparent
  • Price according to your location: Permanent, Removable

For Explore and Maker Families

Yes, there will now also be a version of the "Smart Label" for the Explore and Maker families.

Most of what was written for the Joy is also valid here with the exception of the format which will be in rolls!

You can also check the logos to differentiate them, but again, you will have to turn the packaging to identify the colour!

  • Compatibility: Cricut Explore 3 and Maker 3
  • Mat : no
  • Size: 13" x 3 feet (33 cm x 0.9 m) roll
  • Colours: Black, white, transparent
  • Price according to your location: Permanent, Removable

Cricut Joy Smart Vinyle Matte Permanent

Now you tell me: "Now Natalie, this vinyl really already exists!!!"

Euh, nope!

In fact, the ones that exist are removable Matte vinyl and permanent glossy vinyl.

Cricut is releasing today the permanent matte ? version in the Smart vinyl for the Cricut Joy. And not just in one color, in 14 different colors!

If you're use vinyl frequently, you're going to enjoy the matte finish, for real. It gives a completely different look!

  • Compatibility: Cricut Joy
  • Mat : no
  • Size: 5.5" x 48" roll (13.9 cm x 121.9 cm)
  • Colours: a lot!
  • Price : depending on your location

Smart Vinyl, Matte Metallic, Removable

Here, what's new is the "removable" part. Because yes, this vinyl already exists in permanent. Having it in a removable version allows you to use it in places where you might want to remove it one day like...

Image courtesy of Cricut
  • Compatibility: Cricut Explore 3 and Maker 3
  • Mat : no
  • Size: 13 in x 3 feet roll (33 cm x 0.9 m) and 13 in x 12 feet roll (33 cm x 3.6 m)
  • Colours: Silver and Champagne (gold)
  • Price : depending on your location

Cricut Joy permanent Markers

Yes, I did say permanent markers. That, too, we had been waiting for a long time. Unfortunately, they will only be available for the Cricut Joy (sad) and only partially available in Europe (doubly sad for my European friends).

Is Cricut doing a test to see if it's worth offering for the Explore and Maker families and also outside the Americas? I can't say, but I very much hope so!

But if I can comfort my European friends, it is the most beautiful colors that are available in Europe: metallic!

AND combined with the black Smart Label, wow!! ?

Image courtesy of Cricut
  • Compatibility: Cricut Joy; Can be used on Smart Labels
  • Size: Sets of 3 markers (3 packs available)
  • Colours : Black, red, blue, green (available in Canada and US only) and Metallic available everywhere.
  • Price : depending on your location

Opaque gel pens

Can I do a little dance here? Yet another product we've all been waiting for!

Who doesn't love having the opportunity to draw on dark paper? The opaque gel pens will allow you to do this and give a really great look!

Image courtesy of Cricut

Like all pens and markers, two formats are available. One format for the Joy and another for the Explore and Maker families.

  • Compatibility: Cricut Joy, Explore Family, Maker Family; Can be used on Smart Labels
  • Format: Pack of 3 markers for the Joy or pack of 5 markers for the Explore and Maker.
  • Colours: see the image above, it's simpler 😉
  • Price : depending on your location

Glitter gel pens

These really already exist. Cricut was on the other hand aware of the "failures" that glitter gel pens sometimes had and therefore launches an improved version in more attractive colours, at least, in my opinion!

  • Compatibility: Cricut Joy, Explore Family, Maker Family; CANNOT be used on Smart Labels
  • Size: Pack of 10, 5 and 3 pens.
  • Colours: see the image above, it's simpler 😉
  • Price : depending on your location

Phew, that's it! So, what is your new favourite product?

The different types of felt and how to cut them with your Cricut

Did you know that you can cut felt with your Cricut Maker but also with the Explore family and even with the Cricut Joy? But be careful, there are some subtleties and that's what I'll explain.

There are several types of felt and they are not all created equal!

So I'll explain the differences and which Cricut with which blades can cut them. This post contains links to affiliated products for your convenience and at no additional cost to you. Click here to read my full disclosure policy.

Cricut felt

A material that is made by Cricut also means that it is a custom-designed material for Cricut machines.

Cricut felt comes in combo packs containing 12 x 12 sheets of different colours. Here is an example:

But it is thinner than regular acrylic felt (see next category).

Much thinner.

You can see the difference here:

Acrylic felt

This is the one you've probably seen the most.

It is easily found online and mostly in DIY stores and even in dollar stores. It is often identified as 100% polyester.

But this is the first time, in September 2022, that I see acrylic felt at Dollorama that is as thin as Cricut felt!

So I'm going to have to differentiate between "regular acrylic felt" and "thin acrylic felt". You'll see why below.

Felt made with a mixture of merino wool and rayon

Its name says it, it is real wool mixed with rayon. If you're ready to invest a bit of money in your project, this felt is really great! It has the thickness of acrylic but is softer.

On this, I'll take my friend Cori from Hey Let's Make Stuff word, because not only is this felt hard to find in Canada, but it's also expensive. See below under what conditions I recommend this felt.

Which Cricut to use to cut felt?

If we summarize, for the types of felt, we have:

  • Cricut felt
  • Regular acrylic felt
  • Thin acrylic felt
  • Wool-rayon felt

What is important to know is not which Cricut can cut which felt, but rather which felt can be cut with the fine point blade!!! The blade that comes with all Cricut.

All the felts mentioned above can be cut with the fine point blade, except the regular acrylic felt. It seems to be just too thick!

Even the Cricut felt with the parameter "Cricut felt" needed a second pass. (Hence the importance of always checking if the cut is complete before unloading the mat!)

And again, there were a few little threads left that were not cut.

It was the same for thin acrylic felt. I managed to cut it with the fine point blade, the "Cricut felt" setting and by adding a second pass.

Do you have a Maker?

If you have a Maker, you will be able to use the rotary blade.

The rotary blade? What's that?

Cricut rotary blade for fabric

It is a blade that only works in the Cricut Maker family and that allows you to cut fabric (and other materials).

👉 This is by far the best way to cut all the felts and my favourite way. It is also the only way to cut the regular acrylic felt.

If you are lost and want to know more about the different blades and tips and know what material you can cut with them, check out this post and download my free cheat sheet!

Which felt to choose?

Several things are to be considered as what machine you own, what type of project you want to make and also what colours you need!

Machine and blade

First, consider which Cricut machine you own.

Note that if you have the Maker you are lucky The rotary blade is included in the box. However, it is not included with the Maker 3.

👉 If you have the rotary blade, you can cut any felt.

👉 If you have a fine point blade only, you should avoid regular acrylic felt.

Colours

Acrylic felt, regular and thin, is rather limited in colour choices! Especially if you buy it at the dollar store.

The Cricut felt comes in packs of several colours that are, let's say, "more to my taste"!! 😅

The type of project

Some projects will be more suitable for thick felt. Like for example, rolled flowers.

If you only have the fine point blade and your project requires a thick felt, the purchase of wool-rayon felt would be recommended.

Which Cricut mat to use to cut felt?

You can use just about any mat to cut felt. The important thing is that there's good adhesion to prevent the felt from moving.

I have occasionally added a piece of tape to the corners to make sure the felt fits in place.

One thing is certain, felt will leave a residue on your mat. You can see here what the Cricut felt left. 😥

But know that you can wash your mat. Did you know? It's super simple! Watch this short video:

Unfortunately, acrylic felt (and especially dark colours) leaves even more residue than Cricut felt!!!

That's why I advise adding a backing to the felt!

I use the sticker paper sold to cover the books. Yes, the one that can be found at the dollar store. See how to do it here:

Felt projects

See these other projects made from felt

  • Felt crocus

Faux leather and Foil - How to make luggage tags

See how to make your own luggage identification tags using your Cricut and an underused material, faux leather.

Faux leather is not a material that we use often with our Cricut.

But did you know that only the fine point blade, the regular blade, is needed to cut it? So that means you can cut the faux leather whether you have a Cricut Maker, Explore or even a Joy!

So, in this project, I will use Cricut faux leather, Iron-on (for a special little trick) as well as the foil tip to make pretty identification tags for your luggage!

And I also have for you not one, but two free tag templates that you will find in NeliDesign's library. If you don't already have access to it, sign up below

How to make foil permanent on faux leather

If you have already tested foil on faux leather, you know that it does not hold up very well and rubs off as soon as you touch it. Well, know that I found a super easy trick to make foil permanent on faux leather.

Just use a waterproof spray for shoes and boots! Yes, yes! I do not know if you have that at home, but here in Quebec, it is rather required in particular to protect our winter boots!

This post contains links to affiliated products for your convenience and at no additional cost to you. Click here to read my full disclosure policy.

Required materials to make faux leather tags with foil

  • Cricut Maker, Explore or Joy!
  • Faux leather, the colour of your choice (I used the blue of the "Patina" sample)
  • Foil sheets, the colour of your choice (I used silver)
  • Foil tip for Maker or Explore (be careful, if you have the Joy, it's not the same foil tip as for the Maker and Explore. See here for the Tip of the Joy)
  • Iron-On (I used the Smart Iron-On Silver)
  • EasyPress (I used the EasyPress 3 - 9 x 9)
  • Mat for the EasyPress
  • Waterproof spray for shoes (always do a test according to the product used)
  • Free tags SVG cut file. Available in NeliDesign's library (see above)

See all the details and how to proceed in the video

Interested in the label "J'ai mon voyage" that you saw in the video?

You can also make it! The quote "J'ai mon voyage" is also available for free in the library.

Here are the materials used for the label "J'ai mon voyage"

  • Cricut Maker, Explore or Joy!
  • Faux leather, the colour of your choice (I used the blue of the "Patina" sample)
  • Iron-On (I used some leftovers and the back is the holographic Smart Iron-On)
  • EasyPress (I used the EasyPress 3 - 9 x 9)
  • Mat for the EasyPress
  • Free SVG for the tags and quote "J'ai mon voyage". Available in NeliDesign's library (see above)

Adhesive vinyl or heat transfer vinyl to make a wood sign?

When the time comes to embellish a wooden sign, we immediately think of adhesive vinyl. But do you know that it is possible to use heat transfer vinyl on wood?

In this post, I will explain the difference between the two techniques, under what conditions to use one or the other and even the pros and cons of using heat transfer vinyl on wood.

The difference between adhesive and heat transfer vinyl

First of all, it is important to understand the difference between adhesive vinyl and heat transfer vinyl.

Adhesive Vinyl

Adhesive vinyl is vinyl that has a backing to protect the back part of the vinyl where the glue is.

When we use this vinyl in the Cricut, it proceeds to cut the vinyl, without cutting this protective backing (we refer to this as a "kiss-cut"). We then remove the parts that we do not want (this is called weeding) to preserve only our design.

This vinyl can be applied to several hard surfaces and should ideally be transferred to these surfaces using transfer paper.

Heat transfer vinyl

Heat transfer vinyl is vinyl that requires heat to adhere to the blank. Cricut calls this material "Iron-On" and we also often hear HTV for Heat Transfer Vinyl.

This material is mainly used for fabric and requires a press (such as an iron, an EasyPress or an Autopress from Cricut) to make the transfer.

This vinyl is also on its own backing, but will not require transfer paper.

When loaded in the Cricut, it will also proceed to a "kiss-cut" to keep the backing intact. But it will be necessary to cut the image in "mirror" mode.

If you are confused, do not know how to differentiate these types of vinyl and are afraid of forgetting steps, download my free "No-mistake" cheat sheet below:

The pros of using heat transfer vinyl on wood

If heat transfer vinyl is made primarily for fabrics, then why use it on wood?

Here are some advantages of heat transfer vinyl, in my opinion:

  • It's thinner and more matte than adhesive vinyl. Its finish looks more like paint because it's going to "melt" in the wood. As a matter of fact, it is better NOT to put varnish before, otherwise, the Iron-On will have nothing to "cling" to the wood;
  • It is offered in many colours and styles (glitter, foil, etc.);
  • It is way easier to weed;
  • On the other hand, it is more expensive than adhesive vinyl except that if you add the price of the transfer paper that you must use with it, then the price becomes practically equivalent.

So, in summary, someone can save a lot of time by using heat transfer vinyl on wood.

The disadvantages of using heat transfer vinyl on wood

Obviously, who says "wood" says a surface that may not be perfectly flat.

Therefore, touch-ups will probably be required if the press plate does not touch perfectly the entire surface of the wood.

But warning! The other disadvantage is that you can't heat too much! If the heat transfer vinyl is overheated, the glue will overflow and create a halo effect around the design.

When is it best to use adhesive vinyl on wood?

When using adhesive vinyl on wood, it is highly recommended to put a varnish BEFORE applying vinyl.

The glue of the vinyl will have difficulty adhering to the bare grain of the wood.

As mentioned above, for heat transfer vinyl, it's the other way around. Heat transfer vinyl will have a lot of difficulties adhering to the wood if it is varnished or painted.

So, if you are thinking of putting your project outside, it is better to paint and varnish the wood and then use adhesive vinyl.

Do you need to add a coat of varnish AFTER applying the adhesive vinyl?

This is a controversial subject! Many factors come into play.

I can tell you that in my experience, adhesive vinyl does not need to be covered with an extra layer of varnish.

The only time I would tell you to do so is if your project is really very exposed to the elements of nature such as intense sun, snow, etc.

What if I put heat transfer vinyl and varnish the wood afterwards?

If you have already varnished wood, you may know that the recommendation is to sand between each layer of varnish because the varnish raises the grain of the wood.

So, if we apply the varnish after applying the heat transfer vinyl, the grain of the wood will rise, the varnish will seep under the vinyl and it will be impossible to sand without messing up the project.

What if I leave my heat transfer vinyl project without any wood finish outside?

It's possible! My BBQ sign project (in french) will be my second test for you!

The first test I did, two years ago, was to put this design in full sun so that it undergoes all the elements, summer and winter.

June 2020
August 2020
June 2022

After two years, the heat transfer vinyl is still very well in place. The wood grayed out, cracked, and the vinyl even "followed" the grain of the board.

The only downside: the vinyl yellowed a bit.

I can't wait to see what the black heat transfer vinyl of my BBQ sign will do.

Psst, I've made an English version of the design of the "BBQ Timer" just for you! It's available in my Cricut Access profile! You can also find it by following this link!

How to repurpose your wine bottles into etched glass lanterns

This tutorial will show you how to use your Cricut to turn repurposed wine bottles into beautiful etched glass lanterns!

If you love repurposing things as much as I do, you'll love making this project! Glass etching is also a cool permanent way to personalize items to give to friends and family.

How to etch glass with your Cricut

Etching glass is achieved by using etching cream. The Cricut will be used to make a stencil and hide certain parts of the glass.

If you want to know everything about glass etching, you can see this post that will tell you the do's and don'ts and everything you need to know.

How to make etched glass lanterns using wine bottles

This tutorial was originally part of the Cricut Craftfest 2022. This event featured over 30 workshops taught by expert Cricut crafters. If you'd like to know when the next Craftfest will be, join my newsletter and I'll make sure to send you an invite when the registrations open!

By signing up, you'll also get access to my free resources library full of SVG cut files!

This post contains some affiliate links for your convenience and at no extra cost to you. Click here to see my full disclosure policy.

What you'll need

  • Either a Cricut Maker or Explore
  • Standard grip mat
  • Weeding tool
  • Scraper
  • Adhesive vinyl (either permanent or removable, it doesn’t matter) I strongly suggest that you use one that you already have and don’t think you’ll use or don’t like the colour!
  • Transfer paper
  • Etching cream (I’m using Rust-Oleum Speciality Tub & Tile Etching Cream and therefore, the directions will be for Rust-Oleum, If you’re using something else, make sure you follow the directions of the brand.)
  • Foam brush
  • Parchment paper
  • Painter’s tape
  • Newspapers
  • Gloves
  • Security glasses
  • Paper towel
  • Goo Gone
  • Rubbing alcohol
  • Scissors
  • Wine bottle Fairy lights with Cork
  • Recycled wine bottles

Also want to have the SVG cut file?

The Flamingo file was included for everyone who registered for the Cricut Craftfest. This is another good reason not to miss the next Craftfest (see at the top of this post!)

If you still want to get the flamingo file and a winter bonus one, just follow this link.

Check out the complete tutorial here

How to share a project in Cricut Design Space

How to share a project in Cricut Design Space is a question that comes up super often! And I understand very well why! Cricut Design Space is constantly evolving and the latest updates have changed the way you share a project in Design Space.

This means that many of the tutorials you'll find on the Internet probably won't help you.

So here's how to share a file or project in Cricut Design Space version 7.8 and above (in effect since May 2022) and why sometimes it doesn't work!

**If you prefer to watch the video, scroll to the bottom of this post where I have a video that will show you exactly how to do it!

Conditions for sharing a project in Design Space

To be able to share a project in Design Space, it must be made of images AND fonts from Design Space only.

I can't share a project in Design Space

If you are unable to share a project in Design Space, your project contains a font or image that has been uploaded (if you prefer, imported into Design Space). Even if it's just a tiny part of your design, you won't be able to share it (actually see below to understand why you can share, but your friends can't open it).

You're wondering why it's made like this? Well, it's pretty simple: because of copyright and user licenses.

Imagine that you buy an SVG file. So only you have the license to use it.

Sharing it on Design Space would be like giving the file to others for free and would violate copyright laws and licenses. If a friend wants to have the same file or font as you, they have to get them and pay for the license.

Since it is impossible for Cricut to know where you got the fonts or files imported into Design Space, they cannot allow sharing.

So, if you want to share a project inside Design Space with a friend, it is essential that this project is designed only with images and fonts already available in Design Space.

Share a project in Cricut Design Space

There are now two ways to share a project in Design Space: you can simply share the project or you can make it public. I will show you the two methods.

How to share a project

This method allows you to share a project by sending, for example, the link to your friends. This means that only people who have the link will be able to access the project.

In Design Space, at the top right, click on "My Projects" and then click on the project you want to share to open the project window.

Click on the small arrow in the center on the left (note that you can also click on the same arrow directly on the project without opening the project window).

This window opens and you will have the options on the right to share your project. This is how only people in possession of the link will be able to see and use the shared project.

By clicking on "Copy link", the link will be saved to your clipboard. You can then paste the link wherever you want (using CTRL+V or CMD+V). For example in an email, a chat window, etc.

If we paste this link into a web browser, here's what happens:

Your browser will ask you to open the Design Space app. And if this app is not already installed, it will ask you to install it before.

Make a project public in Design Space

The second way to share a project in Design Space is to make it public in your profile.

To do this, simply toggle the "Make public in Design Space" bar as shown in the image below.

What happens then is that anyone searching in Design Space will be able to find your project.

To make it easier to find projects, you can edit your project details by clicking "Edit Project Details".

You will be able to rename your project, add a description and add tags. For your information, these tags are predefined by Design Space so you can't just write anything.

You can even add an image of your completed project.

How to find someone's profile

To find all the projects shared by a particular person, just search for that person. On the home page type the profile name (for example here "NeliDesign")

Search results will be displayed in all categories. You have to scroll to the bottom, in the "Community Members" category to see the profiles found.

By clicking on the profile, you will be able to see all the shared projects and even subscribe. (Usually, the button to subscribe is under the photo, but since I'm in my own profile, I see "edit profile" which you'll only see if you're also in your own profile!)

What if I succeed in sharing a project with imported images and fonts?

If you are an observer, you may have seen Mario's 1-UP mushroom in the photo of my profile above.

And yes, that's what gets very confusing. In theory, I can make projects accessible on my profile or share projects with uploaded or imported images or fonts. Design Space will let you do it... but once your friend opens the link, here's what will happen:

See at the bottom of the image above? There are no buttons and it says "This project cannot be made or customized". So sharing a project with imported images and fonts only serves to inspire people and show your project!

This post contains some affiliate links for your convenience and at no extra cost to you. Click here to read my full disclosure policy.

Sharing with and without Cricut Access

When you have the Cricut Access subscription, everything that has the small green "a" is included with the subscription. So it's important to understand what happens if you share a project.

For example, for this project, I used a free circle, but also a circle frame and a font that is part of the Cricut Access subscription.

If you share a project with someone who also has the Cricut Access subscription, then that person will see the same thing as you, as below.

On the other hand, a person who does NOT have Cricut Access will be charged for each element if they want to make your project. Here we see that the basic circle is free, but the other elements have a price that totals $8.38 (bottom left).

But note that once you buy them, the objects and fonts will be your forever and you'll be able to use them as many times as you want without needing to pay more.

I hope all this helps you demystify project sharing in Design Space. For more details, you can also watch the video!

Don't forget to share on Pinterest!

New Cricut Card Mat 2 x 2

If you envy the Cricut Joy for its card mat, today's announcement will delight you! Cricut launches its new card mat for the Explore and Maker series!

Disclosure: Thanks to Cricut for providing me with the product for review. I am not paid or sponsored by Cricut to write this post. All opinions are 100% my own and honest.

This post contains some affiliate links for your convenience and at no extra cost to you. Click here to read my full disclosure policy.

You may already know that the Cricut Joy has a special mat to quickly create cards.

This mat allows you to insert a card already folded to allow the Cricut Joy to make the cut only on the upper part.

This mat is super effective for quickly creating cards without cutting on beauty and quality!

Today, Cricut releases a version of this mat for the Explore and Maker series. 🥳

And the most interesting thing is that it will be possible to make four cards at once!!!

A new mat, but also new Cricut card sizes!

The width of the Cricut Joy limits the size of the cards that can be used. The new mat allows the use of larger cards .

Cricut now offers new card sizes in their most popular colours!

A new way to name Cricut card sizes

But before I show you the new sizes, I want to tell you about the new way that Cricut has to name the size of the cards.

I'm telling you, it is now way less complicated! Thank you Cricut!

If you've ever looked at the front of the card packaging and tried to find the same size in Design Space, you know what I'm talking about!

If in addition, you are like me and you try to memorize the dimensions, and the numbers come out of your head as soon as your eyes go from the box of cards to the screen. And then you have to look 20 more times because you are no longer 100% sure if it is the size of the card or envelope that you have seen! 😅 Well, you'll enjoy the new nomenclature!

Cricut, therefore, abandons the "standard" format named with the letter "A" (like A6, A8, etc. which was indicated in Design Space but not on the packaging!!) This format is also not really a standard! As a matter of fact, A6 in the United States is not the same size as A6 internationally. You can imagine the confusion!

So you will see on the card boxes AND on the new Cricut mat "R" and "S" followed by a number.

  • R=Rectangle and S=Square (because yes, Cricut now has square cards!) 😍
  • The smaller the number following the letter, the smaller the card!

Cricut card sizes

All cards (Cutaway or with Inserts) that work for the Joy will also work for the new card mat 2 x 2for the Explore and Maker.

At the opposite, two new formats will only work on the new Card Mat 2 x 2 (the largest cards, those that end in 40, the R40 and S40)

Image courtesy of Cricut

Do you have a big production of cards to make?

Whether for wedding invitations or thank you cards, Cricut has thought of those who want to produce cards in large quantities!

Not only does the new mat allow you to make 4 cards at a time, but you can also get a set of 5 mats. While one mat is in the machine, you can load and unload the others so you don't waste a second!

Cricut also now offers larger packages of cards in R10, R40 and S40 sizes. (Be careful, the quantity of cards is not the same depending on the format, but the price is identical!)

And guess what? The envelope included in the new Cricut R40 card size is large enough to include a 5" x 7" photo!

Using the new 2 x 2 card mat in Cricut Design Space

See all the details in this video or continue reading below.

How to use a "Ready-to-Make" card

Ready-to-make projects are super easy to use. In "projects" simply select the card you want to make and choose the size from the drop-down menu.

How to make more than one identical card

When the card you want to create is on your canvas, you don't have to click "Duplicate".

In the "Prepare" window (after pressing "Make it") you just have to increase the number of copies and Design Space will do the rest! See below.

How to make four different cards of the same size

If you want to make four different cards on the same mat, you can do it! But you will have to make sure that the cards are all the same size.

Also, as it is with regular cuts, Cricut Design Space separates mats by colours.

Four cards of different colours:

4 cards of different colours

Result: four different mat

Result: 4 different mat

So, for the cards to appear on a single mat, the bases of the cards (the "basic cut" layers will have to be the same colour on your canvas (even if in reality, the physical cards are not the same colour).

Here, all the "basic cut" layers have been put in a light blue colour:

All "basic cut" layers are set to light blue

Result: all the cards are on one mat.

Result: all the cards on one mat

It is also interesting to note that you can make different types of lines on the same mat. For example drawing on one card, foil on the other, etc.

On the other hand, note that if you want to make cards with inserts AND Cutaway cards, you will have to do it in two times since these two types of cards do not use the setting!

How to make four cards of different sizes

As soon as you have cards of different sizes, Cricut Design Space will separate the cards on different mats.

It is therefore not possible to make four cards of different sizes in one cut.

But you could do this by unloading and reloading the mat every time since it is possible to move the cards to the desired position.

To do this, you just have to hold down the left button of the mouse button and drag the card into another quadrant of the mat.

Make a card with the Cricut card mat 2 x 2

You will notice that these new card mats are thicker than regular mats. And when you add the folded card, it thickens even more!

It is therefore very important to move the star wheels BEFORE loading the mat in the Cricut. The wheels will have to be moved to the center so that they pass between the cards. You can place your mat in front of the wheels of your Cricut to make sure they will be in the right spot.

You will also have a warning in Design Space to remind you to move the wheels!

When inserting the card into the card mat, remove the two protective plastics. Make sure the card is flush to the top and the fold. You will notice that the card should arrive exactly at the right number (10, 20, 30 or 40) depending on its size.

Tip: The mat is very sticky during the first projects. Use the scraper to gently lift the cards from the mat when it has been cut!

Also, it is important to note that the Cricut card mat 2 x 2 can only be loaded in the Cricut by one side (the writing "Cricut" at the top) and cannot be inserted upside down like the regular Cricut mats.

Do I have to be a Cricut Access member to make cards?

There aren't many free "Ready-to-Make" cards in Design Space. This is a big inconvenience.

On the other hand, if you use the "Cutaway" cards you will easily be able to create your own cards without having to worry about having a "stencil" style design so as not to lose pieces.

If you have no idea what I'm talking about or want to know more about this technique, see this tutorial on "Cutaway" customizable cards.

This tutorial shows how to do it with the Cricut Joy. Now, with the new card mat 2 x 2, you will be able to do the same with your Cricut Explore or Maker series! 🙌

How to use Infusible Ink pens on a mug

This post will show you how to use Infusible Ink markers and pens to make a design on a mug. In addition, I'll explain the benefits of making a test mug before you make any project!

Last winter, I made this mug using Infusible Ink markers:

No tutorials, nothing, just for fun (we all need time off sometimes!!)

I still posted the photo on Facebook, because I wanted to show how the colours of the pen had not come out as I expected! At least, for the green!!!

I then had tons of questions! But it was this one that came up most often: "What material does it take to use the Infusible ink pens and how does it work?"

Make a test mug

After my experience above, I decided that making myself a nice pen holder with a test mug would be a great idea!

And good news for you, I have the file, completely ready in Design Space if you want to make the same thing!

This post contains some affiliate links for your convenience and at no extra cost to you. Click here to read my full disclosure policy.

Required materials

  • A cutting machine (I have the Cricut Maker, but the Explore Air can do the trick. The Joy can also be used but the pens will not be the same since the pens for the Maker and Explore do not work with the Joy)
  • Cricut Blue Mat (light grip)
  • Laser copy paper
  • Infusible Ink pens (the file was designed with these):
    • Box of 30 felt Infusible Ink 1.0
    • Neon 1.0
    • Watercolor Splash 0.4
    • Basics 0.4
  • Cricut Mug Press
  • Mug 12 oz
  • Heat-resistant tape
  • Easy Press Mat (optional)
  • Free Cricut file available directly in Design Space

How to make a mug using Infusible Ink pens

See all the steps and how to use the file available in Design Space by watching the video.

Don't forget to pin it on Pinterest!

New Cricut stencil film and how to avoid paint bleeds

Cricut has released a new stencil film and I'll tell you what are the differences from the original as well as how to avoid the paint from bleeding underneath.

This post contains some affiliate links for your convenience and at no extra cost to you. Click here to read my full disclosure policy.

Stencil vinyl or stencil film?
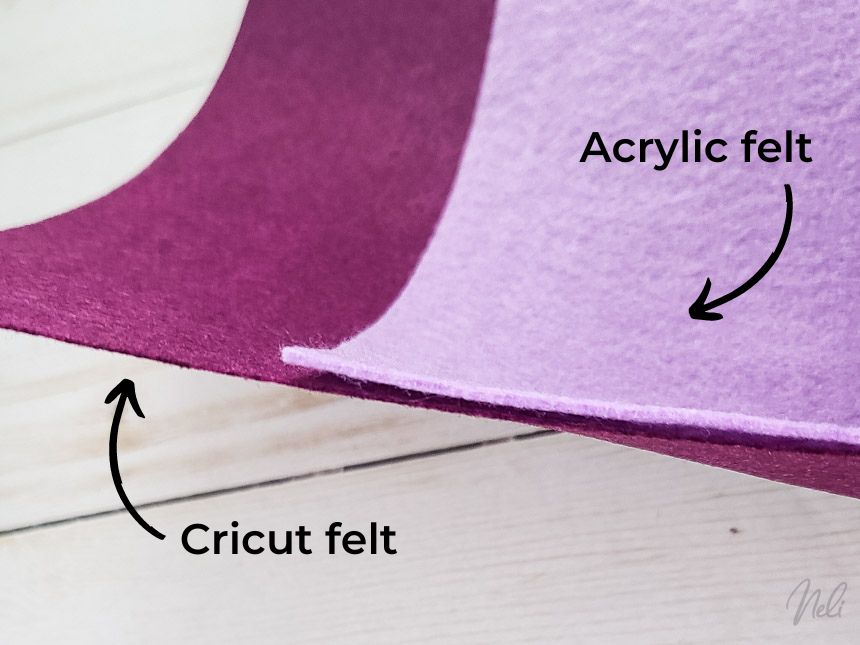
Cricut has a new stencil product that they called "Stencil Film" and not "Stencil vinyl" like the original.

Stencil vinyl (image Cricut.com)
New stencil film (image Cricut.com)

The main differences I noted are:

  • The new stencil film is available in several lengths and even in the "Smart" version to be used without a mat in the Cricut Joy, Explore 3 and Maker 3.
  • The new film has no grid printed on it.
  • The texture is completely different, with a much more matte finish (I explain below the impact of this, which is very positive!)
  • Cricut also indicates that it is an improved material that is more flexible and gives crisper lines.
At the bottom, the stencil vinyl. At the top, the new stencil film that is more matte and without a printed grid.

You can imagine that I had to try it!

I had already used the original stencil vinyl to create a wood sign in this tutorial.

You will see that, for this wood sign, I had used a layer of Mod Podge (FR) to prevent the paint from bleeding under the stencil.

But since Cricut seemed to say that this stencil was improved, I told myself that I was going to go all the way and that I would NOT put Mod Podge or sealant! 😱

First test with the new Cricut Stencil Film

For the first test, I took a piece of wood that I had on hand. I applied a stain but NO varnish.

Materials used

  • Wood plank
  • Black water-based stain
  • Sponge brush
  • Cotton cheese to wipe the stain
  • Cricut stencil film
  • Transfer tape
  • Painter's tape
  • White acrylic paint
  • Makeup sponge
  • SVG file "Bunny better have my coffee"

The cutting of the stencil was done wonderfully as well as the weeding. I would even say that the weeding was much easier since the new stencil film is more flexible.

To transfer the stencil to the wood plank, transfer paper must be used.

This is exactly where I had the hardest time in this tutorial.

The original stencil vinyl is so glossy that it stuck to the transfer paper in an incredible way. The new stencil film is more matte and grainy which makes the transfer paper extremely easy to remove! 🙌

Tip: See the small squares I made at the top of my stencil to help me when aligning my design on the wood plank. But, I know myself! So I decided to cover them with painter's tape before painting because if I don't...we all know what's going to happen!!!!

To paint, I used a makeup sponge for the application. I started with a very thin layer and added several layers.

But when I removed the stencil.....

Disappointment 😱

You can easily see the bleeds and infiltrations of paint. We can even see the stain that was removed by the stencil!

Conclusion: always varnish a project before applying a stencil.

But obviously, I'm not the type to give up so I took my brush and made some touch-ups.

I was lucky my stain was dark and my lettering pale otherwise, I wouldn't have been able to make the corrections!

Before corrections
After corrections

Finally, it's a beautiful result!

Note that if you pay close attention, you will notice that the white now looks a little "dirty". As a matter of fact, I also do not recommend adding a varnish AFTER painting with white paint! 🙈 What a mess!

I decided it gave it a vintage look and I was going to have to live with it! 😂

Second test with the new Cricut Stencil Film

After this failure, I decided to do a second test. After all, my wood plank has two sides!!

So I decided to use an SVG that could do for the rest of the year (so I don't have to store my wood plank at the bottom of a closet!!!)

Materials used

  • Wood plank
  • Black water-based stain
  • Mixwax polycrylic
  • Sponge brush
  • Cotton cheese to wipe the stain
  • Cricut stencil film
  • Transfer tape
  • Painter's tape
  • White acrylic paint
  • Makeup sponge
  • SVG file "Text me if you run out of toilet paper. I know you are on your phone " (note that this file is also available for free to Cricut Access members)

So this time, I proceeded in the same way except that I applied 3 coats of varnish on top of the stain, sanding lightly between each layer (following the manufacturer's recommendations).

I then applied the stencil film with a transfer paper.

Again, I didn't put an extra coat of varnish to act as a sealant (except in one place, I'll tell you more about it below!).

I'm here to test! So I tested!

So I applied 3 coats of white paint. The first one, very, very thin.

And the result?

Oh no, still some paint bleeds and infiltrations! 😱

But, we do see that the varnish has protected the stain. The back of the stencil is way less black than before.

I told you above that I had sealed the stencil with varnish in one place. Can you guess where in the picture below?

The difference is quite obvious! If I had sealed the whole stencil with a light coat of varnish before applying the paint, I wouldn't have had so many touch-ups to do!!!

Before touch-ups
After touch-ups

Note that the varnish will not crack or flake when removing the stencil. It doesn't have time to dry enough for that.

Well, it was for the good of science as they say! And above all to convince you of the usefulness of a sealant! I'm still very satisfied with my wood sign (and I find it particularly funny!)

Is it still necessary to put on a sealant before applying the paint?

In Cricut's defence, it is mentioned in the product description "For a tighter seal on heavily textured bases, use sealant before applying paint."

So there you have it, it's always better to read the instructions well before starting a project!!

So I always strongly recommend sealing the stencil with a varnish or Mod Podge (as in this tutorial) to avoid bleeds. It is one more step but it's not very long and ends up saving you a lot of time. Also giving you a much more satisfying project.

Other recommendations

  • Smart stencil film is much more difficult to transfer to the transfer paper (because of the thickness of its backing). So, if your wood plank is smaller and you have the option to cut on a mat, I recommend taking the regular stencil film, not the Smart one.
  • Always apply varnish or protective coat before applying a stencil to avoid lifting the paint or stain when removing the stencil.
  • Use small squares as guides to help align your design with your wood sign.

Feel free to pin it on Pinterest!

New Cricut presses

Cricut is launching several new presses today including the EasyPress 3, the Cricut Hat Press and especially the Autopress. See everything you need to know!

Disclosure: Thanks to Cricut for providing me with the product for review. I am not paid or sponsored by Cricut to write this post. All opinions are 100% my own and honest.

This post contains some affiliate links for your convenience and at no extra cost to you. Click here to read my full disclosure policy.

Cricut expands its press family by launching 3 new presses!

Image courtesy of Cricut

I have prepared specific posts for you on each product detailing everything you need to know. Click on the links for each product to learn more!

See all my articles on other new Cricut products

Cricut Hat Press

Image courtesy of Cricut

Cricut EasyPress 3

Cricut Autopress

Cricut Heat App

To see the price and details

Click on the different links to see the details and their price on the Cricut website

  • Cricut Hat Press
  • Cricut EasyPress 3
  • Cricut AutoPress

The new Cricut EasyPress 3

Wondering what is different with the new Cricut EasyPress 3? You will know everything by reading this article!

Cricut announces today the release of several products: the hat press, the Cricut Autopress and the new version of its EasyPress.

Disclosure: Thanks to Cricut for providing me with the product for review. I am not paid or sponsored by Cricut to write this post. All opinions are 100% my own and honest.

This post contains some affiliate links for your convenience and at no extra cost to you. Click here to read my full disclosure policy.

What's the difference?

The big difference is that the new EasyPress 3 has Bluetooth connectivity.

Yes, that's it!

Image courtesy of Cricut

The idea is to be able to use it with the new free Cricut Heat app instead of always having to search the Internet in the Cricut Heat Guide to get the temperature and time settings.

Click here to learn more about the Cricut Heat app.

But basically, the app allows you to select your base material, your heat transfer material and send, in one click, the temperature and duration to your Easy Press 3.

Image courtesy of Cricut

Can the EasyPress 3 work without the Cricut Heat app?

The app is very convenient for beginners to follow what you need to do, step by step. But once your EasyPress 3 is registered, the use of the application is completely optional.

You can use the EasyPress 3 without the help of the app. In fact, it can work in the same way as the EasyPress 2 (it has the same setting buttons).

Image courtesy of Cricut

A small downside though! You MUST have the application to make the FIRST registration of the EasyPress 3. So, you absolutely need to have a cell phone (or access to a cell phone) to be able to activate it the first time.

Image courtesy of Cricut

This application is completely free and can be downloaded from Google Play or Apple App Store and is available in several languages.

Click here for more details on the Cricut Heat app.

Should I change my EasyPress 2 for an EasyPress 3?

Aside from its Zen blue colour and Bluetooth functionality, the EasyPress 3 is identical to the EasyPress 2!

The Easy Press 3 is rather aimed at those who have a Cricut and who have never dared to try a heat transfer application, for fear of making a misstep.

With the Cricut Heat app, beginners will be guided step by step through their new challenge and will be able to create with confidence.

Characteristics

The Cricut EasyPress 3 is available only in Zen blue and in 12" x 10" and 9" x 9" format.

Image courtesy of Cricut

Availability

The new Cricut EasyPress 3 will be available for purchase online from March 13, 2022, for Canada and the United States.

In Europe, it will be necessary to wait until May 1, 2022.

See all my posts on other new Cricut products

  • Cricut Hat Press
  • Cricut EasyPress 3
  • Cricut Autopress
  • Cricut Heat App

To see the price and details

Click on the different links to see the details and their price on the Cricut website

  • Cricut Hat Press
  • Cricut EasyPress 3
  • Cricut AutoPress

Questions?

If you have any questions about Cricut's new hat press, feel free to leave them with me below, I will be happy to answer.

New Cricut hat press

If you like caps and hats, Cricut's new hat press will open up a whole new world of possibilities for you!

Disclosure: Thanks to Cricut for providing me with the product for review. I am not paid or sponsored by Cricut to write this post. All opinions are 100% my own and honest. This post contains some affiliate links for your convenience and at no extra cost to you. Click here to read my full disclosure policy.

Customizing hats and caps has just become much easier thanks to Cricut's new hat press.

Image courtesy of Cricut

The new Hat Press from Cricut has a curved plate specially designed for the customization of hats.

Image courtesy of Cricut

It also comes with a shape allowing a perfect press on a hat.

**Allergies! This form is made from walnut shells. So you will see several warnings on the Hat Press page, box, packaging, etc. Please consult your doctor if you have walnut allergies and want to use this product.

Image courtesy of Cricut

The operation of the press is similar to the Easy Press mini and therefore has 3 predetermined temperature settings.

Image courtesy of Cricut

The press can therefore heat up to 400°F (205°C) allowing it to work with heat transfer vinyl (such as Iron-on), Infusible Ink and sublimation products.

Image courtesy of Cricut

Did you say Infusible Ink and sublimation?

If you are familiar with Infusible Ink or sublimation, you will know that you need a fabric with a very high percentage of polyester.

Caps made of polyester are not always easy to find! That's why Cricut also offers you two types of caps specially designed for Ink Infusible transfer and sublimation: the trucker cap and the gray baseball cap.

Image courtesy of Cricut

Types of hats and caps

Although Cricut offers its own caps, you can use a wide variety of caps and hats. The main thing is to make sure that the hat fits well on the shape and that there are no bumps or air bubbles between the hat and the shape.

Image courtesy of Cricut

The new Cricut Heat app

With the launch of this new press and the new Easy Press 3, Cricut is also launching the Cricut Heat application. This app is completely free and can be downloaded from Google Play or Apple App Store.

Before I get into the details, I want to tell you that you MUST have the app to make the FIRST activation of the hat press. So, you absolutely need to have a cell phone (or access to a cell phone) to be able to activate it the first time.

Image courtesy of Cricut

The app is very convenient for beginners to follow what you need to do, step by step. Note that once your Hat Press is registered, the use of the application is completely optional.

Click here for more details on the Cricut Heat app.

To see the price and details

Click on the different links to see the details and their price on the Cricut website

  • Cricut Hat Press
  • Cricut EasyPress 3
  • Cricut AutoPress

Availability

The new Cricut Hat Press will be available for purchase online starting March 13, 2022 for Canada and the United States.

In Europe, it will be necessary to wait until May 1, 2022.

See all my posts on other new Cricut products

  • Cricut Hat Press
  • Cricut EasyPress 3
  • Cricut Autopress
  • Cricut Heat App

Questions?

If you have any questions about Cricut's new hat press, feel free to leave them with me below, I will be happy to answer.

The new Cricut Autopress

Cricut revolutionizes the world of presses with its new professional Cricut Autopress. See everything you need to know and especially if it's really for you!

Disclosure: Thanks to Cricut for providing me with the product for review. I am not paid or sponsored by Cricut to write this post. All opinions are 100% my own and honest.

This post contains some affiliate links for your convenience and at no extra cost to you. Click here to read my full disclosure policy.

The new Cricut Autopress is the most sophisticated professional press.

Image courtesy of Cricut

Seriously, I've heard horror stories about some other companies' big presses. Burns, impossible to close due to lack of strength, bad pressure, wasted projects, etc.

I never dared to buy one. It scared me!

Cricut has been studying these presses for years and came up with a press that solves all problems and is super easy to use:

  • The buttons to adjust the temperature and time are on a movable control panel (length of 39" (1 m.) to be accessible at all times and avoid burns.
Image courtesy of Cricut
  • The press closes with two fingers and opens automatically at the end of its cycle.
Image courtesy of Cricut
  • No pressure to adjust. The press automatically determines the pressure according to the thickness of your project. (It can even press materials, such as wood, up to 2" (5 cm) thick.)
  • The plate is larger (15" x 12") than the larger EasyPress
Image courtesy of Cricut
  • The removable mat allows the project to be positioned outside the press to once again avoid burns.
  • BONUS: once closed, it can be stored vertically.

How to figure out temperature and time

All settings for Cricut materials can be found in the Cricut Heat Guide.

If you use products from a brand other than Cricut, you won't find them in the Heat Guide. Tests are also conducted for non-Cricut heat transfer materials, but due to the wide variety of materials and different formulas on the market, Cricut is not able to give exact settings.

When working with custom heat transfers, keep in mind that Cricut Autopres works differently than other traditional heat presses.

Cricut Autopress automatically applies consistent pressure for projects up to 2 inches thick. This makes transfers easy and repeatable. This also means that if you use custom heat transfers, the settings for the Cricut Autopress will be different from those recommended by the manufacturer.

So, when working with non-Cricut manufacturer settings, Cricut recommends increasing the temperature by approximately 20% and increasing the length of the pressing time to roughly 30 – 60 seconds.

Who is the Cricut Autopress for?

The Cricut Autopress is not for everyone. If you make projects requiring a press only a few times a month, this press is not for you.

Rather, it is aimed at people who are making projects in bulk and who want to:

  • do more in less time;
  • ease of use;
  • batch production;
  • transfer very large designs;
  • press thick materials without having to guess the pressure.
Image courtesy of Cricut

Availability

The Cricut Autopress will be available for online purchasestarting May 15, 2022 in Canada and the United States. For Europe, May 1st 2022.

See all my posts on other new Cricut products

  • Cricut Hat Press
  • Cricut EasyPress 3
  • Cricut Autopress
  • Cricut Heat App

To see the price and details

Click on the different links to see the details and their price on the Cricut website

  • Cricut Hat Press
  • Cricut EasyPress 3
  • Cricut AutoPress

Questions?

If you have any questions about the new Cricut Autopress, feel free to leave them below, I will be happy to answer you.

Cricut Heat App

Cricut is launching its new Cricut Heat application that works with the new EasyPress 3 and Cricut Hat Press.

Disclosure: Thanks to Cricut for providing me with the product for review. I am not paid or sponsored by Cricut to write this post. All opinions are 100% my own and honest.

This post contains some affiliate links for your convenience and at no extra cost to you. Click here to read my full disclosure policy.

The new Cricut Heat app is available for free in 12 languages in the Apple Store and Google Play Store.

It is specially designed to connect to the EasyPress 3 and the new Cricut Hat Press since they are the only two Cricut presses with Bluetooth connectivity.

How does it work?

As with the Cricut Heat Guide (see below), you will have to select the press, your heat-transfer material and your base material.

Then the app will NOT just tell you the required temperature and time, it will send the information directly to your press!

It will then guide you, step by step, on everything you have to do. Preheating, pressing, cold or warm peel and even care instructions!

It is very important to note that the EasyPress 3 and the Cricut Hat Press can be used without the app. But the app will be absolutely required for the first activation and registration of your press.

After that, you'll be able to decide if you want to use the app or not.

But if you are a beginner and you do not feel comfortable with all the steps that you need to take to press a project (or if you often have your head in the clouds like me!🙈) the app can be a super assistant in the success of your projects!

What will happen to the Cricut Heat Guide?

If you're familiar with the Cricut Heat Guide, you know how useful it can be.

Be aware that it will not disappear and will always be available (and even updated) for presses that do not have Bluetooth connectivity. This includes the new Cricut Autopress!

So it's clear for you, I made you a small summary table!

Cricut Heat AppCricut Heat Guide
EasyPress 3EasyPress
Hat PressEasyPress 2
EasyPress mini
Mug Press
Autopress

Availability

The Cricut Heat app will be available in 12 languages for free in the Apple Store and Google Play Store starting March 13, 2022, for Canada and the United States and May 1 for Europe.

See all my posts on other new Cricut products

  • Cricut Hat Press
  • Cricut EasyPress 3
  • Cricut Autopress
  • Cricut Heat App

To see the price and details

Click on the different links to see the details and their price on the Cricut website

  • Cricut Hat Press
  • Cricut EasyPress 3
  • Cricut AutoPress

Questions?

If you have any questions about the new Cricut Heat application, feel free to leave them with me below, I will be happy to answer.

New Cricut Joy Cutaway cards

Cricut has just released new Cutaway cards for the Cricut Joy. I'll explain all the differences with the original sets of cards and what makes the new ones even better!

Disclosure: Thanks to Cricut for providing me with the product for review. I am not paid or sponsored by Cricut to write this post. All opinions are 100% my own and honest.

The Cricut Joy is the smallest of the Cricut machines and specializes in quick and easy creation of cards, labels, etc.

For more details on the Cricut Joy and the comparison with other Cricut machines, see my post on Cricut Essentials according to what you want to make.

New product

This post contains some affiliate links for your convenience and at no extra cost to you. I get commissions for purchases made through links in this post. Click here to see my full disclosure policy.

Although it is already possible to make cards with the specialized mat of the Cricut Joy, Cricut is today launching a new line of cards: Cutaway cards!

You will tell me that this is not new! But yes, it is! These cards have something special that makes them much more efficient, practical and pretty (in my opinion!) than the original version.

Let me explain!

To make cards with the Cricut Joy

Whether with the original model of cards (cards with inserts) or the new model (Cutaway cards) the following steps are the same.

Thus, to quickly make cards with the Cricut Joy, one must use the special card mat as well as the card sets sold by Cricut.

The principle is easy: simply insert the cards into the mat so that the Cricut Joy cuts only the top of the card.

For cards with inserts

The original model of cards for the Cricut Joy requires small slots in the corners to be able to add the insert (the coloured cardstock on the right in the photo below).

Also, for cards with inserts, it is necessary to make sure that the image is in a "stencil" style to avoid losing certain pieces during cutting.

For example, in the photo below, the center of the "e" has been connected to the rest of the card.

The new Cutaway cards

The main difference with the new Cutaway cards is that they do not need the corners for inserts and stencil style is not required either!

In fact, you can use virtually any image to make your own cards! Like this one:

How does it work?

The new Cutaway cards are... Adhesive! It has an adhesive backing like this:

The card sets come with "backers" (what were called "inserts" in the original model).

The idea is to remove the back of the card to reveal the sticky part. Then we apply the "backer" (the beautiful side facing the adhesive).

By inserting the card on the mat, the Cricut Joy will then cut the design as it would have done for the original card sets.

The difference is that it will be necessary to weed the cardstock to reveal the "backer". Thus, all the centers of the letters and the other small floating pieces will remain well in place! 🙌

You think there will be glue left on your card? No no no!

The adhesive combined with the "backer" are specially designed so that the glue is also removed with the weeded pieces! Magic!

Materials and tools required

  • Cricut Joy
  • Card mat for Cricut Joy
  • Set of Cutaway cards

Access the cards templates in French!

If you are a Cricut Access member, you will also have access to several card templates. I also created some cards in French!

If you don't have Cricut Access, you can totally create your own cards!

Questions

Is the card mat included when buying the Cricut Joy?

No, the mat must be purchased separately.

Do I have to have Cricut Access to make cards?

Templates are available in Cricut Access. Simply search for "cutaway". On the other hand, you can also easily create your own projects! Watch the video to learn more!

Next Page »

Hi! I'm Natalie

I help crafters create with confidence, useful DIY and craft projects with their Cricut.

More about me

Popular

  • Cricut Maker 4 and Cricut Explore 4: Everything you need to know about these new cutting machines!
  • Cricut's Value materials
  • How to engrave on a curved surface with the xTool S1 laser cutter
  • Difference between xTool M1 and xTool S1 laser cutters

Seasonal

  • Cricut printable Iron-on for light and dark fabrics - everything you need to know
  • How to cut felt with the Cricut Joy and Joy Xtra
  • Using Infusible Ink on cotton
  • Buying a Cricut: where to find the best price

Footer

↑ back to top

Informations

  • Privacy Policy
  • Disclosure
  • CCPA
  • Do not sell my personnal information

Newsletter

  • Sign up for emails and updates

Resources

  • Access the library
  • Discount codes
  • About NeliDesign
  • Contact
  • Français

.

As an Amazon Associate I earn from qualifying purchases.

Copyright © NeliDesign

Manage Cookie Consent
We use technologies like cookies to store and/or access device information. We do this to improve browsing experience and to show (non-) personalized ads. Consenting to these technologies will allow us to process data such as browsing behavior or unique IDs on this site. Not consenting or withdrawing consent, may adversely affect certain features and functions.
Functional Always active
The technical storage or access is strictly necessary for the legitimate purpose of enabling the use of a specific service explicitly requested by the subscriber or user, or for the sole purpose of carrying out the transmission of a communication over an electronic communications network.
Preferences
The technical storage or access is necessary for the legitimate purpose of storing preferences that are not requested by the subscriber or user.
Statistics
The technical storage or access that is used exclusively for statistical purposes. The technical storage or access that is used exclusively for anonymous statistical purposes. Without a subpoena, voluntary compliance on the part of your Internet Service Provider, or additional records from a third party, information stored or retrieved for this purpose alone cannot usually be used to identify you.
Marketing
The technical storage or access is required to create user profiles to send advertising, or to track the user on a website or across several websites for similar marketing purposes.
Manage options Manage services Manage {vendor_count} vendors Read more about these purposes
View preferences
{title} {title} {title}
Manage Cookie Consent
To provide the best experiences, we use technologies like cookies to store and/or access device information. Consenting to these technologies will allow us to process data such as browsing behavior or unique IDs on this site. Not consenting or withdrawing consent, may adversely affect certain features and functions.
Functional Always active
The technical storage or access is strictly necessary for the legitimate purpose of enabling the use of a specific service explicitly requested by the subscriber or user, or for the sole purpose of carrying out the transmission of a communication over an electronic communications network.
Preferences
The technical storage or access is necessary for the legitimate purpose of storing preferences that are not requested by the subscriber or user.
Statistics
The technical storage or access that is used exclusively for statistical purposes. The technical storage or access that is used exclusively for anonymous statistical purposes. Without a subpoena, voluntary compliance on the part of your Internet Service Provider, or additional records from a third party, information stored or retrieved for this purpose alone cannot usually be used to identify you.
Marketing
The technical storage or access is required to create user profiles to send advertising, or to track the user on a website or across several websites for similar marketing purposes.
Manage options Manage services Manage {vendor_count} vendors Read more about these purposes
View preferences
{title} {title} {title}