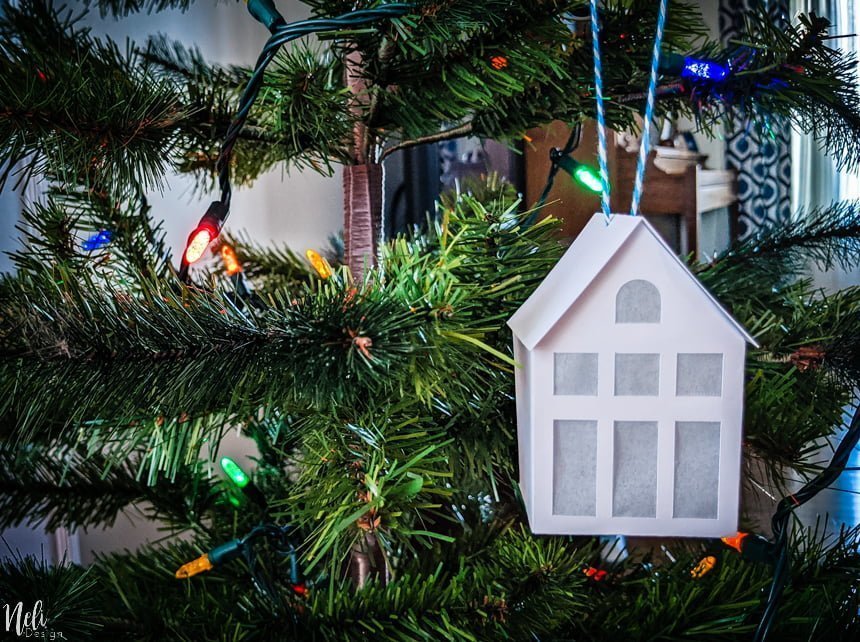
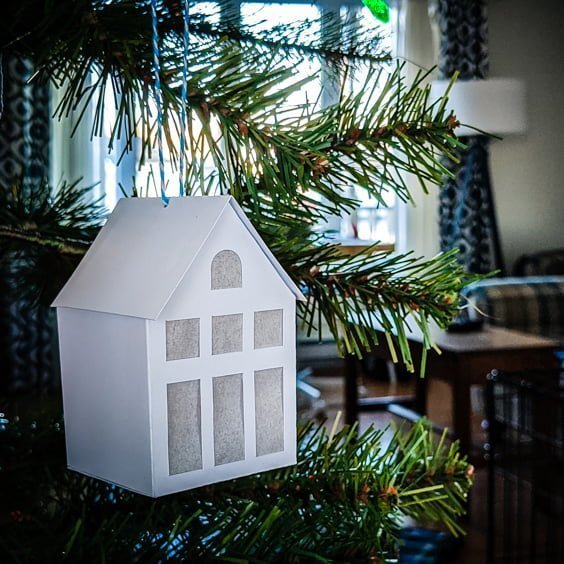
It's the second day of the 12 Crafts of Christmas Challenge and today, I will show you how to make these IKEA-inspired house ornaments in cardstock.
From December 1st to Christmas, I will make one video every 2 days.
For this 12 Crafts of Christmas Challenge, I will show you how to make original projects and I will even include free SVG files to download.
There will also be special projects using the perforation blade and the wavy blade. I can't wait to show them to you.
IKEA-inspired ornaments
Who doesn't love IKEA!!! Today, I will show you how to make these pretty houses to decorate your Christmas tree or just your home. Although we love IKEA for its inexpensive solutions, these little houses will cost you a fraction of the price.
Let's do it! This post contains some affiliate links for your convenience and at no extra cost to you. Click here to see my full disclosure policy.
Hardware and tools needed to make the Christmas house ornaments
- Cricut Maker (the one I have) or Cricut Explore Air 2
- Scoring wheel (for the Maker) or the Stylus for the Explore Air 2
- White cardstock
- White Parchment paper
- Christmas twine
- Spray adhesive
- Free SVG file available in my resources library by subscribing below.
How to make the Christmas house ornaments
Watch this video to get the full instructions of follow the steps below.
Step by step Christmas house ornament
In Cricut Design Space
First of all, in Cricut Design Space, you're going to click on "upload".

Then, on "upload image".

Find the SVG file on your computer. This is why it's important to organize them when you download them from my free library so you always remember where to find them!
Click "save".

Select the file (don't mind the image, I have 3 times the file, but you'll only have it once!!!) and click "insert images".

The first thing to do, while everything is selected is to click "Ungroup".

This will leave you with 3 groups that I've created to help you figure out what to attach together. But before attaching, will need to change the lines to score.
When you see a line in the layer panel (as opposed to a shape) select it (you can use "shift" to select all of them at the same time).

In the "linetype" dropdown menu, choose "score".

The score lines are now dashed lines. Now, select the first group and click "Attach" so that the score lines stay in place.
Also, select the second group and do the same thing. You won't need to do it for the third group since there are no score lines in it.

Click on "Make it". I changed the material size because I had Letter size cardstock.

Select the material you have and just press the Cricut button.
How to make the house ornament
When removing the cardstock from the mat, remember to fold the mat, not the cardstock.

Using a leftover of the cardstock, apply glue between the doors and windows and add the pieces of parchment paper.


Fold along the score lines.

Close the four sides of the house. You'll need to hold it that way for a bit so it stays in place.

Add the twine to the roof and make a knot so it's on the inside of the roof.

Add glue to the house where the roof will go.

I'm using my spatula to press on the flaps that hold the roof in place to make sure it's properly glued.

Last step, adding glue to close the bottom! and that's it!
They are really cute and will make a good addition to my tree... once I get around to decorate it! Maybe that's why this little puppy doesn't seem too impressed!!! 😄

If you have any questions or comments, or even some suggestions for a next craft, don't hesitate to write to me below!
The 12 Christmas Crafts Challenge
Recap
Day 1
Day 2

Day 3

Day 4
Day 5

Day 6

Day 7
Day 8

Day 9

Day 10
Day 11

Day 12
Please Pin it if you liked it!