See how two easy techniques can make metal engraving stand out with your Cricut Maker
You have the engraving tip of the Cricut Maker but do not dare to engrave metal because you think you won't get a nice result?
I understand your concern!
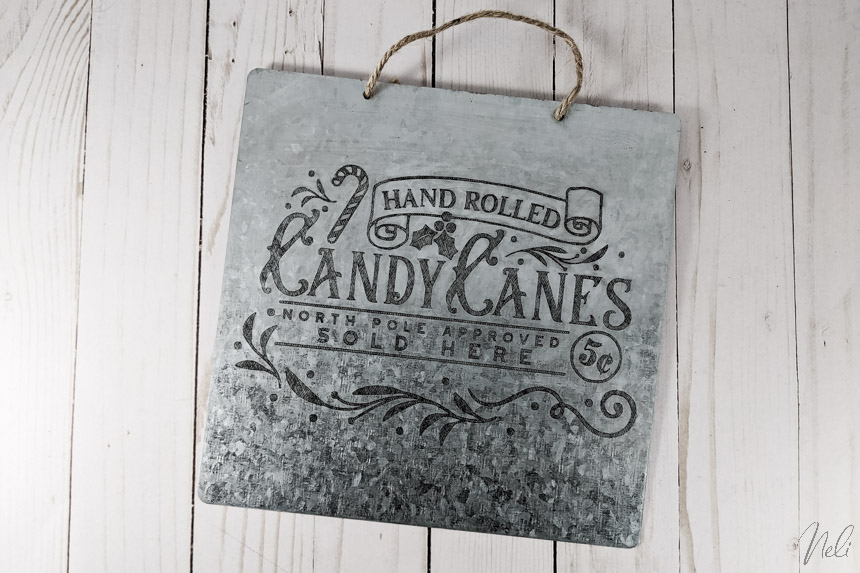
The best trick to enhance metal engraving made with the tip of the Cricut Maker is to use these two combined techniques: fill in the letters or drawings with hatches and use a product to darken the design.
This tutorial will show you both techniques so that you too can make an engraving just like this one.
But first, here's what you need. This article contains links to affiliated products for your convenience and at no additional cost to you. Click here to read my full disclosure policy.
Required materials
Several kinds of metal can be used. Here are a few:
- Galvanized aluminum sheets (this is what I use in this tutorial and I found them in the liquidation section at Michaels)
- Cricut Aluminum sheets
Tools required
- Cricut Maker (it can be done with the Explore Air but it takes a tool that is not Cricut brand. Be careful not to cancel your warranty if you use it.)
- Maker's engraving tip (and Quick Swap base)
- Purple mat
- Masking Tape
SVG Files
The SVG files used in this tutorial come from this Bundle made by Caluya Design.
How to fill with hatches to make the engraving stand out
To fill your design with hatches you can either use a drawing software like Silhouette Studio Business Edition (as I did for engraving the plastic for this LED lamp) or use my SVG files.
I have indeed created 2 SVG files, a file of hatches spaced at 0.020 inches with an angle of 60 degrees and another with the same spacing but at 120 degrees.
You can find these files in NeliDesign's free library. To get access, sign up for my newsletter below:
You can see in the following video, all the details on how to use these files.
I chose 0.02" after doing several tests with different spacings and hatching. Here's a preview, but you can see it in detail in the video.

How to darken the design to make the engraving stand out even more
There are several products to darken the design and make your metal engraving stand out. My friend Jen, from "Well Crafted Studio" tested a lot of them. She even developed her own technique for engraving aluminum flashing. Go take a look at it!
Me, I would have loved to use Gilders Paste, but being in Canada, I could not find any (at least, not at a reasonable price!).
Jen also told me about Ranger's Vintaj Patinas and I promise to try them next time.
Also, did you know that you can use Infusible Ink (pencils or transfer sheets) on Cricut Aluminium sheets? I think that sounds very interesting. Another project to add to my enormous list!!!
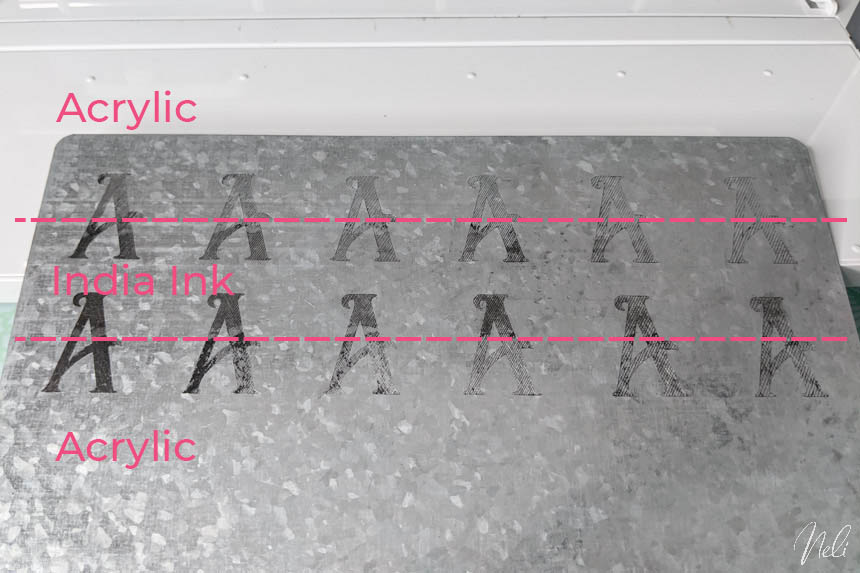
All this to say that I finally decided to try 2 products that I had on hand to darken my design:
- China Ink (or India Ink)
- Acrylic paint
You can see in detail in the video that China Ink is much more effective and that the acrylic does work but the result is more subtle.
I hope it inspired you to try your own engraving!
If so, come and show them to me in my Facebook group. It's always nice to see your projects!

