NeliDesign

menu icon
go to homepage
  • Projects
    • Cricut Help
    • Home Decor
    • Crafts
    • Organization
  • Materials
    • Adhesive Vinyl
    • Heat transfer vinyl
    • Foil
    • Infusible Ink
    • Paper and Cardstock
    • Pens and Markers
    • Other
  • Free cut files
    • See the free cut files
    • Get the free cut files
      • Get a password
      • Access the Library
  • Shop
  • Français
search icon
Homepage link
  • Projects
    • Cricut Help
    • Home Decor
    • Crafts
    • Organization
  • Materials
    • Adhesive Vinyl
    • Heat transfer vinyl
    • Foil
    • Infusible Ink
    • Paper and Cardstock
    • Pens and Markers
    • Other
  • Free cut files
    • See the free cut files
    • Get the free cut files
      • Get a password
      • Access the Library
  • Shop
  • Français
×
Home » Blog » Home Decor

Easter decoration and new offset feature from Design Space

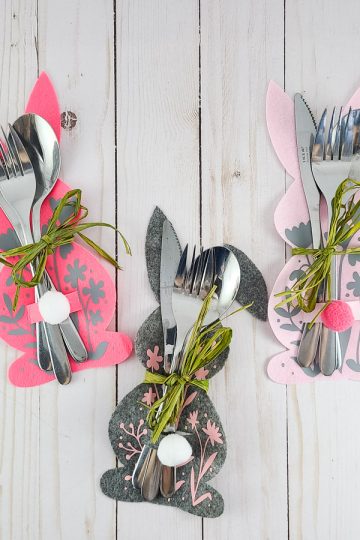
In addition to showing you the details of Cricut Design Space's new "offset" feature, I will show you how to create an original Easter decoration using the new feature.

We've been waiting for it for a long time! There were a lot of tutorials on the internet that showed how to do it outside of Design Space. But finally, with just a few clicks, we can add an offset to our project, directly inside Design Space!!

A little caveat though. This feature is currently in Beta which means it is being tested. So you may not have access to it yet or if you do, it may be doing some strange things. Don't hesitate to report any bug to Cricut! They need it to know what to improve!

It is not a tool that is very difficult to understand. I'll show you the basics, but I'll also show you how to make this original project, step by step using images found in Design Space.

Easter frame made with the offset function of Design Space.

If you like 3D crafts, join my 3D Papercraft Challenge, it's free for a limited time!

Click here for more information.


The new offset tool

"Offset" allows you to add an offset layer to an image, a text, an object.

By clicking on the new button in the top menu bar, you'll have the option to change the distance as well as the shape of the corners. Note that you need to select an object to access the "offset" tool.

In the image below, you can see the result when the round corner option is selected.

If the option is changed to square corners, here's what happens.

As for the distance bar, if you drag it to the left of the center, you will have an inset instead of an offset. It is also when the Beta version has a little more difficulty.

You can also choose to enter the offset dimension yourself. At this point, to see the preview, you'll have to click in the offset box before clicking "Apply."

By selecting 2 or more objects, a new option appears: "Weld offsets".

When this option is checked, the result of the offset will be welded into a single layer even if the original objects were not welded.

If the "Weld Offsets" option is not checked, each offset will be individual. This is also true for the text where each letter will be on its own layer.

This can be useful, for example, if you have multiple images and want to add an offset all at once but still want to keep each offset on its individual layer.

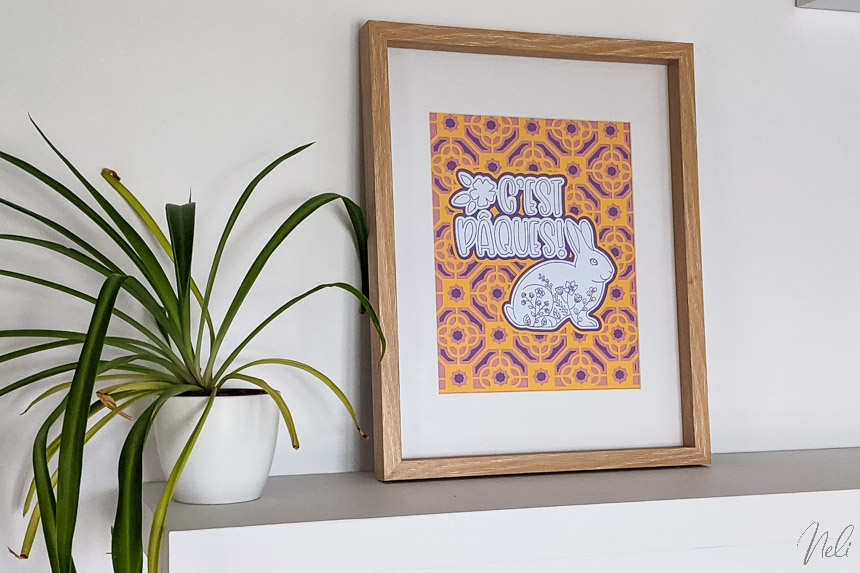
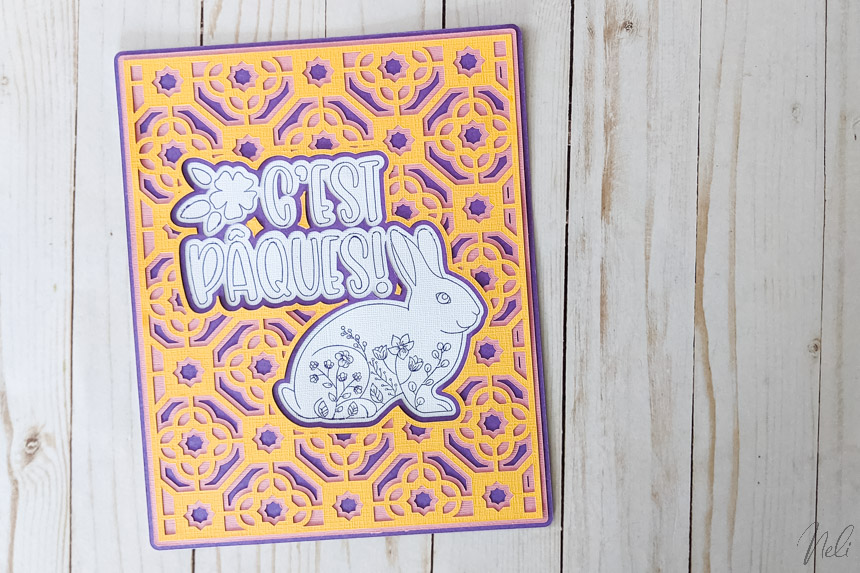
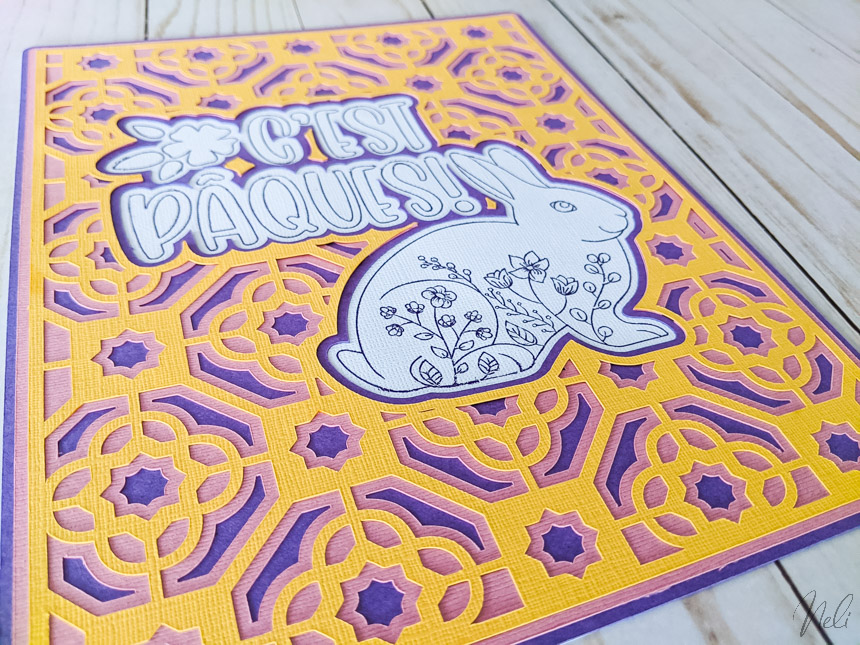
Easter decoration with the "offset" tool

Instead of just showing you a simple sticker project, I decided to do a slightly more complex project.

So I'm going to show you how to make a cute Easter decoration using only those images available in Design Space and the "offset" function.

These three images will become this pretty decoration that you can put in a frame or just leave as-is:

3D Easter decoration made with the offset function of Design Space

Design Space files used

Use the number in brackets, including the hashtag, in the search bar in the "images" section of Design Space to find the image. Only the rabbit needs a subscription to Cricut Access, but I also suggest a free one in the video.

  • Pattern (#M3E217)
  • Bunny (#M257C06EC)
  • Text "C'est Pâques!" (#M1B9DDCBE)

This post contains some affiliate links for your convenience and at no extra cost to you. I get commissions for purchases made through links in this post. Click here to see my full disclosure policy.

Materials and tools required

  • Cutting machine (I have the Cricut Maker, but the Explore Air2 can do the trick. The Joy also if you limit the project to 4.5 inches wide)
  • coloured cardstock
  • Glue (I love my glue pen for small details)
  • Foil tip
  • Foil transfer sheets - Jewel
  • Cricut Access subscription (optional)

It's still not a simple tutorial and I'll be honest, I had to test at least 3 times the steps in Design Space before I had anything coherent to present to you! So don't worry if you find it complicated and if you have to click "undo" several times!

The idea is really to show you how far you can go with the "offset" function besides making stickers!

So I invite you to watch the following video to see all the steps that would not be well represented in simple text and images!

In the video, I scale the pattern so that it can fit into an 8" x 10" frame. I offset it twice from 0.1". This means that every time I offset it, 0.1" is added to the left and 0.1" is added to the right. So, after 2 offsets, the width will be 8.4 inches.

For the final width to be 8 inches, I subtracted 0.4" from 8". Thus, the starting width of the pattern will be 7.6 inches! Whoa, I know, it's a little confusing!!! 😉

Can foil transfer sheets be place side by side?

The foil transfer sheets I wanted to use (purple) are only available in 4" x 6". So I placed 2 sheets side by side on my cardstock. I wasn't sure of the result! But I'm here to do tests for you!

Two foil transfer sheets placed side by side.

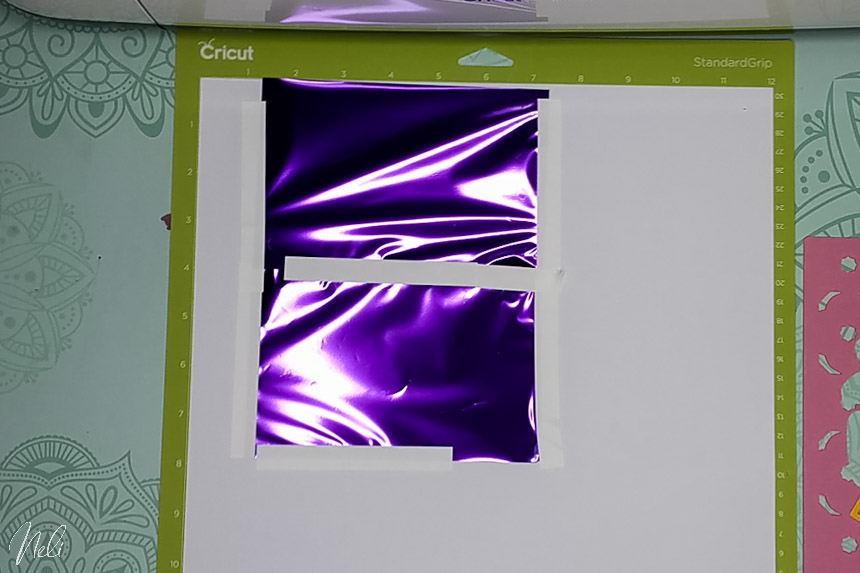
Well, the answer is yes! You can place more than one foil sheet side by side to make a drawing larger than a sheet. But you should expect to have a slightly less clear line where the foil tip touches the tape.

You can see up close that the lines that make up the tips of the bunny's ears as well as the top of the letters of the word "Pâques" are a little less sharp. These lines were under the tape at the center.

The result of two foil transfer sheets placed side by side.

I also misaligned the foil and the bottom left of the rabbit was also under the tape (bah... it happens to everyone!!)

The result of two foil transfer sheets placed side by side.

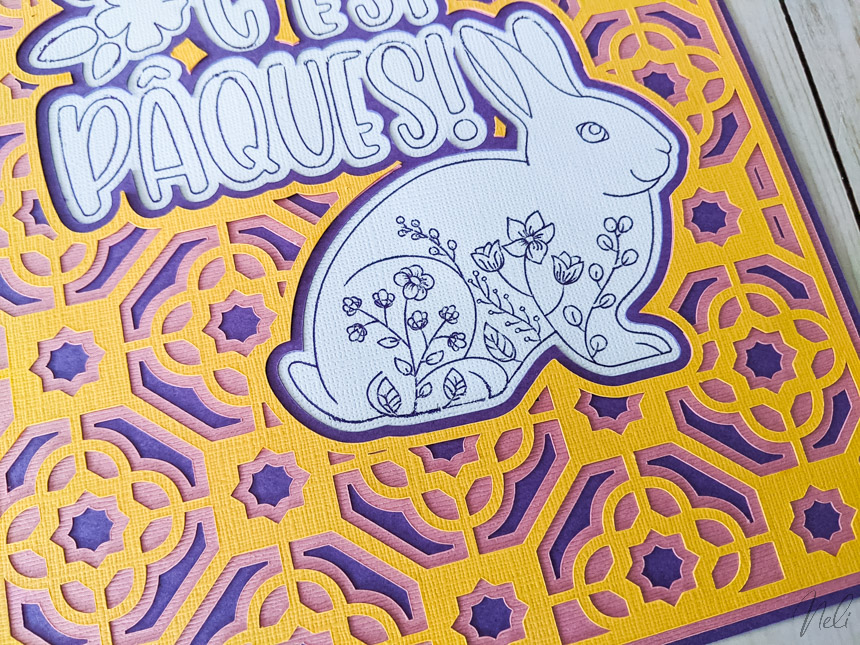
But honestly, you have to be very attentive to see these little flaws! I think the test was worth it! I love the 3D effect, and you?

The result of two foil transfer sheets placed side by side.

If you like 3D crafts, join my 3D Papercraft Challenge, it's free for a limited time!

Click here for more information.

And don't forget to Pin it!

Voir plus

  • How to cut felt with the Cricut Joy and Joy Xtra
  • Make a 3D Christmas ornaments in cardstock
  • Create felt Scandinavian Christmas ornaments with your Cricut
  • The different types of felt and how to cut them with your Cricut

Hi! I'm Natalie

I help crafters create with confidence, useful DIY and craft projects with their Cricut.

More about me

Popular

  • Cricut Maker 4 and Cricut Explore 4: Everything you need to know about these new cutting machines!
  • Cricut's Value materials
  • How to engrave on a curved surface with the xTool S1 laser cutter
  • Difference between xTool M1 and xTool S1 laser cutters

Seasonal

  • Cricut printable Iron-on for light and dark fabrics - everything you need to know
  • Using Infusible Ink on cotton
  • Buying a Cricut: where to find the best price
  • Make interchangeable candle wraps with your Cricut

Footer

↑ back to top

Informations

  • Privacy Policy
  • Disclosure
  • CCPA
  • Do not sell my personnal information

Newsletter

  • Sign up for emails and updates

Resources

  • Access the library
  • Discount codes
  • About NeliDesign
  • Contact
  • Français

.

As an Amazon Associate I earn from qualifying purchases.

Copyright © NeliDesign

Manage Cookie Consent
We use technologies like cookies to store and/or access device information. We do this to improve browsing experience and to show (non-) personalized ads. Consenting to these technologies will allow us to process data such as browsing behavior or unique IDs on this site. Not consenting or withdrawing consent, may adversely affect certain features and functions.
Functional Always active
The technical storage or access is strictly necessary for the legitimate purpose of enabling the use of a specific service explicitly requested by the subscriber or user, or for the sole purpose of carrying out the transmission of a communication over an electronic communications network.
Preferences
The technical storage or access is necessary for the legitimate purpose of storing preferences that are not requested by the subscriber or user.
Statistics
The technical storage or access that is used exclusively for statistical purposes. The technical storage or access that is used exclusively for anonymous statistical purposes. Without a subpoena, voluntary compliance on the part of your Internet Service Provider, or additional records from a third party, information stored or retrieved for this purpose alone cannot usually be used to identify you.
Marketing
The technical storage or access is required to create user profiles to send advertising, or to track the user on a website or across several websites for similar marketing purposes.
Manage options Manage services Manage {vendor_count} vendors Read more about these purposes
View preferences
{title} {title} {title}
Manage Cookie Consent
To provide the best experiences, we use technologies like cookies to store and/or access device information. Consenting to these technologies will allow us to process data such as browsing behavior or unique IDs on this site. Not consenting or withdrawing consent, may adversely affect certain features and functions.
Functional Always active
The technical storage or access is strictly necessary for the legitimate purpose of enabling the use of a specific service explicitly requested by the subscriber or user, or for the sole purpose of carrying out the transmission of a communication over an electronic communications network.
Preferences
The technical storage or access is necessary for the legitimate purpose of storing preferences that are not requested by the subscriber or user.
Statistics
The technical storage or access that is used exclusively for statistical purposes. The technical storage or access that is used exclusively for anonymous statistical purposes. Without a subpoena, voluntary compliance on the part of your Internet Service Provider, or additional records from a third party, information stored or retrieved for this purpose alone cannot usually be used to identify you.
Marketing
The technical storage or access is required to create user profiles to send advertising, or to track the user on a website or across several websites for similar marketing purposes.
Manage options Manage services Manage {vendor_count} vendors Read more about these purposes
View preferences
{title} {title} {title}