NeliDesign

menu icon
go to homepage
  • Projects
    • Cricut Help
    • Home Decor
    • Crafts
    • Organization
  • Materials
    • Adhesive Vinyl
    • Heat transfer vinyl
    • Foil
    • Infusible Ink
    • Paper and Cardstock
    • Pens and Markers
    • Other
  • Free cut files
    • See the free cut files
    • Get the free cut files
      • Get a password
      • Access the Library
  • Shop
  • Français
search icon
Homepage link
  • Projects
    • Cricut Help
    • Home Decor
    • Crafts
    • Organization
  • Materials
    • Adhesive Vinyl
    • Heat transfer vinyl
    • Foil
    • Infusible Ink
    • Paper and Cardstock
    • Pens and Markers
    • Other
  • Free cut files
    • See the free cut files
    • Get the free cut files
      • Get a password
      • Access the Library
  • Shop
  • Français
×
Home » Blog » Home Decor

DIY wood slice wreath with vinyl

This tutorial will show you how to make a personalized wood slice wreath using vinyl and your Cricut. You'll even see how to cure real tree slices.

This tutorial was born from a collaboration idea between my friend Lindsay and I. Lindsay blogs at "A Butterfly House" and makes projects that often involve a mitre saw and safety glasses!!

She doesn't own a Cricut and knows absolutely nothing about it! But she's my friend anyway! 😆 We've been helping each other with our blogs for over a year and talking to each other every week. Even though she lives in the U.S., she's probably the friend I've seen the most lately! (pandemic social distancing!) Haha

DIY wood slice wreath

As she's the one skilled with a saw and I, with a Cricut, Lindsay was in charge of making this beautiful wood slice wreath.

DIY wood slice wreath written Ho Ho Ho with vinyl.

It's amazing, don't you think?

So I invite you to visit her blog to find out:

  • How to cure wood slices (honestly, I didn't think it was that easy!)
  • How to build a wreath with wood slices

For my part, I was responsible for making the letters with vinyl and mailing them to Lindsay (don't tell her, but I think I was the one who had the easy job!!!!) This post contains some affiliate links for your convenience and at no extra cost to you. Click here to read my full disclosure policy.

Cut vinyl to apply to wood slices

Tools required

  • Cricut (I have the Maker, but the Explore Air and even the Joy will do)
  • Weeding tools
  • Scraper (optional but very useful!)

Required materials

  • Wood slices (you can buy them if you can't make them yourself!)
  • Permanent Vinyl (such as Cricut Premium Permanent or Oracal 651)
  • Transfer paper
  • SVG file (see below)

By subscribing to my newsletter, you will have access to these words in SVG, DXF, PNG and PDF files. You can also choose between these 4 types of writings.

Sign up here to get access:

    As for my friend Lindsay, by subscribing to her newsletter, you will find the same fonts, but with different words (except for the Ho Ho Ho).

    Click here to see her tutorial and subscribe.

    In case you'd rather write what you want, these fonts come from this "20 Christmas Fonts" bundle I bought.

    They are called "Snug Sweater" and you can also find them individually here.

    Should you add a sealer on wood or not?

    To apply permanent vinyl on wood, you don't necessarily need to seal the wood. If your wood is smooth and clean and you use permanent vinyl, a sealer or protective layer on the wood is not necessary.

    On the other hand, if your wood is very uneven, I would add something like Minwax polycrylic underneath to help the vinyl adhesion. If in addition your decoration is outdoors and subject to the weather, I would use an exterior varnish, under, and maybe even on it to increase its lifespan.

    (Note: I'm doing an outdoor test on different types of vinyl. I will come back to you soon with the results and recommendations. If the types of vinyl get through a Quebec winter, nothing will stop them!!)

    Preparing vinyl to send to another person

    My friend Lindsay being in the United States, I had to mail her the vinyl.

    So I did the layering of the vinyl on the transfer paper as if I were to install it myself. Then I simply put the transfer paper back on its carrier sheet. 🙌

    Layering several layers/colours of vinyl

    Speaking of layering vinyl, do you know the easiest and most precise way to layer multiple colours of vinyl?

    You use parchment paper!

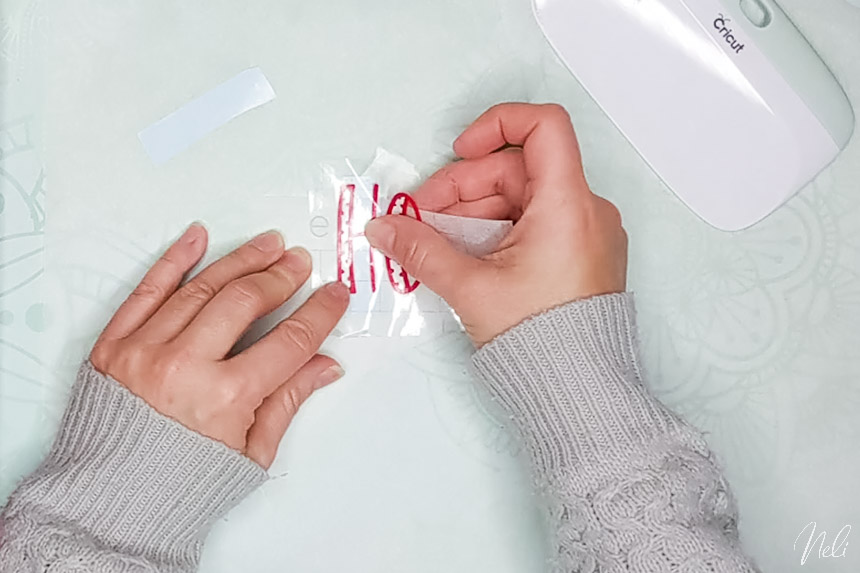
    Apply the vinyl to a piece of parchment paper, allowing a small portion of the vinyl at the top to exceed.

    Then press the parchment paper onto the piece of vinyl on which you want to layer it by bending the top to prevent it from sticking.

    As parchment paper slides and is transparent, it will allow you to align the vinyl perfectly.

    Using parchment paper to layer multiple colours of vinyl

    Once perfectly aligned, press the top part to make it stick.

    Using parchment paper to layer multiple colours of vinyl

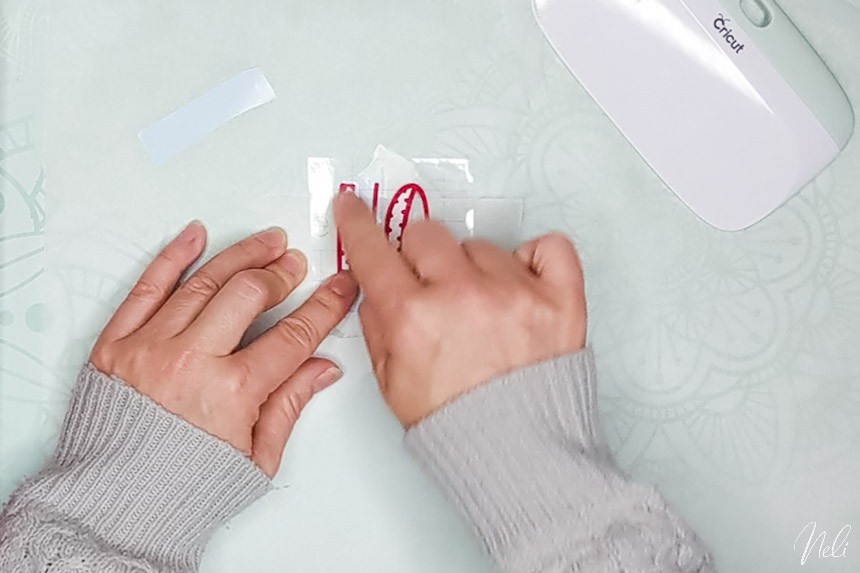
    Lift the transfer paper by making sure the top doesn't move and remove the parchment paper.

    Using parchment paper to layer multiple colours of vinyl

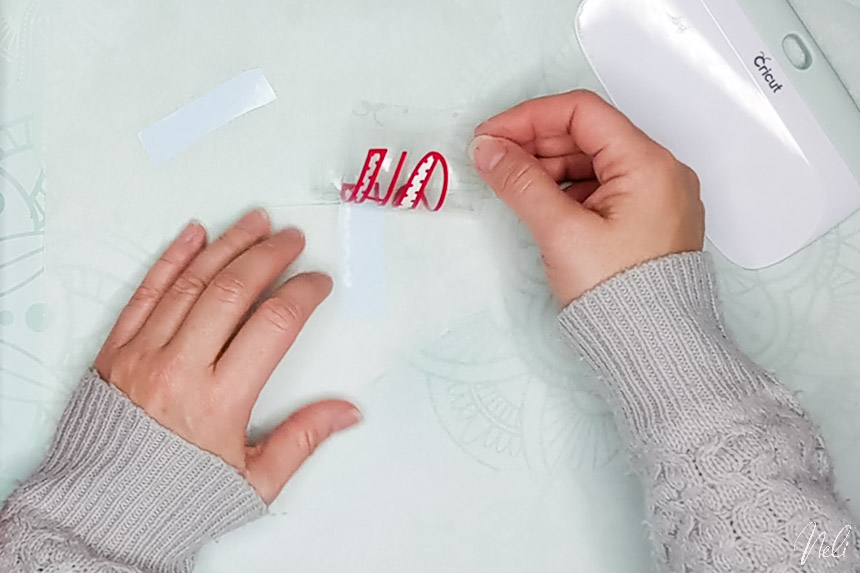
    Re-apply the transfer paper by gradually pressing down from top to bottom with the scraper.

    Using parchment paper to layer multiple colours of vinyl

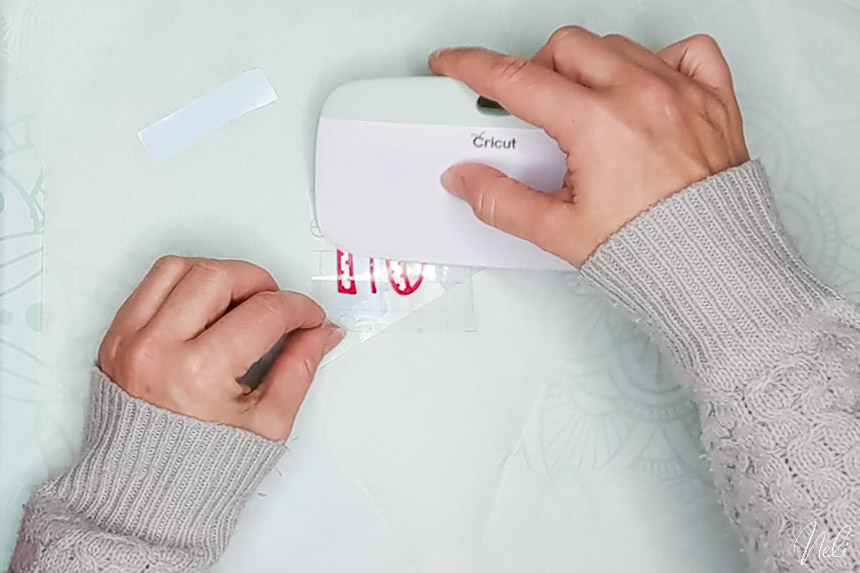
    There you go! Two layers of vinyl perfectly aligned!

    Detailed tutorial

    To see the tutorial in detail, watch the video!

    I'm really happy to have done this project with my friend! Proof that, even physically far away, we can collaborate! Awesome isn't it?

    Don't forget to pin it for later!

    How to personalize a wood slice wreath with vinyl and a Cricut + Free SVG, DXF, PNG, PDF

    More Home Decor

    • How to cut felt with the Cricut Joy and Joy Xtra
    • Make a 3D Christmas ornaments in cardstock
    • Create felt Scandinavian Christmas ornaments with your Cricut
    • The different types of felt and how to cut them with your Cricut

    Hi! I'm Natalie

    I help crafters create with confidence, useful DIY and craft projects with their Cricut.

    More about me

    Popular

    • Cricut Maker 4 and Cricut Explore 4: Everything you need to know about these new cutting machines!
    • Cricut's Value materials
    • How to engrave on a curved surface with the xTool S1 laser cutter
    • Difference between xTool M1 and xTool S1 laser cutters

    Seasonal

    • Cricut printable Iron-on for light and dark fabrics - everything you need to know
    • Using Infusible Ink on cotton
    • Buying a Cricut: where to find the best price
    • Make interchangeable candle wraps with your Cricut

    Footer

    ↑ back to top

    Informations

    • Privacy Policy
    • Disclosure
    • CCPA
    • Do not sell my personnal information

    Newsletter

    • Sign up for emails and updates

    Resources

    • Access the library
    • Discount codes
    • About NeliDesign
    • Contact
    • Français

    .

    As an Amazon Associate I earn from qualifying purchases.

    Copyright © NeliDesign

    Manage Cookie Consent
    We use technologies like cookies to store and/or access device information. We do this to improve browsing experience and to show (non-) personalized ads. Consenting to these technologies will allow us to process data such as browsing behavior or unique IDs on this site. Not consenting or withdrawing consent, may adversely affect certain features and functions.
    Functional Always active
    The technical storage or access is strictly necessary for the legitimate purpose of enabling the use of a specific service explicitly requested by the subscriber or user, or for the sole purpose of carrying out the transmission of a communication over an electronic communications network.
    Preferences
    The technical storage or access is necessary for the legitimate purpose of storing preferences that are not requested by the subscriber or user.
    Statistics
    The technical storage or access that is used exclusively for statistical purposes. The technical storage or access that is used exclusively for anonymous statistical purposes. Without a subpoena, voluntary compliance on the part of your Internet Service Provider, or additional records from a third party, information stored or retrieved for this purpose alone cannot usually be used to identify you.
    Marketing
    The technical storage or access is required to create user profiles to send advertising, or to track the user on a website or across several websites for similar marketing purposes.
    Manage options Manage services Manage {vendor_count} vendors Read more about these purposes
    View preferences
    {title} {title} {title}
    Manage Cookie Consent
    To provide the best experiences, we use technologies like cookies to store and/or access device information. Consenting to these technologies will allow us to process data such as browsing behavior or unique IDs on this site. Not consenting or withdrawing consent, may adversely affect certain features and functions.
    Functional Always active
    The technical storage or access is strictly necessary for the legitimate purpose of enabling the use of a specific service explicitly requested by the subscriber or user, or for the sole purpose of carrying out the transmission of a communication over an electronic communications network.
    Preferences
    The technical storage or access is necessary for the legitimate purpose of storing preferences that are not requested by the subscriber or user.
    Statistics
    The technical storage or access that is used exclusively for statistical purposes. The technical storage or access that is used exclusively for anonymous statistical purposes. Without a subpoena, voluntary compliance on the part of your Internet Service Provider, or additional records from a third party, information stored or retrieved for this purpose alone cannot usually be used to identify you.
    Marketing
    The technical storage or access is required to create user profiles to send advertising, or to track the user on a website or across several websites for similar marketing purposes.
    Manage options Manage services Manage {vendor_count} vendors Read more about these purposes
    View preferences
    {title} {title} {title}