[wc_box color= »secondary » text_align= »left » margin_top= » » margin_bottom= » » class= » »]
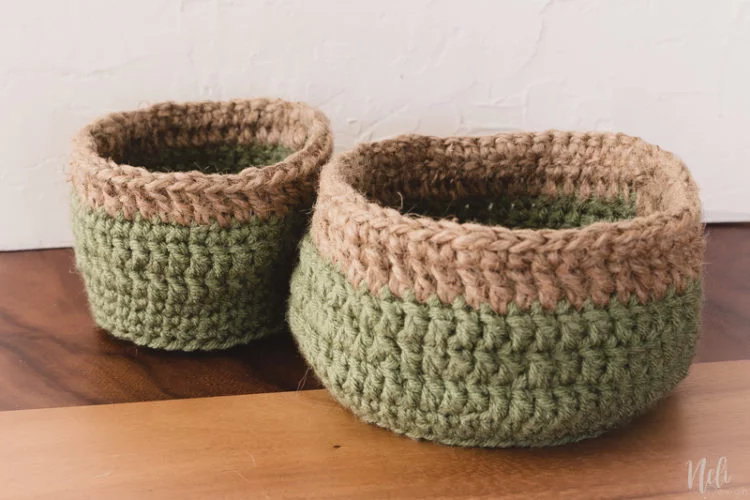
Seule une connaissance de base du crochet est nécessaire pour réaliser ces paniers rustiques au crochet. Les instructions sont faciles à comprendre. Le résultat vous donne un décor rustique et abordable pour n’importe quelle pièce de votre maison. Les gens vous demanderont où vous les avez achetés!
[/wc_box]
J’essaie de trouver des façons bon marché de décorer ma salle de bain pour le $100 Room Challenge. Erin, de Lemons, Lavender and Laundry , a commencé cette série en septembre 2015 :
Une pièce, un mois et 100 $
Maintenant, elle l’a ouvert à d’autres blogueurs et je suis heureux de dire que j’en fais partie, mettant à jour ma salle de bain pour moins de 100 $.
Voir le récapitulatif ou allez voir plus tard :
Semaine 1 | Semaine 2 | Semaine 3 | Semaine 4 | Semaine 5
Nous sommes actuellement en route vers la semaine 4 . Donc, pour rester dans mon budget, j’ai pensé : Pourquoi ne pas faire des paniers au crochet qui apporteront de la couleur à la pièce?

Si vous souhaitez faire ces paniers au crochet, ils sont assez faciles et ne vous coûteront pas une fortune! Et, si comme moi vous avez l’impression qu’une longue route ou un vol est une perte de temps, apprenez le crochet! Ce projet m’a assurément occupé pendant mon vol de retour de la relâche! 😉
Cet article contient des liens vers des produits affiliés pour votre convenance et sans frais supplémentaires pour vous. Cliquez ici pour lire ma politique de divulgation complète.
Ce dont vous aurez besoin :
[wc_box color= »primary » text_align= »left » margin_top= » » margin_bottom= » » class= » »]
- Laine (j’ai obtenu la mienne à Hobby Lobby en Floride pendans la relâche, avec le coupon de 40%, cela m’a coûté 2,53 $)
- Ficelle en jute (déjà en main)
- Crochet de 5 mm
[/wc_box]
Instructions
Note : les abbréviations sont en anglais (américain). Pour voir les équivalences en français, je vous suggère ce site.
- ch : chain
- st : stitch
- sl st : slip stitch
- Sc : single crochet
- dc : double crochet
- dec : decrease (1 dc in the next 2 st)
- Inc : increase (2 dc (or sc) in the next st)
Grand panier
(environ 6-1/2″ diametre)
R1 – Start by making a magic circle of 12 dc / join with sl st to form ring (12)
R2 – ch 3 / Inc with dc / sl st in 3rd chain of first ch 3 (24)
R3 – ch 3 / {dc / inc with dc } repeat { } around / sl st in 3rd chain of first ch 3 (36)
R4 – ch 3 / {dc in next 2 st / inc with dc } repeat { } around / sl st in 3rd chain of first ch 3 (48)
R5 – ch 1 / sc in back loop, all around / sl st in the ch 1 of the beginning (48) This will be the bottom edge of the basket
[wc_divider style= »dashed » line= »single » margin_top= » » margin_bottom= » » class= » »][/wc_divider]
Côté
R6 and R7 – ch 1 / sc all around / sl st in the ch 1 of the beginning (48)
R8 – ch 3 / dc all around / sl st in 3rd chain of first ch 3 (48)
R9 – ch 3 / {dc in next 5 st / dec with dc } repeat { } around / sl st in 3rd chain of first ch 3 (40)
R10 – ch 3 / dc all around / sl st in 3rd chain of first ch 3 (40)
[wc_divider style= »dashed » line= »single » margin_top= » » margin_bottom= » » class= » »][/wc_divider]
Changer pour la ficelle de jute
R11 – ch 3 / dc all around / sl st in 3rd chain of first ch 3 (40)
R12 – ch 1 / sc all around / sl st in the ch 1 of the beginning (40)
Attachez et rentrer les fils.
[wc_divider style= »solid » line= »double » margin_top= » » margin_bottom= » » class= » »][/wc_divider]
Petit panier
(environ 4″ diametre)
R1 – Start by making a magic circle of 12 dc / join with sl st to form ring (12)
R2 – ch 3 / Inc with dc / sl st in 3rd chain of first ch 3 (24)
R3 – ch 3 / {dc / inc with dc } repeat { } around / sl st in 3rd chain of first ch 3 (36)
R4 – ch 1 / sc in back loop, all around / sl st in the ch 1 of the beginning (36) This will be the bottom edge of the basket
[wc_divider style= »dashed » line= »single » margin_top= » » margin_bottom= » » class= » »][/wc_divider]
Côté
R5 to R7 – ch 1 / sc all around / sl st in the ch 1 of the beginning (36)
R8 and R9 – ch 3 / dc all around / sl st in 3rd chain of first ch 3 (36)
* note: for the small basket, I didn’t decrease, but I think I should have because the top seems to open a bit.
[wc_divider style= »dashed » line= »single » margin_top= » » margin_bottom= » » class= » »][/wc_divider]
Changez pour la ficelle en jute
R10 – ch 3 / dc all around / sl st in 3rd chain of first ch 3 (36)
R11 – ch 1 / sc all around / sl st in the ch 1 of the beginning (36)
Attachez et rentrez les fils.
[wc_divider style= »dashed » line= »single » margin_top= » » margin_bottom= » » class= » »][/wc_divider]
Vous voyez, assez facile! Et vous pouvez même les utiliser pour couvrir des pots en argile (je sais, cette plante est assez bizarre !! haha)

N’hésitez pas à me poser des questions si vous en avez besoin.
Surveillez le prochain article ce mercredi pour la semaine 4 . D’ici là, jetez un oeil aux autres semaines du défi:
Semaine 1 | Semaine 2 | Semaine 3 | Semaine 4 | Semaine 5
[wc_box color= »inverse » text_align= »center » margin_top= » » margin_bottom= » » class= » »]
Vous ne voulez pas manquer les nouvelles gratuités et avoir accès à une bibliothèque remplie de ressources?
[wc_button type= »secondary » url= »https://nelidesign.com/fr/landing-page » title= »Yes, give me access! » target= »blank » url_rel= » » icon_left= » » icon_right= » » position= » » class= » »]Oui, donnez-moi accès![/wc_button]
[/wc_box]
N’oubliez pas d’épingler pour plus tard!


Pour voir à quel « Link Party » je participe, cliquez ici
